G38 19 Model 5 Series Change your own air conditioning filter elements and engine air filter ~
I have nothing to do at home on weekends, thinking that I have been carrying my car for a year now, so I can change the air filter and air conditioner by myself. After all, it will save thousands of yuan to change it myself than to go to the 4S store. It smells good, and actually changing a filter element is like that. In less than an hour in the whole process, it’s done.

First of all, let’s take a picture of the car that I think is passable.
P.S: this car photo is still a picture of me out of danger. Do you see where you met it?
P.S: this car photo is still a picture of me out of danger. Do you see where you met it?
Just do it, some treasure bought Mahler’s air filter and air-conditioning filter, plus less than 130 yuan, there is anti-counterfeiting check ~ but whether it is true or not is not very important, after all, it is changed once a year.
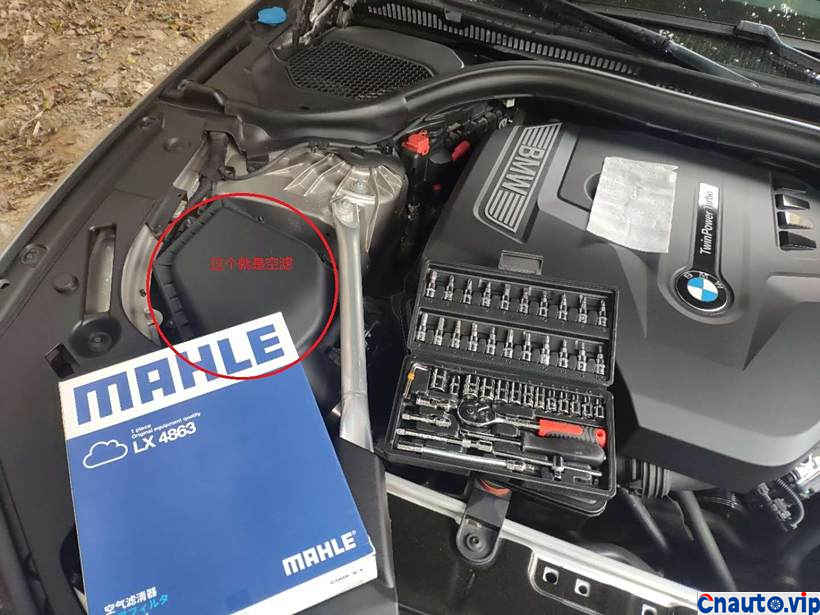
The screwdriver was also bought by a certain treasure for 27 yuan. it is so complete that it is no problem to dismantle the engine.
The screws around the air filter can be twisted out with a T25 or T20 screwdriver. After the screws are twisted out, you don’t have to take them out. You just need to loosen the screws to stay stuck in the shell. However, there is a problem that the engine lever will block the lid from opening, so loosening the lever slightly to one side will be more convenient to remove / put into the air filter.
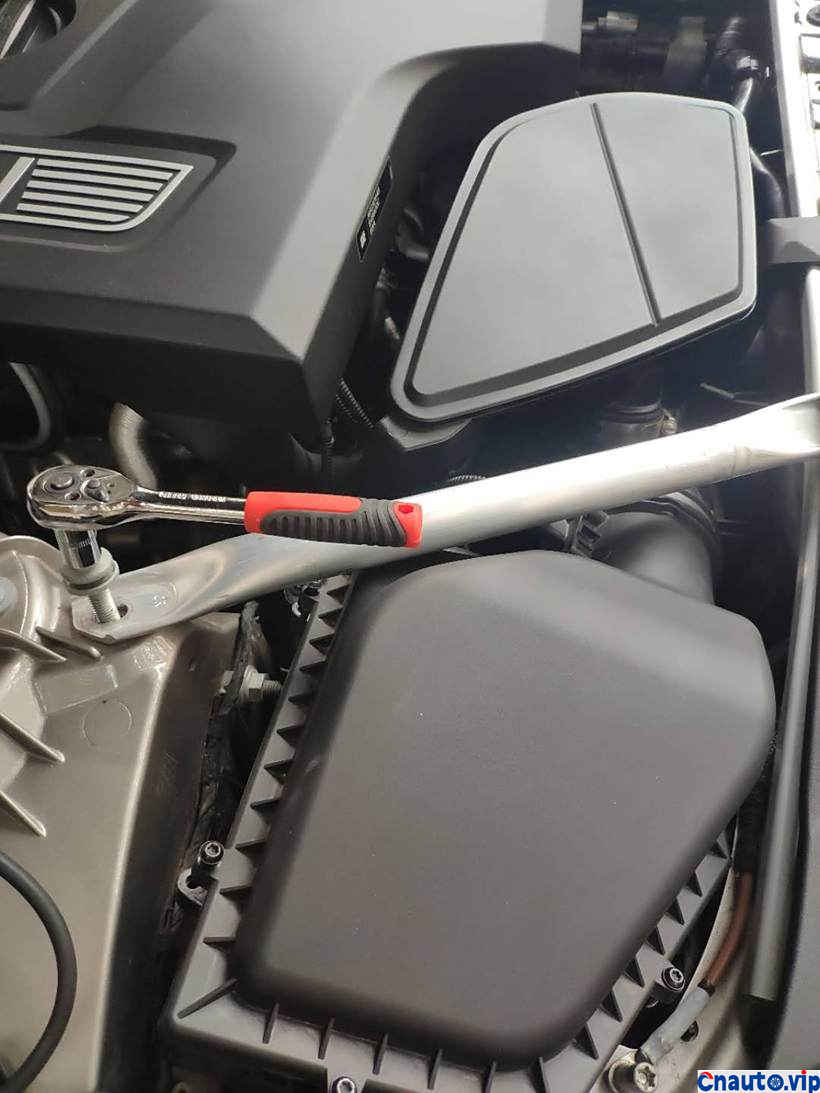
I have to say, this screw is really tight, and you have to loosen it slowly with a sleeve.
By the way, screwdrivers, screws, tools and so on should really be careful not to fall into the engine compartment, otherwise it will be very difficult to pick up, believe me.
By the way, screwdrivers, screws, tools and so on should really be careful not to fall into the engine compartment, otherwise it will be very difficult to pick up, believe me.
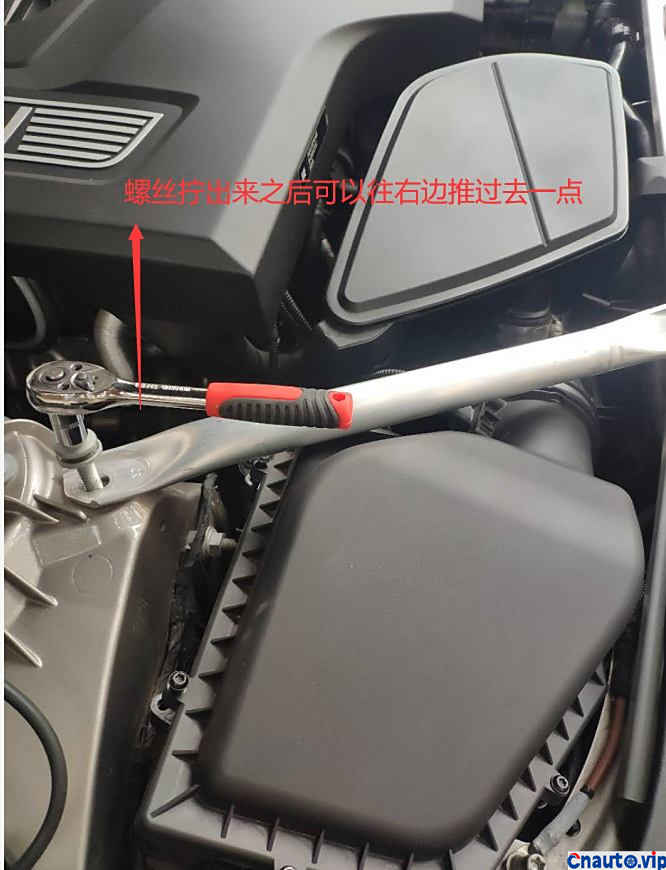
After the screw is screwed out, you can push the lever up to the right, so that you can open the lid of the air filter and restore it according to the original position during installation.
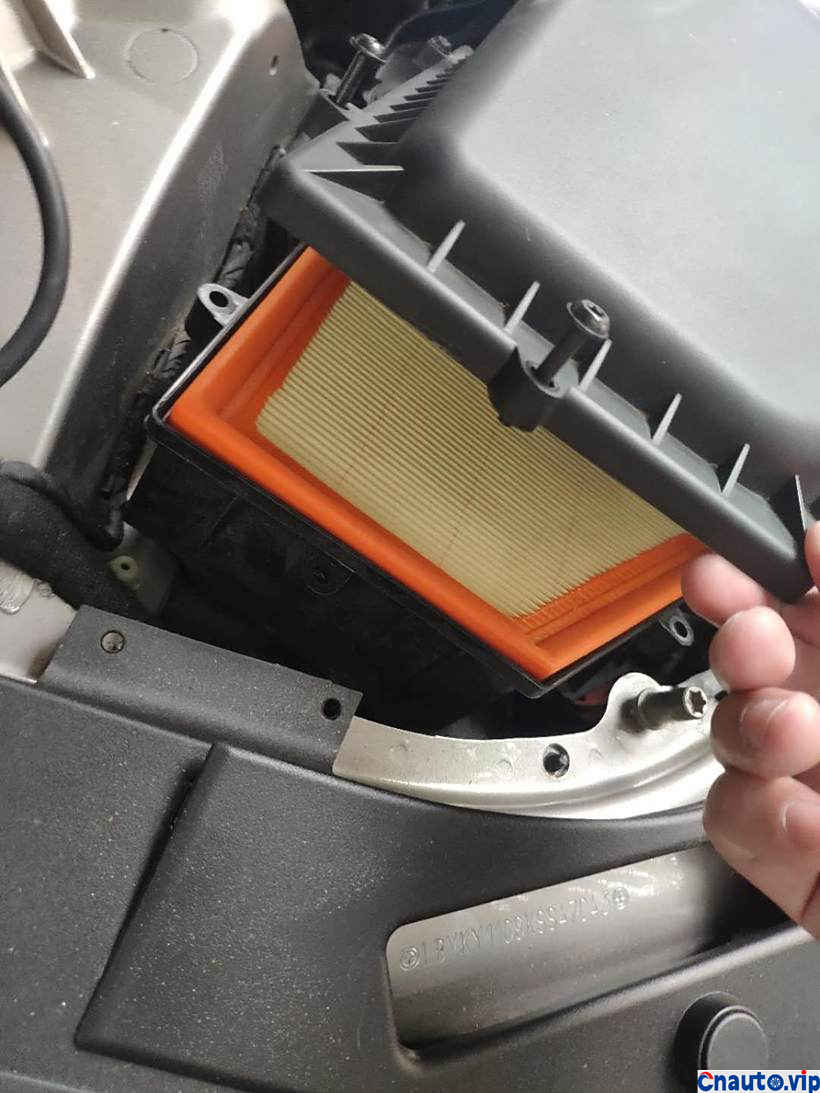
Open the lid and remove the old air filter ~
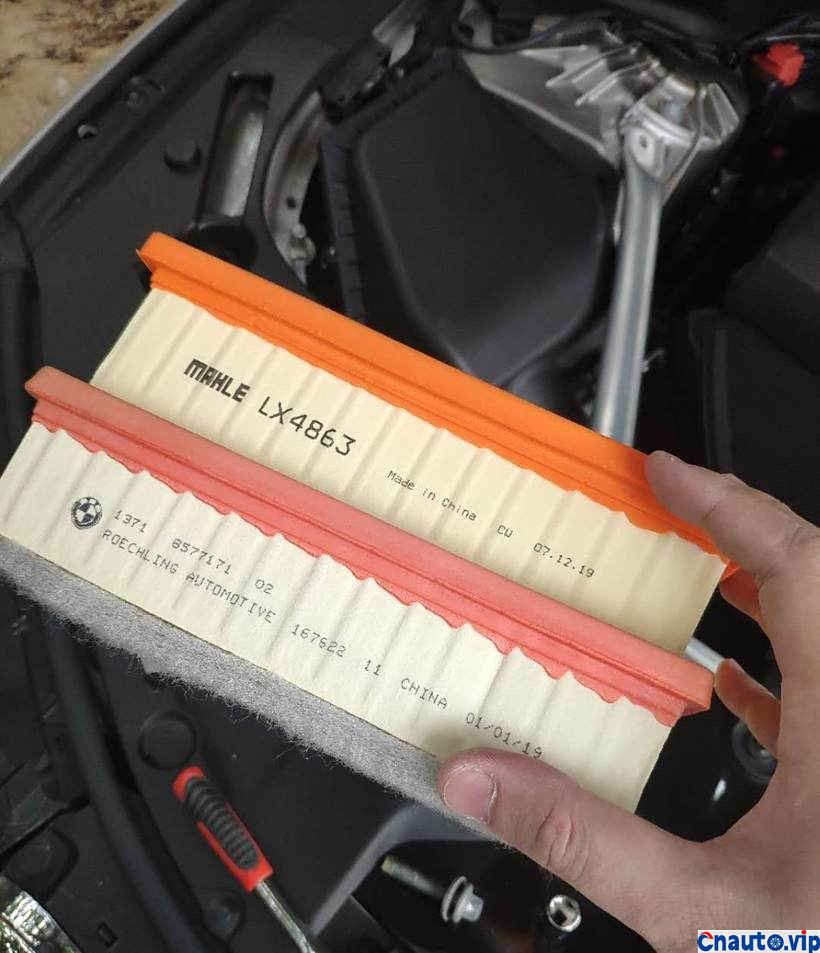
Compared with the original air filter and Mahler air filter, I feel that the air filtration quality of the original factory is better.
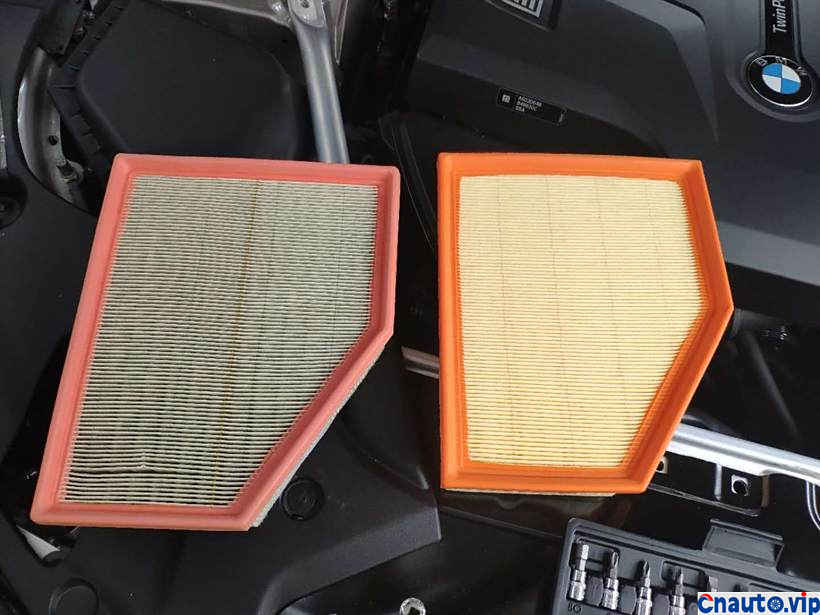
After using it for a year, the car ran 1W kilometers, but it wasn’t very dirty.
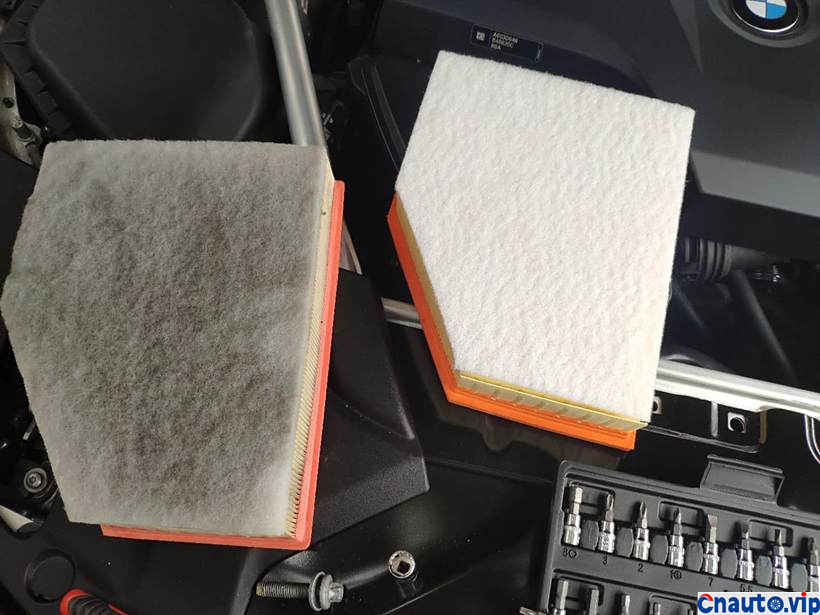
Once again, screwdrivers and screws should be put away, it will be very difficult to pick them up if they fall into the engine compartment!
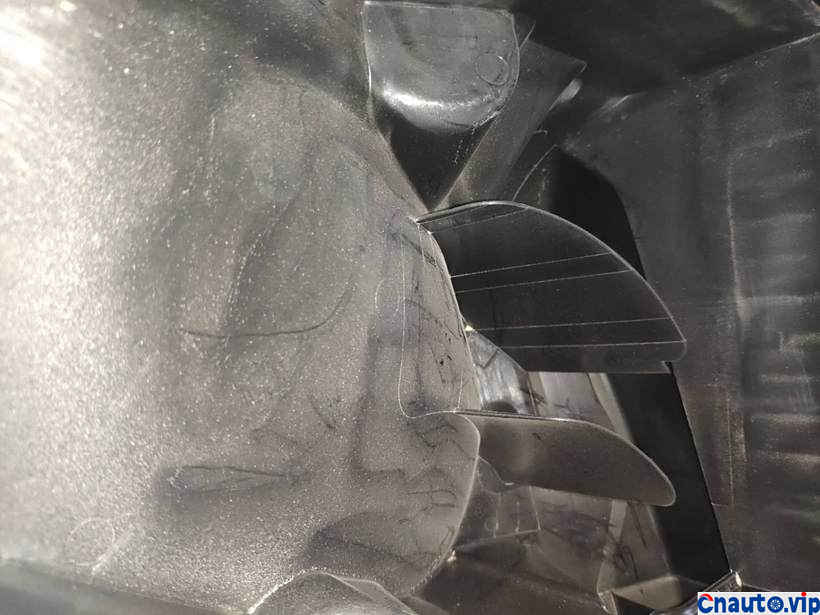
After taking out the old air filter, I found that it was still dirty and dusty. I suggest using a vacuum cleaner and wiping it clean and tidy with a wet towel.
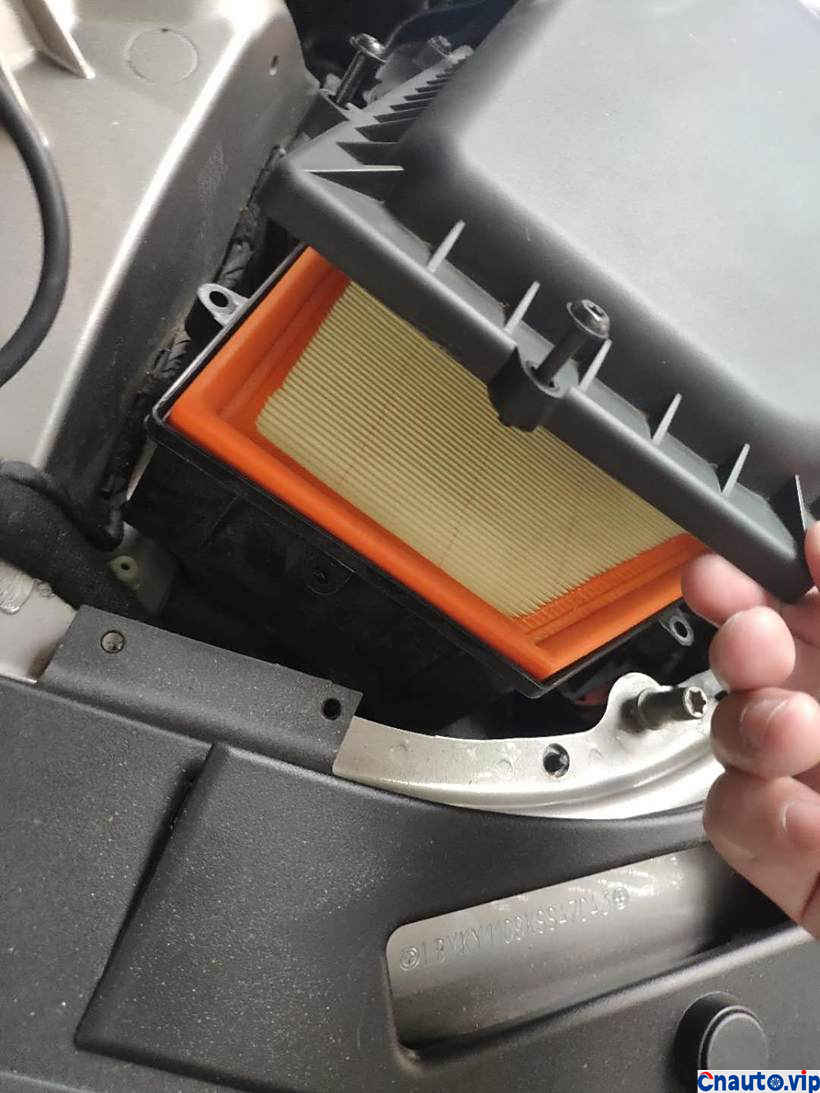
Finally, put the new air filter in, tighten the screw of the air filter box, move the engine lever back to the original position and tighten the screw to finish the whole process + less than 20 minutes of cleaning (I change it for the first time, it should be faster next time)
After changing the air filter, I went to the air conditioner filter element. After the air conditioner filter element was changed, the feeling was the most obvious. When the air conditioner was turned on, the smell was gone.
The replacement of the air conditioner filter element is a bit more troublesome than the air filter element, because two boards have to be removed, and if the method is wrong for the first time, there will be some detours. I will share my method of changing the air conditioning filter element below.
The replacement of the air conditioner filter element is a bit more troublesome than the air filter element, because two boards have to be removed, and if the method is wrong for the first time, there will be some detours. I will share my method of changing the air conditioning filter element below.
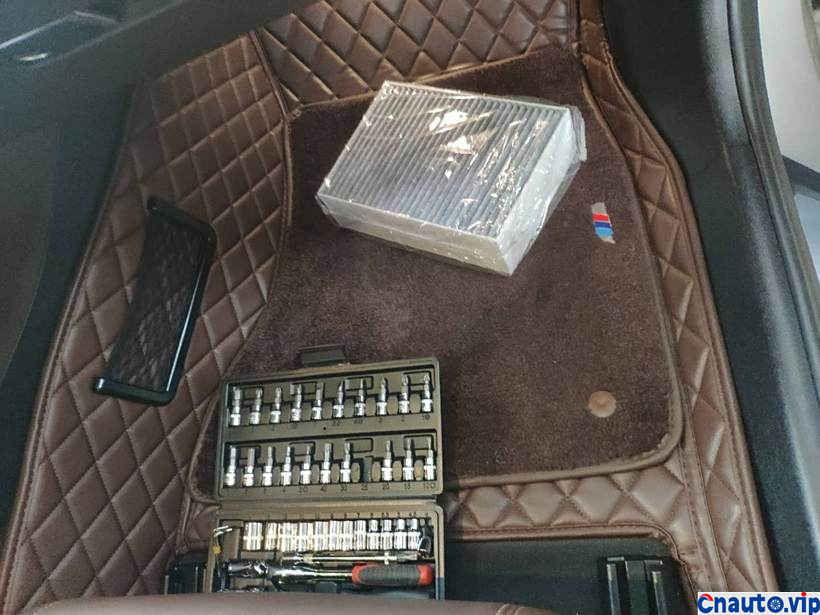
The filter element of the 5-series air conditioner is under the passenger seat, under the glove box.
P.S: don’t be frightened by my toolbox. In fact, all you need is a screwdriver for T20 or T25.
P.S: don’t be frightened by my toolbox. In fact, all you need is a screwdriver for T20 or T25.
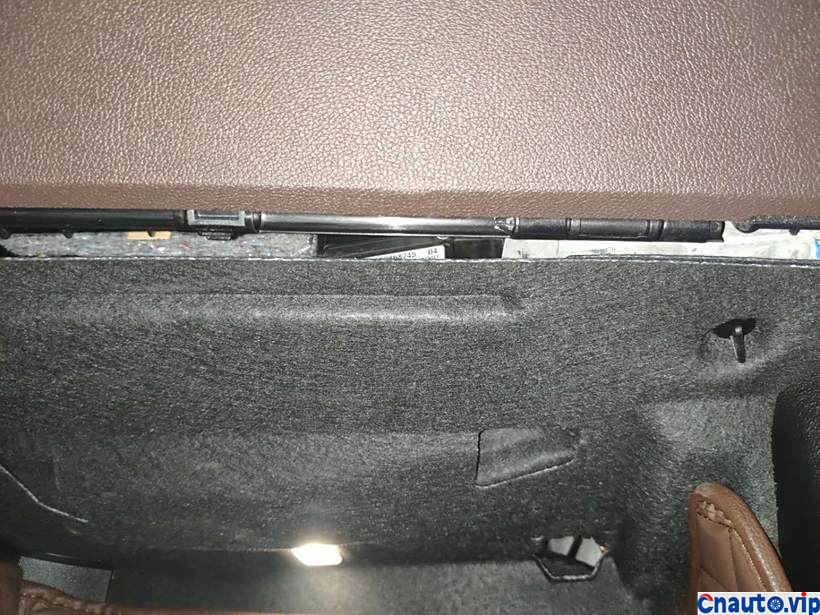
First of all, find a suitable position, twist the two rotary buckles under the glove box, and there is a rotating buckle on the left and right sides. There is no need to use a screwdriver here, as long as the hand is twisted.
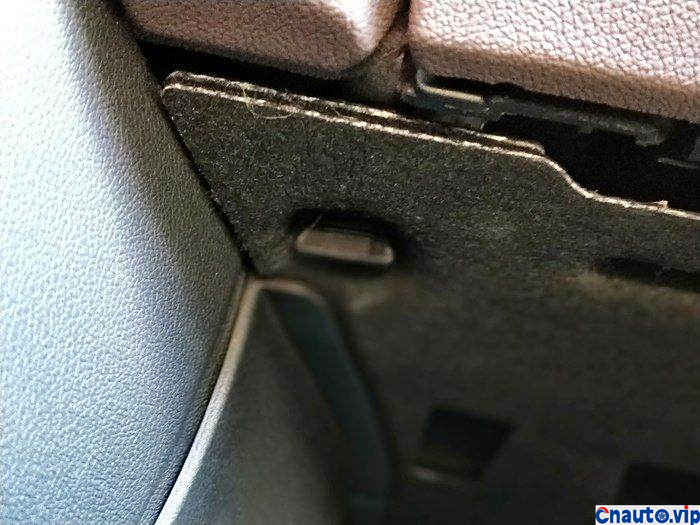
There is also a buckle on the left.
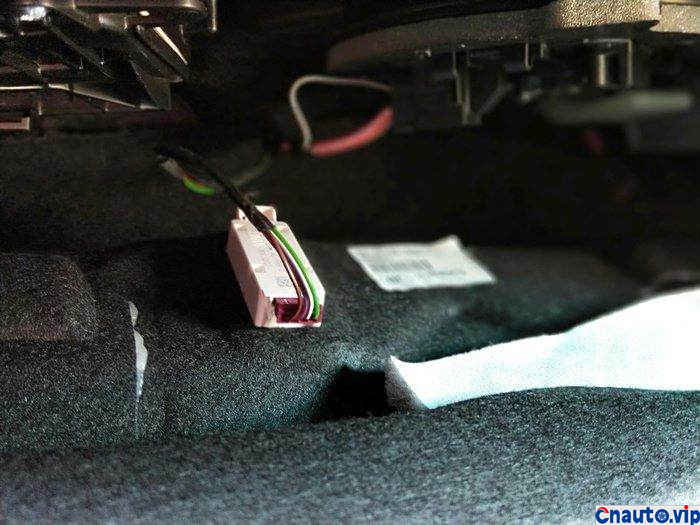
Knock on the blackboard! Pay attention, don’t pull it off after the buckle is twisted off, because this board is still connected with a foot lamp, so you have to unplug the foot lamp first.
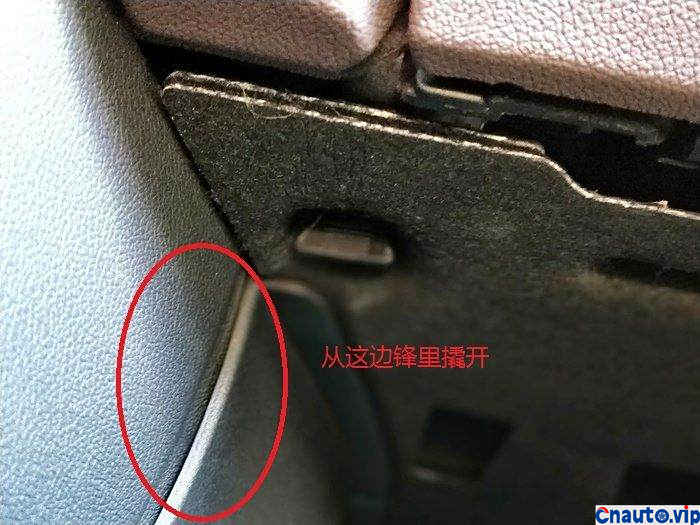
In addition, after the selection buckle on both sides is twisted, the board still cannot come down. It is estimated that the clasp will be broken when it is broken. The correct way is to pry it open from the circled position in the picture, and the whole cover can be removed. Pay attention to the position of the buckle here when you get it, and aim it when you put it back, otherwise it’s not easy to install. I forgot to take a picture here. Please understand the details by yourself. anyway, remember one thing: just be bold and careful.
P.S: it’s not that crispy, actually.
P.S: it’s not that crispy, actually.
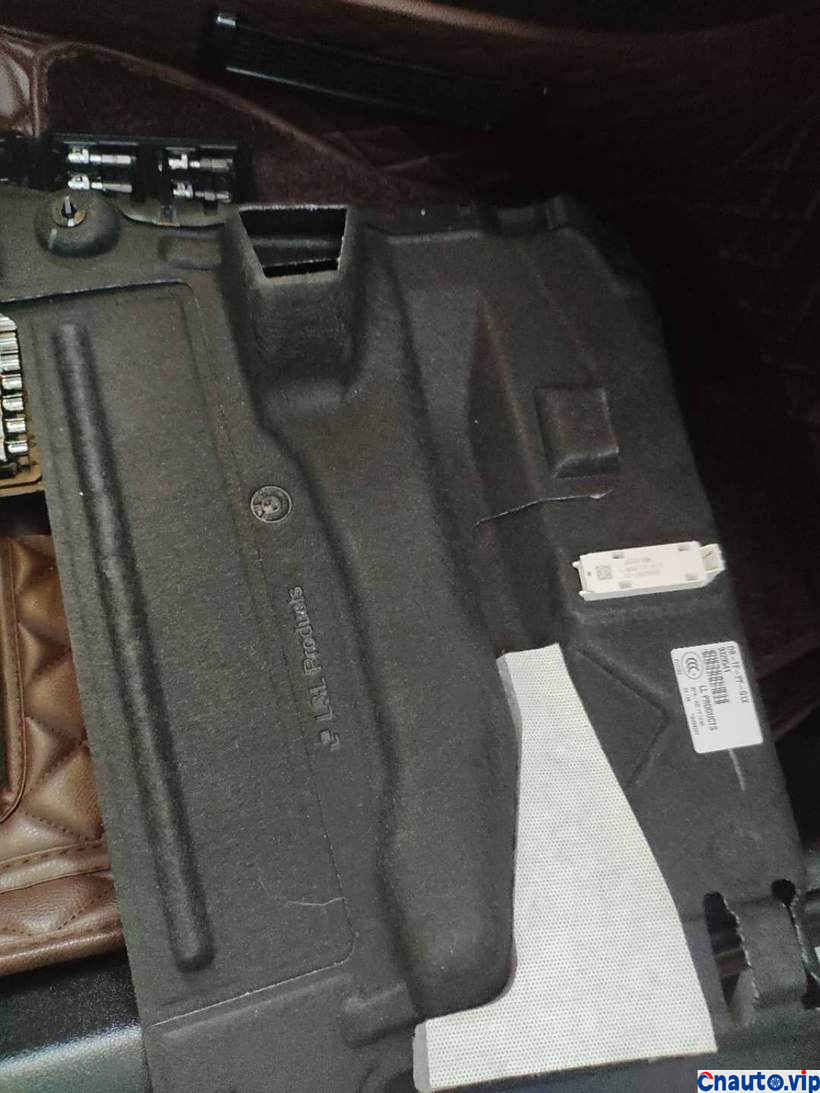
After the cover is taken off, the duck is not very good-looking.
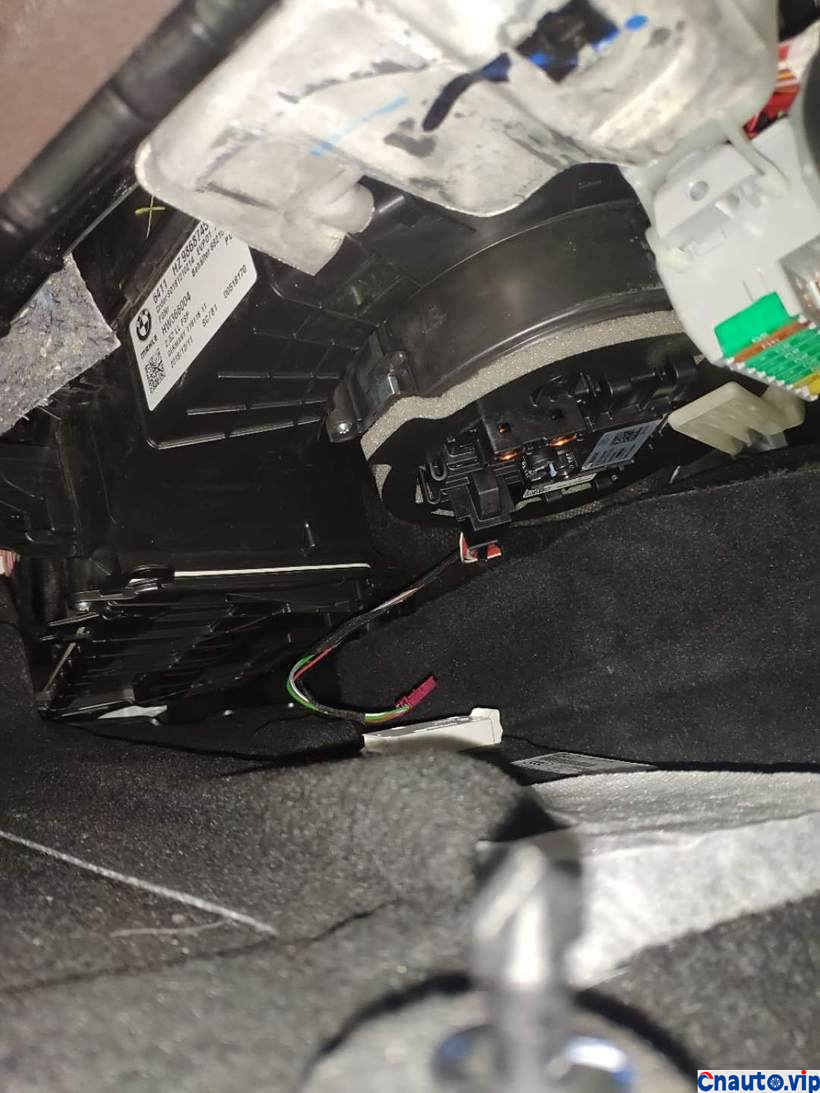
The inside of the cover looks like this.
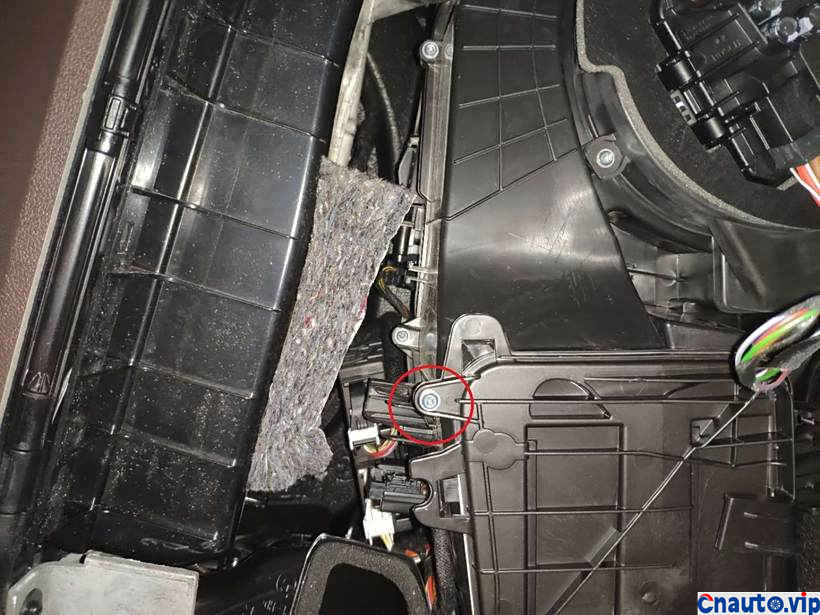
After the cover plate is removed, the cover plate of the air filter should be twisted off again. There is a screw on each side. Just twist it off.
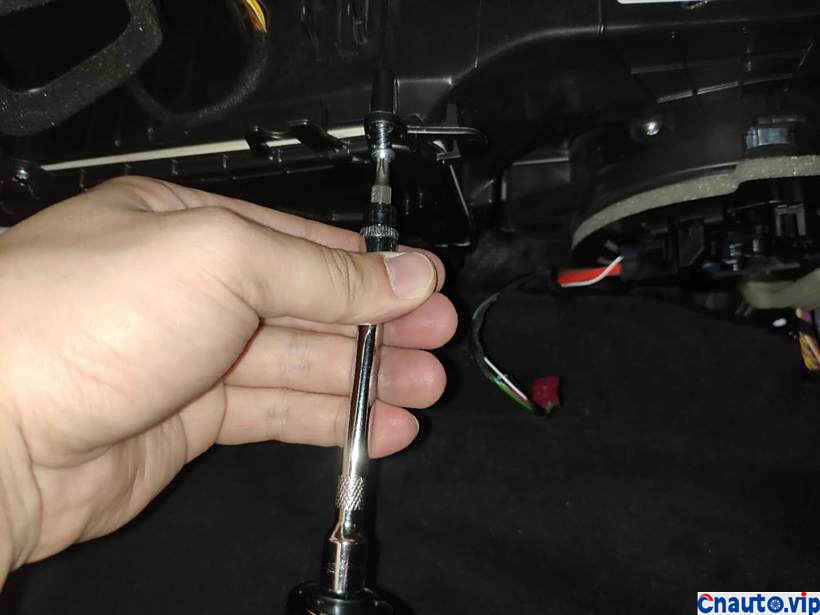
Screw on the right, twist it off!
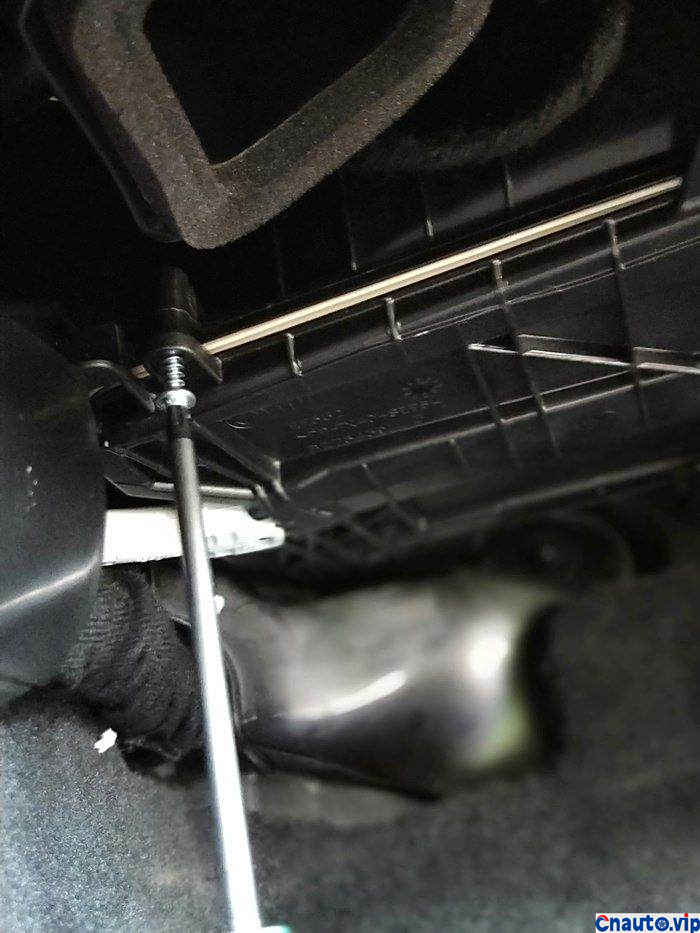
Screw on the left, twist it off!
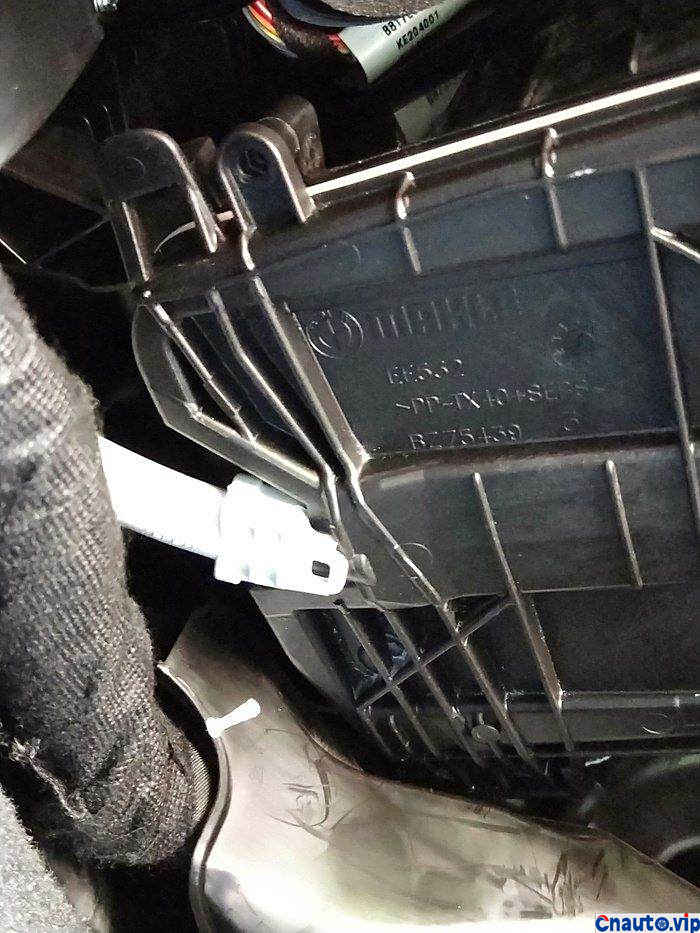
After twisting the screw, I found that there is a white hose here. This should be an air quality sensor. To detect air quality, unplug it first, replace the filter element and close the lid, then reconnect it.
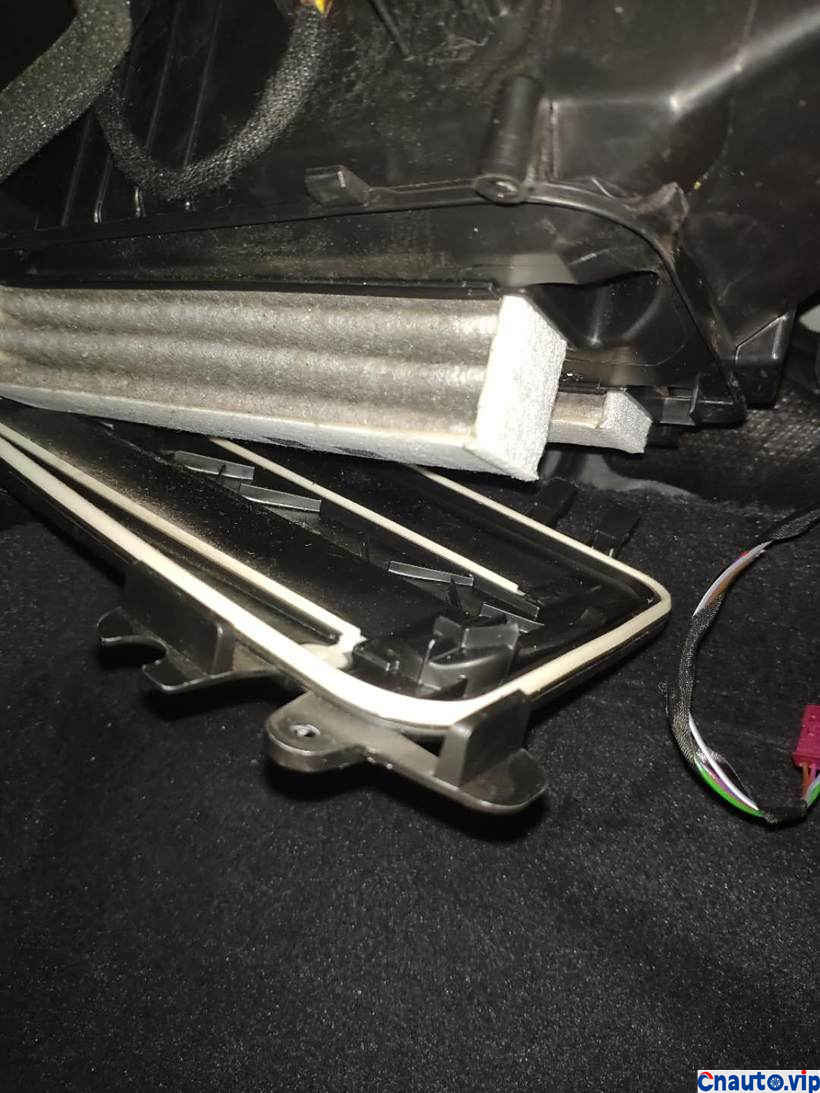
There are two air conditioner filter elements inside the lid, just pull it down.
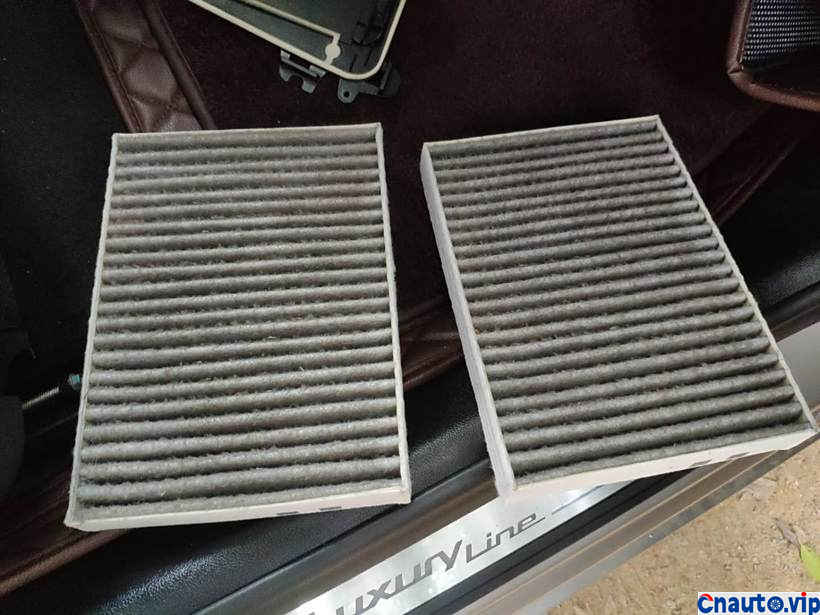
The air conditioner filter element removed is still quite dirty. Here, I would like to advise everyone that the old filter element and empty filter should be thrown into the dustbin. Don’t throw it away and be picked up by children to play with it, because it’s really dirty.
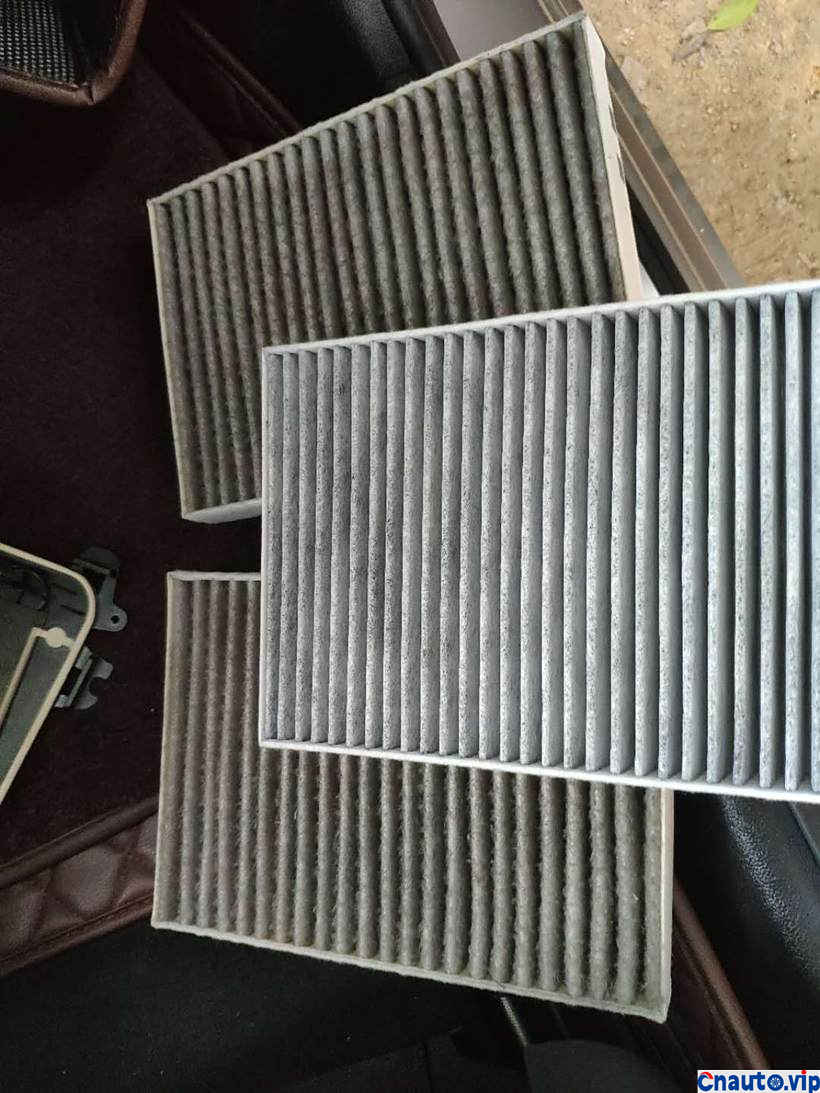
Comparison between the old and the new ~
The two old ones below and the new ones above
The two old ones below and the new ones above
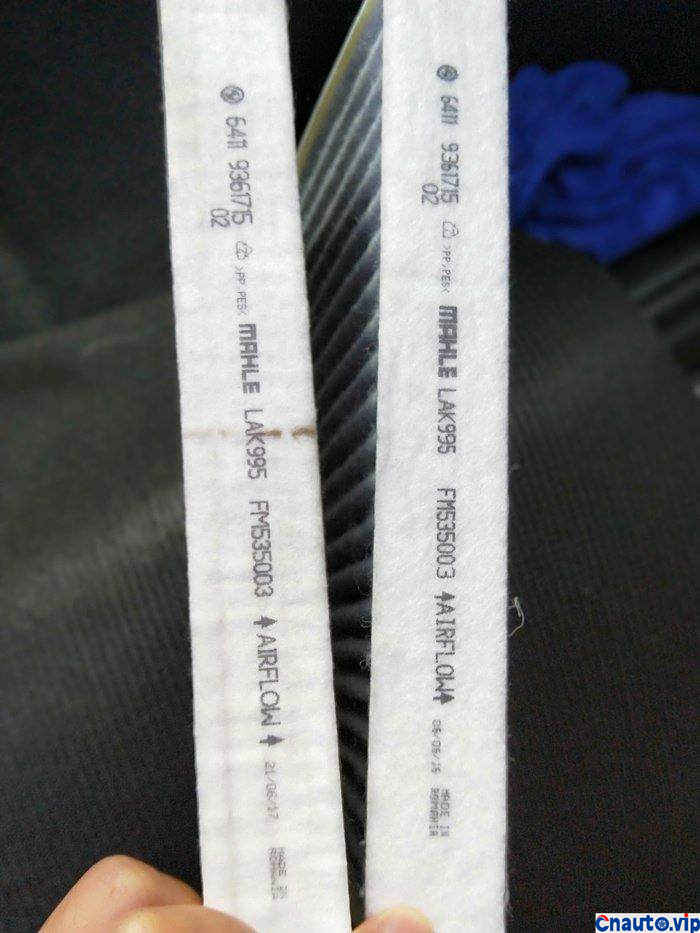
For the installation of air-conditioned travel, remember that the arrow is facing the front of the car. Install it. The arrow is facing the front of the car. Arrow towards the front of the car! Arrow towards the front of the car!
After the filter element is installed, reinstall the filter element cover, put on the screws, and then reconnect the white hose. Finally, connect the foot lamp back to the largest cover plate and put it back on again. This saves thousands of dollars.
PPermine S: the installation and removal of the largest cover plate should start from the left, install it back at the card position, and finally lock the rotary buckle.
Hot Information
Tesla Autopilot and similar automated driving systems get ‘poor’ rating from prominent safety group
 April 1, 2024
 Localization of EV parts without production scalability may not help cut EV price, says President, Amara Raja
 March 27, 2024
JCTSL may turn bus stands into charging points for e-buses
 March 27, 2024
 You May Like

