The replacement of automobile brake fluid is regarded as a professional operation, not because of its complexity, but because of a high degree of safety, so it is necessary to ensure reliability. In the past, all the cars were replaced by themselves, but this time they are the same.
Personally, I feel that the VW car is indeed sophisticated in design, but its maintenance and repair are not convenient enough to compare with Japanese cars. Guess that the Germans think that the precision machines they make are generally unworthy of repair, the repair manual (such as ELSAWIN) is quite complex, and there are few DIY items in the user manual, which generally let customers meize stores to maintain and maintain, so the cost of using cars is relatively high, especially unpopular in the United States. VW cars need more careful maintenance and maintenance in order to drive long and reliably.
Do you need special (special) tools? Can I work on the ground? Can I operate it alone? To solve the following problems, let’s first talk about the results:
1. It can be operated by one person. Generally speaking, the special tool for using VW (VAS 5234) is operated by a single person, and you can also use a vacuum exhaust device, which requires compressed air, which is difficult for DIY to obtain. DIY single brake fluid exhaust is also possible, as follows
2. You can work on the ground, but you must abide by the safety regulations. These include that vehicles must be parked on solid, flat ground, supported by reliable ground support tools, and unvented axle tires are reliably stuck with retainers.
3. Very few special (special) tools are needed. If you don’t have to, you’d better. It is as follows:
The front sub-pump guide pin mentioned in the previous post requires a thin opening wrench.
B, decoder, rear wheel EPB (electronic parking) motor reset, non-reset forced compression pump piston may damage EPB. Of course, you can also disassemble the electronic parking electricity.
Machine, but the O-ring of the rear cover is required to be replaced, so the operation is more troublesome.
C, ultra-thin ratchet torque wrench, rear wheel calipers need both bolts. To reach the professional level of operation, most of the fasteners of the braking system need to control the twist.
Moment. It includes caliper fixing bolt and sub-pump bolt.
Next, go through the operation process quickly, mainly introduce the matters needing attention, a lot of information on the general program network, answer questions and answer questions by the way. Brake system maintenance procedures are almost exactly the same as replacing brake friction plates, and those who want to change can also be used for reference. It would be much easier to just change the brake fluid.
First of all, must the brake fluid be changed regularly in accordance with the requirements of the mainframe factory (only a very small number of mainframe factories are not required)? The answer is yes. Because the ordinary water content testing pen can not well judge the quality of the brake fluid. Although the automobile braking system is a closed system, moisture and dust will still enter the system. Even if a small amount of water enters, it will not only cause high temperature air resistance for a long time, but also acidify and corrode metal parts (metal pipeline, sub-pump piston, etc.).
Consumables:
1, brake fluid, DOT4 can be, Jiaru needs 1L MagneVW and gives the capacity of each pipeline, which can be regarded as the rigor of the German. The capacity is as follows:
Left anterior and right anterior 0.2L, left posterior and right posterior 0.3L respectively. Manual clutch pump 0.15L
2. Sub-pump guide pin grease. The best special, can not use ordinary lithium grease, can not suffer from high temperature, waterproof property is not good
3, brake system maintenance consumables, you can buy sets, the price is not expensive. It includes brake disc cleaning agent, flange anti-bite agent, sub-pump guide pin grease and so on.
Tools
1. T45 hexagonal TORX sleeve head, remove front wheel guide pin outer bolt (hexagonal sleeve can also be used)-brake system maintenance
2. Partial pump piston compression tool-brake system maintenance
3. 17mm thin opening wrench, guide pin of sub-pump before disassembly-maintenance of braking system
4. 11mm open or ring wrench, exhaust bolt
5, the decoder, can use Yuanzheng and other general-purpose, of course, Volkswagen 5054, 6054 and other special inspection-brake system maintenance
6. HAZET 6mm wears heart ratchet and 7mm 6-angle batch head, other brands are also available, I can’t find it. VW special tool is VAS6784-brake system maintenance
Note:
1. Wear goggles. Brake fluid will hurt your eyes.
2. Prevent brake fluid from spilling on paint and rubber parts, which will cause injury.
The structure diagrams of the braking system of Jiayu (similar to Golf) are shown above.
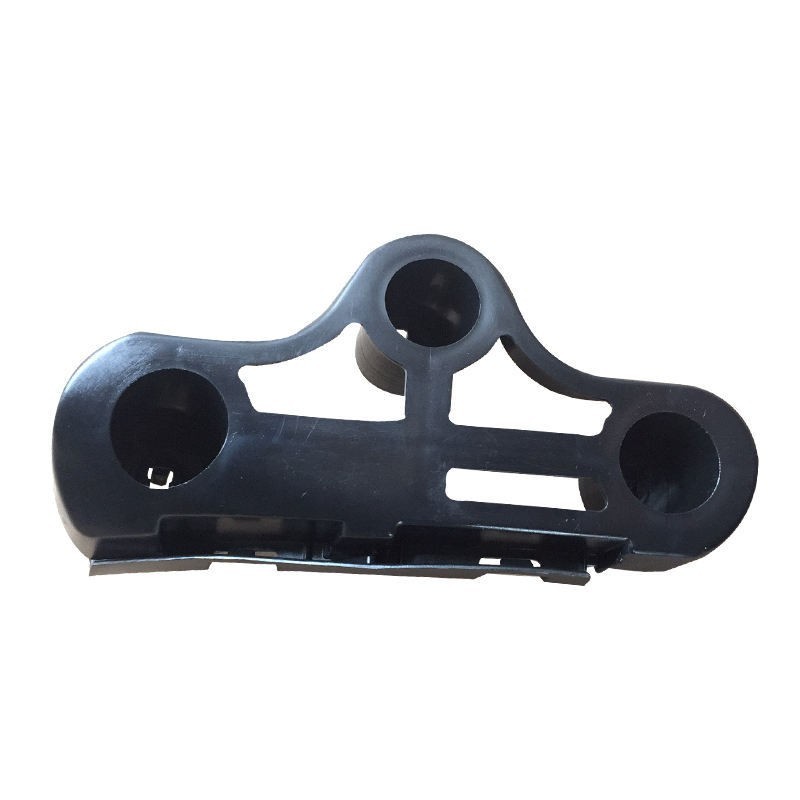
The front caliper is a standard design, and the guide pin of the sub-pump is a sealed structure, which is waterproof and dustproof. The picture of the guide pin (No. 4 accessory) is incorrect, it is actually hexagonal. My progressive version of Jiaru does not have a thickness alarm device for brake friction plates. I wonder if it has been reduced or not.

Front caliper structure diagram
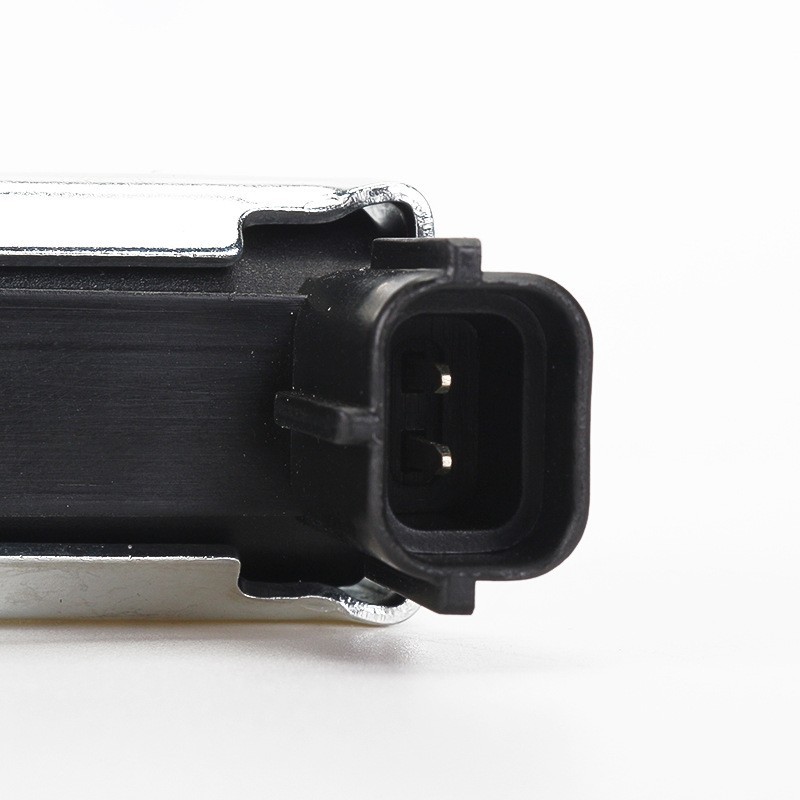
Rear sub-pump with EPB (electronic parking). Guide pin (No. 3 accessory) is semi-exposed, dustproof and waterproof.

Rear split pump structure
Let’s talk about the relatively special tools that need to be prepared.
Since VW provides brake fluid capacity for each brake line, prepare a graduated plastic bottle to accurately determine when the oil discharge will end. There are two holes in the bottle cap, one is inserted into the oil discharge hose, and the other is used to balance the air pressure. It looks like this:

Waste brake fluid collection bottle
A thin 17mm open wrench is used to secure the guide pin of the front sub-pump.

Remove the guide pin of the front wheel pump

Removed front wheel sub-pump guide pin (not yet lubricated)
Special ratchet head for rear wheel guide pin. In order to achieve professional standards, the guide pin should be installed with a torque wrench, but the VW design is strange, the ordinary torque wrench ratchet head has no room to operate, one in the front is blocked by a multi-link longitudinal arm, and the back one is blocked by a brake hose and electronic parking mechanism. Of course, if torque control is not considered, it can also be installed with an open wrench or a 12-ring wrench over the batch head.

Insufficient space for ordinary torque (ratchet) wrench for front guide pin of rear sub-pump

The rear guide pin of the rear sub-pump is blocked by brake fluid hose and electronic parking mechanism.
In order to show respect for the German precision design, or spend a lot of money to buy tools. Bought a Hoffman’s interchangeable torque wrench to match Hatchett’s semi-piercing ratchet head. VW requires 6mm hexagonal handle ratchet, but it is difficult to buy in China. Buy a ratchet head with Hazette 8mm handle, which is still too long, and use an angle grinder to grind it short.
In addition, using a changeable torque wrench with a ratchet head of different sizes may need to convert the torque value (that is, it cannot be fastened according to the wrench torque scale), which is not detailed here, if you are interested, you can go to the Hatchett website.

Left and right is an ordinary torque wrench ratchet with hexagonal batch head, too high. In the middle is Hazette’s, and the approval head has been worn short.

The guide pin of the rear wheel can be installed just by using Hazette’s 8mm ratchet head.

The guide pin of the sub-pump is fastened with Hoffman’s changeable torque wrench.
Give a brief description of the operation process.
According to the requirements of the VW ELSAWIN maintenance manual, the exhaust order of the sub-pump is as follows: front left-front right-rear left-back right, which is different from the conventional exhaust sequence from the farthest end to the nearest (from the ABS pump).
First of all, clean the dust around the lid of the brake liquid storage tank, extract the brake fluid from the liquid storage tank, and do not try to remove the filter, because if you draw too much of the old brake fluid near the bottom of the tank, the air will enter the pipeline and affect the emptying effect.
Reliably support the front of the car sound, remove the left front wheel (if you do not do brake system maintenance, replace the brake friction disc, you can try not to support the vehicle, remove the tire). Use T45 sleeve head + thin opening wrench to loosen the two guide pins of the sub-pump (see photo above), then you can remove the sub-pump.
Note: hang the sub-pump tools on the damping spring, do not hang the sub-pump by brake hose.

Measuring the water content of brake fluid

Hang up the sub-pump tool
Remove the old grease from the guide pin and guide pin hole of the sub-pump, and then apply grease on the guide pin.
Clean caliper bracket, sub-pump stains, dust. A special protective agent for brake system maintenance is sprayed on the back of the brake friction plate, and the contact surface of the hub is also smeared with a special anti-sticking lubricant. It would be better if you want to thoroughly push out the piston of the sub-pump and lubricate it.

Guide pin of sub-pump under lubrication

The back of the brake friction disc and the contact surface of the hub are all maintained.
Install the sub-pump according to the disassembly sequence. If you do not replace the brake friction disc, you generally do not have to push back the sub-pump piston.
Next, change the brake fluid.
Note:
The main contents are as follows: 1. The liquid in the waste liquid collection bottle should submerge the hose to avoid entering the air in the loosened state after the brake pedal is released due to individual work.
2. The exhaust hose is suspended and the highest point is higher than the exhaust valve

Collect the waste liquid from the tank and submerge the hose

Exhaust hose suspension
Add the new brake fluid to the storage tank to the high position, then open the exhaust valve, step on the brake pedal on the car, and the old brake fluid flows out of the sub-pump into the collection tank. Check the liquid level of the storage tank after many operations and replenish it in time until the brake fluid in the hose becomes clear and transparent and there are no air bubbles, and then check that the total amount of brake fluid discharged reaches the capacity given by VW, then the exhaust valve can be closed.

The scale bottle can determine whether the discharge is complete or not.
The operation of the rear wheel is similar to that of the front wheel. The difference is that the special tools mentioned earlier are needed to disassemble and assemble the guide pin of the sub-pump and reset the electronic parking mechanism.

Push back the piston of the sub-pump after the electronic parking mechanism of the rear wheel is reset.

After the maintenance of the rear wheel braking system
After the exhaust and maintenance of the rear wheel brake fluid is completed, we should also use the decoder to restore the electronic parking system (that is, finish the repair and make the system work again), hear a motor sound of the rear wheel electronic parking system, and the software screen prompts it to be completed.
Go through all four rounds, and finally fill the brake fluid storage tank to the upper limit scale and complete it.
Note:
1. If the sub-pump is removed, do not drive immediately after starting the engine. Step on the brake pedal in place for many times to make the sub-pump and brake friction plate reach the working position.
2. The old brake fluid must be collected and must not be dumped into sewers or dustbins and handed over to maintenance stores or professional institutions for disposal.
From reading Volkswagen maintenance manual, preparing tools, pre-disassembly (first disassembling four wheels to see if the tools are available, electronic parking maintenance reset) to the operation used intermittently for more than half a month, the operation took more than 5 hours.
What’s the effect of a twist? The sudden sensation of the previous braking is gone (it is estimated that there was air in the pipeline), has the braking ability improved? I didn’t notice it.
Have you met the VW maintenance requirements? I think it is.
How does it compare with the DIY operators of the United States and the British Empire? I think it’s way ahead.
![]()
Oh, boasting is not taxable.
The space is too long, the manual clutch fluid changes the next pendulum.

The old brake fluid discharged can be seen as a dirty suspended substance.


 April 1, 2024