2018 Volkswagen Sharan DIY replacement gasoline filter element
I want to install the fuel tank guard, so I bought a steam filter by the way. Install the guard plate and put the steam filter protection (block) inside, so first try to change the steam filter.
Changing steam filter is actually very simple, not as complicated as this article, please jump directly to the last few reference posts, which are the same as Xia Lang.
Tools:
1. Jack (not attached to Xia Lang’s original car)
2, safety bracket (safety protection, to prevent the Jack from suddenly tilting, necessary! It seems that the rear wheel can also be changed by steam filter, so you don’t have to use it)
If you have a gutter and a lift, you don’t need it.
3. Glasses (protect eyes, operate face up, gray chassis, glasses are necessary)
4. Containers such as trays for receiving gasoline (connected with gasoline filter and a small amount of gasoline leaking from the pipe)
5. Phillips screwdriver (remove the plastic clip that surrounds the gasoline filter element outside, and absolutely prohibit the use of electric screwdrivers)
6. Gloves, towels, rags (if you want to do it yourself, you can’t avoid dirt)
7. Express package foam packing skin (paving the floor, people lying on it)
8. Self-spray tank for cleaning (cleaning gasoline filter element and surrounding dirt, I am useless)
9. Fire extinguisher (a small amount of gasoline will flow out, observe that there should be no danger of spark or fire around, be careful to make the ship for ten thousand years, of course I didn’t expect it at that time)
10. Fuel pipe pliers (I am useless)
Quick steps (1. Remove the right rear wheel? , 2. Knock the sand off the filter joint of the vibrating machine, 3. Press and hold the tubing quick connector clip, 4. Remove the other end of the two tubing, 5. A Phillips screwdriver removes the large plastic hoop of the steam filter, 6. Remove the end of the separate tubing, 7. Reinstall the new machine filter)


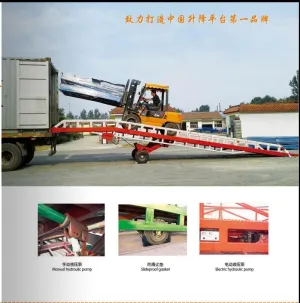
As shown in the picture, green is the Jack and red is the safety bracket.
Put the Jack a little further back at the fulcrum of the chassis, and put the safety bracket in place to see if the support points of both are suitable, and don’t push it at the edge gap.
There is an obvious bulge and notch structure at the supporting edge of the chassis, which is clear at a glance, which is the preset structural stress point.
The Jack mouth groove is stuck into the edge line, and the semilunar low point of the safety support is stuck into the edge line.
In front of the right rear wheel, lift the car with a Jack and place the safety bracket synchronously. After jacking to the high point, lower the Jack, transfer most of the weight to the safety bracket, and the Jack does not have to withdraw.
When the Jack is lifted, the safety bracket is also lifted synchronously and protected synchronously. Because when the Jack rises to the high point, it becomes more and more unstable, don’t suddenly dump and bend, the injury to the car is small, it is not good to hurt people.
I guess removing the right rear wheel will also make it easier to change the steam filter. Just put a tire in the middle of the car. You don’t have to use a safety bracket. )


(1) preparatory work
Abandoned express film floor, because the need for people to lie on the ground on the back to operate, so that the neck does not hurt in the next few days.
Wear glasses to protect your eyes because the chassis turns gray when you knock.
Rags and gloves, which is a dirty job, can be solved with a small fee of 50, and do it at the same time as changing the oil, estimated at 20-30.
(2) Fast joint construction
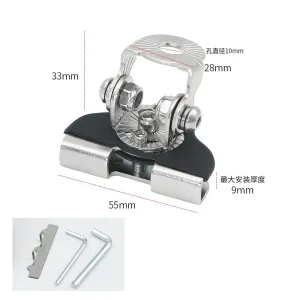
The steam filter looks like the picture. There are convex rings on the three aluminum tube heads of the steam filter. The car body has three fuel pipes connected to the steam filter, and there is a quick joint on the fuel pipe, which is stuck on the convex ring and is firmly mechanically connected. The inlet pipe is a blue clip, and the return pipe and outlet pipe are black clips of the same color as the pipe. Press the clip of the quick connector inward to remove the connector.
The pictures of the quick connection below are all illustrations of the clip structure, not Xia Lang’s fuel pipe joint, but the principle is the same. It can be seen that after pressing the red clip in the picture, the locking relationship between the red clip and the convex ring on the steam filter aluminum tube is released, and the two can be removed.


The whole steam filter is surrounded by a plastic (blue arrow below) and fixed to the chassis of the car body. There are screws on the plastic ring, and the whole steam filter can be taken out after unloading.

There is an arrow on the steam filter housing to indicate the direction of gasoline flow.
There are two pipes at the inlet end: the thick one is the inlet pipe with an outer diameter of 10mm, and the thin one is the return pipe with an outer diameter of 8mm.
The oil outlet end is a single pipe with an outer diameter of 10mm. All are connected to the pipe through a quick joint.
(5) the pressure in the oil circuit.
The oil circuit contains pressure, which is one of the reasons why the fast joint is not easy to separate.
Standard operation, should pull out the fuel pump fuse, start the engine, until the engine automatically flameout, complete pressure relief.
Start the engine again, if it cannot be started, the fuel system and its pipeline can relieve pressure successfully, and the steam filter can be replaced.
In the actual maintenance, in order to save time and trouble, generally will not relieve pressure, directly replace the steam filter.
(6) remove quick connector
When you are lucky, press and hold the clip (blue or black) with your hand or screwdriver, squeeze the quick joint closer to the direction of steam filter, then pull it out in the opposite direction, and you can separate.
When you are unlucky, you can’t press the clip at all. The gap in the clip was burned to death because of the deposition of sand and dust on the chassis.
The screwdriver hits the joint and the sediment falls one after another (pay attention to eye protection). Try again. Spray detergent to lubricate and try again. Usually, after the sand is knocked out, you can press the clip.
Of course, using the fuel pipe clamp tool is the most labor-saving and clean.
(7) formal steps
< < after making sure that there is no source of fire around, and there is no danger such as electrostatic fire in clothing > >
0: clean the sediment, keep the joint clean and mud-free, and will not pollute and affect the new machine filter and joint.
A: first separate the other end of the two heads, quickly release the joint and leak the convex ring of the aluminum tube, do not pull it out immediately.
The blue card is the feed pipe and the black card is the return pipe.
B: the screwdriver loosens the screw of the large plastic ring that wraps the steam filter. It is absolutely forbidden to use an electric screwdriver.
C: Remove the two fuel pipes. Plug it into a new steam filter as soon as possible and click into place.
Be aware that a small amount of gasoline may spray out to protect your eyes! The container catches the flowing gasoline. (I used a foam box to connect it, but the foam box melted by gasoline).
D: Open the large plastic ring that surrounds the steam filter and take out the steam filter. The old steam filter is in a falling state connected to the oil pipe.
E: Separate the quick connector at the steam filter outlet pipe end, pay attention to the outflow of gasoline, and protect your eyes! The container catches the gasoline.
During this period, use the blocking cap of the new steam filter to block the nozzle of the old machine filter to reduce leaks.
F: Connect a new steam filter. There is a click sound from the quick clips! Reassemble.
<
(8) Closing work
When installing a new steam filter, pay attention to the fast joints of the three nozzles being firmly jammed. Screw back the large plastic ring screw. Finally remove the jack and safety bracket.

(1) Shape of Sharang steam filter
Sharan uses a 6.6BAR steam filter, and the arrow points in the direction of gasoline flow.
The outlet end is a single tube: the outer diameter is 10.0mm.
The inlet end is a double tube: the central tube is a thin tube with an outer diameter of 8.0mm; the outer tube is a thick tube with an outer diameter of 10.0mm.
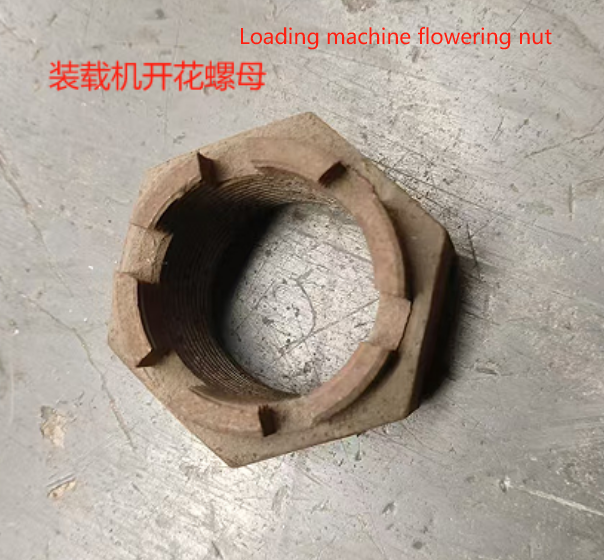
The photo shows the original removed car parts, UFI brand, said to be from Sofima. The Volkswagen part number is 7N0201 051A, and the corresponding other brand numbers are ~~~
The pressure value and nozzle thickness are different, so it is not common with other public machine filters, and the price is relatively several times higher.


The photo shows other models, and Sharan is completely similar to this one


In the picture, it is obvious that the ends of the two pipes are removed first, and the plastic cover of a new steam filter is immediately blocked to prevent further leakage of gasoline.
labor-saving and clean.


 April 1, 2024
March 27, 2024
April 1, 2024
March 27, 2024  March 27, 2024