There are many such installation tutorials for cyclists in the altar. I would like to pay tribute to all of you. The rubber in the inner ring of my crankshaft pulley is aging and cracked, so plan ahead before it is thrown on the road. After learning, I also started to do it. Here are some installation experiences, focusing on some details that need to be paid attention to, to remind my brothers who want to DIY in the future.
![]()
Tool preparation: Jack, 19 tire disassembly sheet hand, 18 fast flying sheet hand and sleeve, connecting rod (for removing the big screw in the middle of the pulley), wind cannon, 20 sleeve (for pulling the horse tool to remove the pulley, 35 ocean), 14 opening plate (for screwing the horse three fixed screws), one sealant (for oil seal) A little oil (lip sealing with lubricating oil), a self-made oil sealing tool, and a buckle removal tool (for removing the inner fender of the tire).
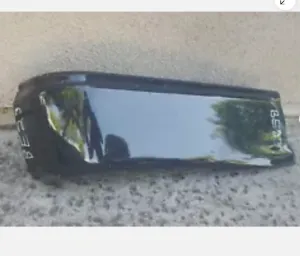
Material preparation: original crankshaft pulley (125 ocean), original oil seal (47 ocean, must have spring).
Start to do:
1. Loosen the tire screw first, pay attention to loosening first, do not remove the tire. The Jack holds the front beam of Yuanbaoliang at the bottom of the car and lifts the car body.
2. Remove the tire.
3. Remove the fender inside the wheel and remove the 4 clasps as soon as they are removed.
4. Unscrew the middle big screw of the pulley. Remember that this screw is a positive thread, twist it to the left when you unscrew it, that is, counterclockwise. Before that, you have to loosen the belt. The square head of Zhongfei Express can be plugged into the square hole of the tensioner and pulled in the direction of the body. just take off the belt in the direction-assisted position, and the belt will be all loosened. The big screw of the pulley is very tight, and the position of manipulation is relatively small, the general sleeve plus connecting rod can not be screwed, and can be hit with a wind cannon. (don’t use the open plate, it can’t be screwed and easy to slide.) because the big gasket under the screw is rusty and the small wind cannon is motionless, I borrowed a big kilogram wind cannon to repair the tyres of the cart. Because it is a loose screw, don’t be afraid that the screw will break. Loosen the screw in the right direction: counterclockwise, counterclockwise.
5. Insert the shortest screw into the screw hole of the crankshaft with the screw head facing outward. It’s in the tool kit. Then use the pulley to unload the pulley: three screws first fix the pulley on the pulley (there are three screw holes in the pulley, the height of the three screws should be the same, otherwise it will pull the crankshaft). The thickest big screw is inserted in the middle, and the big screw should be turned clockwise against the small screw head that was first put in. When the wind cannon served, the wheel got off very easily.
6. Unload the oil seal. A word screwdriver can pry, or use a hook hook, just don’t hurt the sealing slot. Never use self-tapping, the sealing groove is bound to be hurt. If
The oil seal does not leak, this step can be omitted.
7. Clean up oil stains. Buick patent leak, oil lesbians, dismantled, wipe the sealing groove around, towels, paper towels all on. Be sure to wipe it clean so that it is easy to apply sealant during installation. Wipe the seams of the oil pan again and paste some Kaft sealant on the outside of the oil pan. There must also be a leak. to solve the oil leakage completely, the oil pan pad must be changed and glued again. (the main thing that has been taken apart is close at hand, so just paste the glue easily.
8. Install oil seal. First put a ring of sealant on the sealing groove of the car body (be careful not to put too much, let alone into the crankcase). Apply a thin layer of sealant on the outside of the oil seal. Oil seal lips apply some oil lubrication to prevent the belt pulley from dry grinding oil seal after loading, but the original factory comes with its own lubricant. Take a good position and start pressing in. My tool is a plastic liner that I brought when I bought the Mahler oil seal. The diameter of the oil seal is 6CM, the diameter of this liner is 5.5CM, and the height is also appropriate. There’s a hole in the middle. Screw in with large crankshaft screws. (pay attention to the oil seal must be placed correctly, pressed in to the outside of the seal groove shall prevail, the oil seal can be flush with the outside, but also can be further inside. I almost pressed it to the end, there is a limit, it will not be pressed into the crankcase. )
9. Install new pulley. First put some sealant in the wheel spline groove, which can effectively prevent oil leakage from here in the future. There can also be less glue on the crankshaft splines. Apply less oil to the surface of the crankshaft. Press the groove at the spline and tighten the large screw clockwise. Clockwise, clockwise! The large screw can be directly inserted by a wind cannon. If you are afraid of damaging the contact surface of the crankshaft, you can tighten it with a quick sheet hand and a socket rod. This large screw must be tightened. The normal torque is 210. I slipped the outside of the screw because of the wind gun.
![]()
And then use the one on the inner plum blossom plate. The wheel will turn on the plum blossom plate, one of the screws in the pulling horse tool can be screwed on the wheel, the screw can be fastened with another sheet hand to prevent the wheel from turning, and then the plum blossom plate of 18 will be screwed hard until it cannot be screwed, and the button plate with long strong arm is better. It must be noted here that the crankshaft pulley must be screwed in place, otherwise the car will not start properly, because the crankshaft position sensor is behind the wheel. I just didn’t screw it in place at first, screwed it to the end, installed the tire and tested it, but it didn’t catch fire.
![]()
If the position is not correct, if the sensor can not correctly judge the position of the crankshaft, it will not start normally. People on this network often make this mistake.
![]()
Then the rework is re-tightened with breast-feeding force and started.
![]()
Remember! )
10. Install belt. Needless to say, the position of the pump is illustrated. Zhongfei plug into the square hole toward the body direction, put the belt on the booster pump wheel. )
Install the fender.
12. Load the tire and put the screw on the wheel first.
Loosen the Jack and put down the car.
14. Tighten the tire screw.
The test run is over. The oil seal sealant takes 24 hours to dry, so it is recommended to use the car the next day. )


 April 1, 2024