Pretreatment of rear drain pipe joints of 19 Charang skylight…
When I first started with Sharon, many enthusiastic Sharon cyclists introduced to me the problems that are easy to occur in Sharon. I wrote them down one by one and took preventive measures.
Among them, the most talked about is the problem of skylight leakage, which is generally easy to fall off at the joint between the two rear drain ends of the skylight and the rubber drain, resulting in water leaking under the floor of the car, and also easy to cause blockage due to the semi-closed rear drain structure.
So the riders all suggest: 1. Bandage the joint of the drain and the drain so as not to fall off. 2. Subtract the semi-closed port that cyclists call “chrysanthemum”.
I thank these enthusiastic cyclists from the bottom of my heart for saying, “listen to others and have enough to eat”. The second item is easy to do, so I have already cut the “chrysanthemum”!
We have to deal with the problem of connection today.
Because the left and right two drain joints are in the interior panels on both sides of the trunk, it is necessary to remove the interior panels and C-pillar panels. I have been messing around with Tuan for ten years, so it is the biggest headache to remove the interior panels, which is really troublesome. But if the problem is not solved, the leakage will be more troublesome in the future.
I studied the interior panel of the trunk over and over again, and finally found that I could handle the joint without removing it all.
Let’s do it!
This is the tool to be used: the specifications are T20, T30 and M10, respectively.

Sealant for auxiliary bonding of joints

Adhesive tape for bandaging joints
Note: Volkswagen commonly used tape is basically these two, the above is flannelette, mostly used in the car. The following is heat-resistant, oil-resistant and wear-resistant cloth-based tape, which is mostly used outside the car. I think the latter should be used in the drain joint.
Note: Volkswagen commonly used tape is basically these two, the above is flannelette, mostly used in the car. The following is heat-resistant, oil-resistant and wear-resistant cloth-based tape, which is mostly used outside the car. I think the latter should be used in the drain joint.

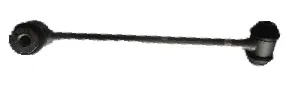
The drain of Xia Lang’s original car is very short outside the car, and it is even shorter after cutting the chrysanthemum, so I found the drain of this specification, which is also the original part of Volkswagen. I don’t know what car is. I think the outside part of the car is much longer than that of Xia Lang. And the end is not a chrysanthemum, but a movable soft plug, this plug can be easily removed.
Don’t ask me about links or anything. I have no obligation to advertise for sellers.
Don’t ask me about links or anything. I have no obligation to advertise for sellers.

Start on the right!
First remove the C-pillar, remove the decorative cover, inside is a T20 screw, remove this screw C-column can be removed.
First remove the C-pillar, remove the decorative cover, inside is a T20 screw, remove this screw C-column can be removed.


After removing the C column, you can see that there are two T30 bolts on the lower edge. When unscrewing these two bolts, you should be careful not to fall into the interior panel.

Finally, in the removal of the front ring bolt, the tool and the removal seat is the same M10, in fact, this screw does not seem to affect anything.

After removing the above screws, use the warping tool to pry open the three clips.

After that, I just dragged it, and it was all stuck.

I dragged the interior panel to the extent that I could reach out to deal with the drain and find something suitable to support the interior panel so that I could begin to disassemble and assemble the drain and drain.


This is the drain behind the skylight.

The fixed iron hoop of the sunroof drain pipe is hung on the car body. If you look at the structure carefully, it should be disassembled.

When the end of the drain is pulled out, you can see that the chrysanthemum has been cut off from the inside of the wheel lining of my car.
The joint is intact and there is no mud in the drain.
The joint is intact and there is no mud in the drain.

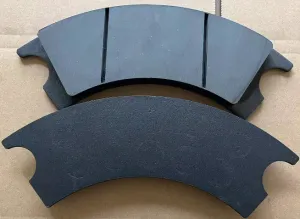
Compare the new and old drains.

Removing the red plug from the new drain is equivalent to cutting the chrysanthemum.![]()

Apply some sealant to the end of the drain pipe and be careful not to apply it to the port, so as not to cause blockage in the pipe.

Connection between drain outlet and drain pipe
I think as long as the drain is not blocked, this joint will not fall off easily.
I think as long as the drain is not blocked, this joint will not fall off easily.

Now that it’s taken apart, wrap the joint with adhesive tape to make sure it won’t fall off.

This hole won’t be clogged again, will it?

Finally, put the drain back on.
It is difficult to plug this rubber drain into the round hole in the car body. It is easier to install it patiently, but it must be plugged in place, otherwise it will fall off easily in the future.
It is difficult to plug this rubber drain into the round hole in the car body. It is easier to install it patiently, but it must be plugged in place, otherwise it will fall off easily in the future.

The one on the right is done, then the one on the left.
With the experience on the right, it is familiar with the road on the left.
With the experience on the right, it is familiar with the road on the left.

Warp the card


The original appearance of the drain.

Pull it out and you can see the chrysanthemums that have been cut.


This is followed by gluing, docking, bandaging and stuffing.


Restore as before
Can I ignore the skylight leak in the future?
Can I ignore the skylight leak in the future?

Hot Information
Tesla Autopilot and similar automated driving systems get ‘poor’ rating from prominent safety group
 April 1, 2024
 Localization of EV parts without production scalability may not help cut EV price, says President, Amara Raja
March 27, 2024 
JCTSL may turn bus stands into charging points for e-buses
March 27, 2024 You May Like