Twin fathers continue to replace the air conditioning filter elements for the BMW 218 station wagon!
Er Fat bought it and opened it, and I haven’t changed the air conditioning filter element yet! Everyone knows the price of 4s air conditioning filter elements! Taking advantage of the Double 12 event, I bought a pair of mann brand air conditioning filter elements! Erfat’s original air conditioner filter element is mann brand Denso. What the hell? What an operation is this! Anyway, regardless of online motorists, there are many posts about replacing their own air conditioning filters! It happened that the car was being maintained in the 4s on the weekend, so I planned to ask the 4s receptionist to ask the maintenance technician to replace it! Unfortunately, it was difficult to talk to, so I had to go back and do it myself! Without saying much, get started!
Prepare the work torque wrench socket! 8mm sleeve! Interlude I searched the sleeves of the entire tool set, but I couldn’t find the 8mm specification. I was so anxious that I was going to call downstairs and ask for stainless steel equipment to my neighbor to pick it up. I just took out my mobile phone and was going to make a call. I stepped on a sleeve and looked at the 8mm. I was so excited that I couldn’t wait to have a kiss that time. Hahaha! Anyway, look at the picture and remove the two fixing screws under the glove box! Take off the cover! Pay attention to the loudspeaker behind you and remove the plug! I’m in trouble here! Because I added the reversing image separately, there is a decoding box stuffed here and it will fall out! So tightening the screws is even more difficult! See the picture! Then you drill down and you can see that there is a rice-shaped screw t10 here in the central guard plate. I think you should remember to screw it off! This position is not very good to tighten and apply force. Either drill in or torque wrench! Remove the cover plate after screwing it off! This way, you can drill down and see the innermost air conditioning filter guard! See the picture, you can open the cover and remove the small guard! Forgot to take pictures. Then try to pull out two empty filters just like I do in this position! It’s still easier to get! Comparison between old and new In fact, I didn’t drive much 23000 kilometers and it wasn’t too dirty. Prepare to replace 4.5w next time. The key is that the one above the new air filter is not very easy and it is too difficult to plug it. Posture depends on me! Hahaha, my daughter-in-law saw that I hadn’t come downstairs for a long time and immediately took a photo of me! Leave me with this beautiful figure! Warning! It is impossible to change fat people! Don’t make yourself boring! I warned you! When you get down, you will be on the map!
Prepare the work torque wrench socket! 8mm sleeve! Interlude I searched the sleeves of the entire tool set, but I couldn’t find the 8mm specification. I was so anxious that I was going to call downstairs and ask for stainless steel equipment to my neighbor to pick it up. I just took out my mobile phone and was going to make a call. I stepped on a sleeve and looked at the 8mm. I was so excited that I couldn’t wait to have a kiss that time. Hahaha! Anyway, look at the picture and remove the two fixing screws under the glove box! Take off the cover! Pay attention to the loudspeaker behind you and remove the plug! I’m in trouble here! Because I added the reversing image separately, there is a decoding box stuffed here and it will fall out! So tightening the screws is even more difficult! See the picture! Then you drill down and you can see that there is a rice-shaped screw t10 here in the central guard plate. I think you should remember to screw it off! This position is not very good to tighten and apply force. Either drill in or torque wrench! Remove the cover plate after screwing it off! This way, you can drill down and see the innermost air conditioning filter guard! See the picture, you can open the cover and remove the small guard! Forgot to take pictures. Then try to pull out two empty filters just like I do in this position! It’s still easier to get! Comparison between old and new In fact, I didn’t drive much 23000 kilometers and it wasn’t too dirty. Prepare to replace 4.5w next time. The key is that the one above the new air filter is not very easy and it is too difficult to plug it. Posture depends on me! Hahaha, my daughter-in-law saw that I hadn’t come downstairs for a long time and immediately took a photo of me! Leave me with this beautiful figure! Warning! It is impossible to change fat people! Don’t make yourself boring! I warned you! When you get down, you will be on the map!

4 s maintenance

original engine oil

Replace the empty filter

8mm sleeve

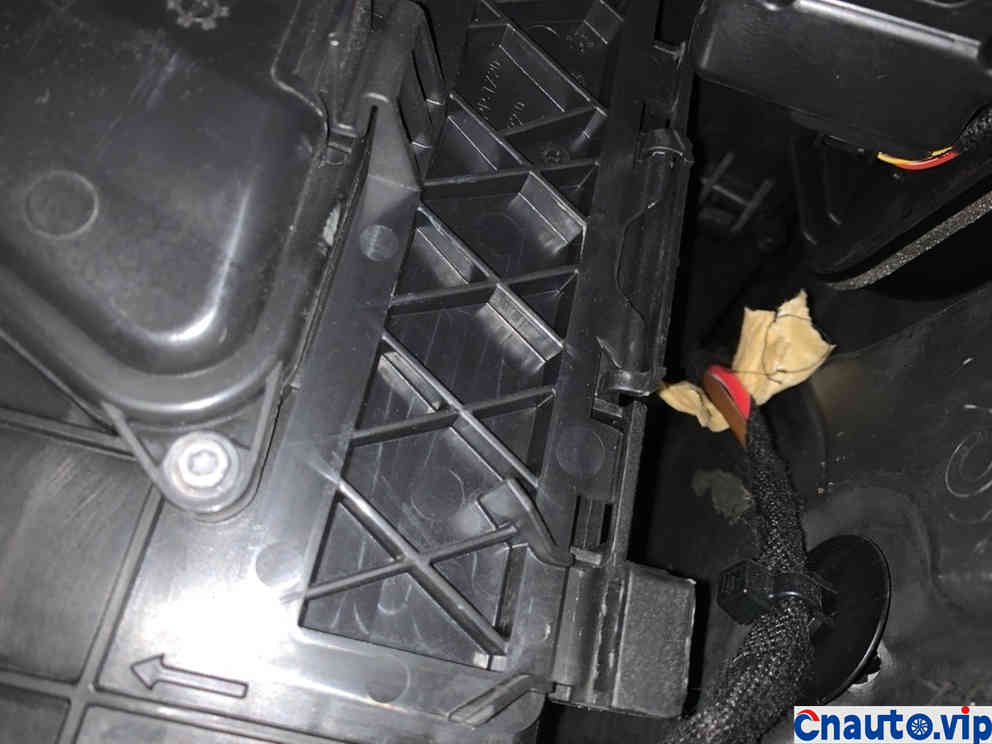
Note that this is the screw that needs to be unscrewed

Another 8mm
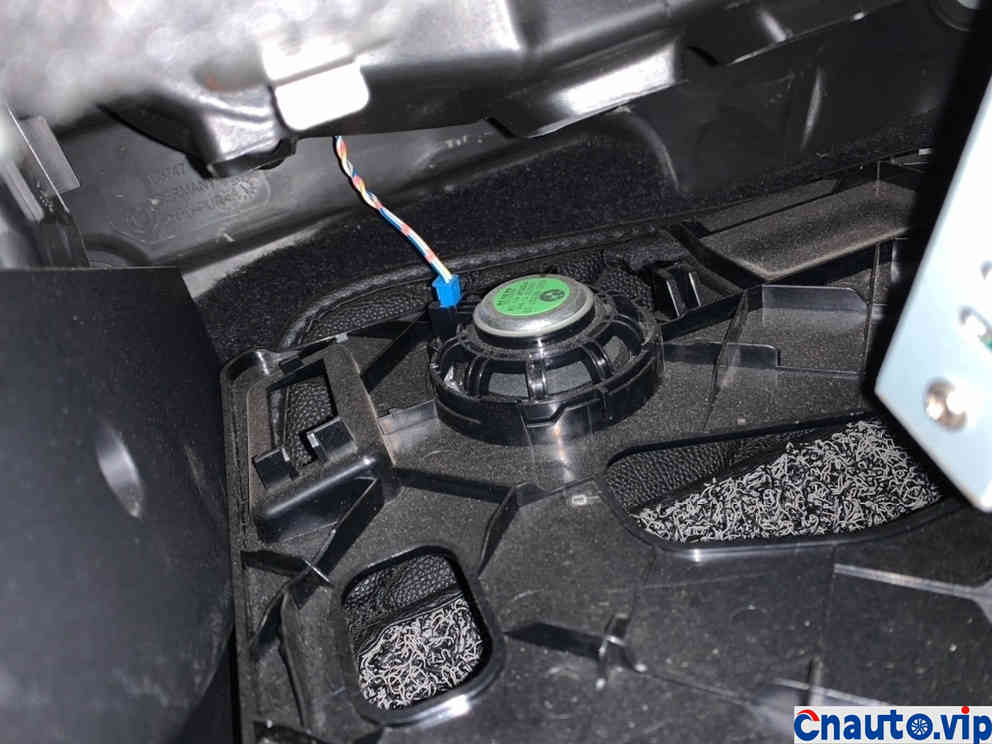
Unplug the horn connecting cord of the lower guard plate

I have a reversing image decoder interfering with me screwing the screws
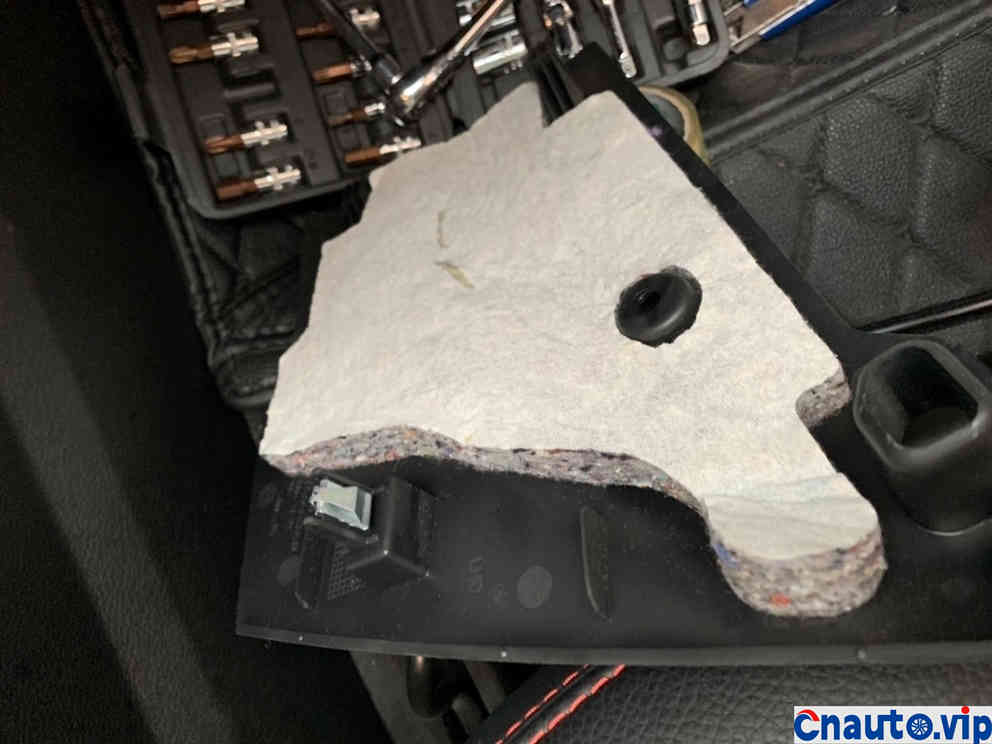
Removed central guard
The air conditioning filter element you see when you drill in is a cover plate
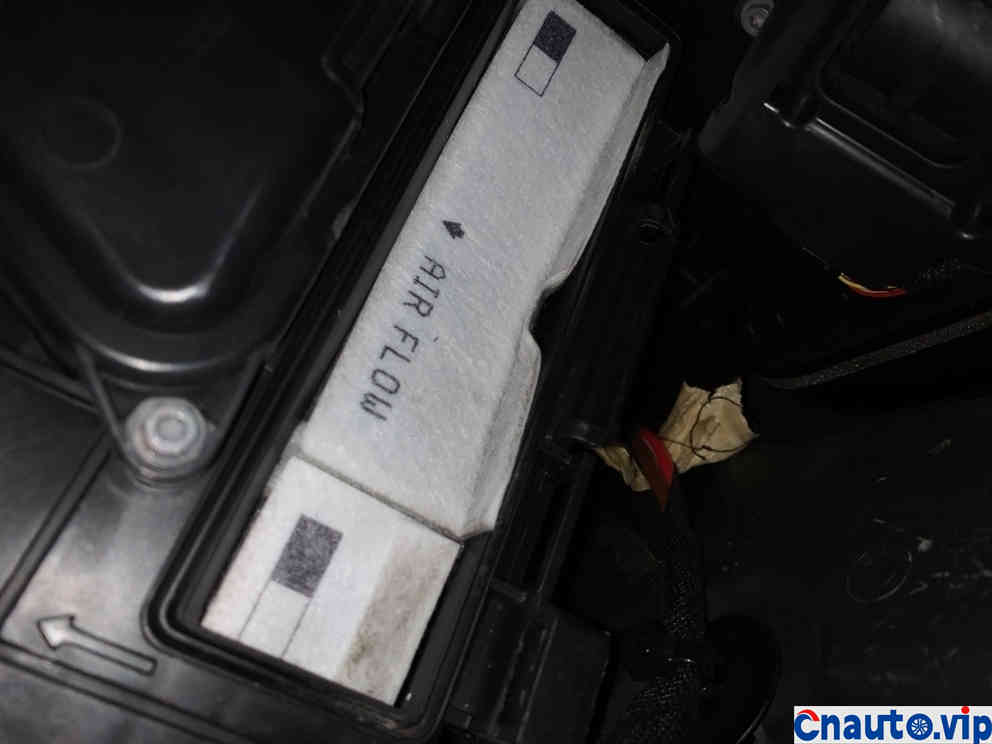
Watch your direction
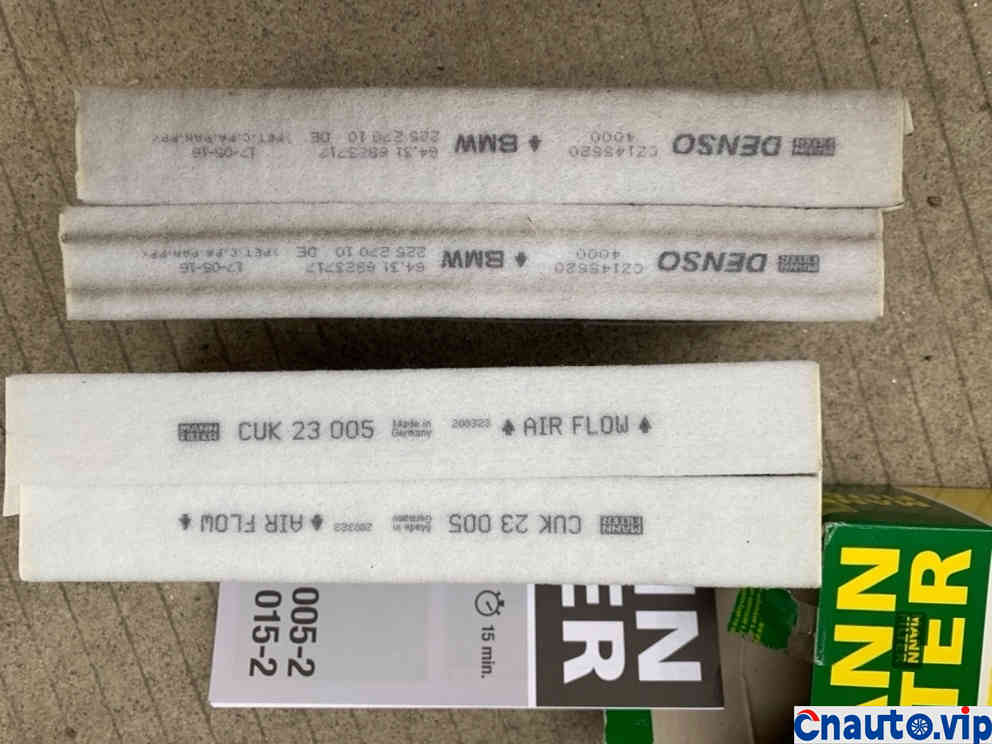
Comparison between old and new

Let’s see if it’s dirty.
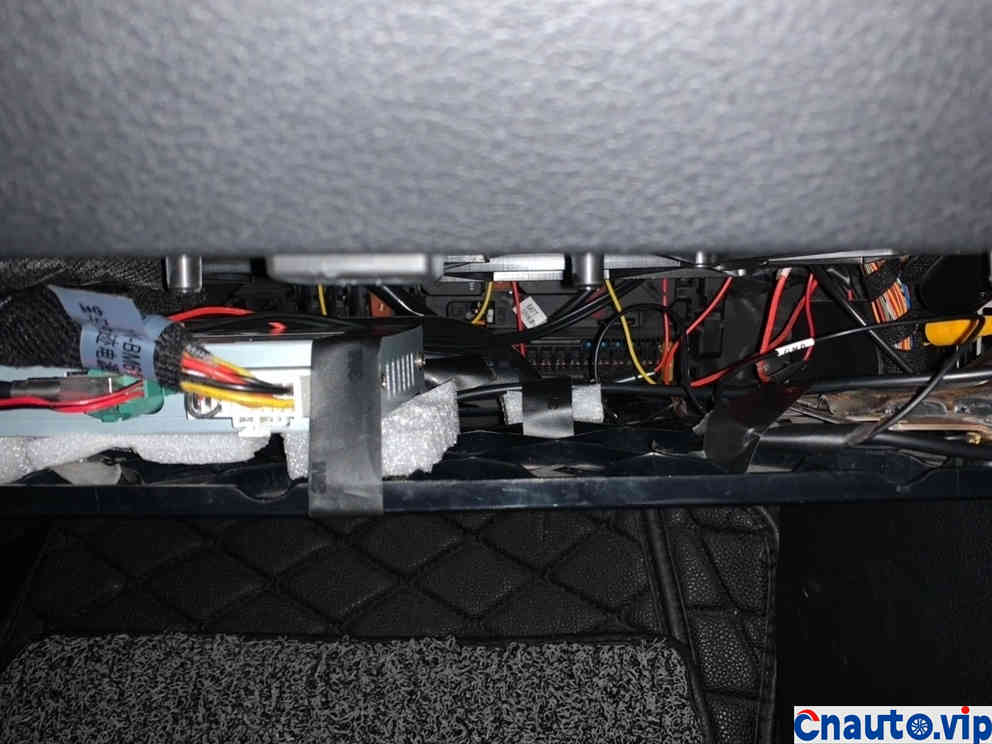
Decoder fixed

It is also fixed offline here

Beautiful figure. I saw the big butt at a glance! hahaha
Hot Information
Tesla Autopilot and similar automated driving systems get ‘poor’ rating from prominent safety group
 April 1, 2024
 Localization of EV parts without production scalability may not help cut EV price, says President, Amara Raja
March 27, 2024 
JCTSL may turn bus stands into charging points for e-buses
March 27, 2024 You May Like