The common fault of the old Mercedes-Benz belongs to the design mental handicap. There are repair axles and aluminum alloy shafts on the Internet, and the disassembly instructions and schematics are not detailed and complete. I’ll make one that everyone can understand. I directly replace the aluminum alloy shaft, strongly do not recommend using adhesive repair, must change the aluminum alloy shaft, do not accept rebuttal, read the following will know why.
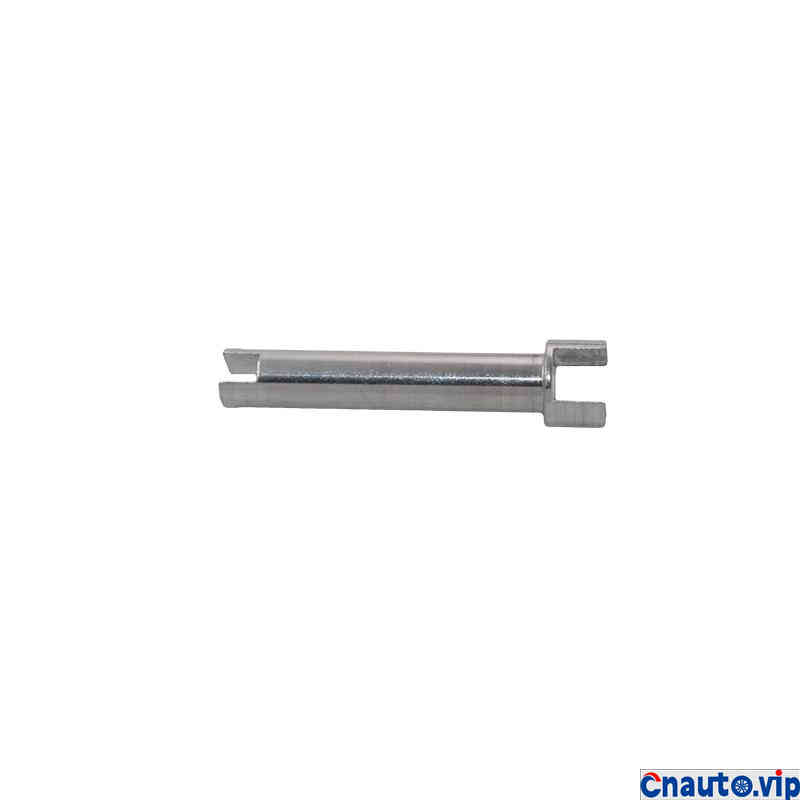
1, this is the legendary aluminum alloy shaft, Taobao search command knob shaft, about 75 to 120 price to buy one, I bought it 75.
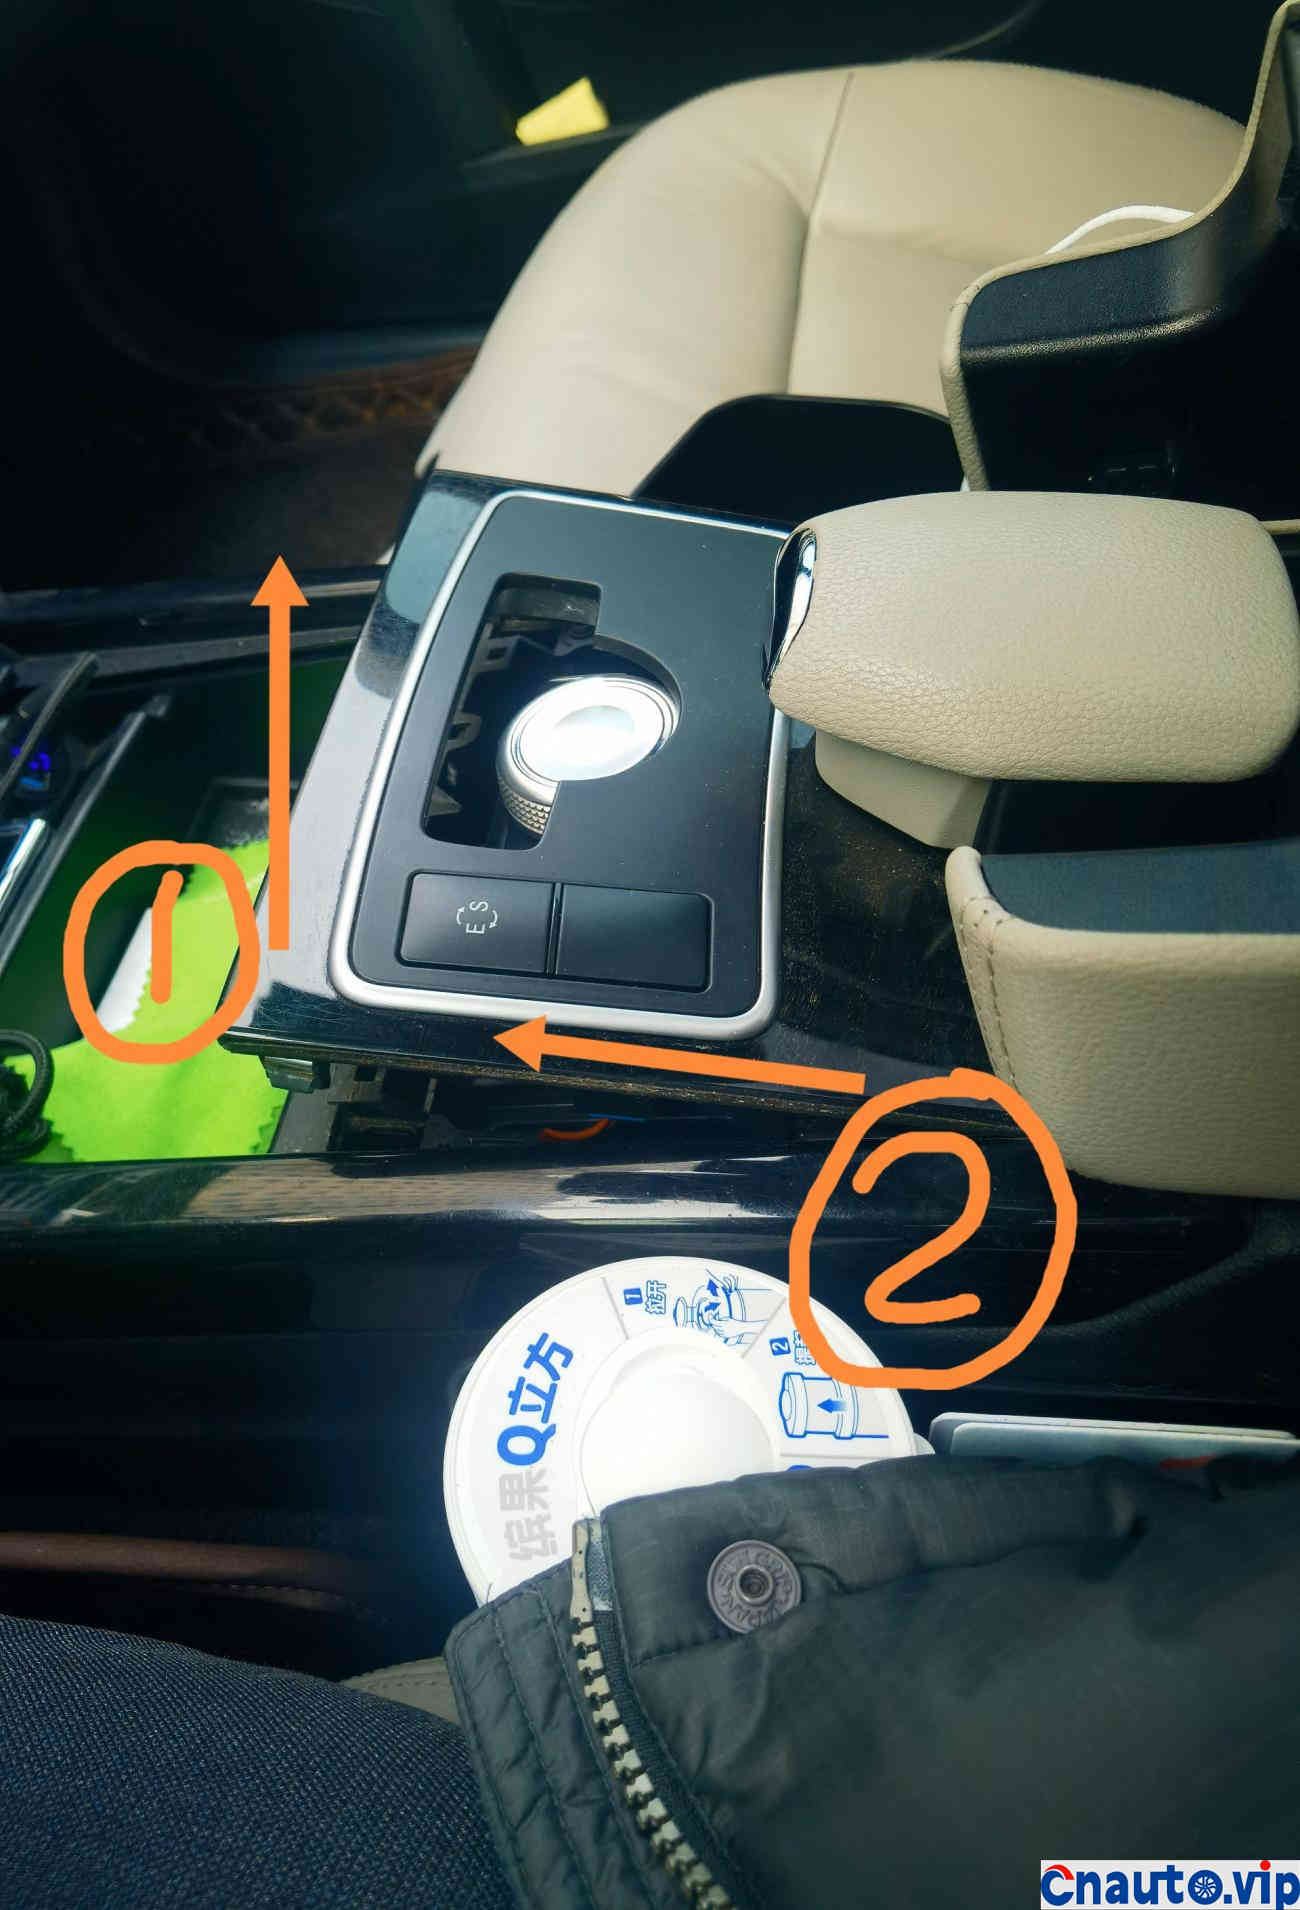
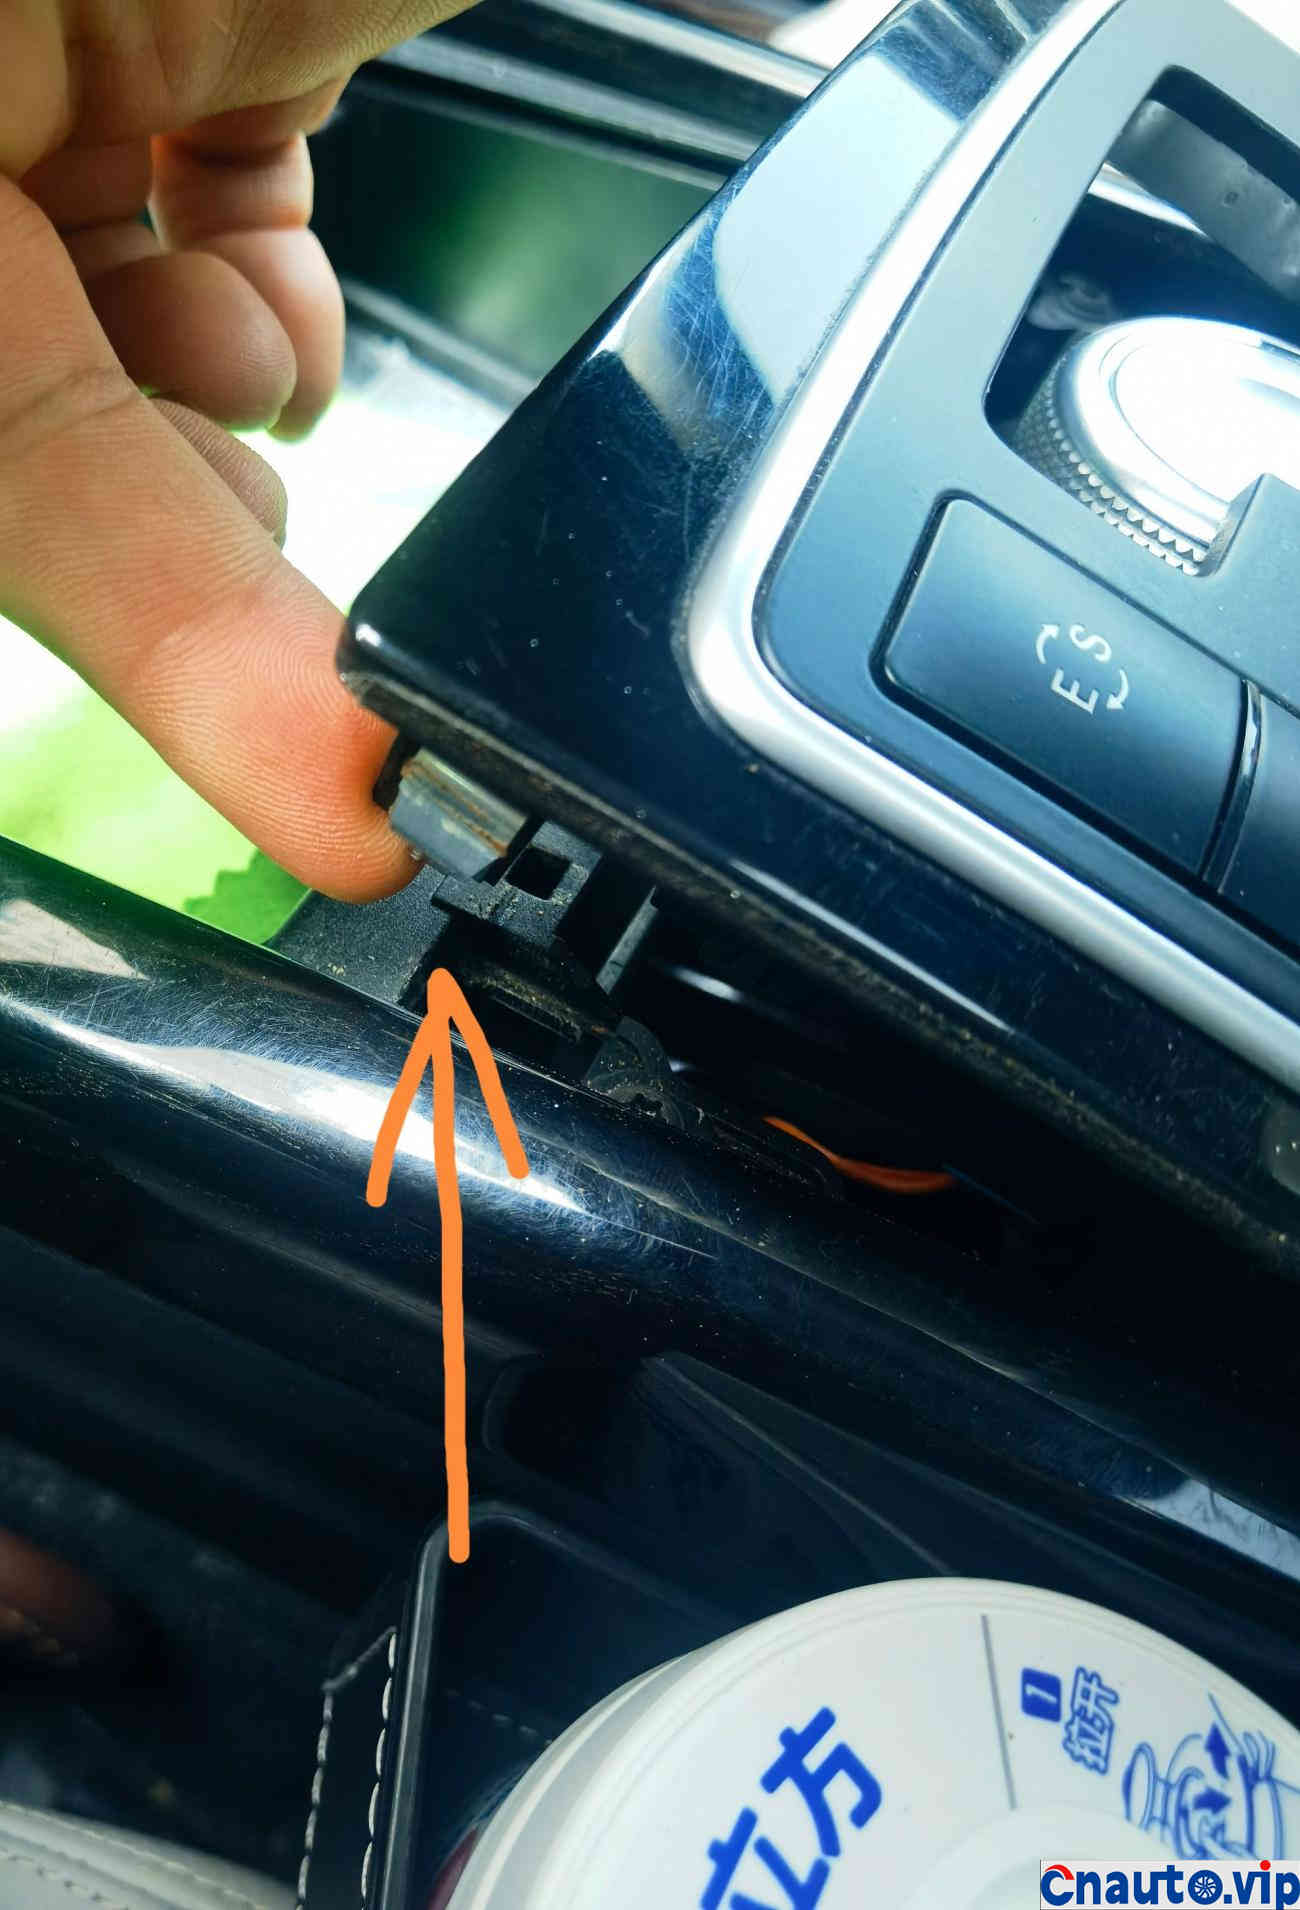
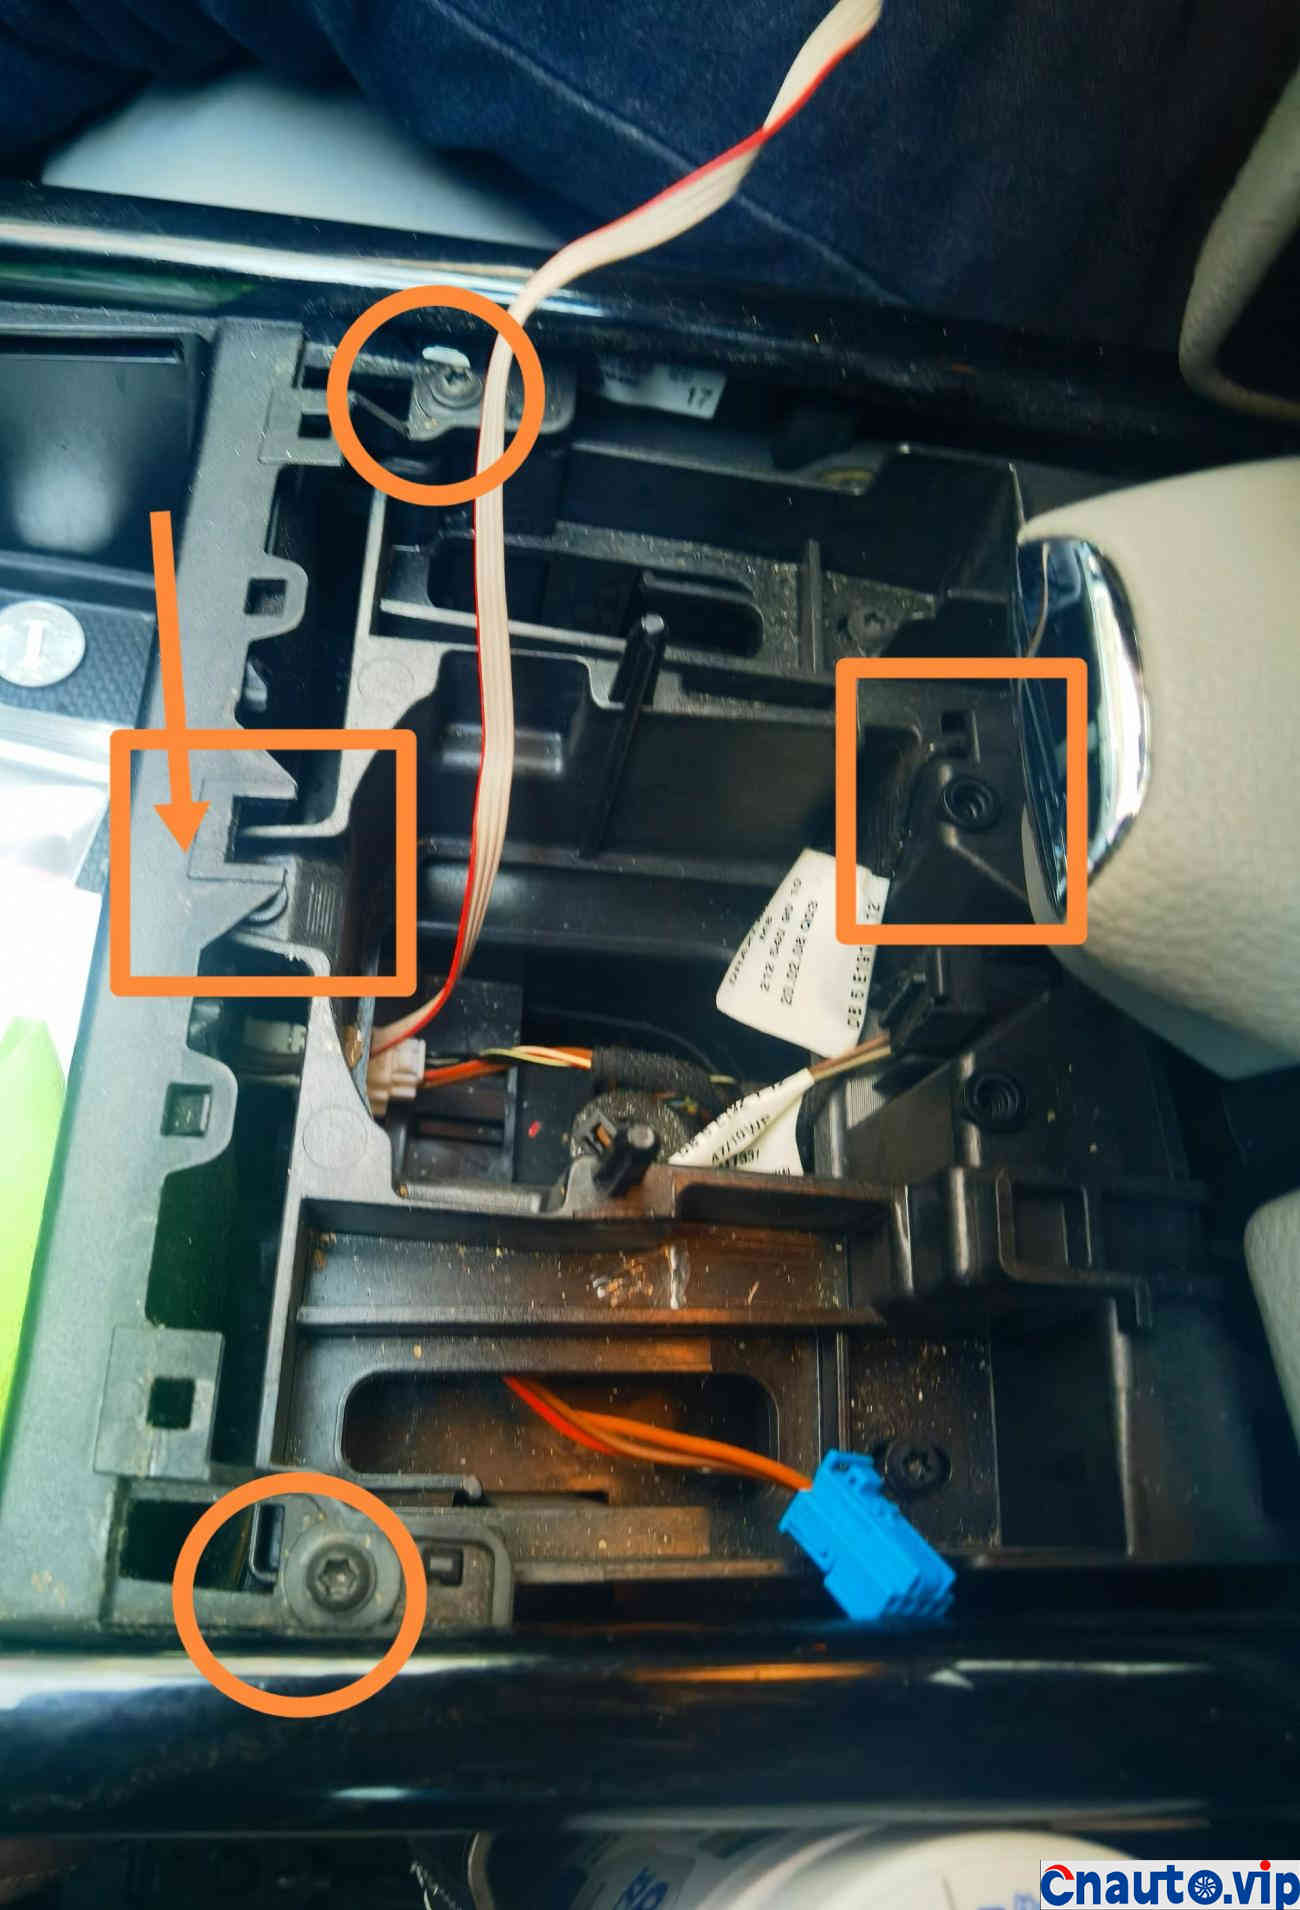
2. Disassemble the panel according to the order and direction of the arrows. The first step is to grab it by hand directly from the front and break it up. It will be more violent. If you don’t understand, you will understand the details of the structure behind. Step two, push and drag the panel forward. When this panel is pushed and dragged, it will be blocked by the switch box of the rear armbox, ignore it. After the front of the panel is scratched up, remember the main points and push and drag directly forward. The card hook at the back of that panel forgot to pat. It is a sloping tenon with an oblique back, which can only be pulled forward to remove the slot.
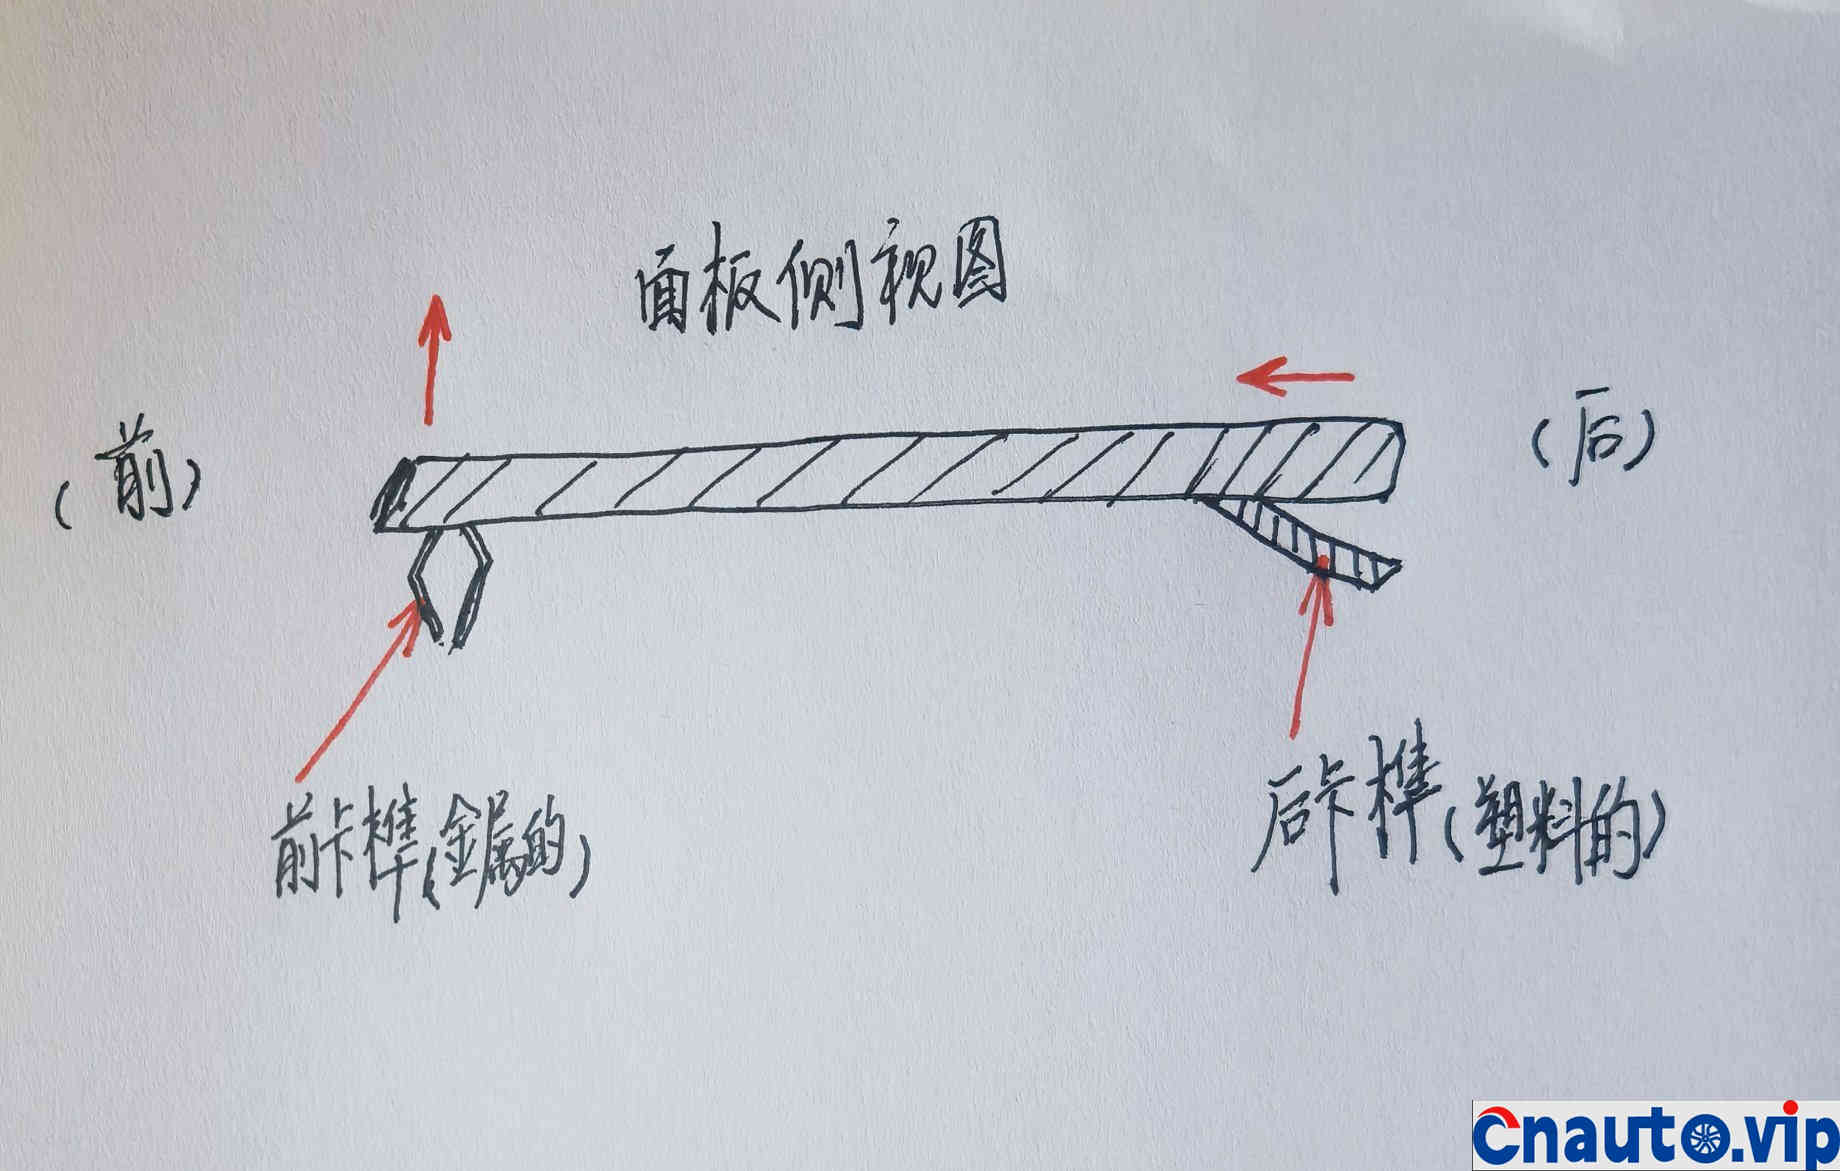
Side view of hand-painted panel. This structure determines that you must first lift the front part to make the front card tenon detach, and then push and drag the panel forward to make the rear card tenon disconnect before you can remove the panel.
The hook slot at the front of the panel.

The hook slot at the front of the panel. Now you can see. There is also a hook slot symmetrically on the other side, and the two hook slots fix the front end of the panel.

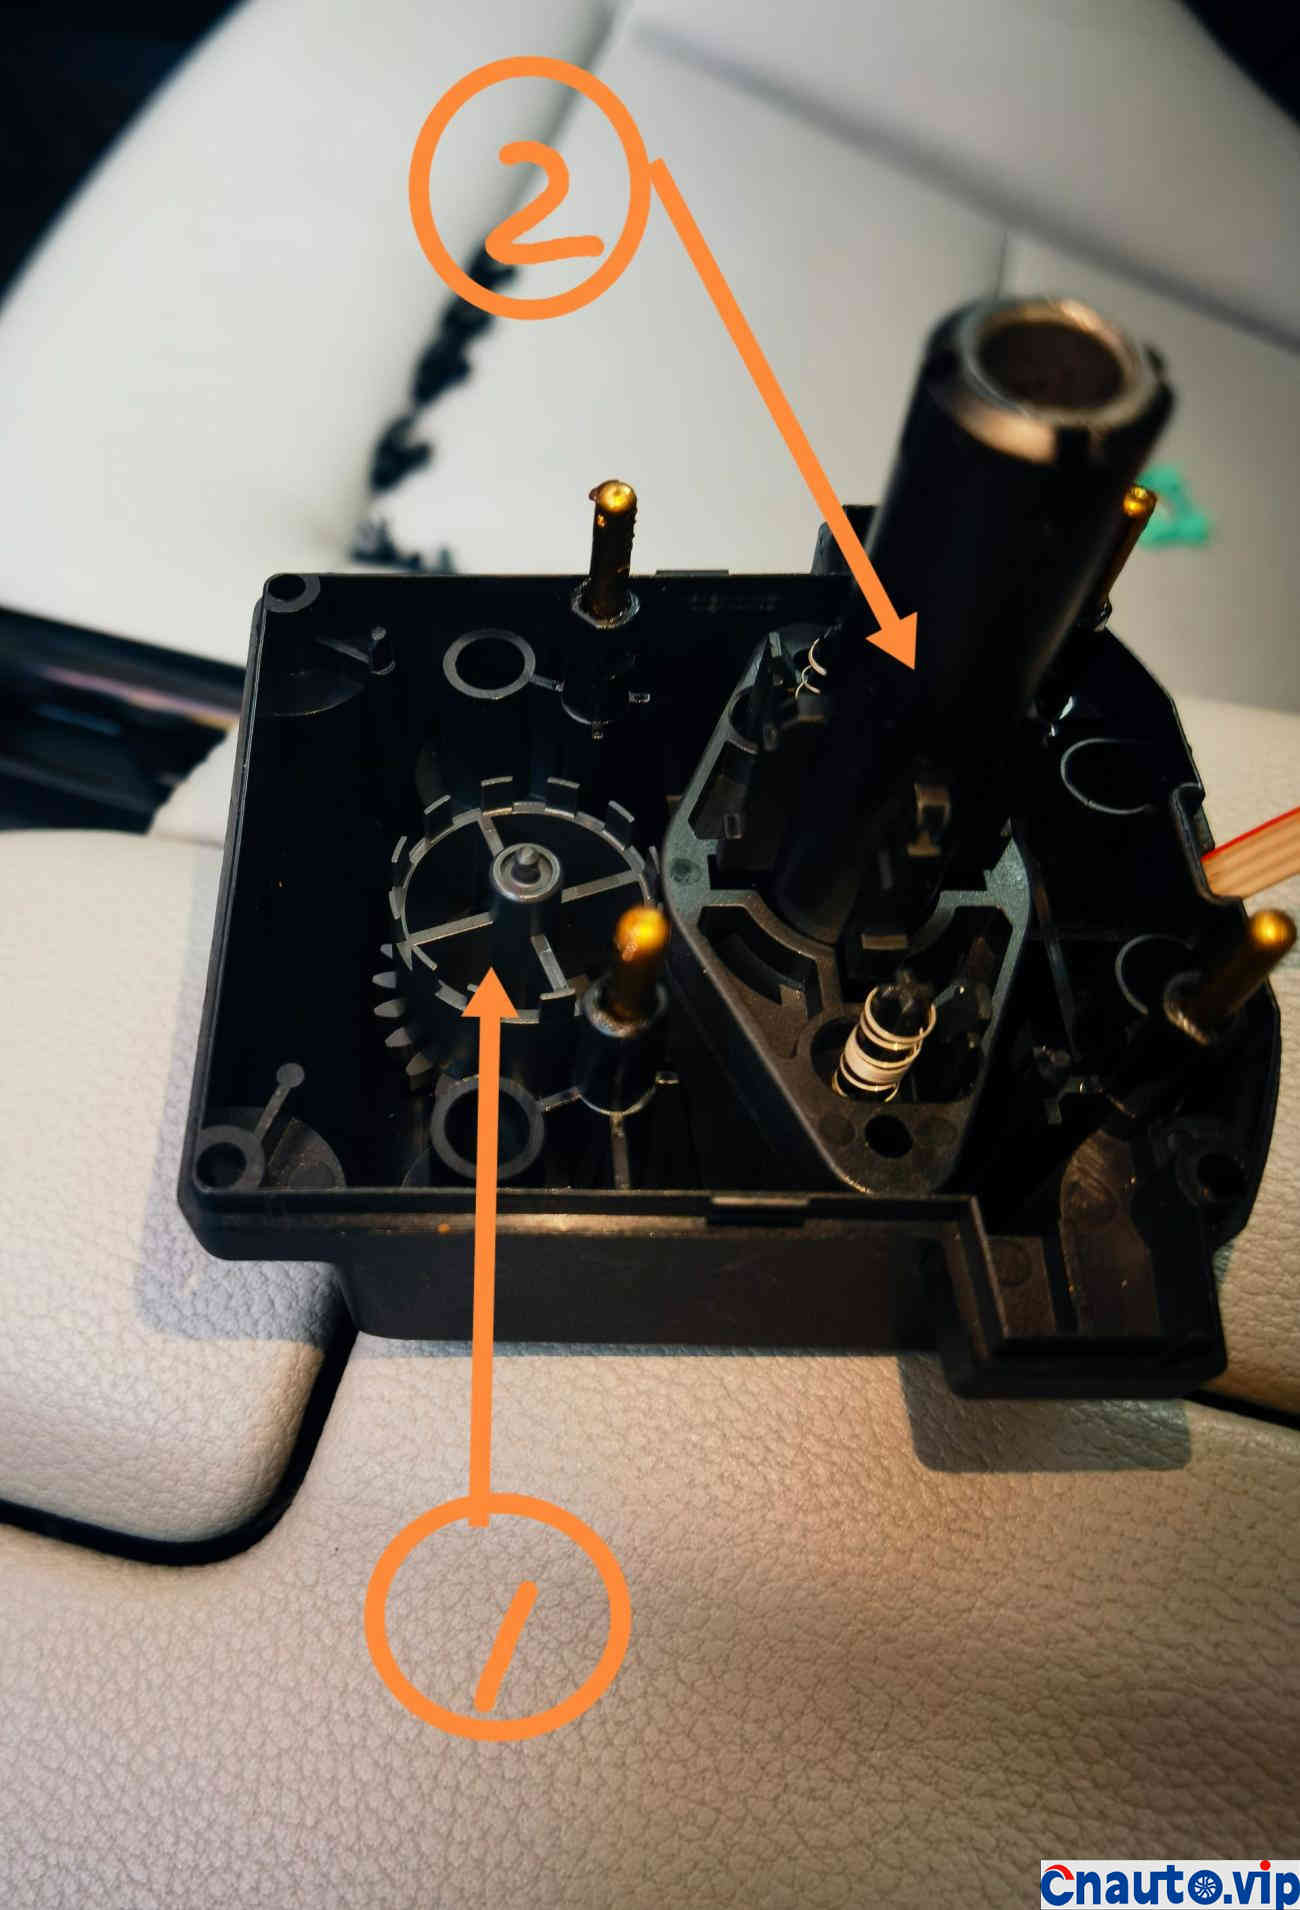
The card slot at the back of the panel, arrow 1 indicates the position, showing a little bit of the card slot, did not shoot well, but you can see a little bit. Symmetrically, there is also a card slot in Arrow 2, which is not visible in the picture, blocking it.
When taking the panel, the arrow indicates that the position is the armbox switch box, there will be a little hindrance, do not dismantle it, a waste of time and energy, according to me, pry up and push forward to remove the panel.
3. The small cover plate indicated by this arrow can be removed from the panel smoothly or not. I took it off, and when I thought about it, I didn’t have to take it.
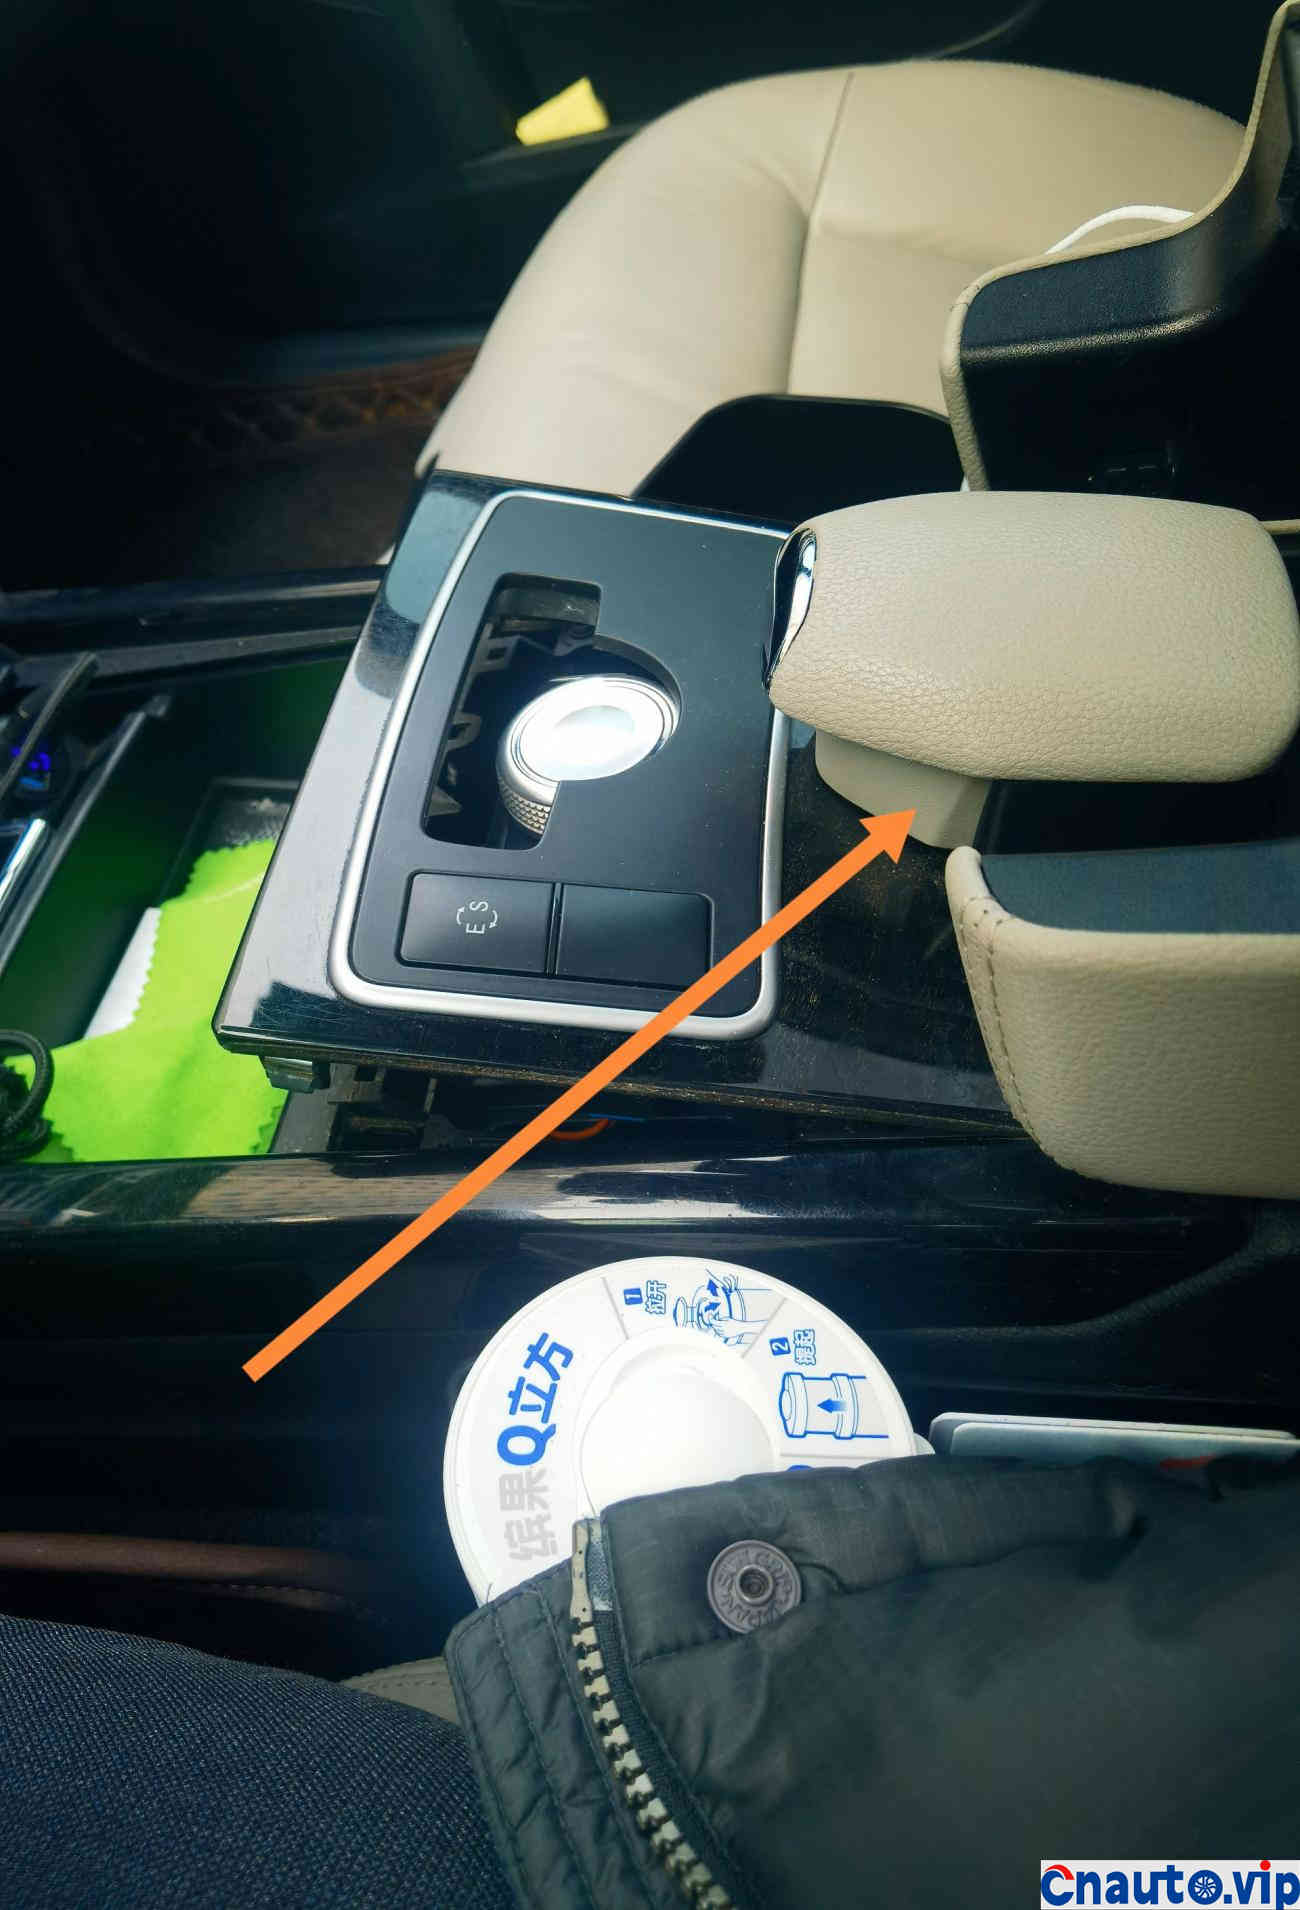
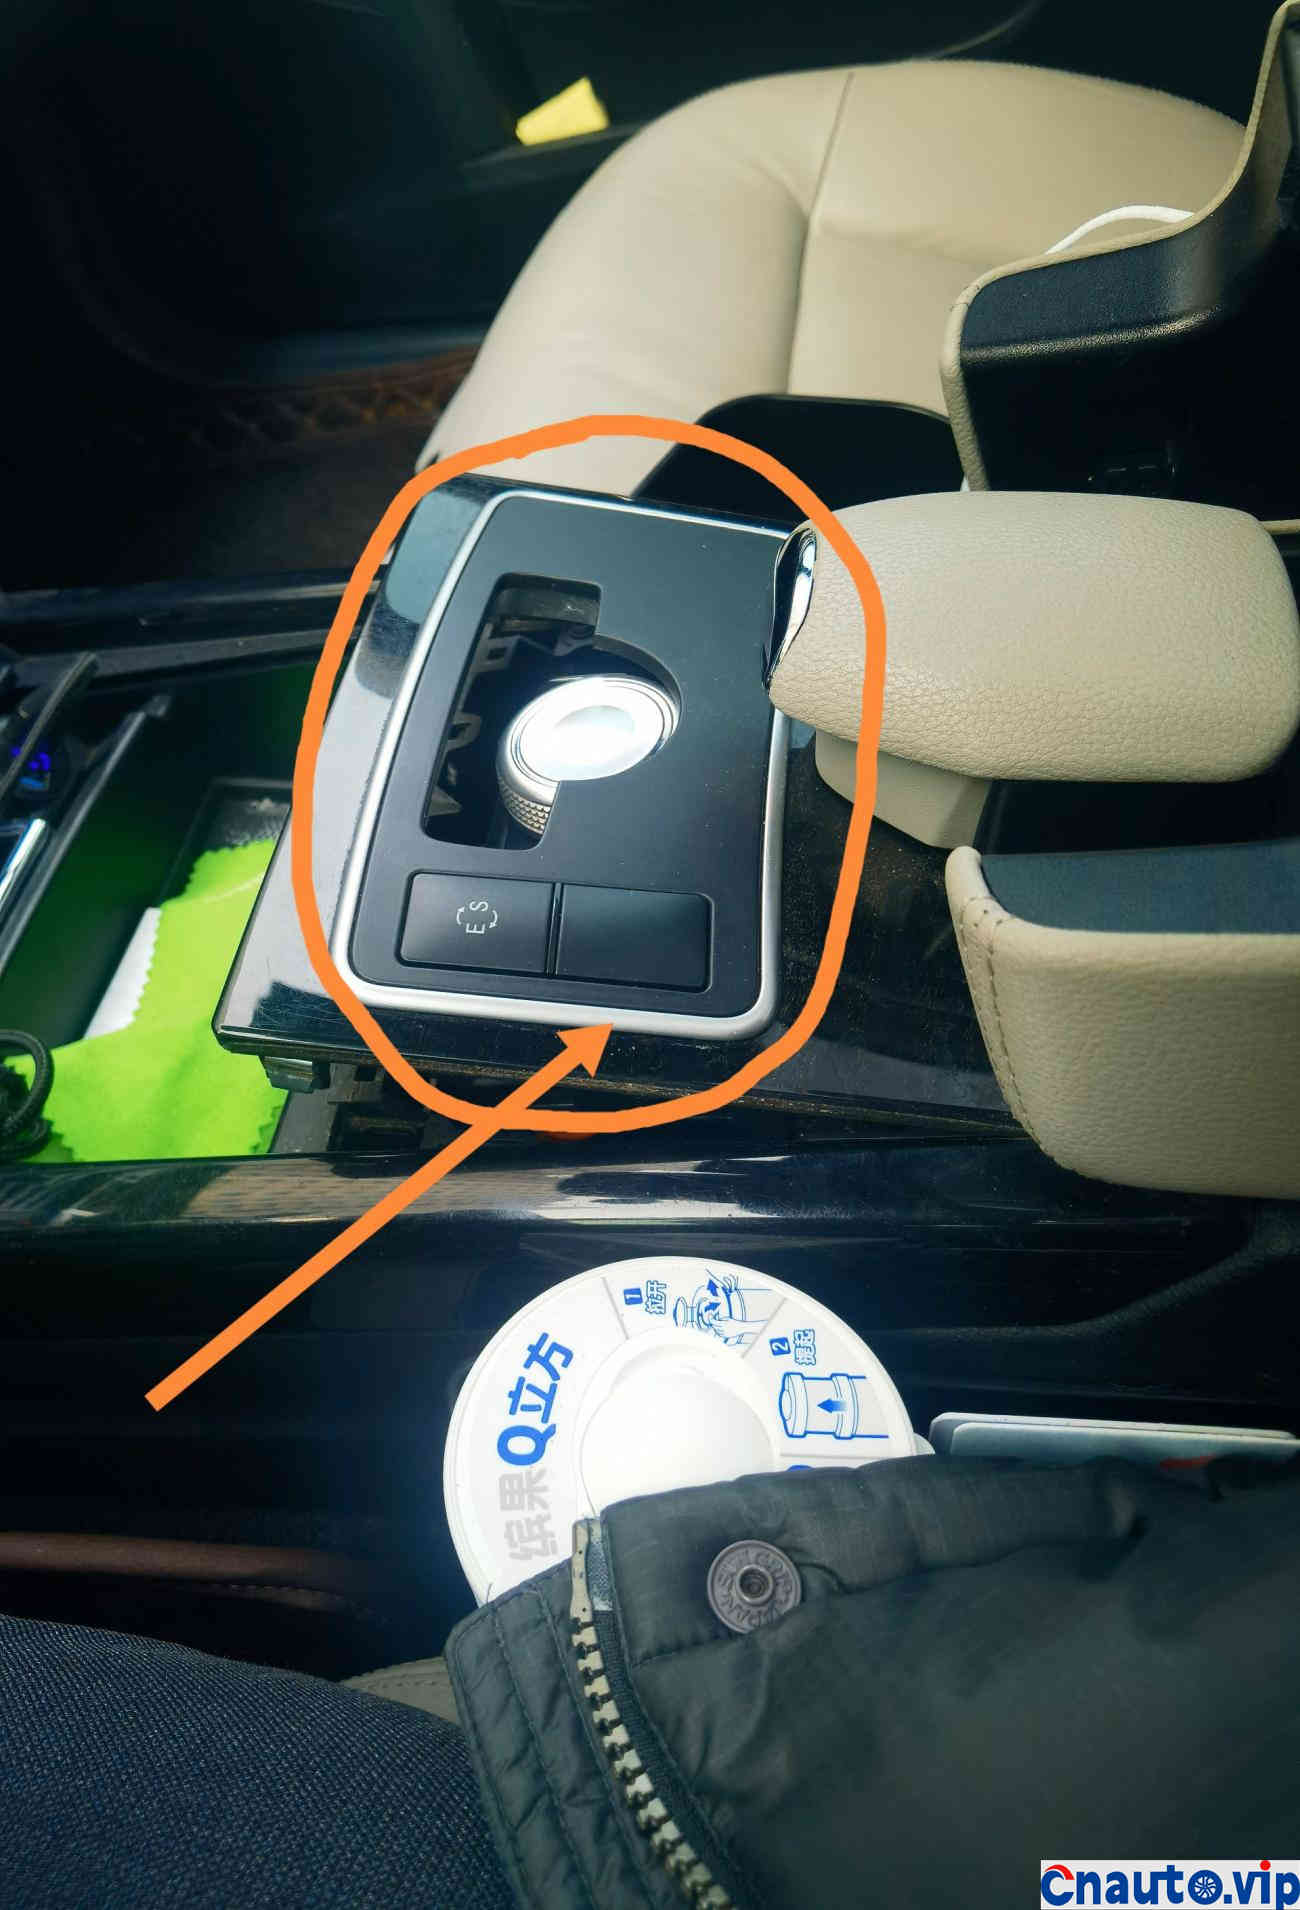
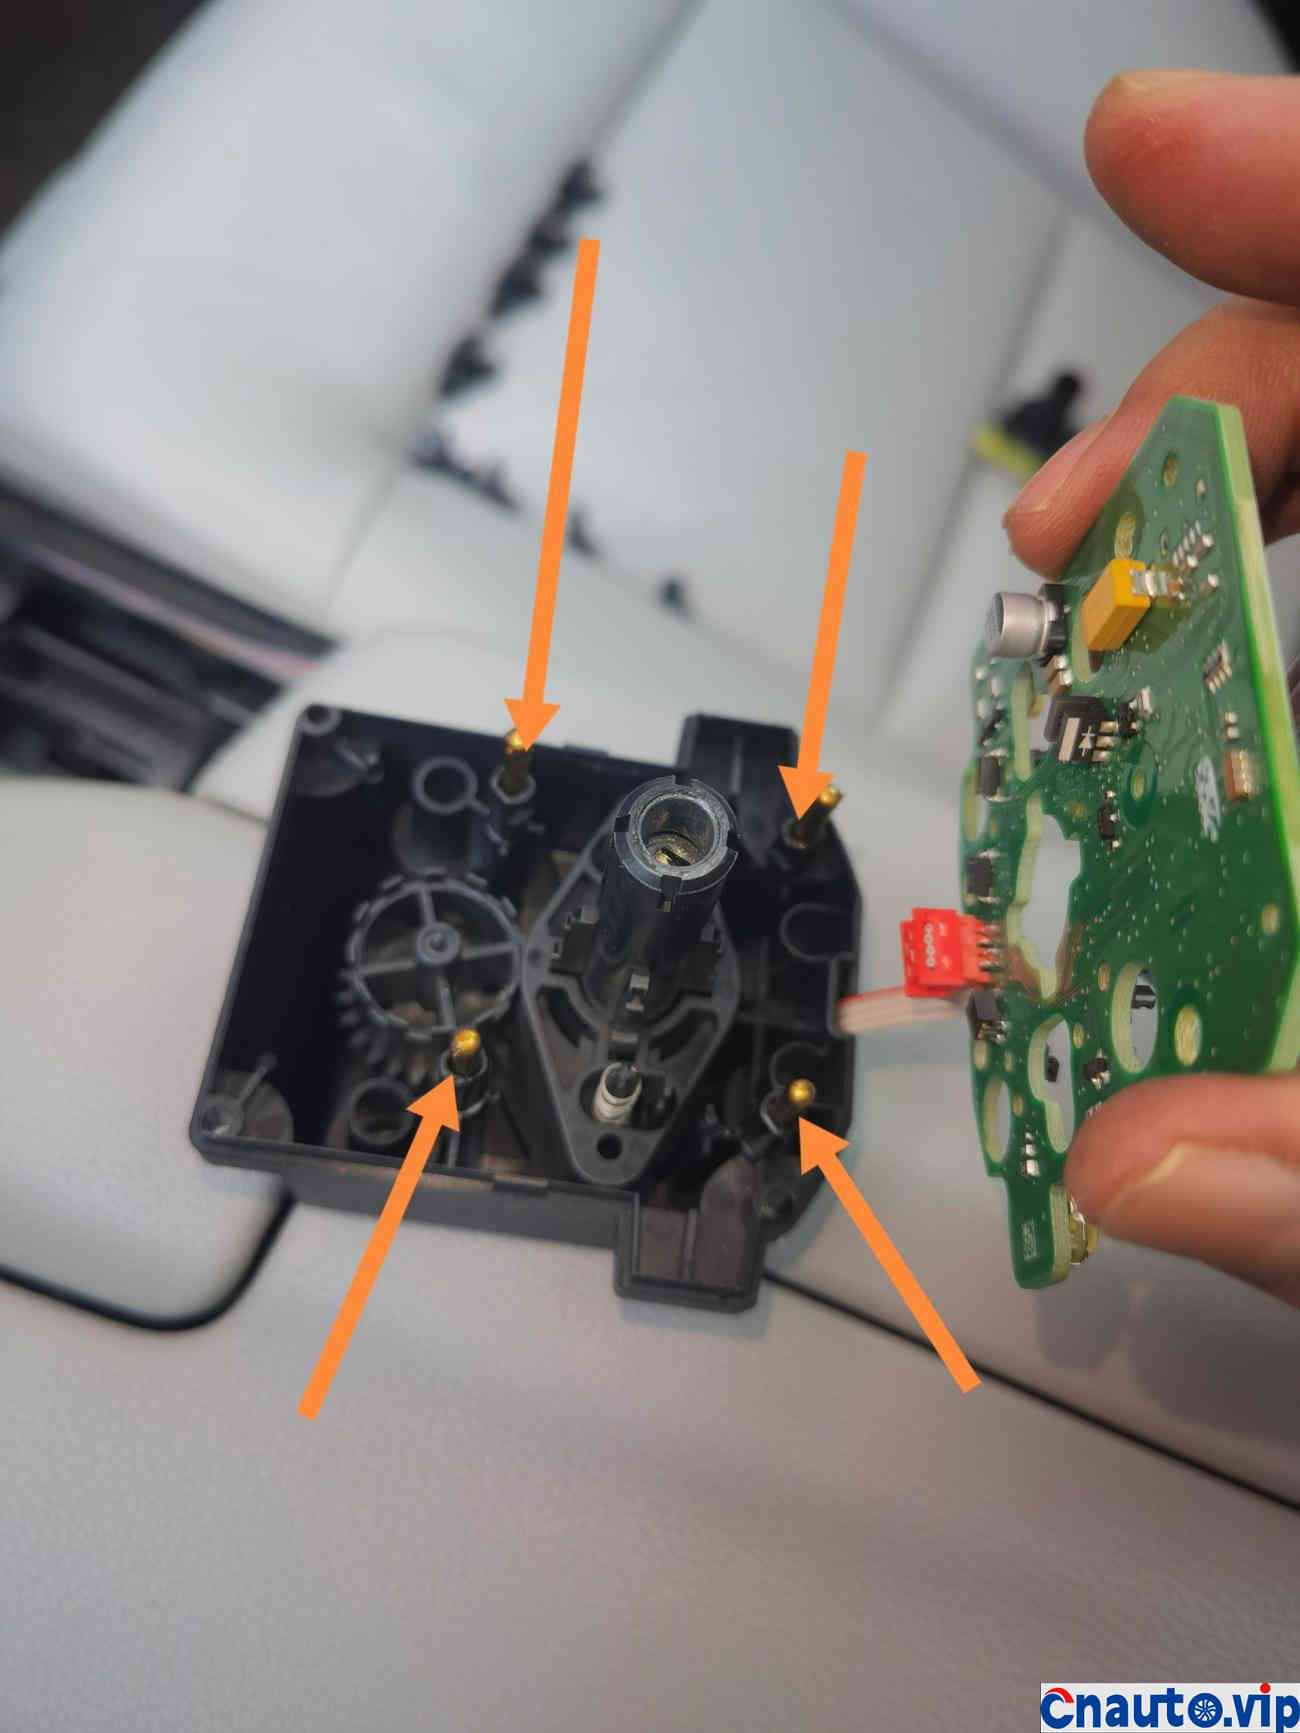
4. Disassemble command knob module. The two boxes are fixed screws. Remove them and the module can be removed. But notice that the arrow will block the module from taking out. You have to pry that place forward a little before you can take it off, or take some trouble to screw off the two screws in the circle, so that the arrow can be pried more easily. I took it by force, and I didn’t break anything. I’d better take off the screws if I’m weak.
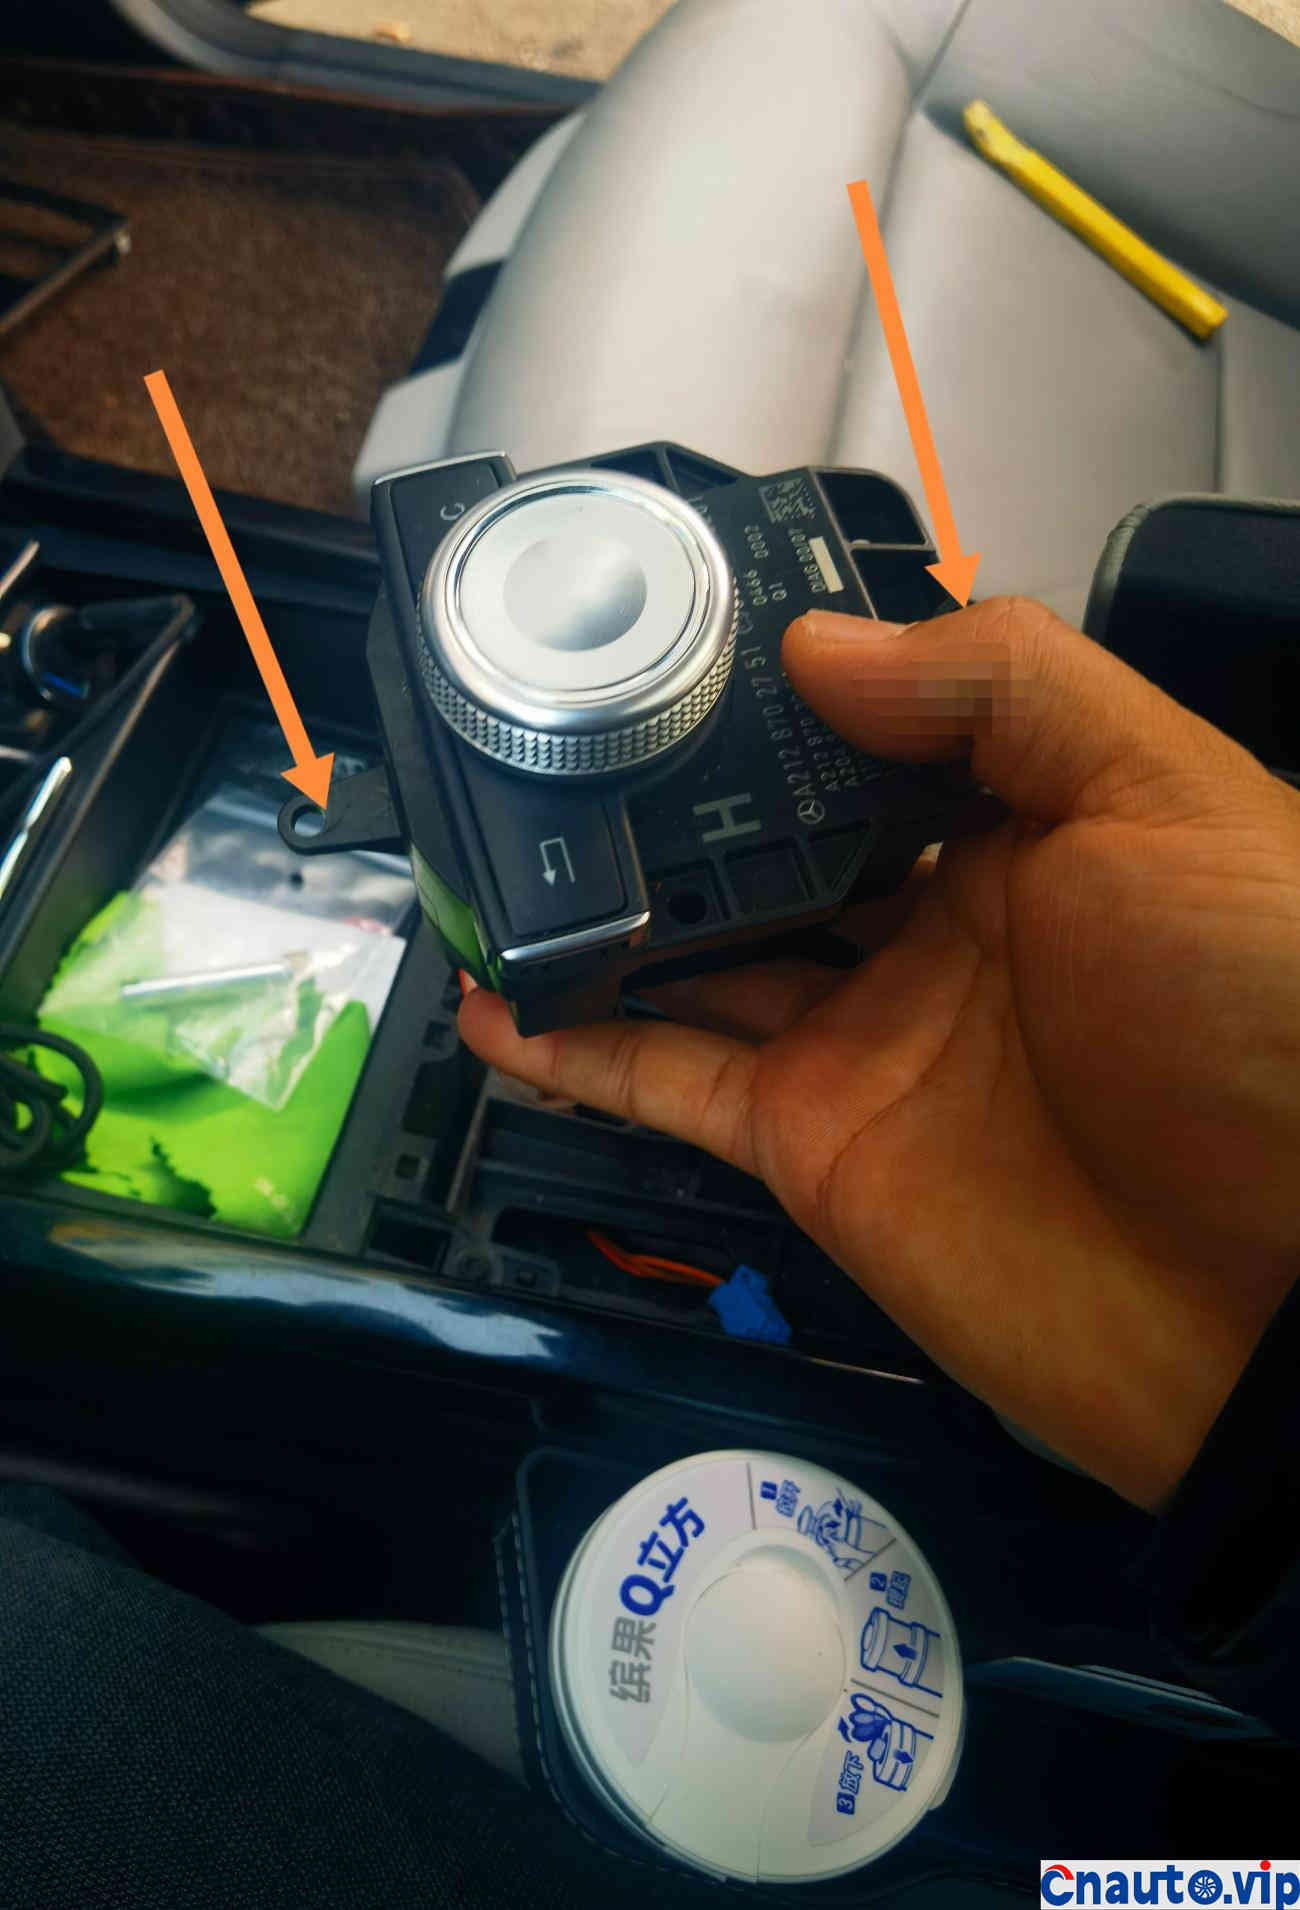
This is the famous command module, which costs at least 2000 yuan in the 4S store. The two arrows indicate the position of the screws of the two fixed modules, and the protruding part indicated by the arrow at the front is the part that is easy to be blocked.

5. Ten screws are all hexagonal, and the screwdriver generally does not match, which is very perverse. I replaced it with a small word screwdriver and pressed it hard. Not afraid of damage, but also lost one out of ten, more than one less one does not matter, does not affect anything, anyway, unload once will not unload a second time.
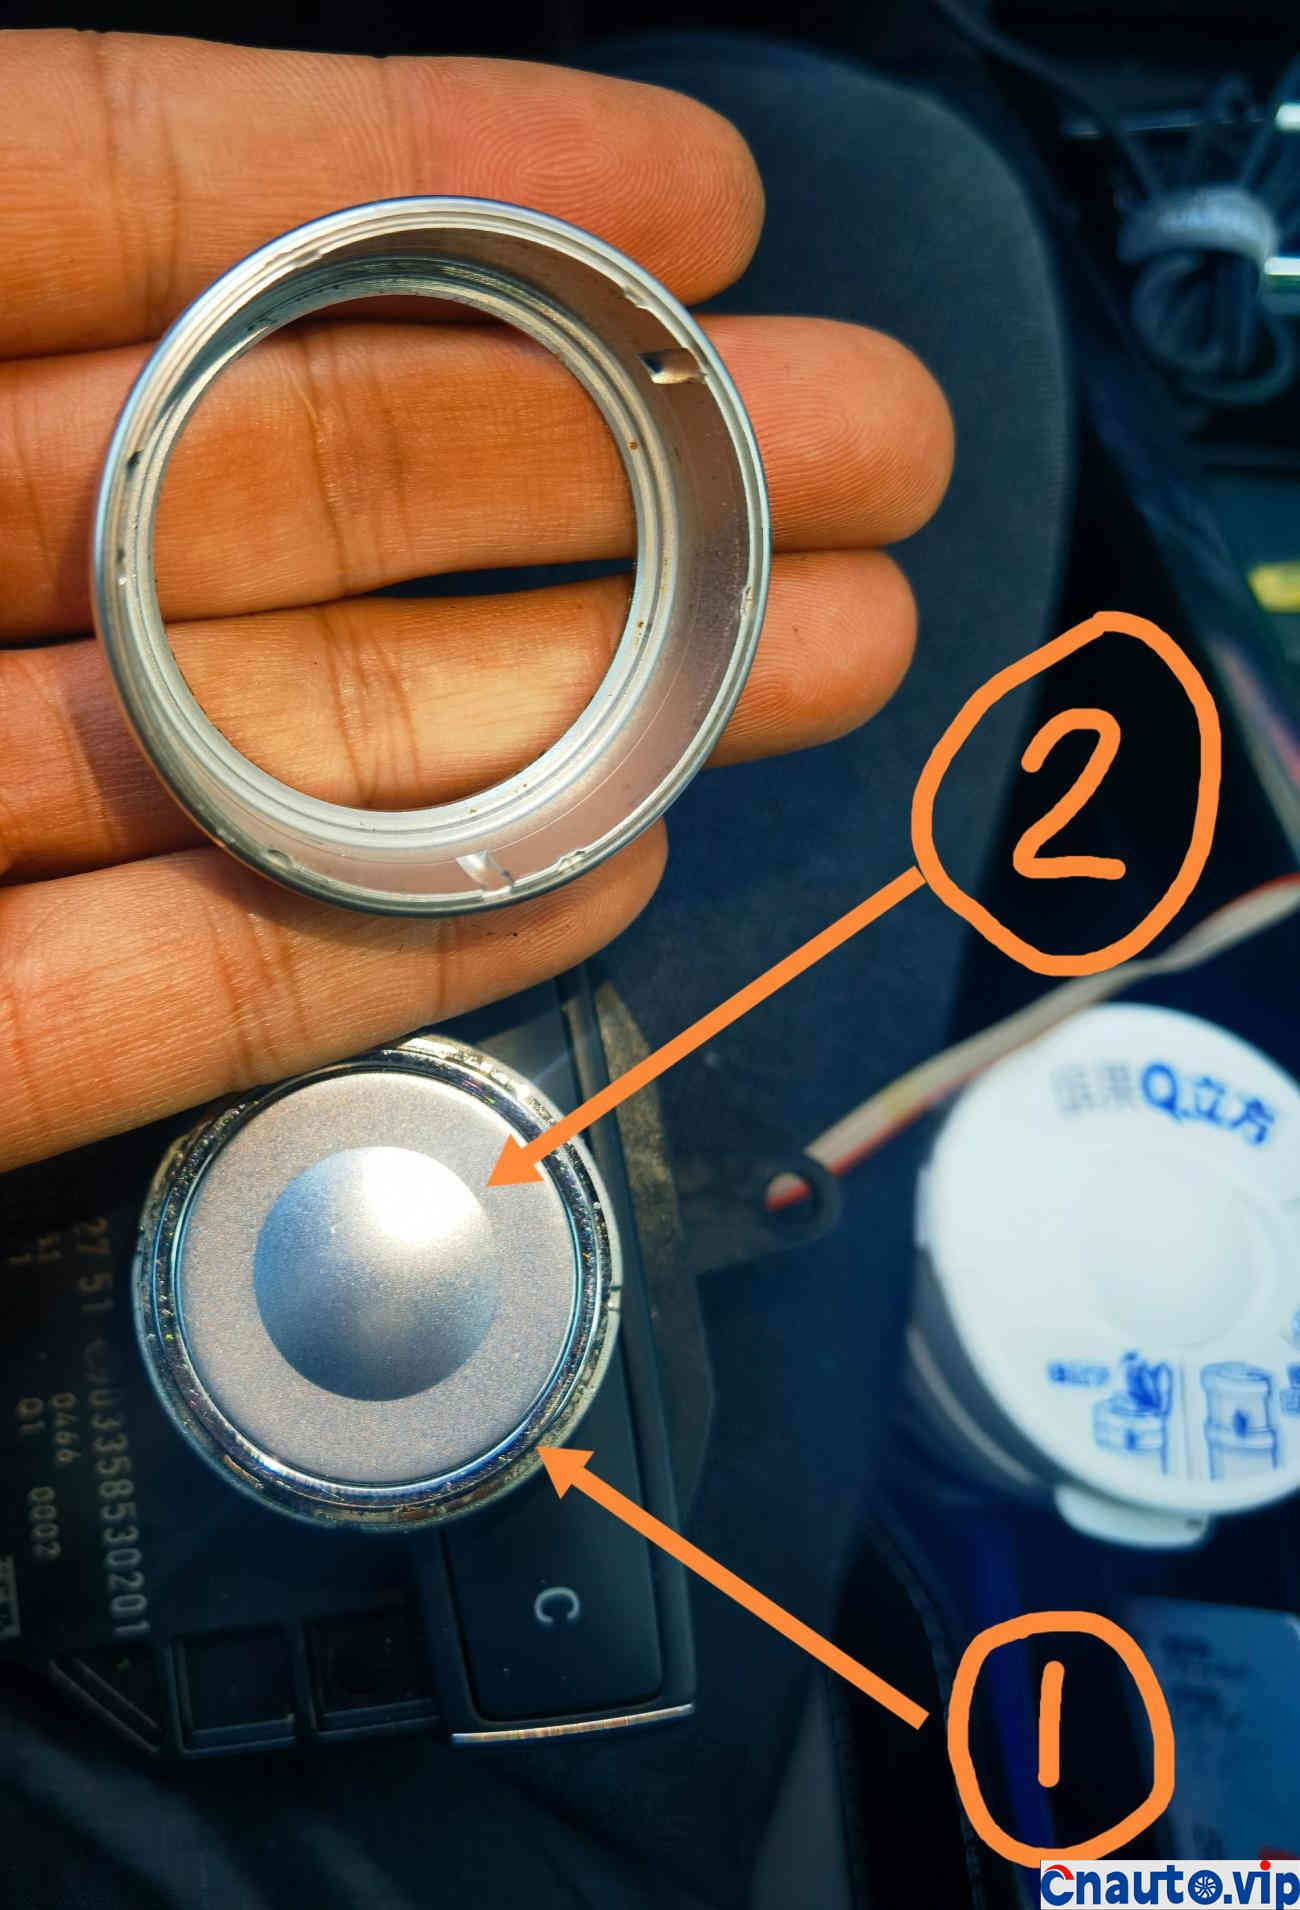
6. (knock on the blackboard) here comes the key point. This is the cover that someone said is easy to scratch. Because those people did not make it clear before, I continued to repeat the same mistake. Arrow 2 is the noisy cover, which is glued and pried into the gap on the edge of the lid with a knife. In fact, the lid is not easy to scratch, but the silver ring indicated by Arrow 1 is easy to scratch. There are two silver circles in the picture, but in fact there is only one. By the time I figured out what was going on, I had scratched the silver circle and pried it directly in anger. Later, when I think about it, I can actually use the electric hair dryer to blow the heat, and it will be easier to pry up slowly. Be sure to use a thin knife, not an art blade, a pencil sharpener, or a small screwdriver for repairing a watch.
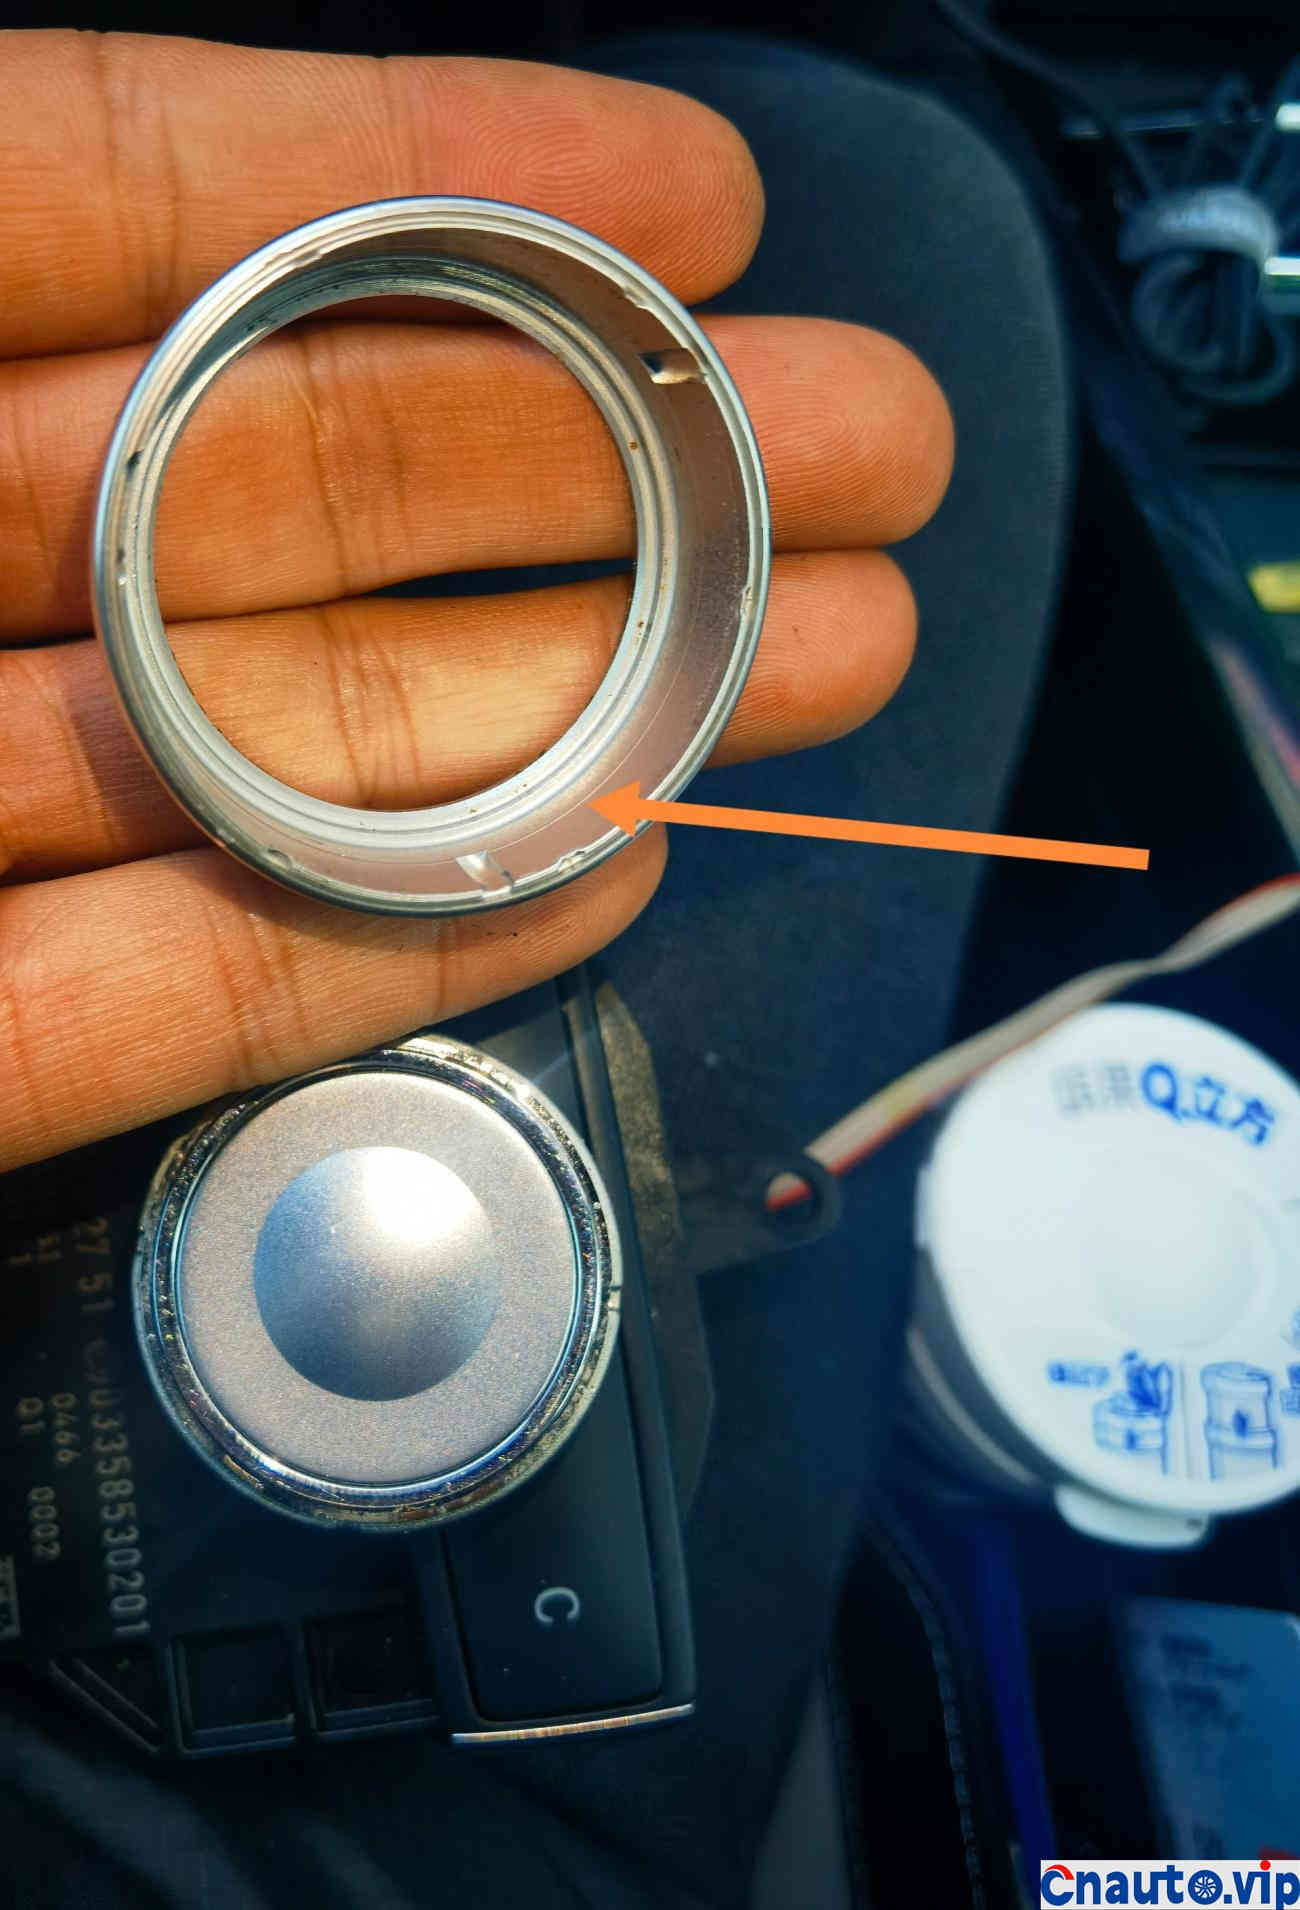
I also made a mistake. I just saw a pure picture post in Aika and found that the inner ring could also be removed. I first took off this sheath and directly pried the small lid in the middle, causing the silver ring to scratch. You should remove the outer ring sheath and the small silver ring, and then pry the middle lid.
7. There is a missing step here, and the two arrows indicate the screw hole hidden under the small lid, which has been wrenched off.

The screw looks like this.
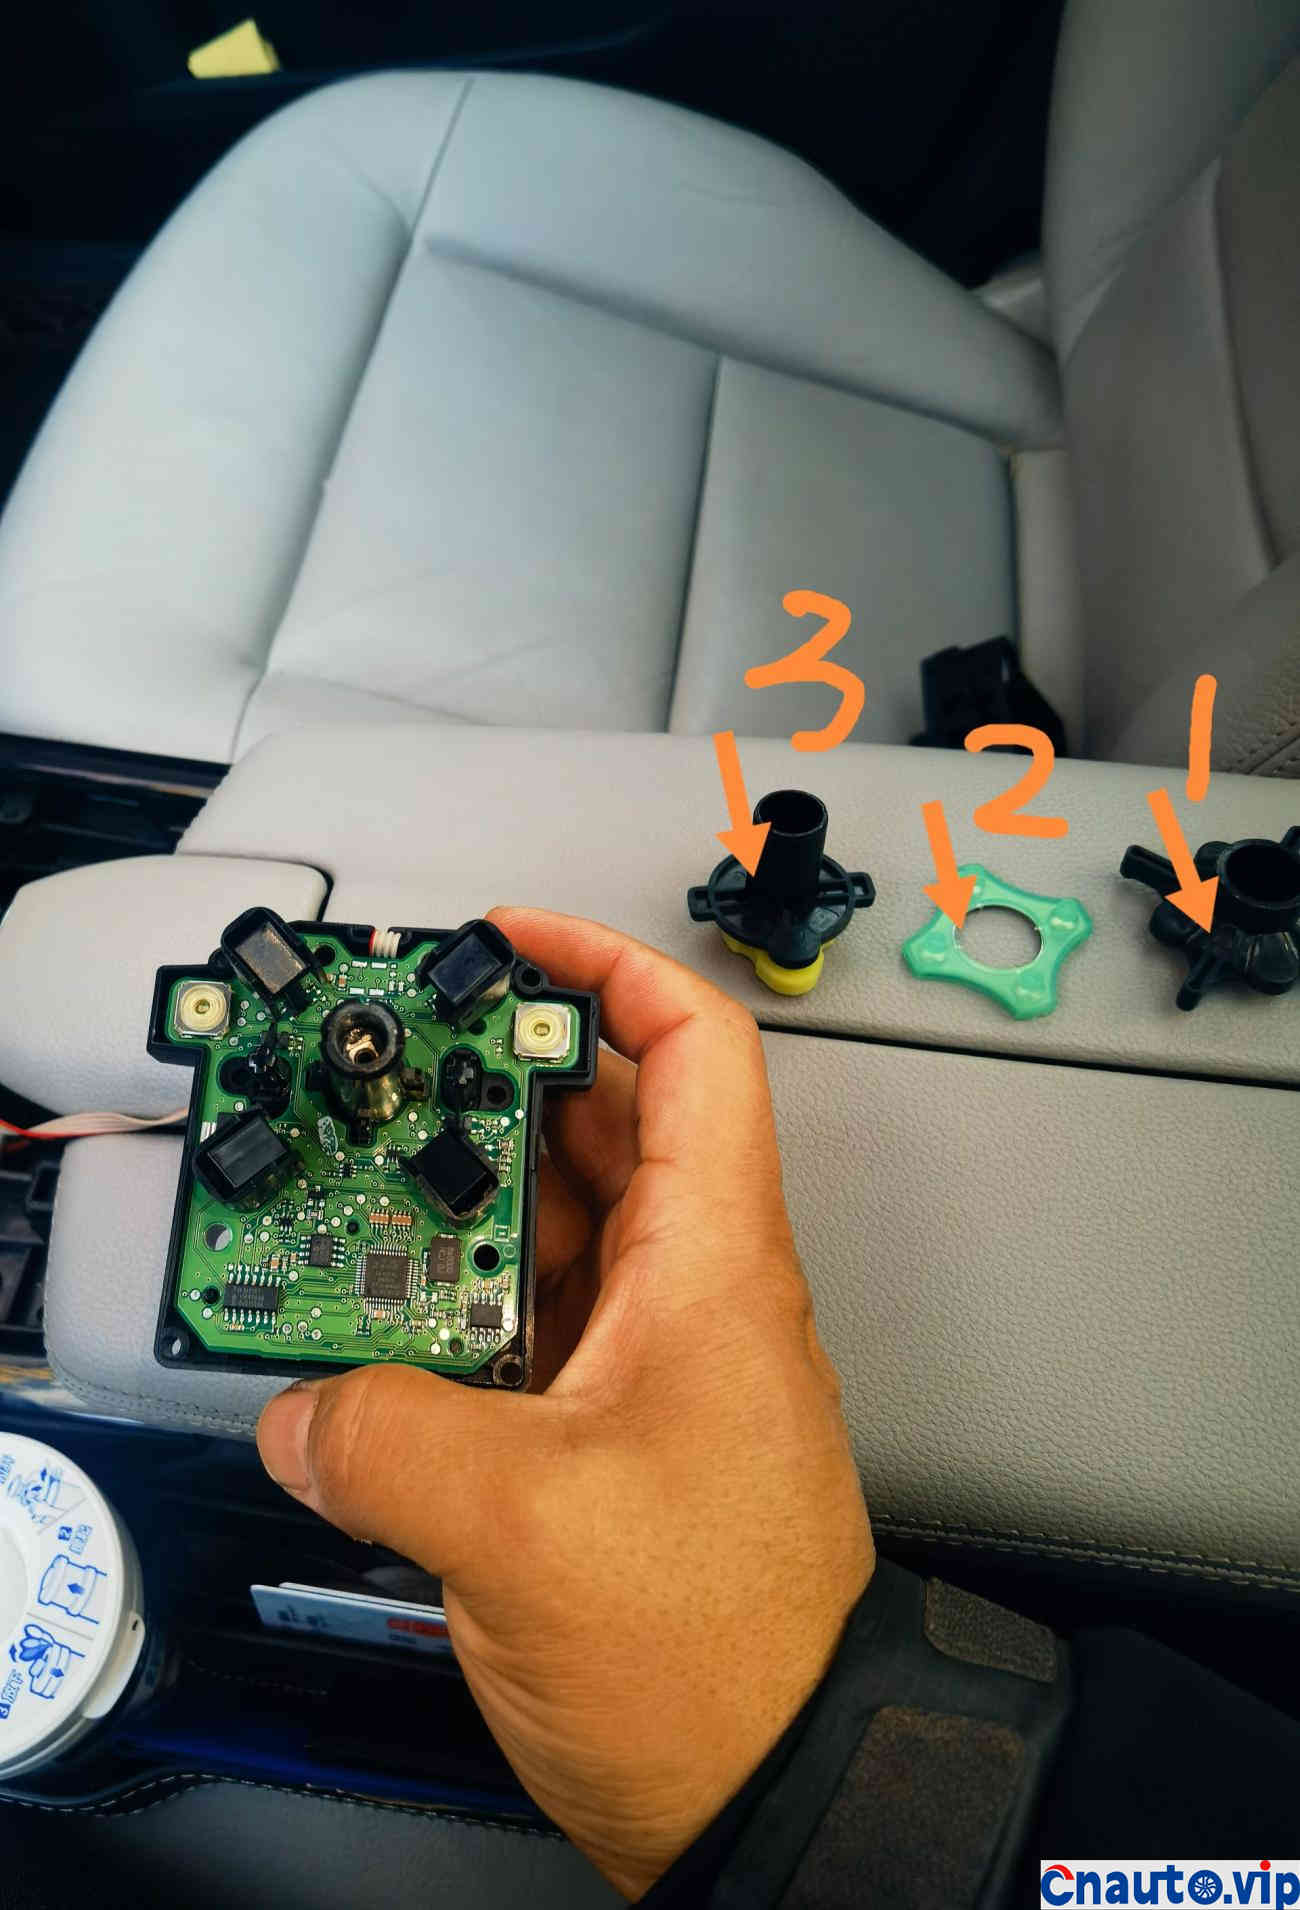
8. this is what it looks like to open it. Remove the moving parts one by one from top to bottom. The three arrows are small parts taken from the small post in the middle in order. Notice that I made another big mistake at this time. There were several moving parts in the other half of the component exposed in the passenger seat, which I didn’t care about when I took it off. I casually put it on the passenger seat. When I finally installed it, I found that there were still small parts in it, which was a bit out of position, resulting in a delay of an hour later. Must be careful to take, turn over to place, inside the small parts are different angles, try not to touch the dislocation, otherwise the back installation of the upper and lower components can not be closed.
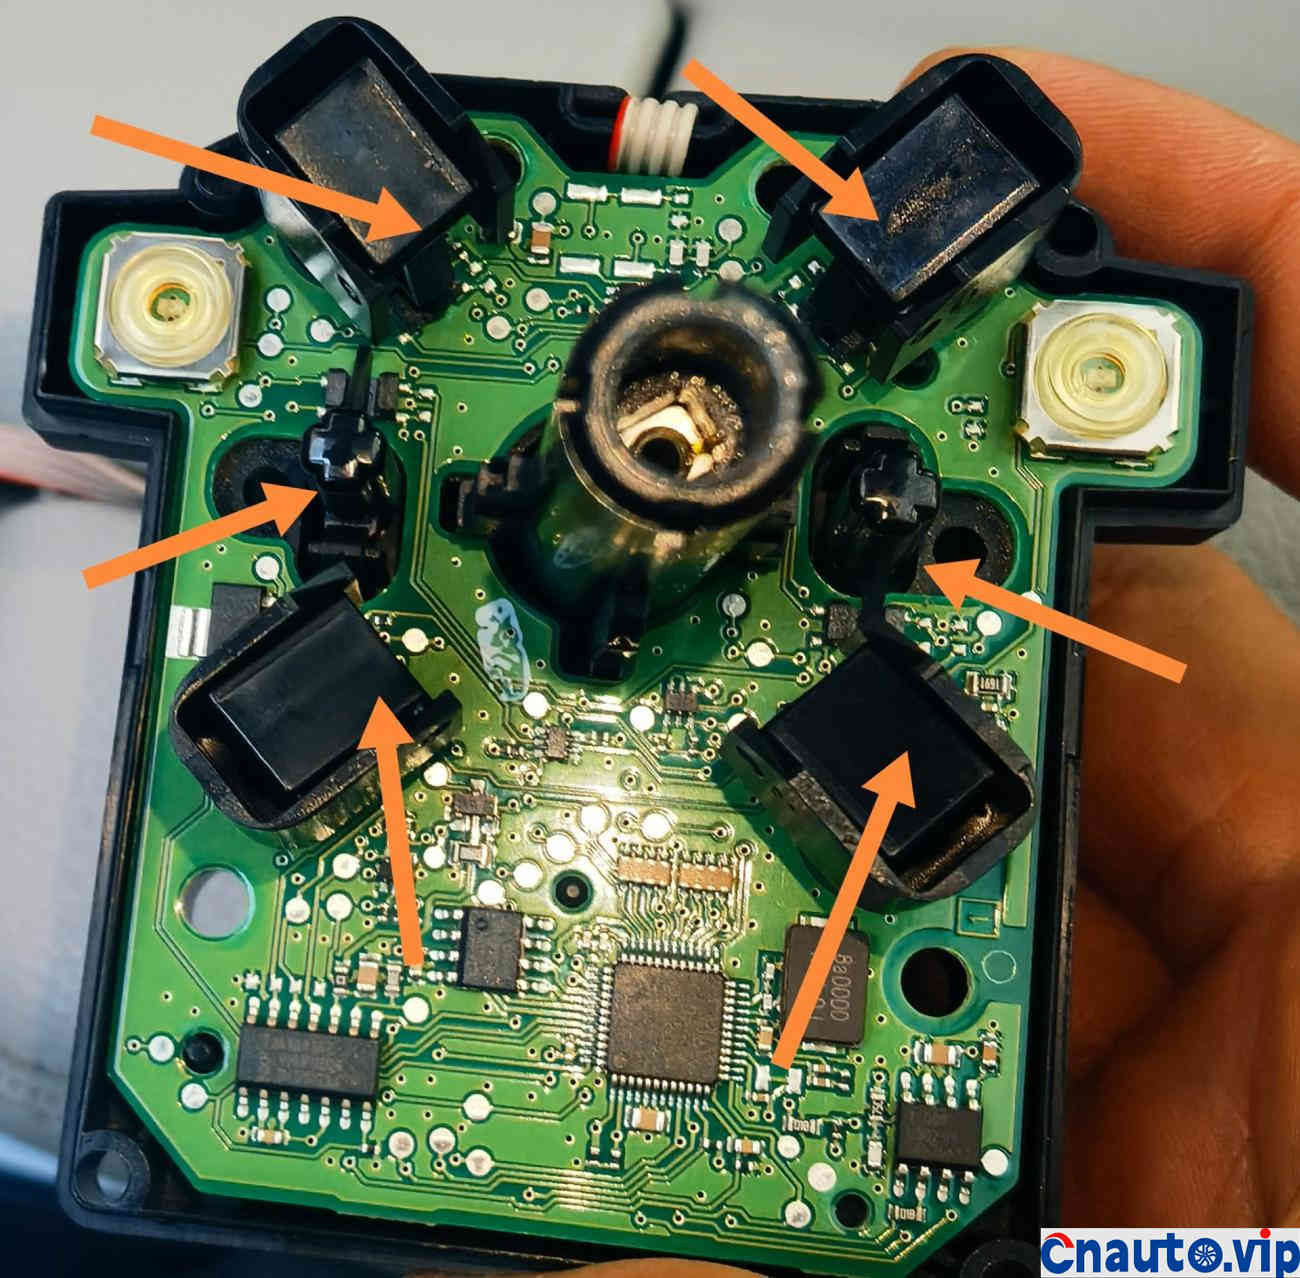
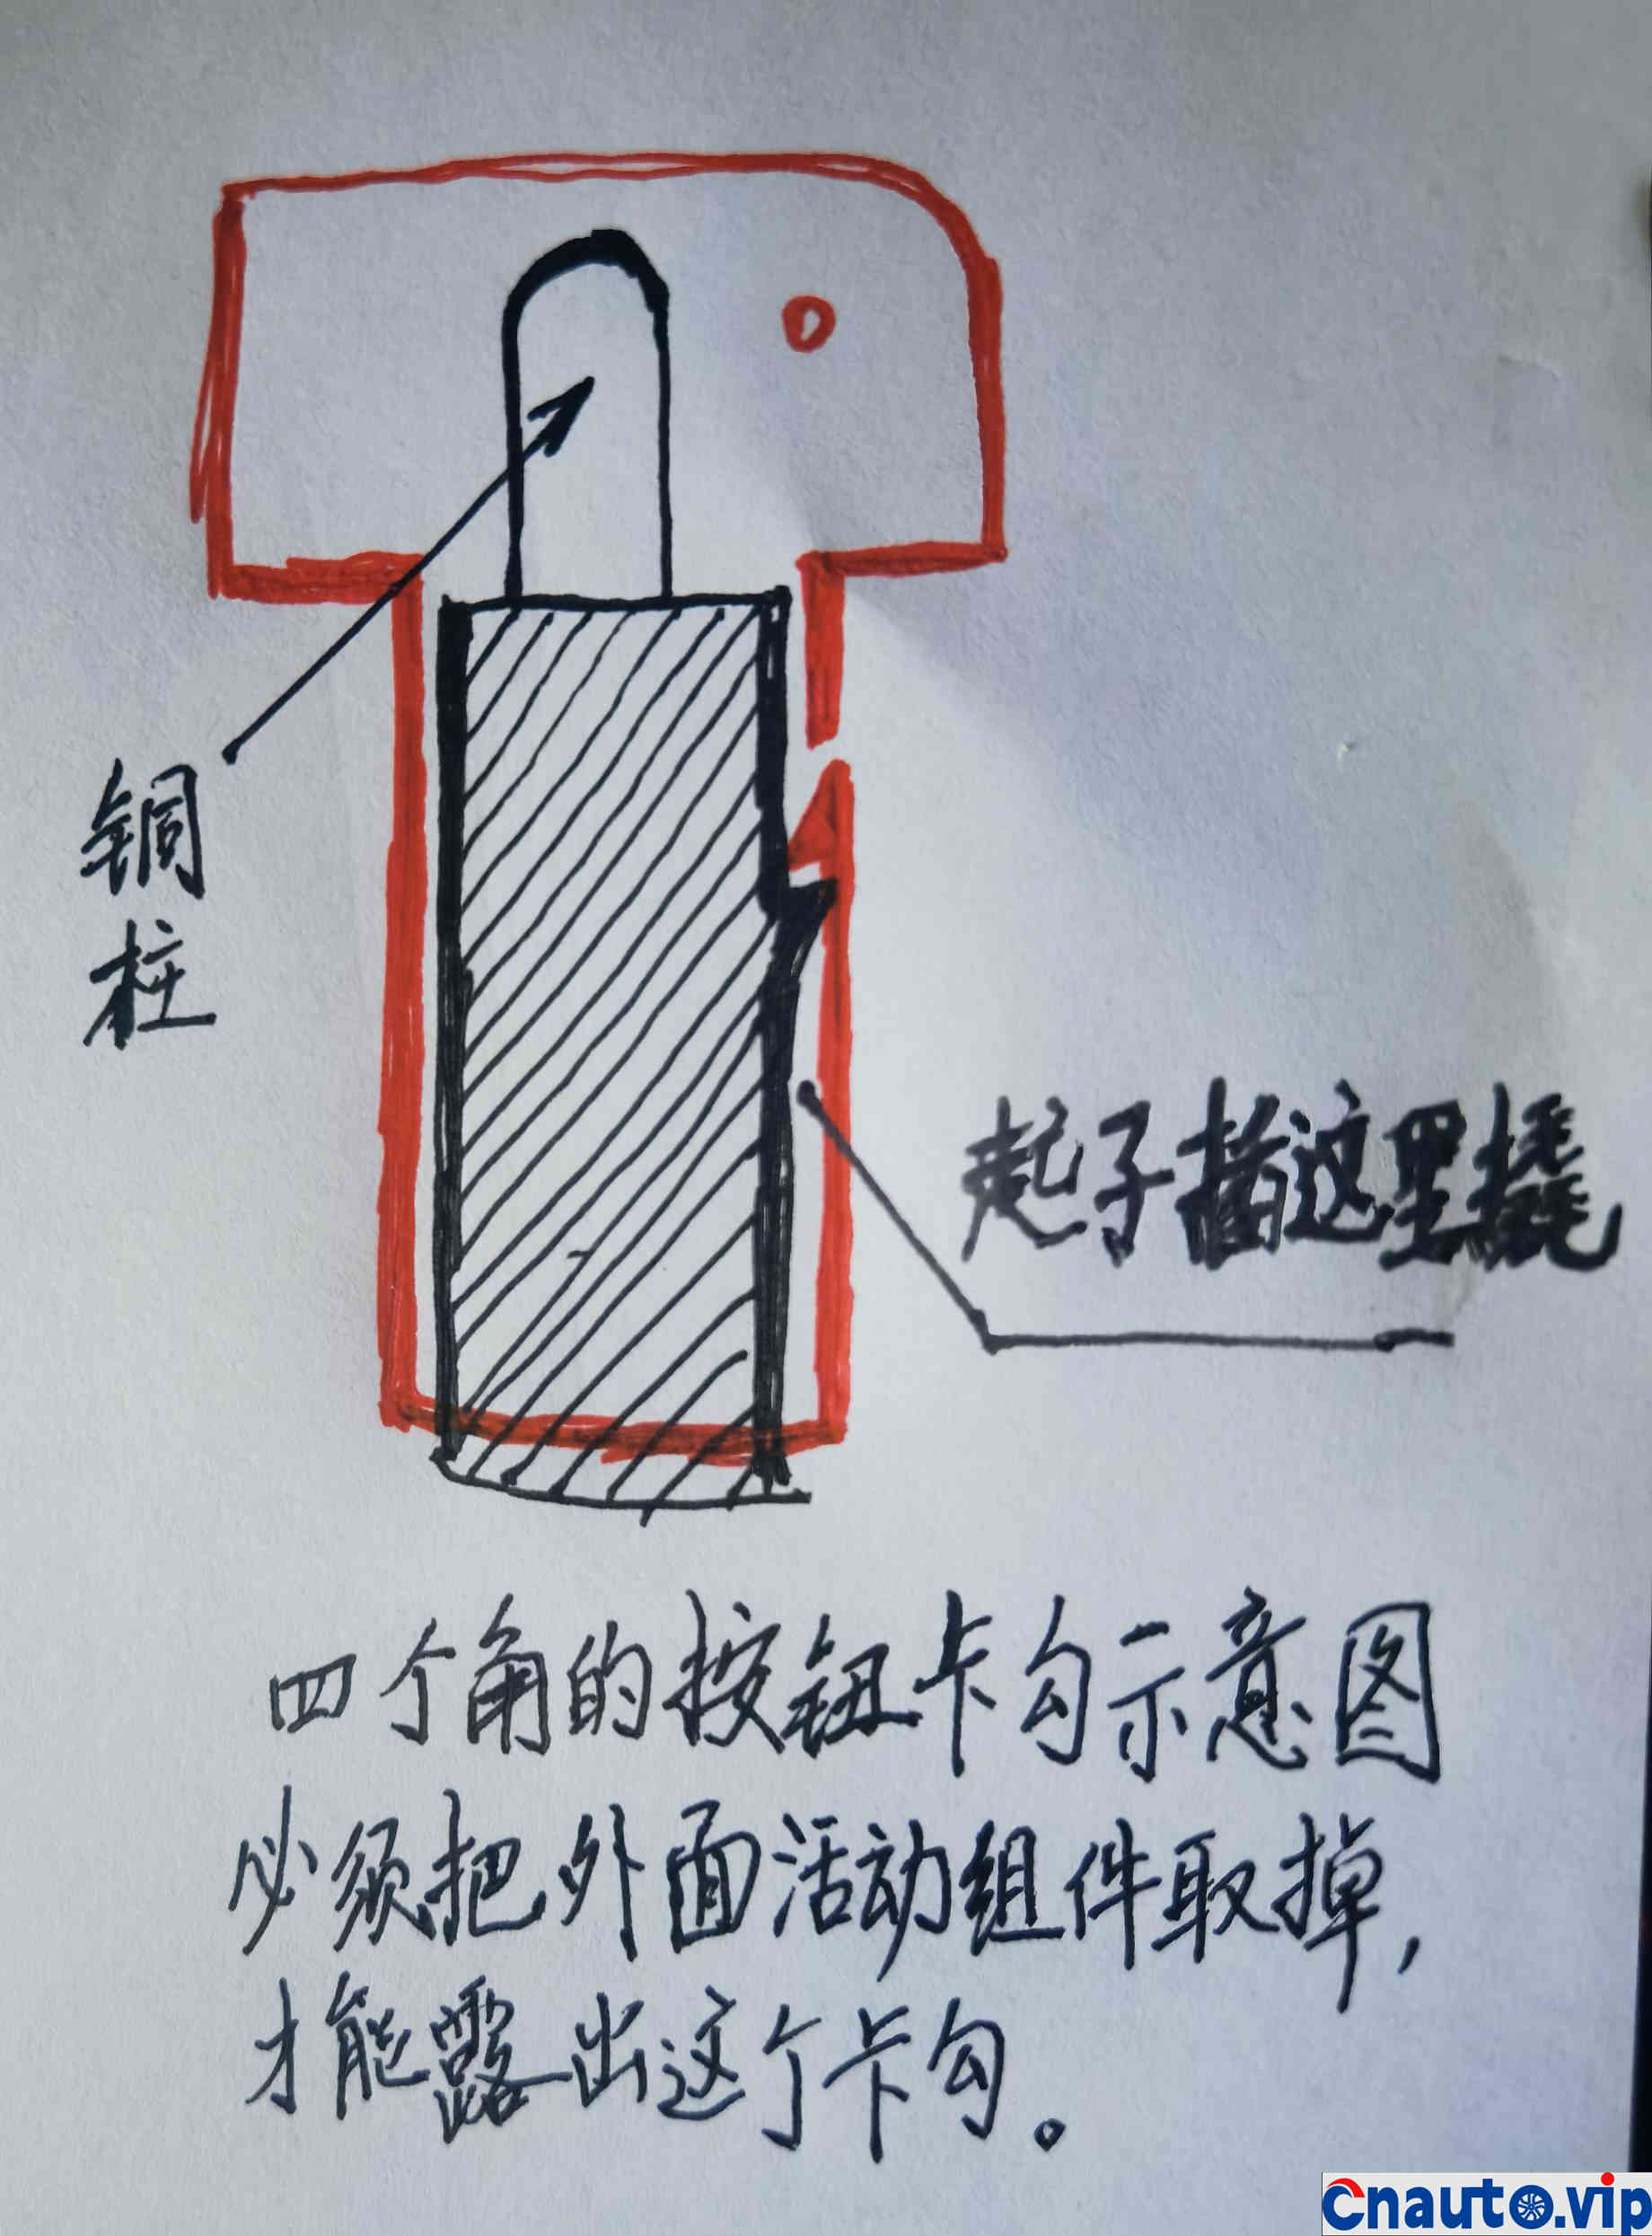
9. The four beveled black components are those with small spring copper columns below. Press to rebound. The middle two sickle-shaped widgets are also springback components with springs. There are detailed illustrations below.
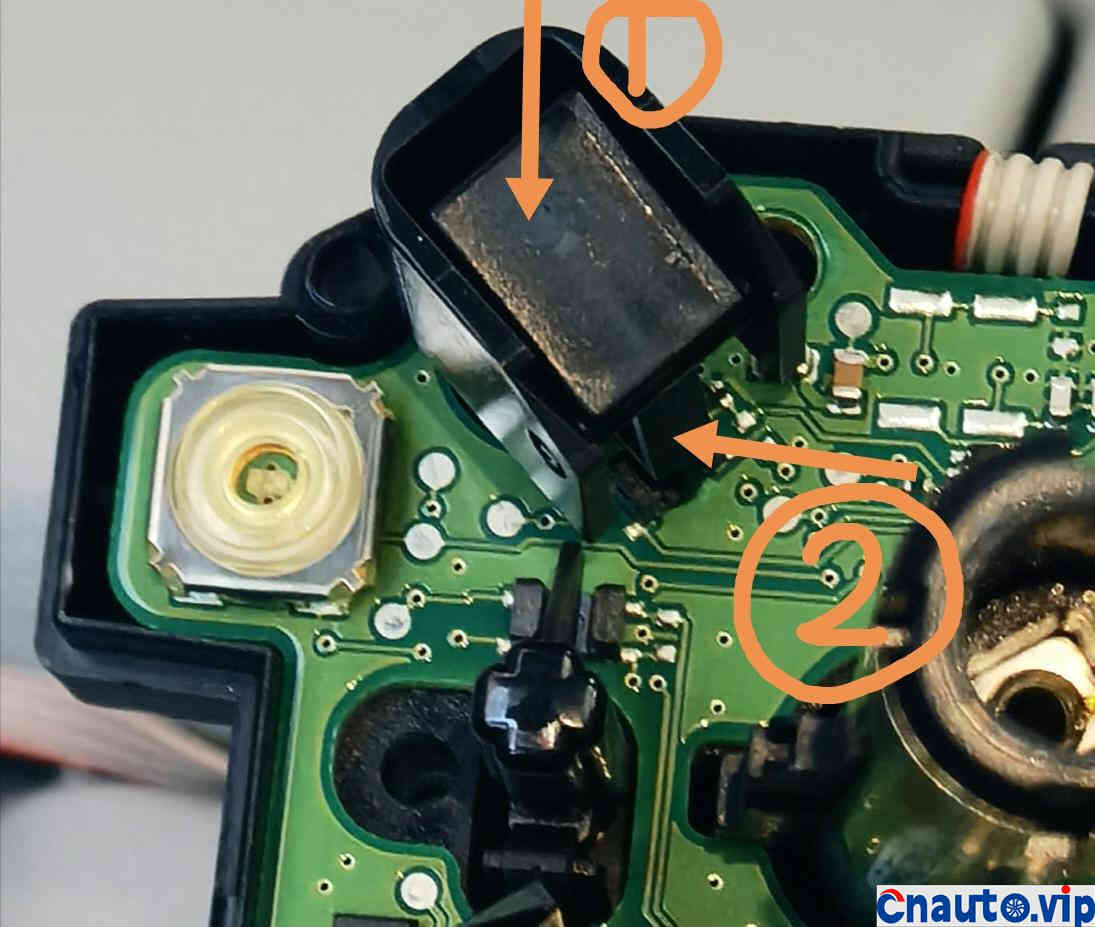
The two parts indicated by arrow 1 and arrow 2 are actually one. When you press Arrow 1, Arrow 2 is also linked. Keep looking at the picture.

There are two small tenons on both sides of the conjoined component, which are combined with the outer square component through the two small tenons to complete the action of pressing and bouncing. When unloading, you must use a small screwdriver to insert a gap between the two components to pry open, exit the tenon, and remove the assembly indicated by Arrow 2. Then you can take the square assembly, which is in the shape of a sleeve, which is hooked by a small plastic card hook post, so you have to insert it with a small screwdriver and gently pry the sleeve hook to remove the square component. It is too small to show you. If you read my passage carefully, you will understand how to operate it. That small sleeve hook is very delicate and good quality, repeatedly pried components are fortunately not broken, but please be careful.
Hand-drawn a schematic diagram, the drawing is not good, please ignore, but you can see it.
And this small part, like a sickle, there are a total of two. The lower part of the cross sickle body indicated by the arrow is also a hook combination structure. Press the hook up and down and you can easily see where the hook is. You have to gently pry the hook to remove the sickle. Also be careful to pry, although the quality is very good, but do not break it, otherwise seek your own blessing.
See, the base column of the sickle button is covered with a small spring. Be careful, don’t lose the spring, it’s easy to slip out.
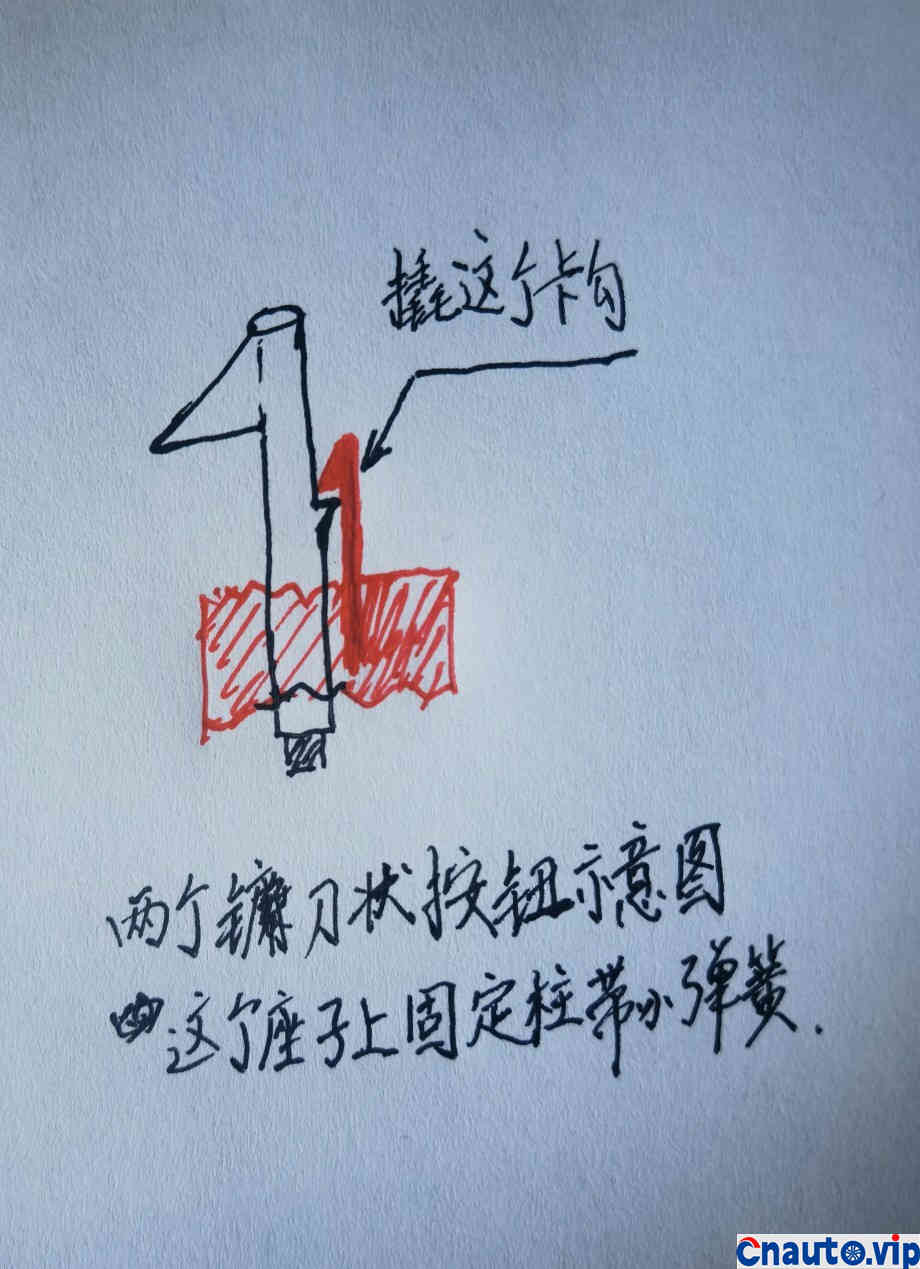
Sickle button side view. The level is limited, so we can only make do in this way.
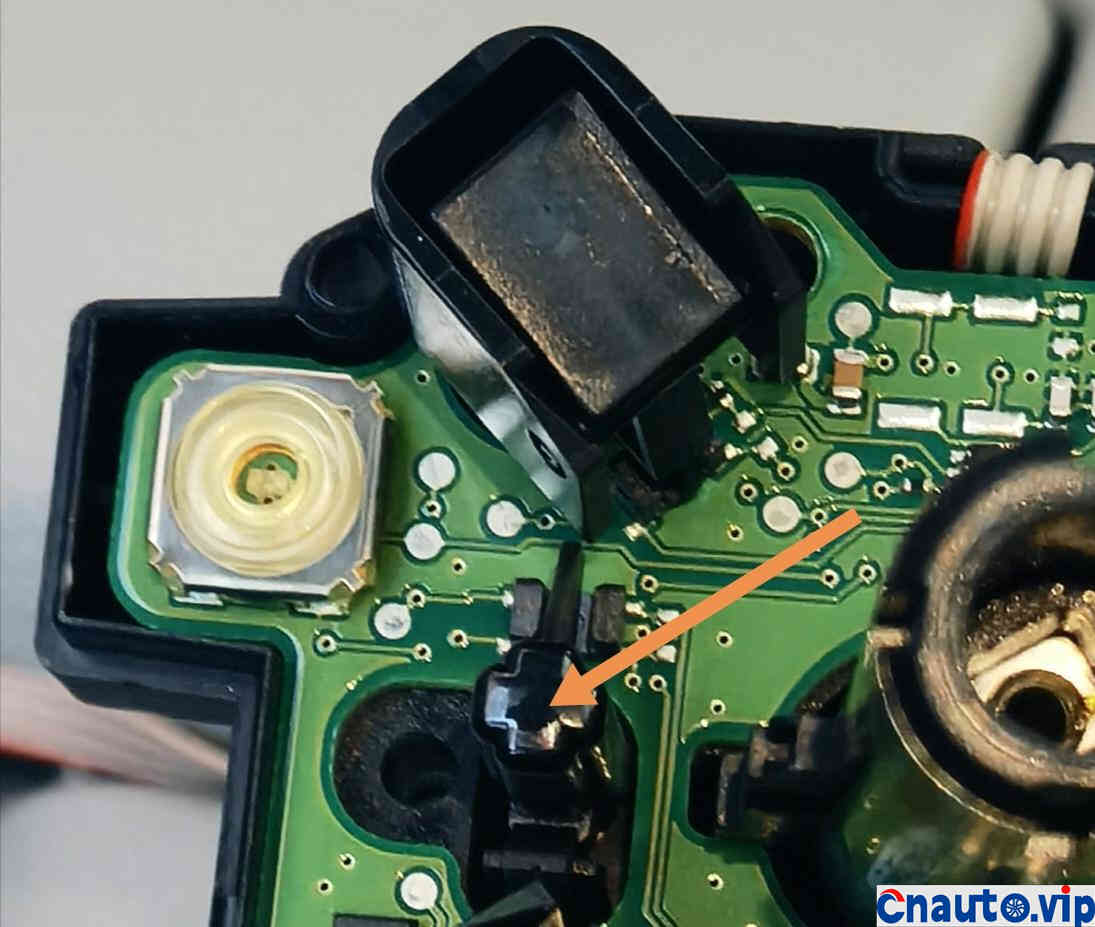
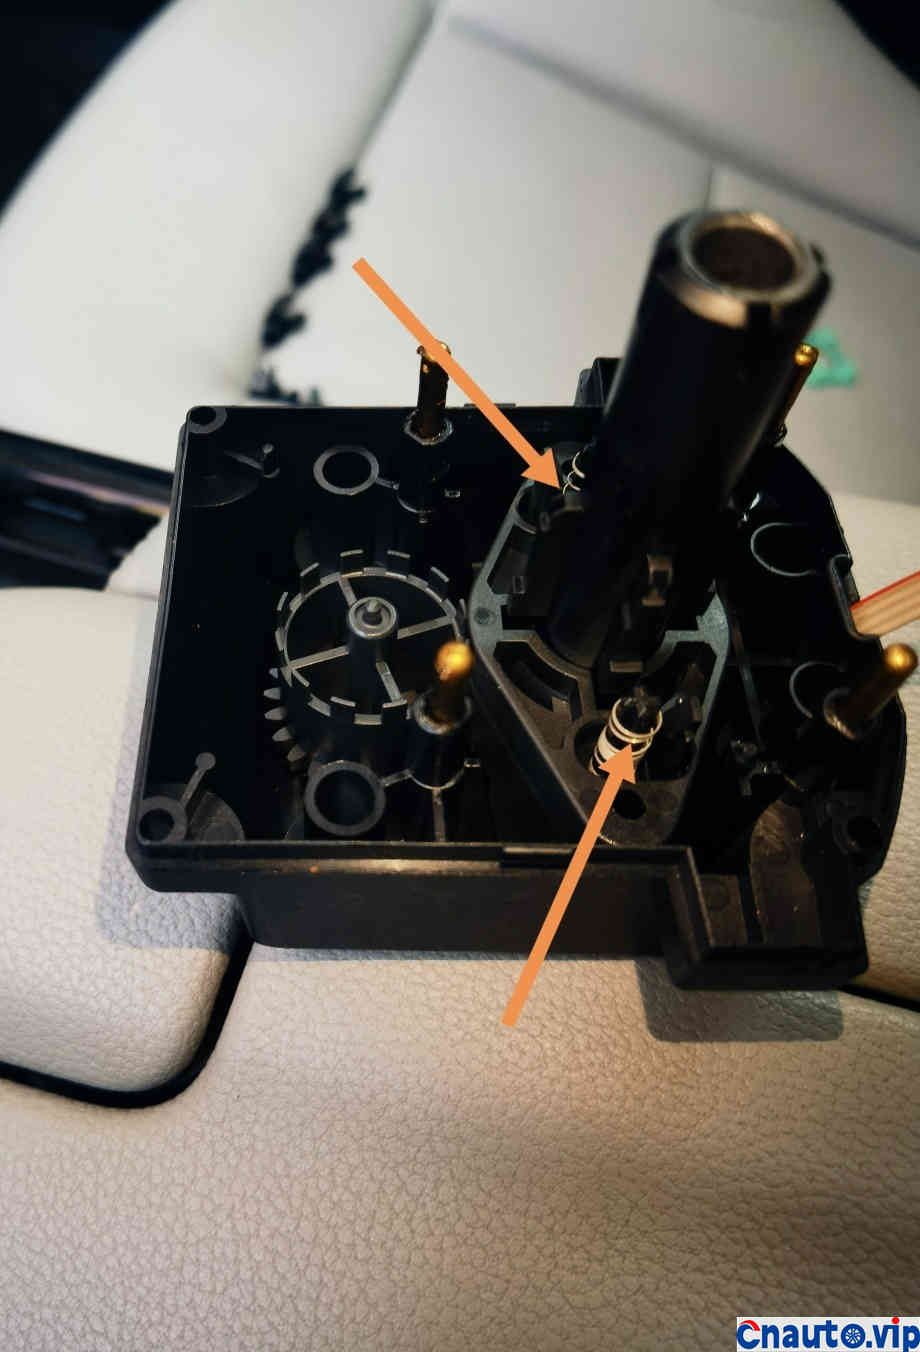
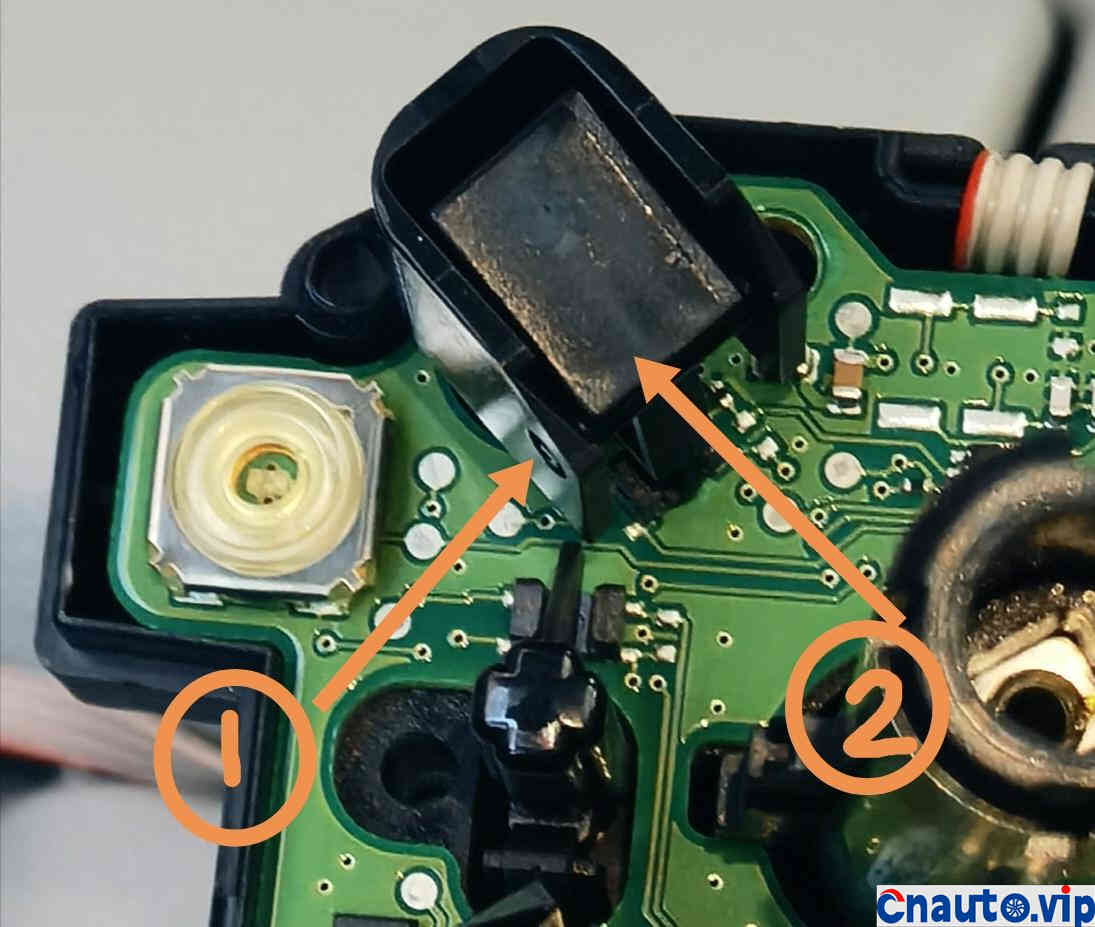
10. Only now can we open the circuit board. Look, there are four copper columns with springs in them. Under the buttons of those four corners just now, it is these four things that play a bouncing effect.
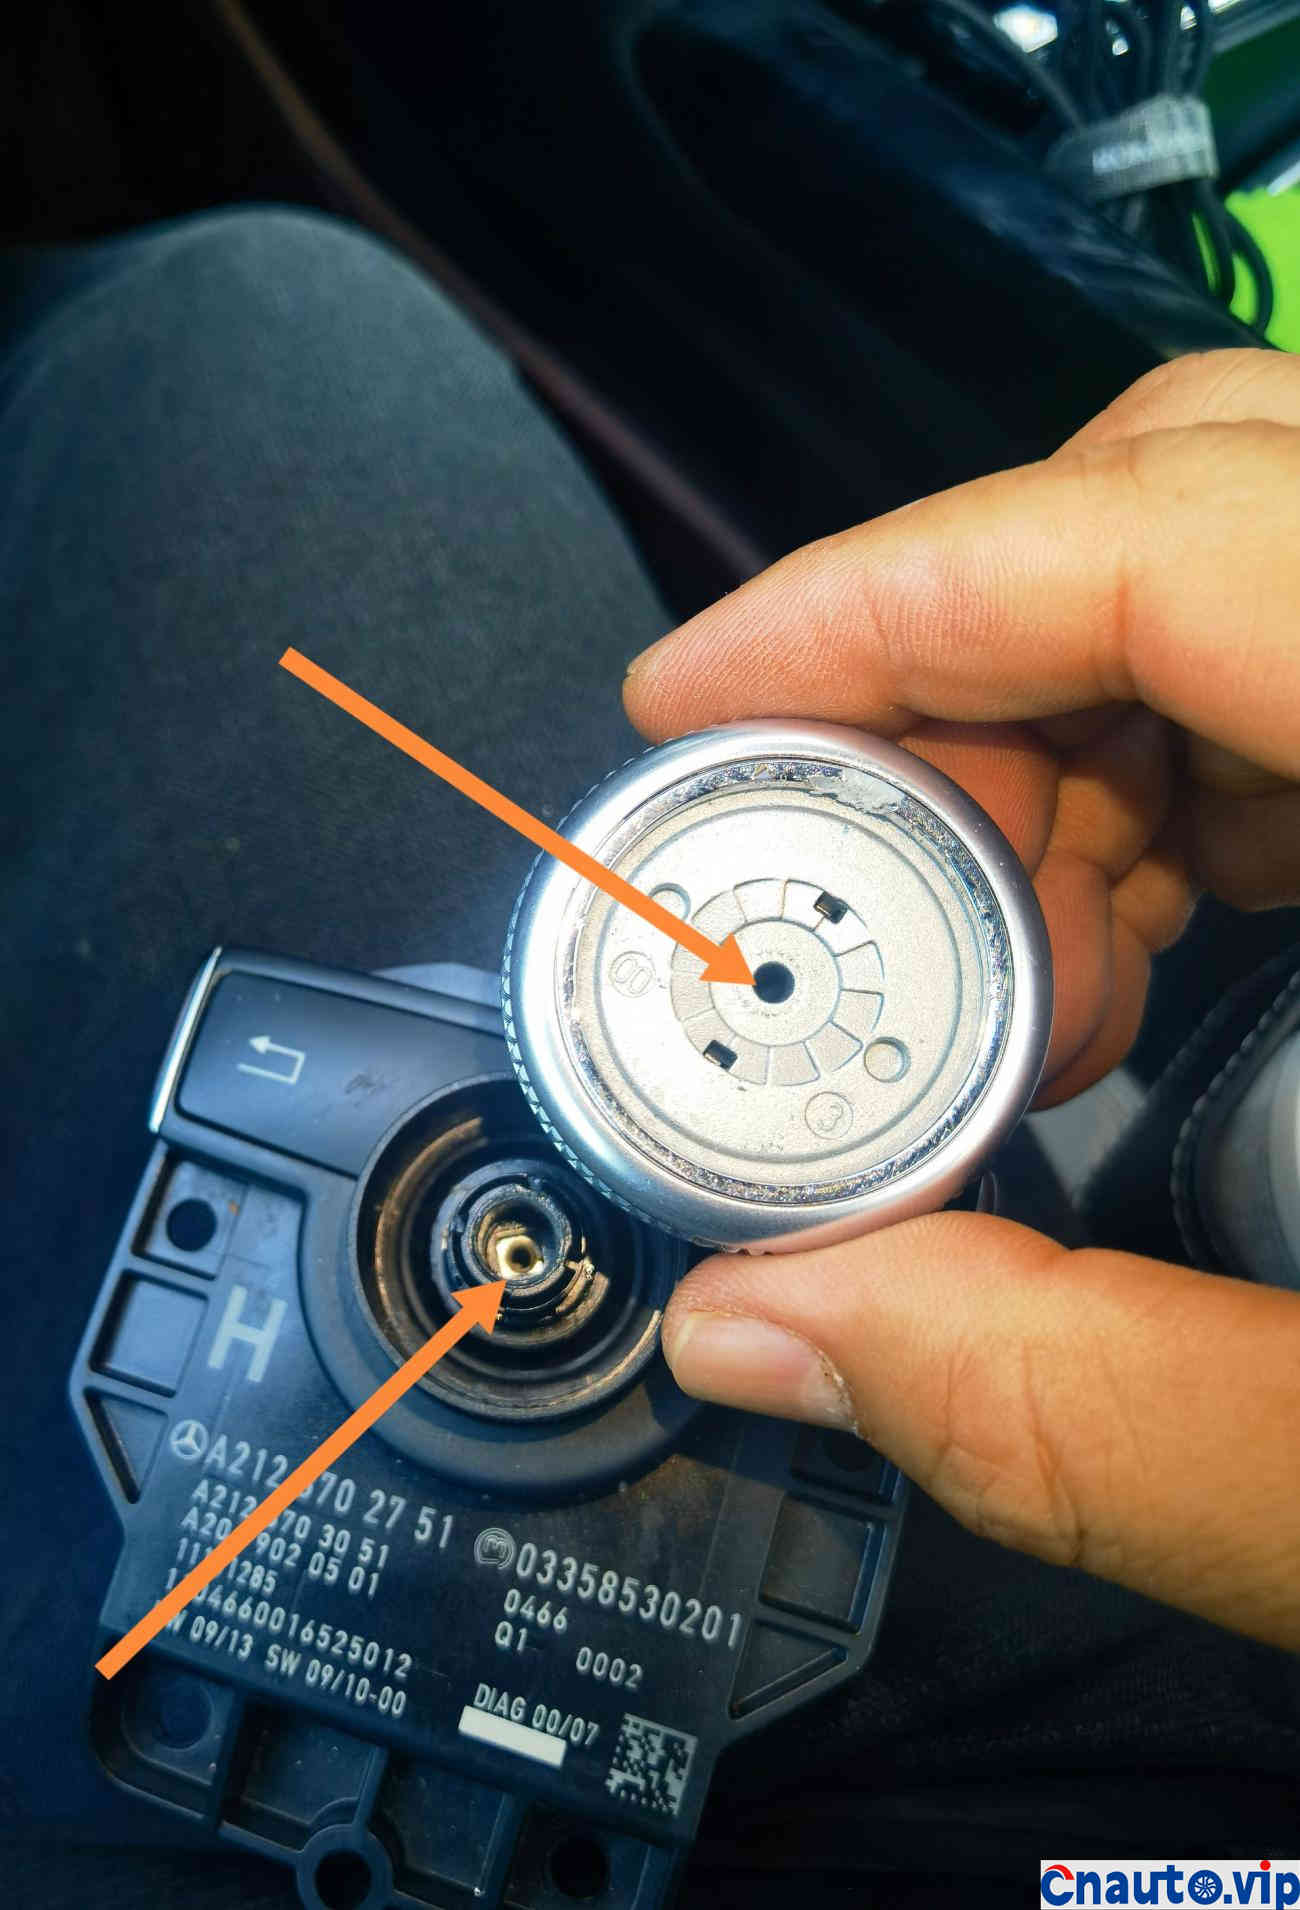
Arrow 2 indicates the outer sheath of the knob shaft. Only at this stage can we remove the sheath and see the broken shaft of the culprit. If there is a picture on the Internet, the broken shaft will not be displayed. Anyway, the design is very retarded. The upper and lower shafts are connected only by four small plastic contact points. Just imagine how this design can continue to reflect the axle strength of foreigners. Or the Chinese are smart, invented aluminum alloy shaft, simple and direct, low cost, stronger. The thing indicated by Arrow 1 is a linkage gear, plastic, so use a screwdriver to move the shaft, and the gear will act at the same time. All right, now take out the jacket, take out the broken shaft, and put the aluminum alloy shaft in. Feel free to put it, there is no angle, but the big end of the aluminum alloy shaft should be washed down, see the following picture.

Rush the big head down and put it in and install the jacket. The rest of the parts are installed back in the opposite direction. But don’t be complacent, there is another installation detail that must be explained below. Keep looking at the picture.
When you install it back, you must first combine the square assembly with the widget indicated by arrow 2, and then install it on the copper column. If you install the square component before the arrow 2 component in this step, you will be exhausted and you won’t be able to install it.
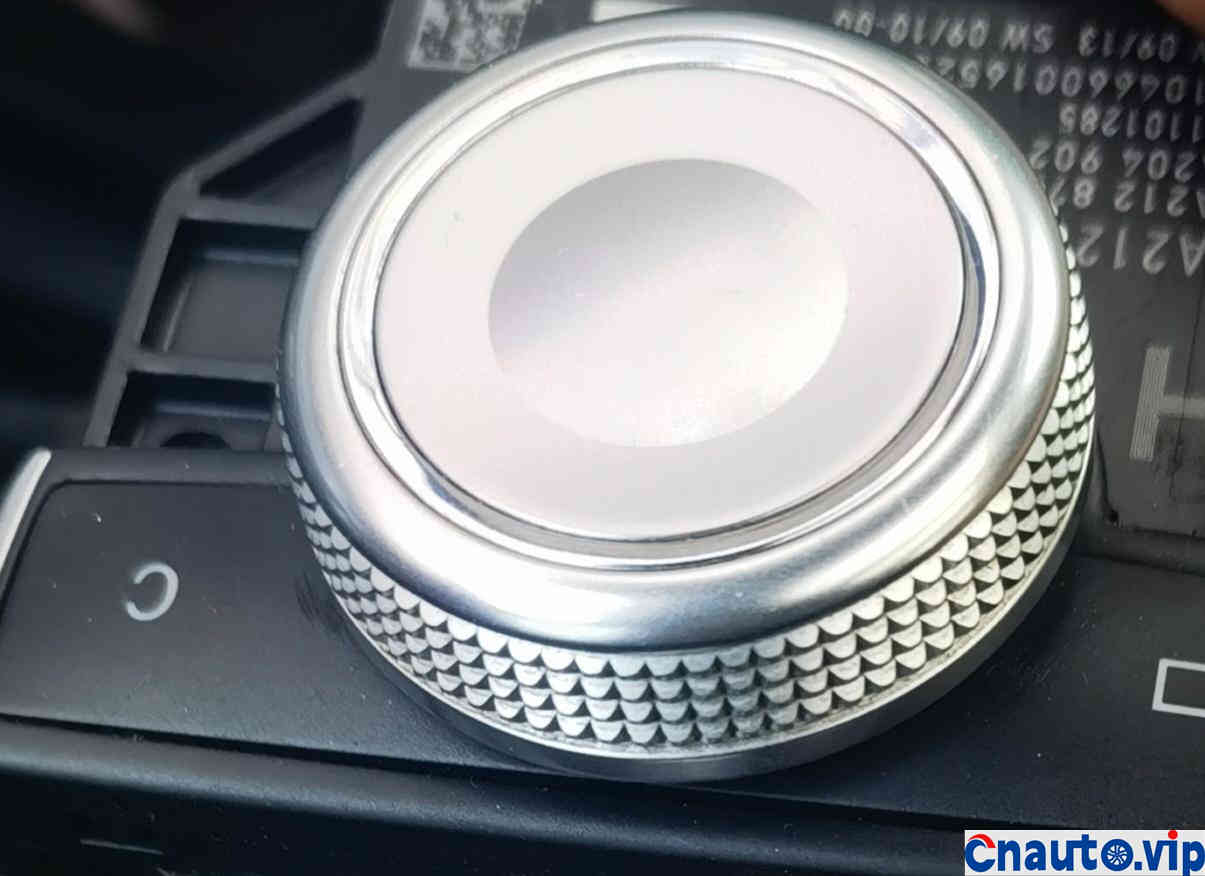
There is no need to say any more about the other installation steps. I’m exhausted from writing this post. Panel reinstallation is still a little violent, but do not make the wrong violence, it will break the plastic parts. It’s the right way. There’s nothing wrong with violence. If the method is wrong, violence will go wrong. What if this cover is scratched? Taobao to find, enter command knob, or enter Mercedes-Benz central control mouse knob, you can buy alternative decorations. If I can’t understand this post this time, then spend money. 4S store only provides a complete set of replacement parts, 2000 is indispensable.
Such a tedious operation, I believe you will understand why it is highly recommended to change the aluminum alloy shaft, anyway, I will not use glue, I am not sure to open the second time. First of all, there is no guarantee that the mortise hook will be broken. Just because I didn’t break it this time doesn’t mean I won’t break it next time. Will you be so lucky? Those who do not change the aluminum alloy shaft, but just take glue, how many times are you going to remove it? Don’t think about spending the whole set. First, although you don’t care about 2000 yuan, do you have it in stock in the 4S store? Second, after the replacement of the whole set, the axis is still the same as Lin Daiyu’s virtues. Will it still be broken and replaced after a period of time? Isn’t it annoying? So once in place, the shaft will not be broken on the day the car is scrapped. Can you understand me by saying that?
If you read this post or will not operate, or which step is still not clear, you can contact me here, Wechat phone text are happy to answer your questions. But the drivers of this car will not be idle people, and there is no guarantee that they will be on call like your driver, Ma Zai.
![]()
![]()
![]()
.


 April 1, 2024