The brake fluid should be changed every two years according to the manual. The last time the brake fluid was changed in 4S at the end of 14 years, 1 liter of oil was discharged from two front wheels. Feel that it is not thorough enough to replace the old brake fluid in the rear wheel line. I struggled for a long time, but I forgot it after a long time. When it comes to another two-year replacement cycle, I intend to follow the scheme suitable for individual operation. I feel that the pressurization method is more convenient and can replenish the brake fluid in the rehydration kettle in time, so that there is no risk of entering the air. As the days went by, there was no obvious decline in braking. However, since 1919, I began to feel that there was a phenomenon that I wanted to stop but could not stop immediately. Bought a brake fluid detector test really began to turn on the yellow light, water content exceeded.
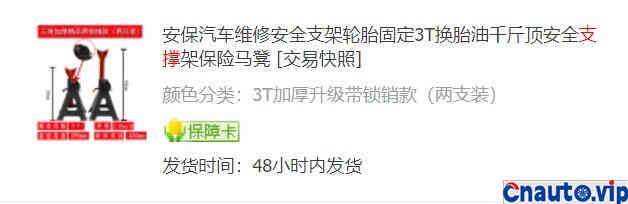
Starting from the self-made brake fluid pressurization equipment, I chose the original water purification filter pot used for negative pressure pump oil as the container, and the pipe fittings also used the 2-minute pe tube of the water purifier. In addition, buy a cheap Volkswagen brake fluid cover to modify the brake fluid filling device. In order to remove the wheel more safely also bought two iron 3T safety brackets, as well as the 11mm dual-purpose ratchet wrench to screw the exhaust valve. Two valve dust covers are also aging and need to be replaced.

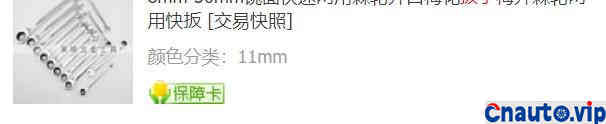
Be sure to use 11 clubs wrench, it is not easy to slide.
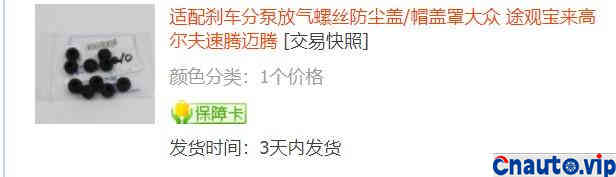
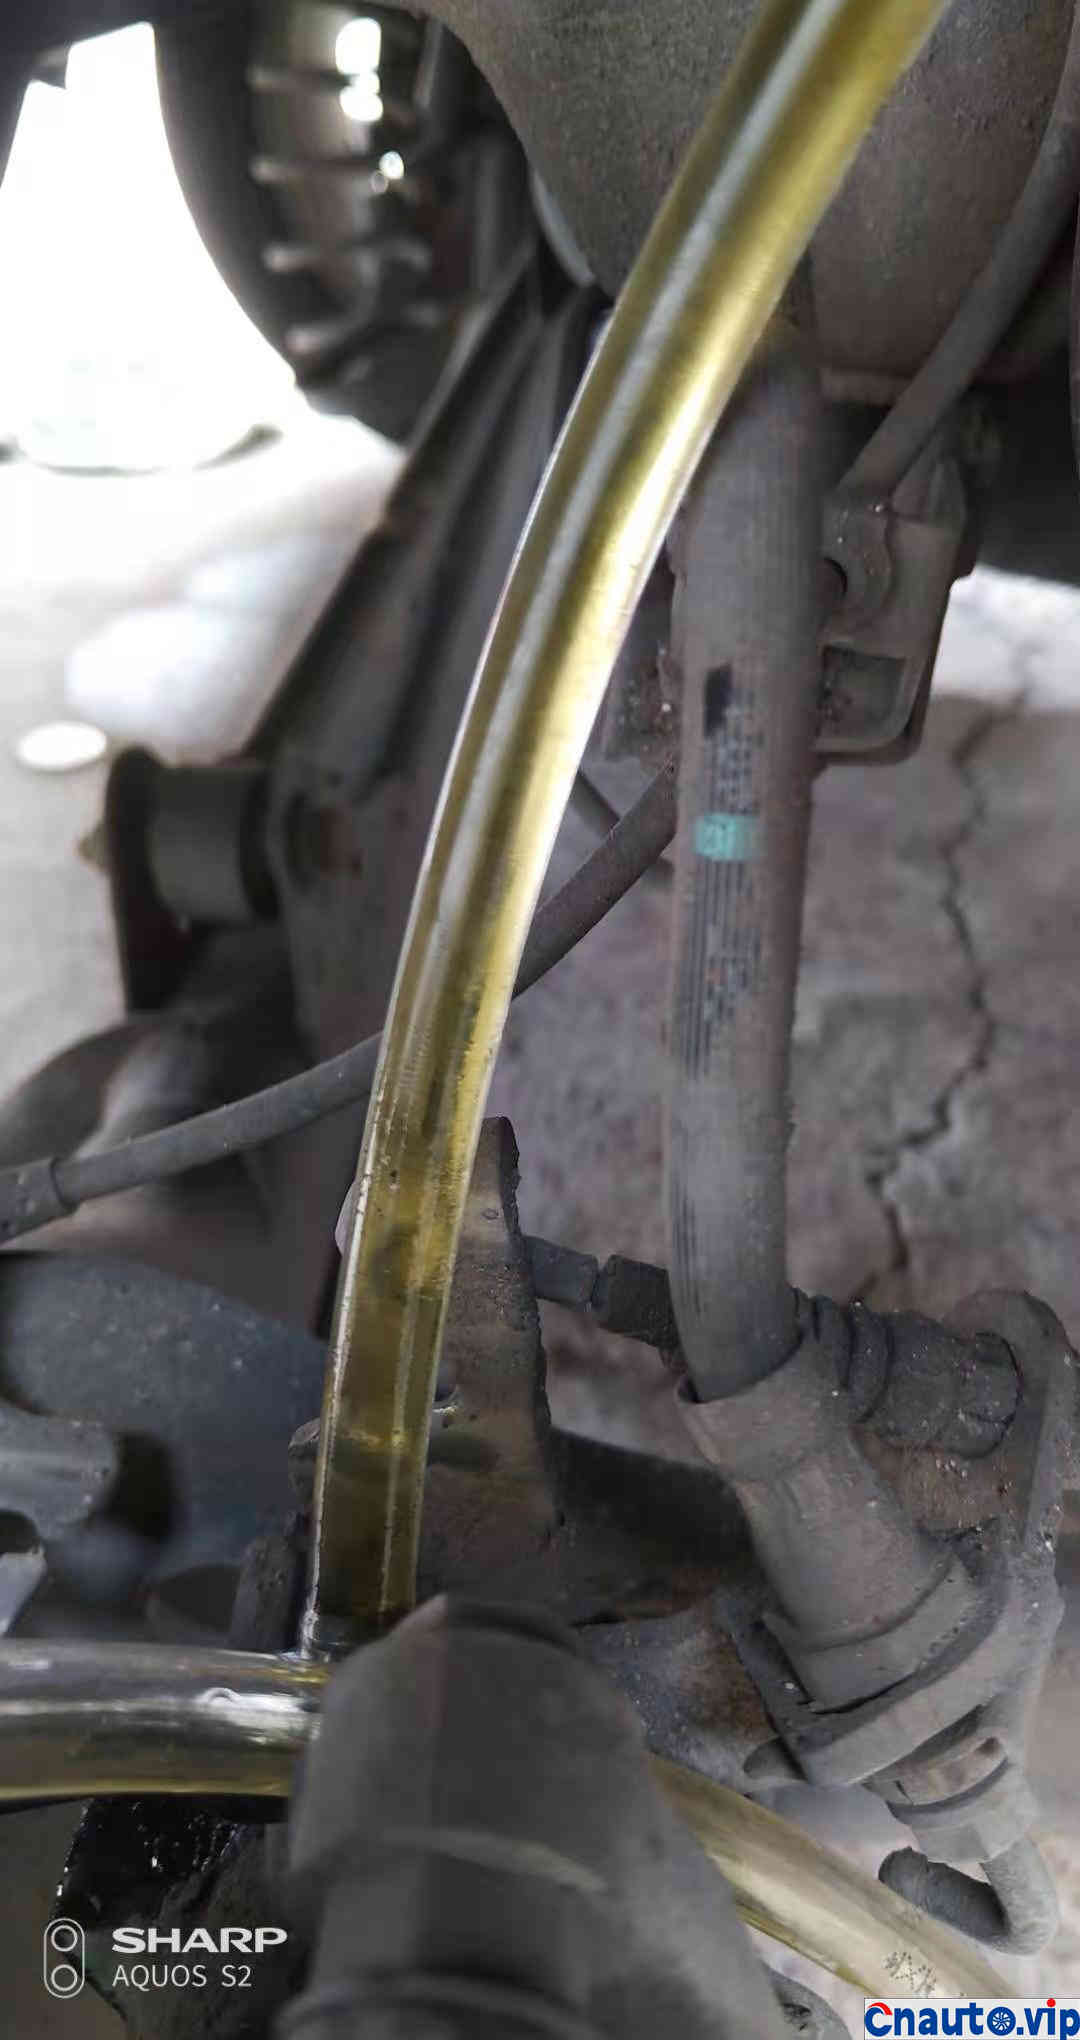
The dust cover of the two front wheel oil discharge screws is aging and cracked and needs to be replaced.
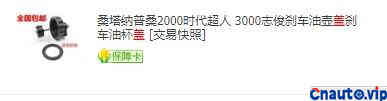
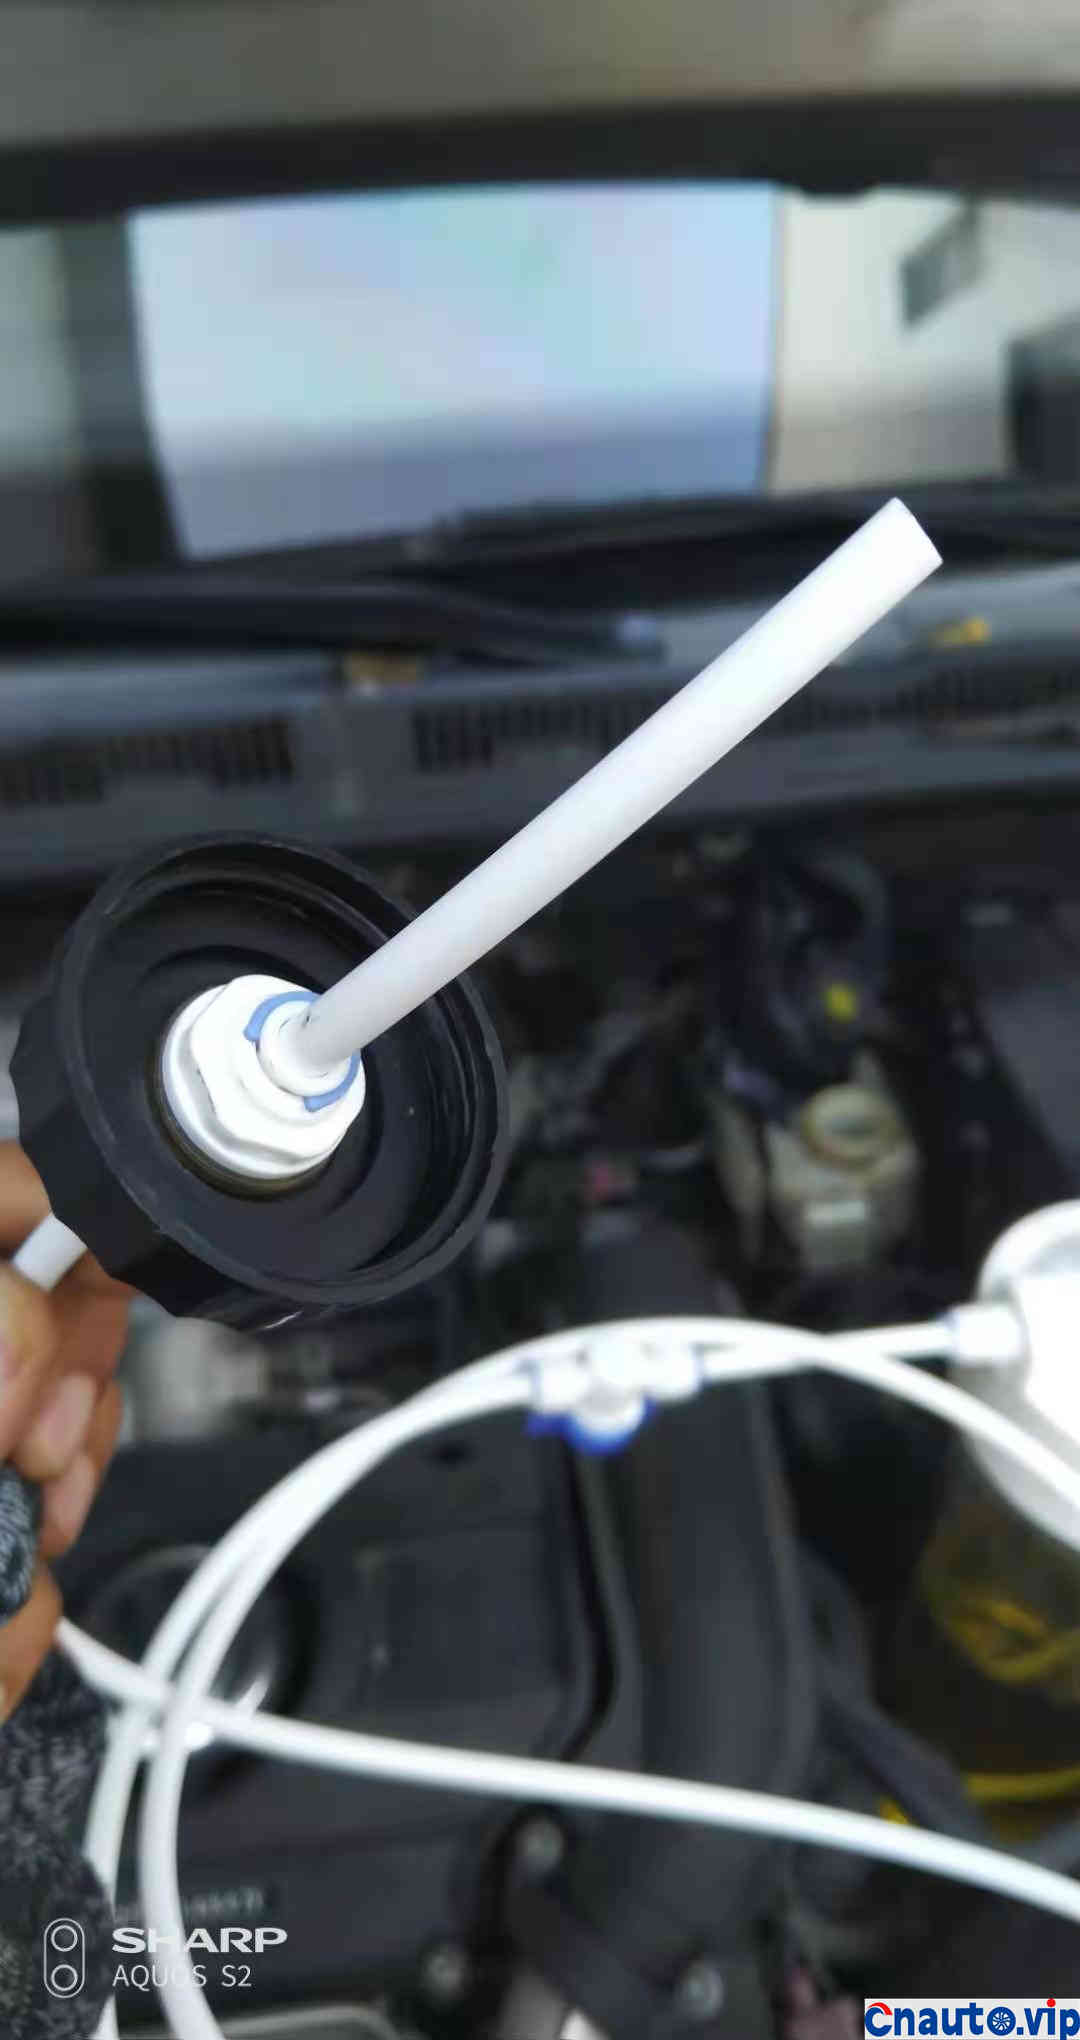
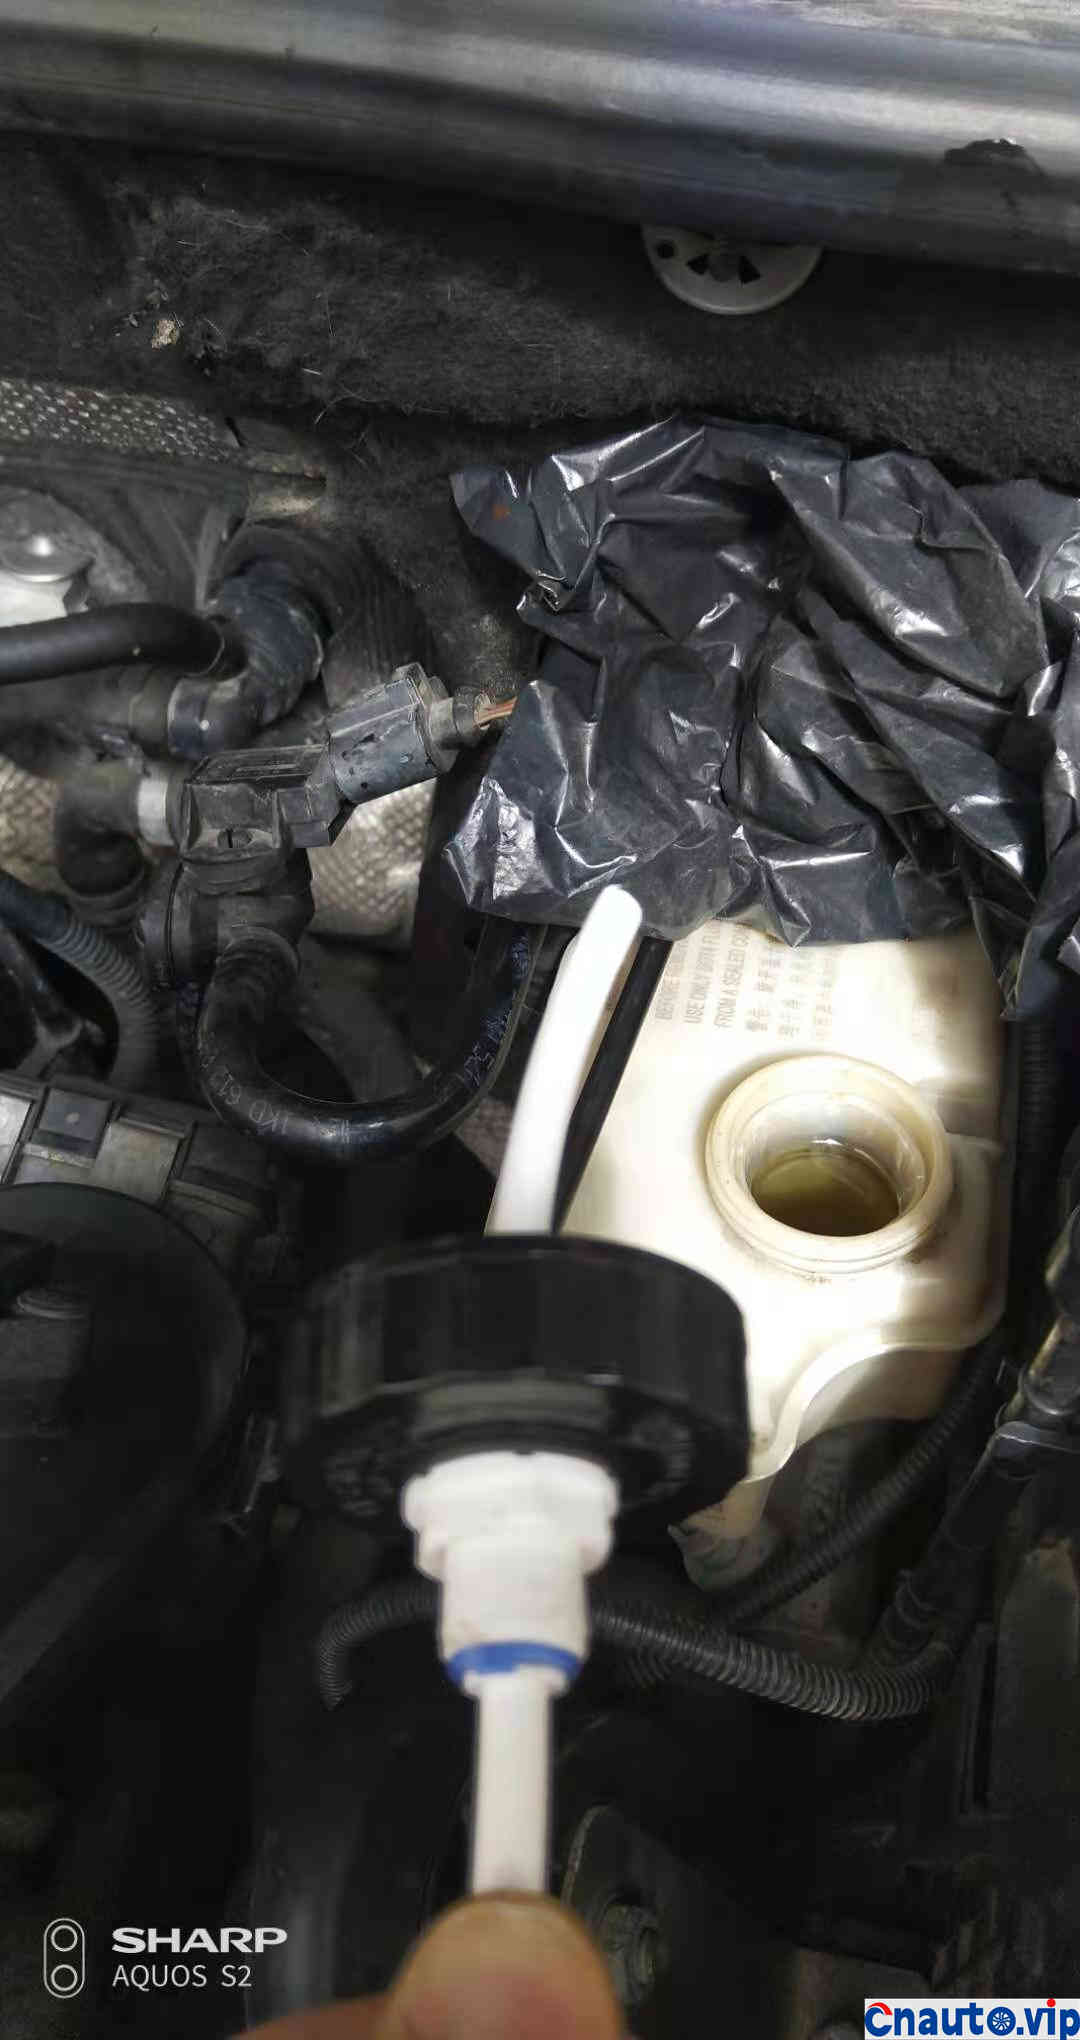
Production of special liquid filling equipment: dig out the liquid level probe in the middle of Santana brake liquid cover and enlarge the hole to the size of the plate joint. When installing the through-plate joint, you need to install a leak-proof silicone pad on the inside of the cover. The silicone pad of 4 points hose can be taken from the water pipe. There is a rubber sealing ring between the rehydration kettle and the lid, and the tightening point will not leak air. The length of the filling pipe should be inserted under the liquid level.
Water purifier accessories are easy to get when they are sealed.
The inlet water of the filter bottle is connected with the pneumatic male and connected with the air pump. The outlet is connected to the middle of the filter bottle where the filter element is installed, which needs to be connected to the bottom of the filter bottle with a 20mm PVC tube, so that the air pressure can make the brake fluid in the kettle replenish to the filling kettle without entering the air. I can’t find the pvc pipe of 20mm at the moment, so I use the pe pipe of the water purifier to connect to the outlet joint directly. A control valve is also connected between the filter bottle and the filling kettle to facilitate the control of pressure.
For fear of unskilled operation and waste of materials, specially prepared three liters of Bosch DOT4 brake fluid. In the end, two barrels were used for a total of two liters.
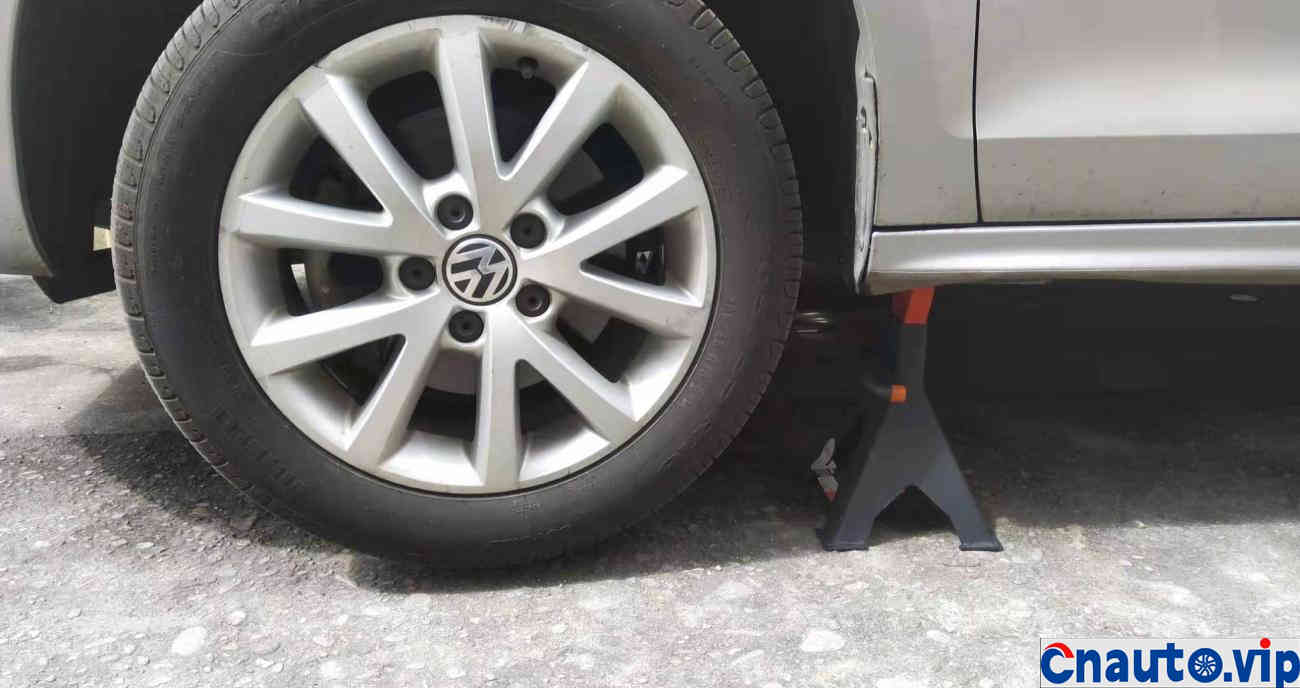
First use daughter to top up two front wheels with safety bracket support

Hit one side to the end, there is also room to operate.
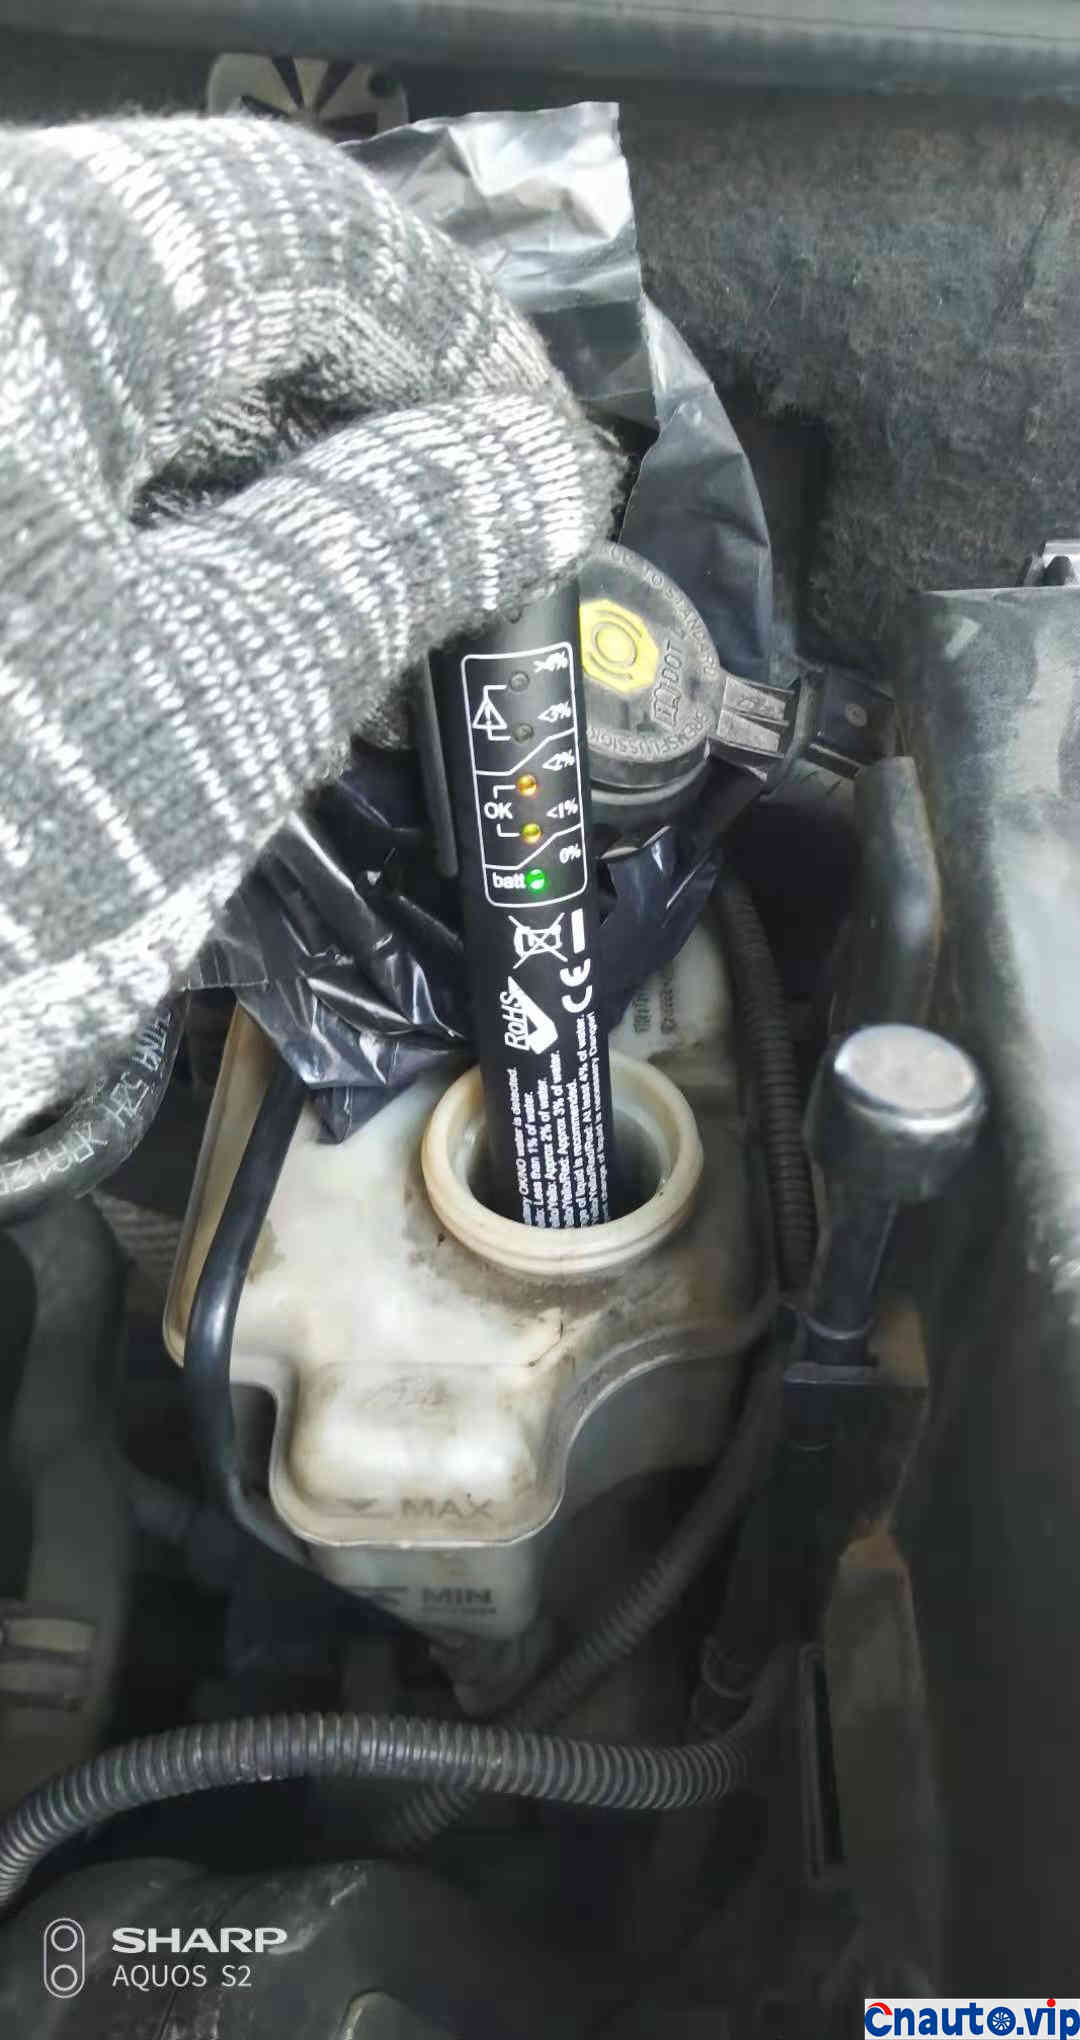
Brake fluid is corrosive, cover with plastic Pita Bread Plain good, 4 years brake fluid moisture content of more than 2%.
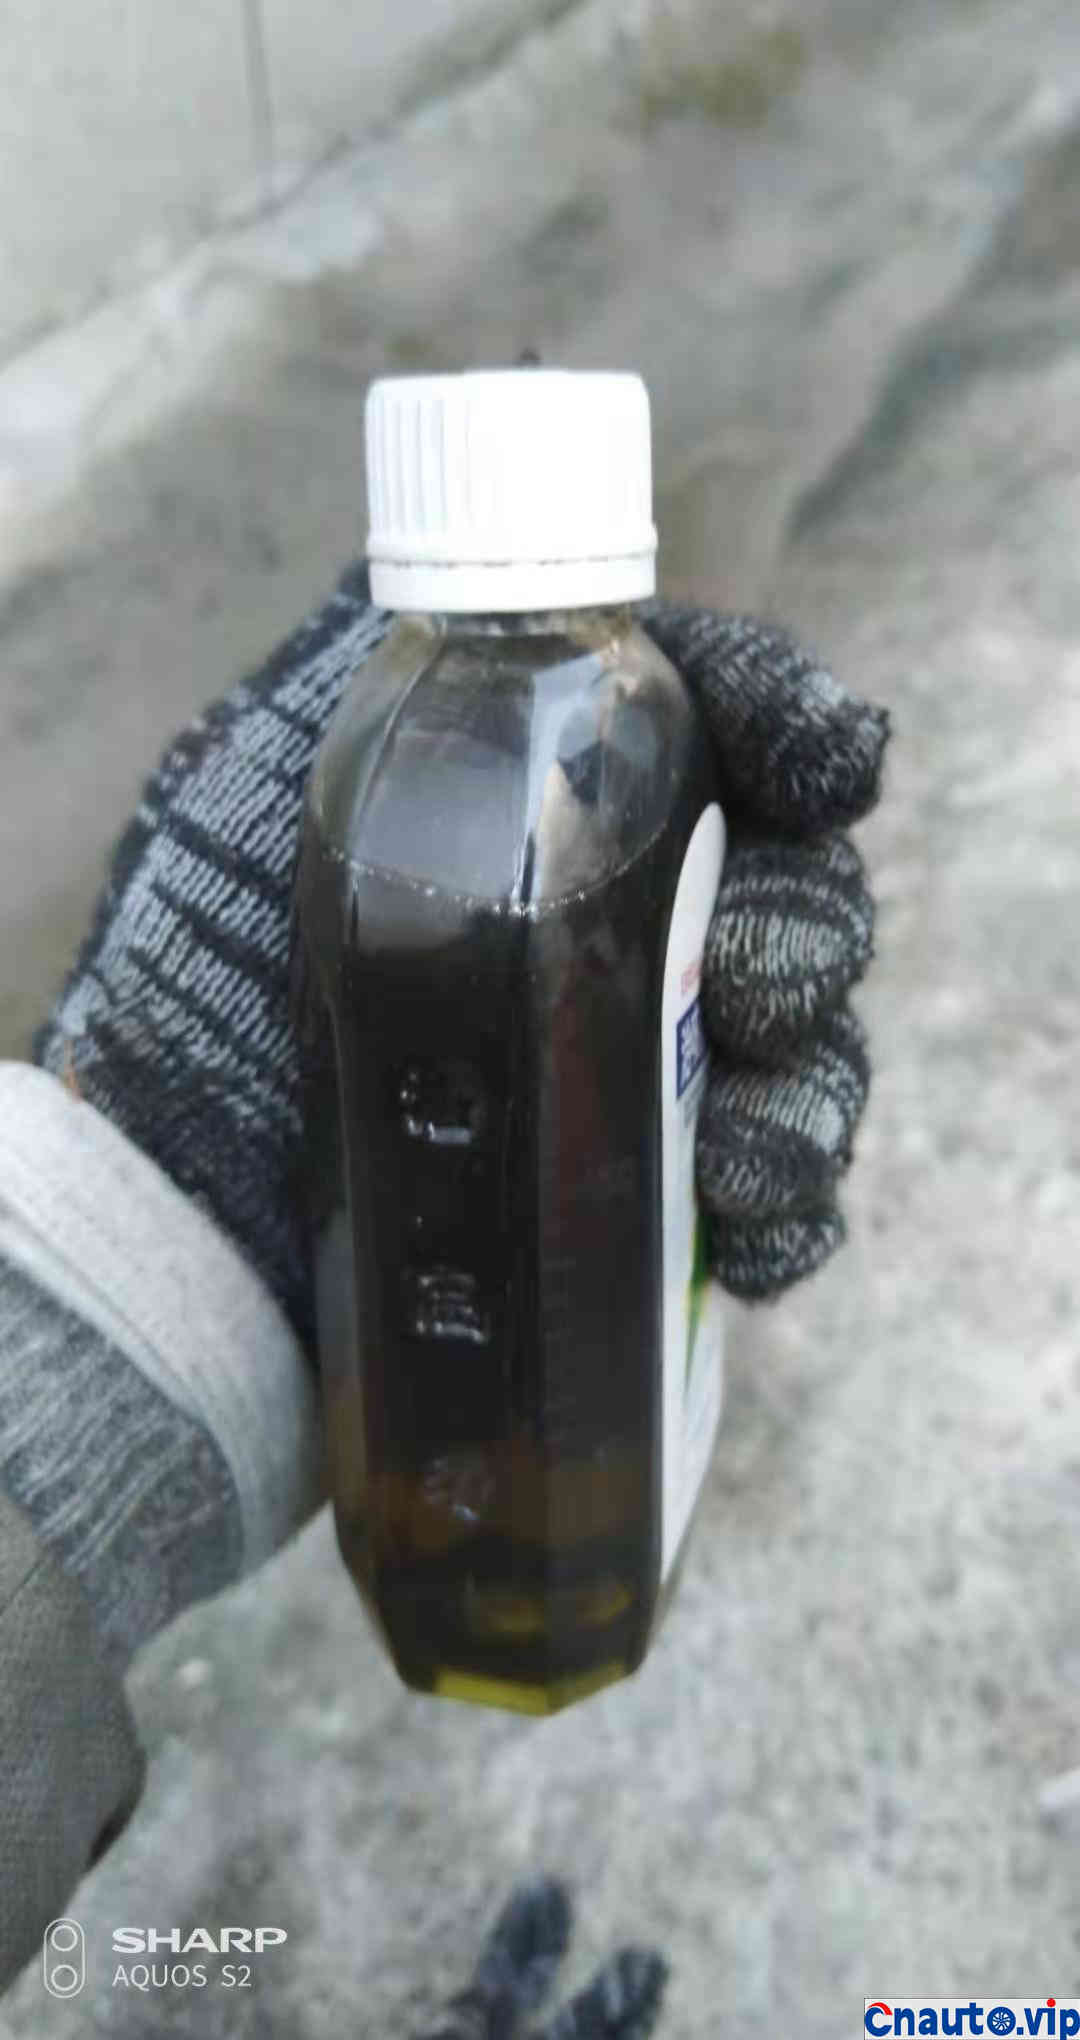
For the old brake fluid in the rehydration tank, use an injection syringe to pump about 250 milliliters. The color is darker.
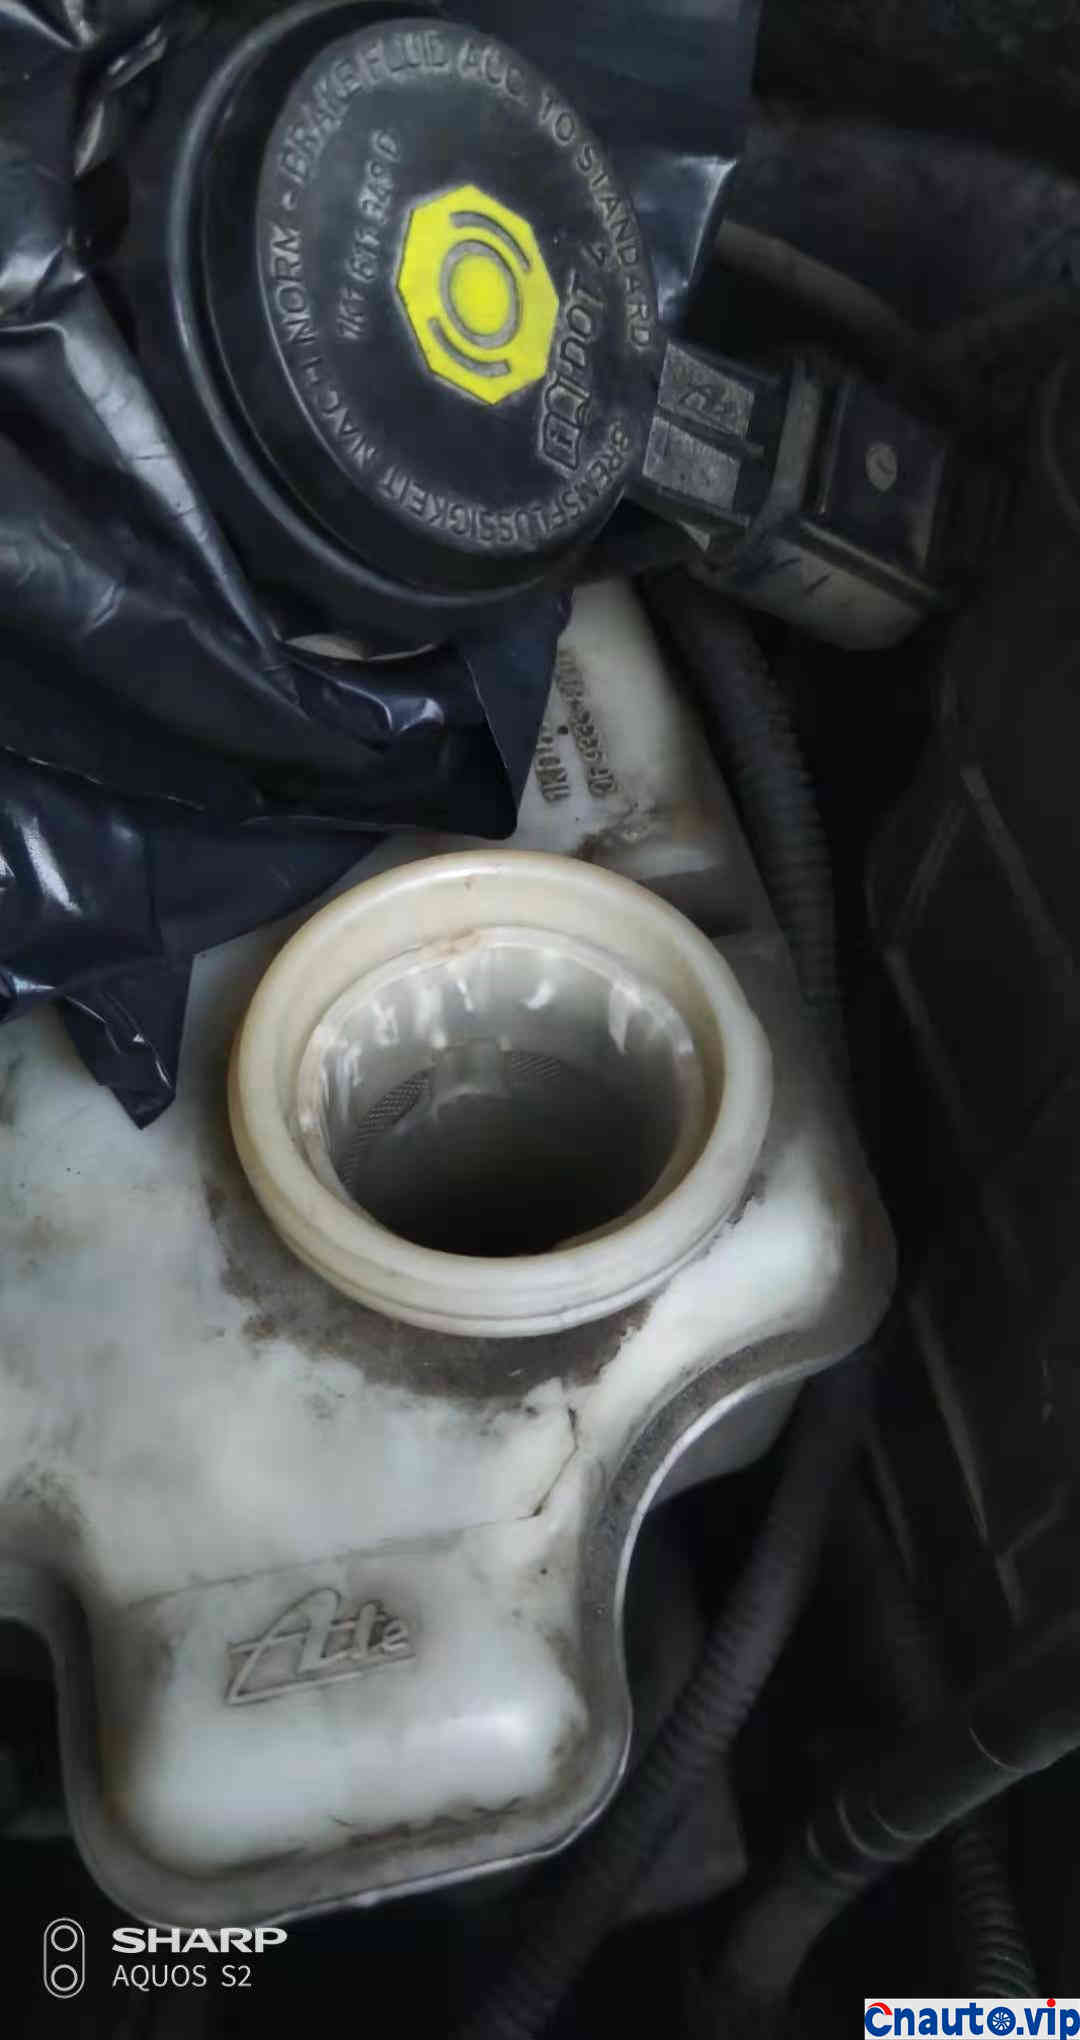
After prying the filter net for a long time, the scars can not be dug out, so it is not easy to pry through. Give up directly, after pumping the brake fluid from the filter, it is not far from the bottom of the pot.
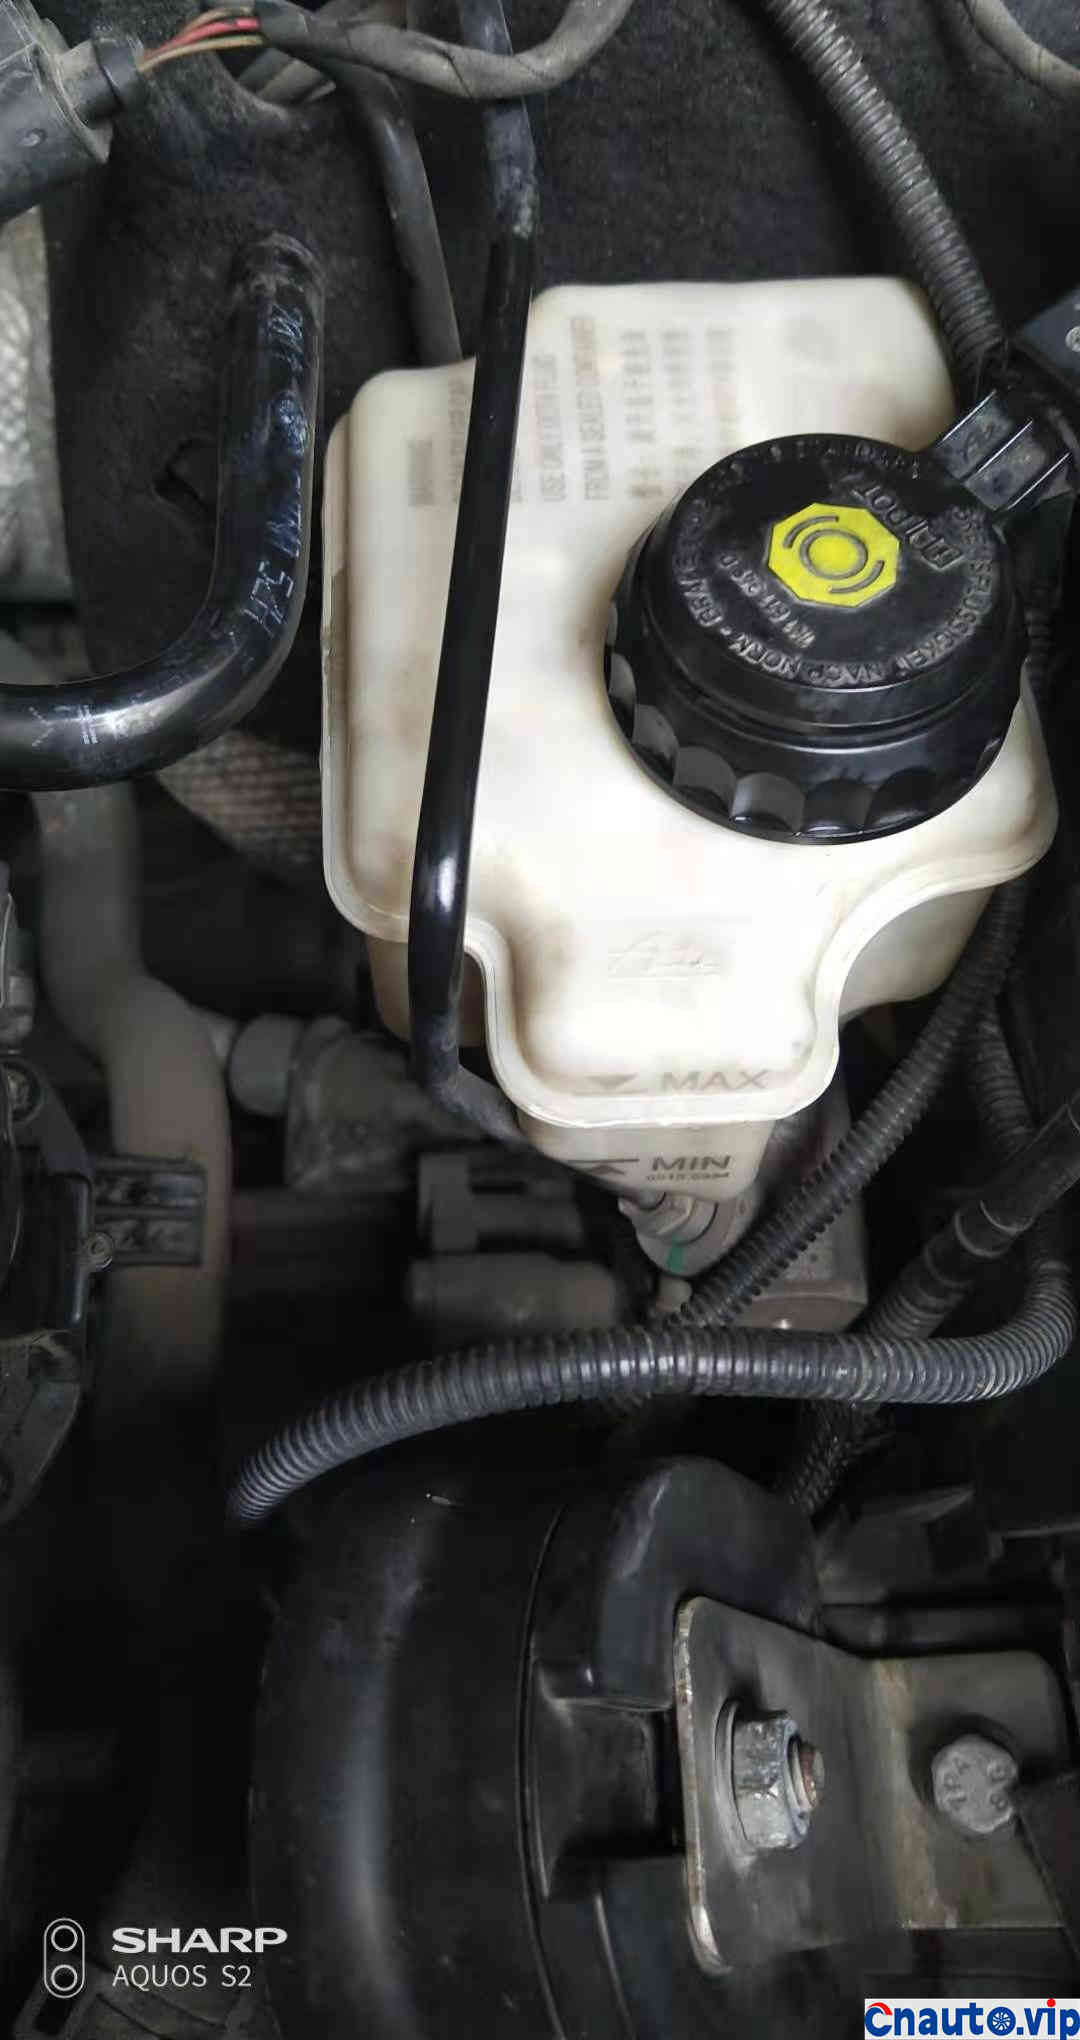
Fill the rehydration tank with new brake fluid to the line and tighten the lid. To avoid leakage of gas and liquid.
The filter bottle is also filled with new brake fluid.
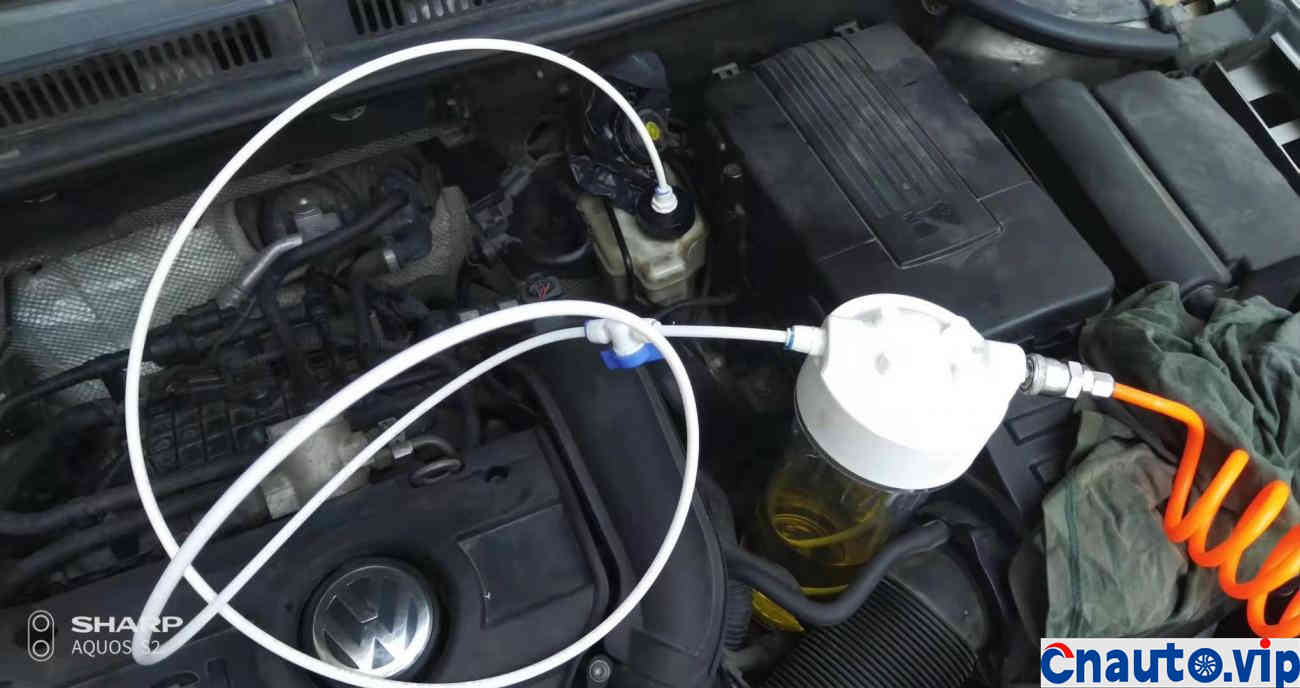
The filter bottle connects the whole view of the trachea and the rehydration pot. First inflate the filter bottle and then close the pump valve and slowly open the control valve on the side of the bottle. Observe the pipeline and rehydration lid for leakage. If there is no problem, you can drain the old brake fluid for four rounds.
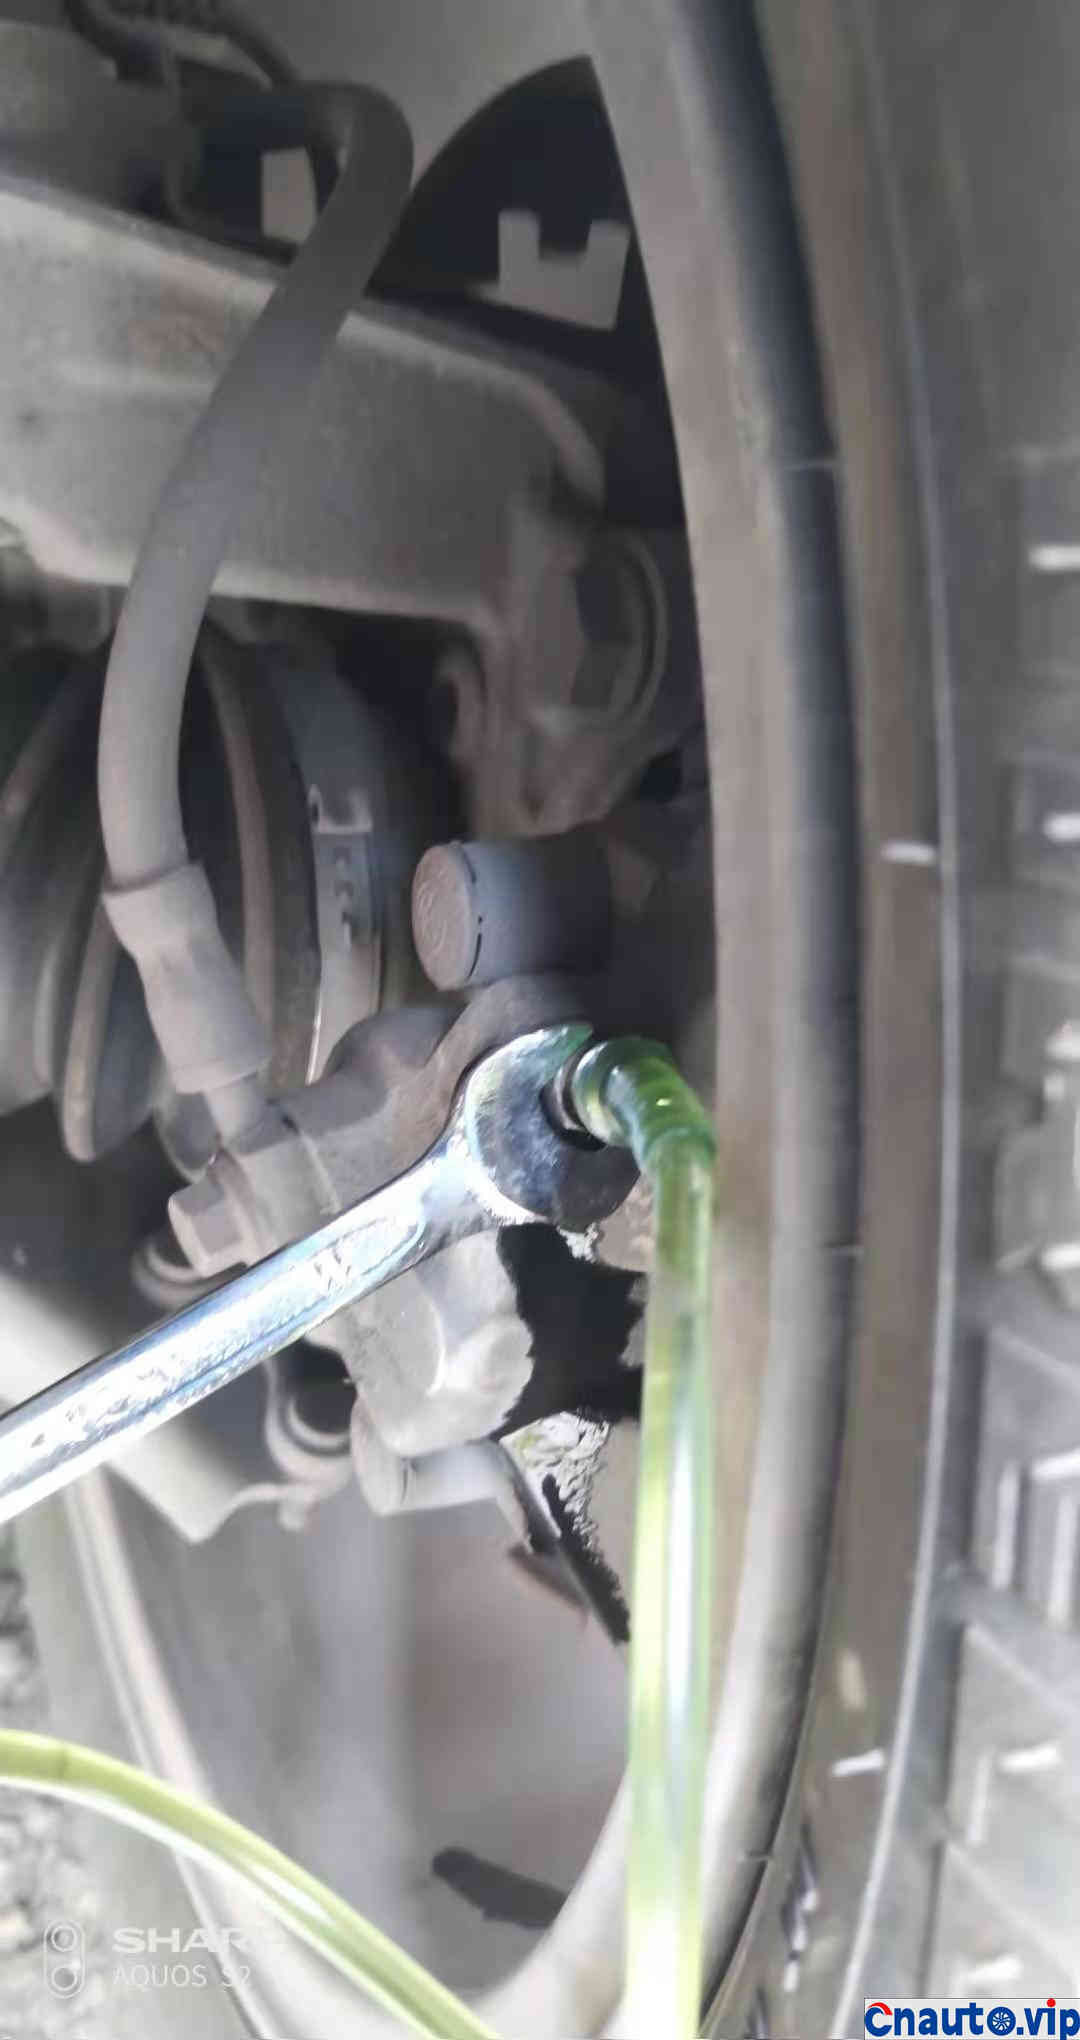
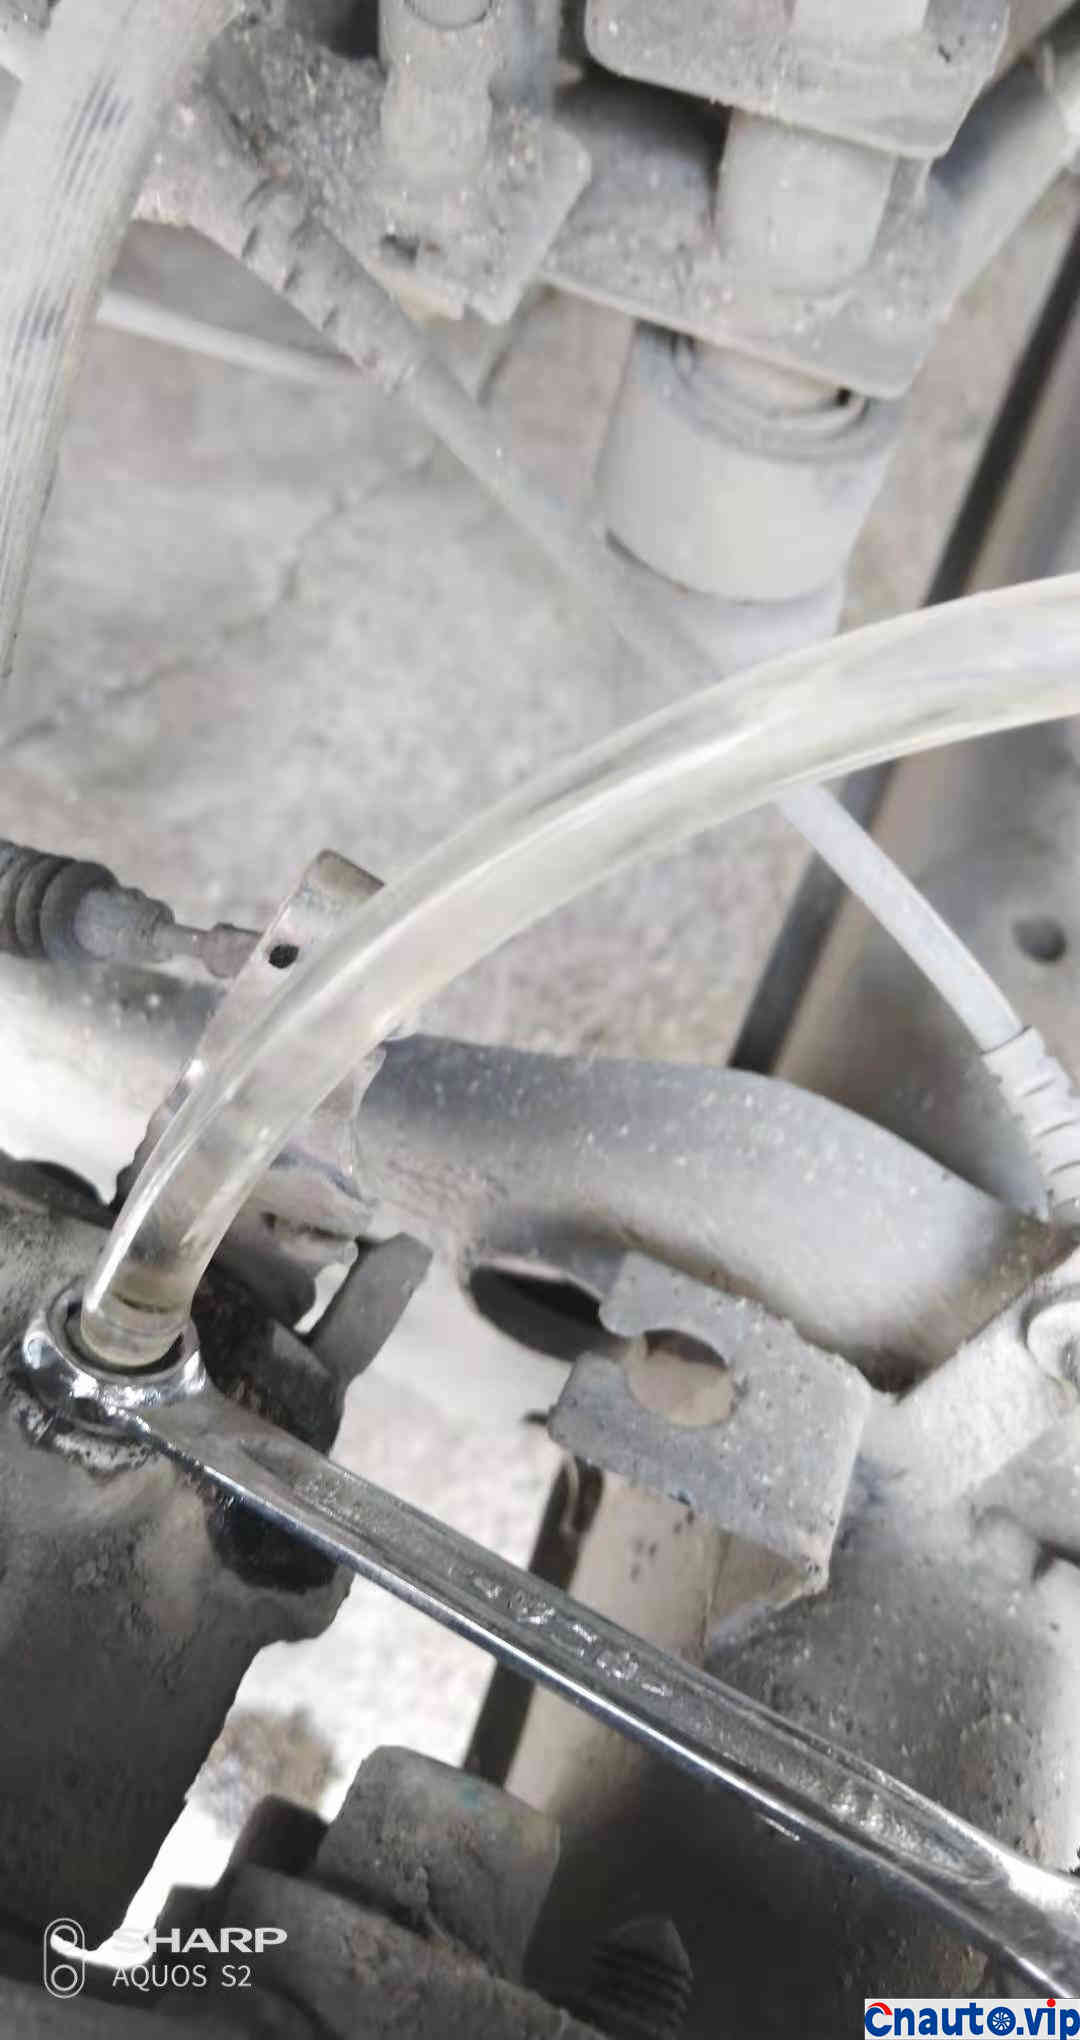
By loosening the exhaust screw, the old brake fluid can be discharged without having to find someone to step on the brake pedal. In this way, the whole oil drainage step can be completed by one person.
The order is in front of the left, before the right, after the left and later on the right. In fact, I exhaust the gas from the front wheels for the second time. It doesn’t matter if you follow the sequence.
I put 300 milliliters before and after four rounds, but in fact, about 200 of the oil has become clear. Simplified point in fact, the front wheel 200 rear wheel 300 just 1 liter is the most reasonable.
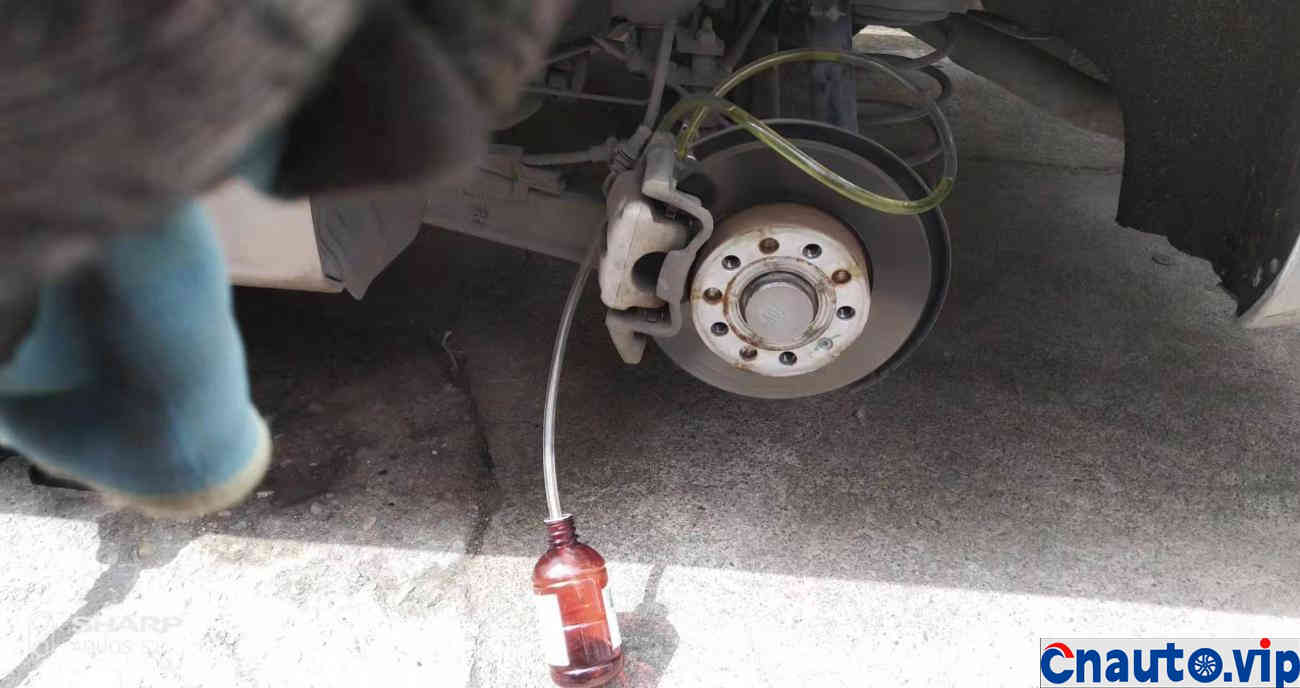
The rear wheel must unload the tire, and the pressurized oil release does not have to worry about air reflux. If you feel that the oil discharge speed is slow, you can get on the car and step on the brake pedal to speed up the emission and replace the old brake fluid in the brake master cylinder.
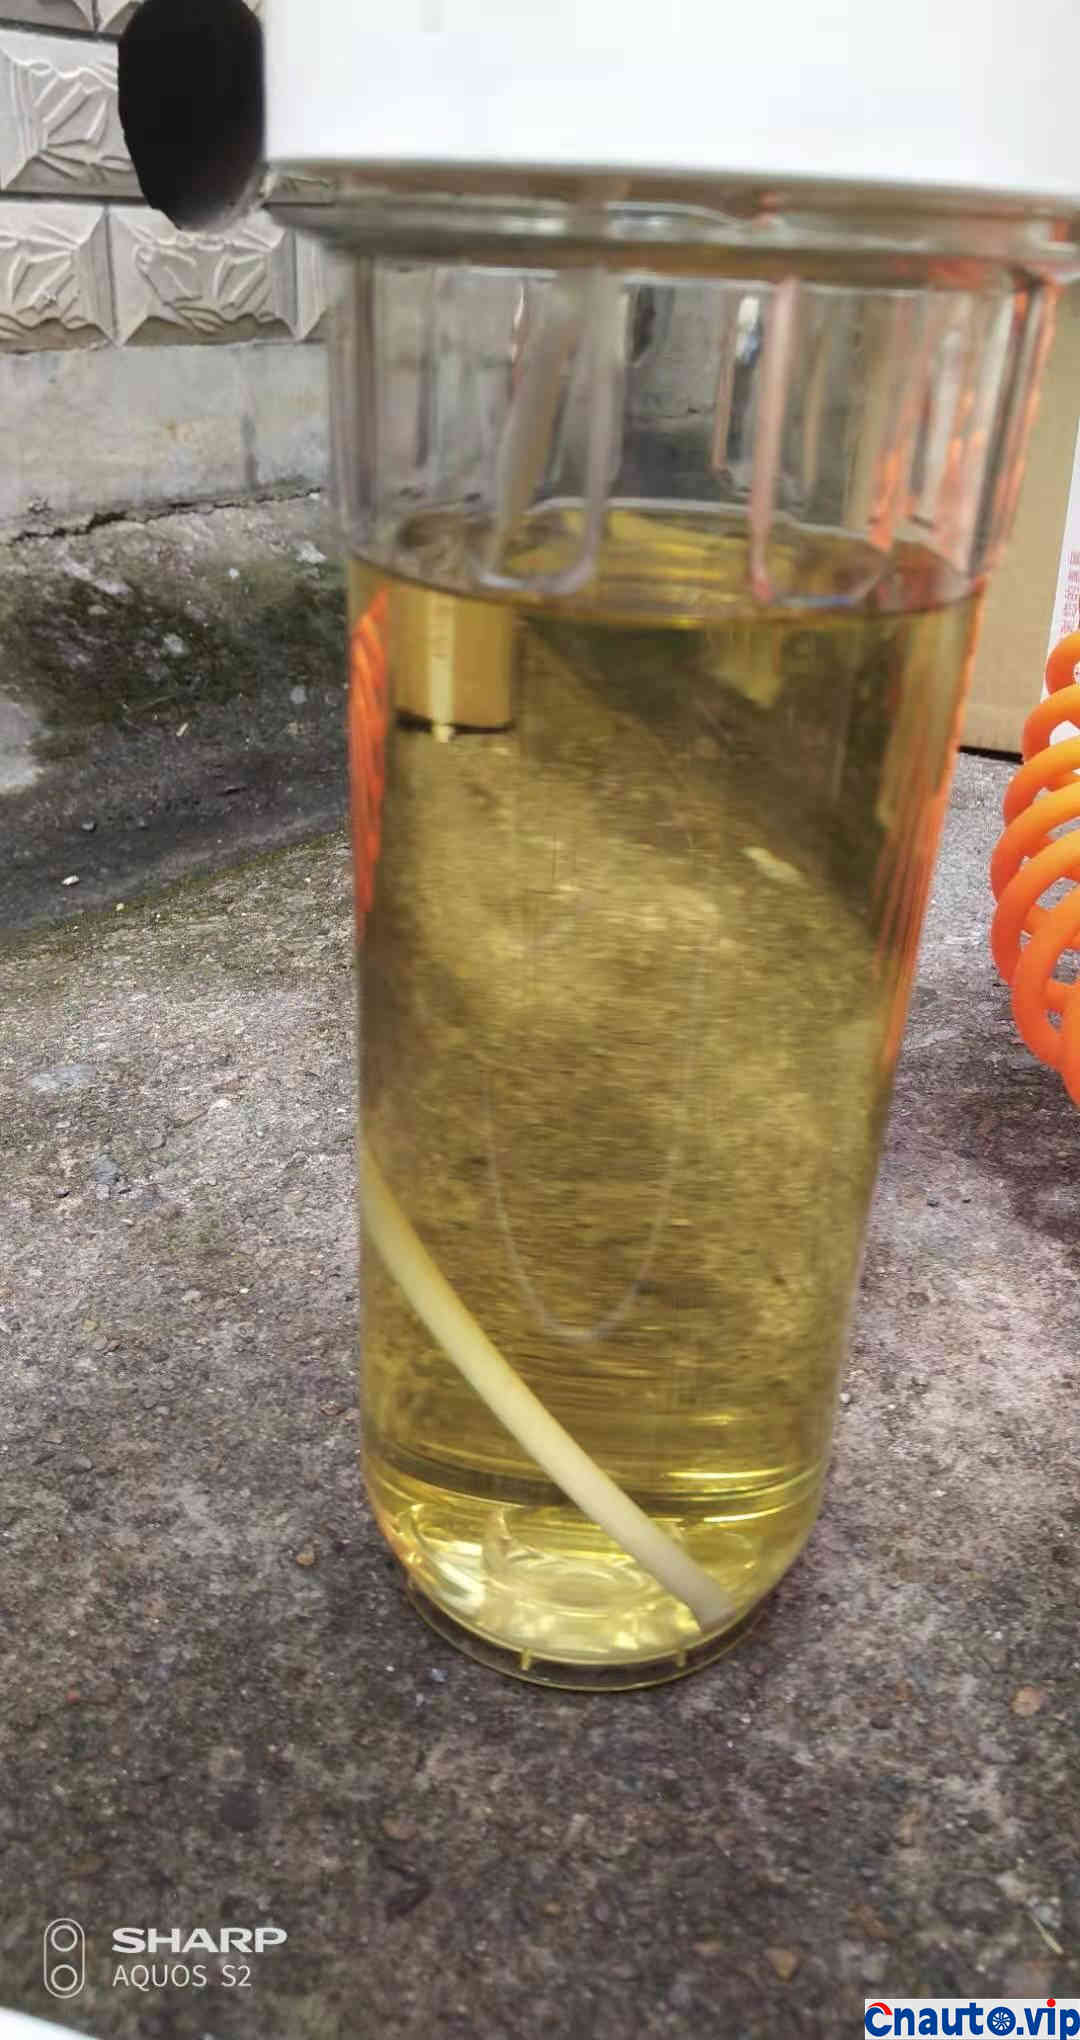
The old oil is dark in color.
The front wheel row 200ml, the rear wheel row 300ml 200ml 4 wheels just 1000ml a bottle. The new brake fluid is basically transparent, and it is easy to distinguish between the two.
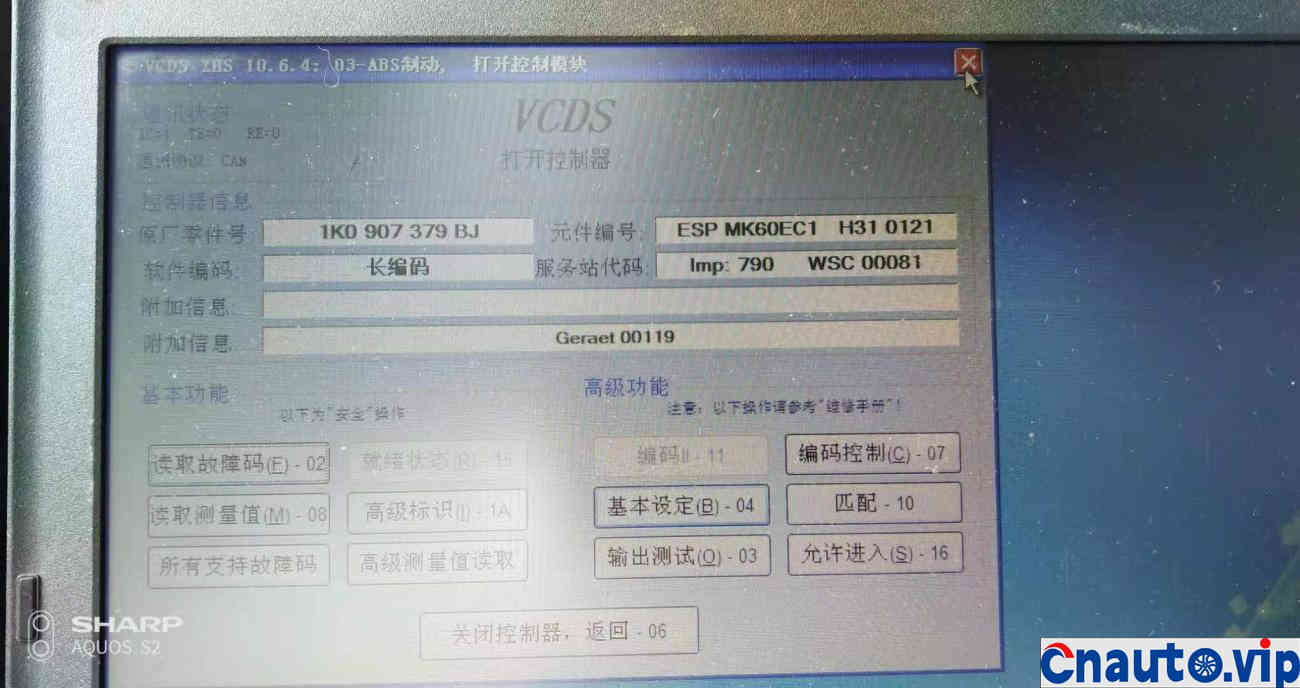
The basic setting of using 5053 to enter the abs module after 4 rounds.
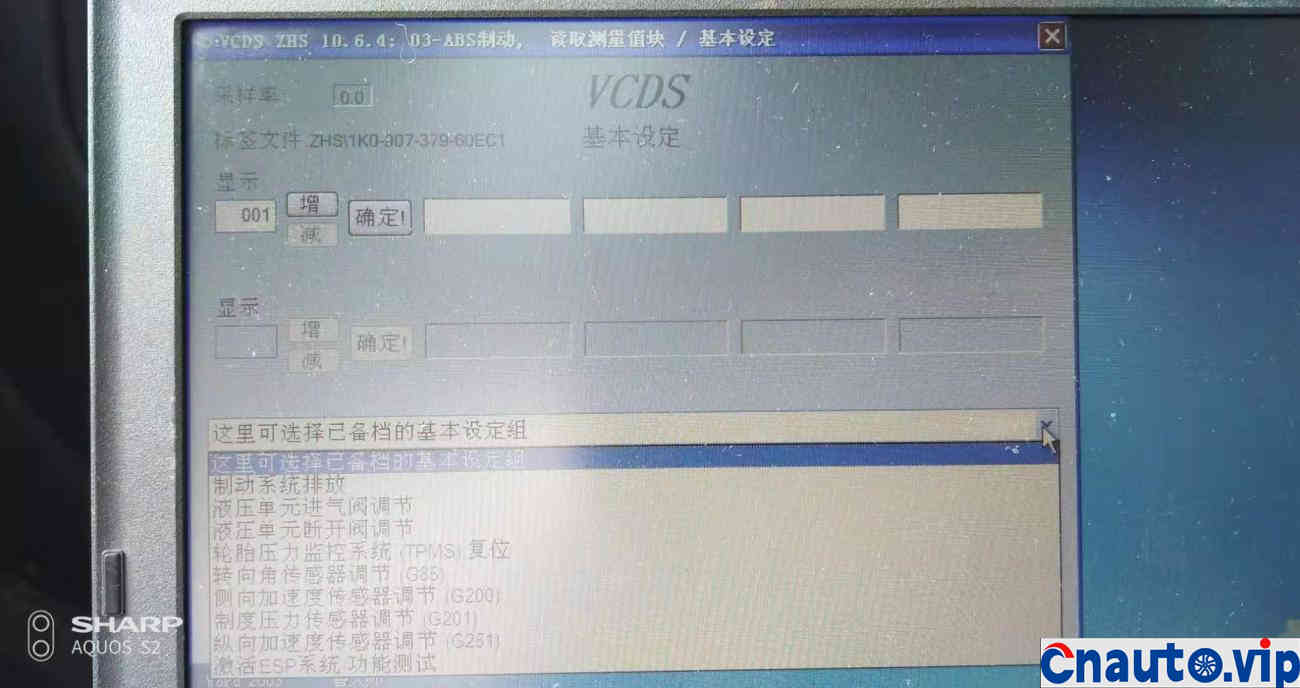
Selected brake system discharge
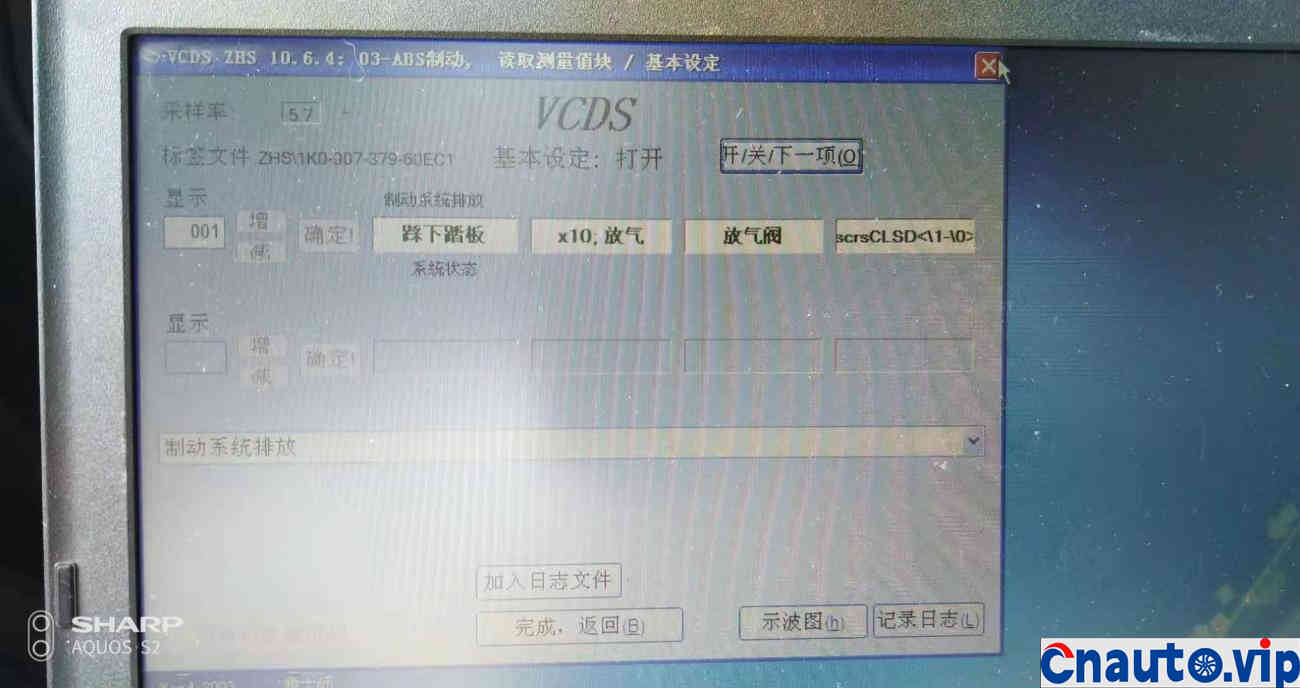
Then press the brake pedal as instructed. Click the switch / next item. The abs will run for 10 seconds to complete the discharge of the old brake fluid from the abs pump to the pipeline.
At this time in the two front wheels for the second discharge of 300 ml, plus waste, 2 barrels of 1 liter of hydraulic oil is enough. In this way, the brake fluid of the whole vehicle can be replaced perfectly. Because it is automatic, it does not involve the replacement of hydraulic oil in the active cylinder of clutch pedal. During the 4-round discharge, the brake fluid in the filter bottle can be inflated and pressurized appropriately according to the situation to maintain a certain pressure.

Finally, close the control valve on the edge of the filter bottle. Unscrew the lid of the kettle with liquid, so that the brake fluid in the kettle will not overflow without pressure. Due to the inevitable leakage of brake fluid in the process, dilute and flush the parts with tap water in time to avoid corrosion.
Because of the full sealing pressure balance of the self-made special equipment, the liquid level in the filling tank will not change, and there is no need to worry about the air entering into the system pipeline during the whole process.
Step on the brake pedal before you hit the road. After the road test, the front part of the brake pedal stroke is obviously more sensitive than before the change. Emergency brakes are more confident. It doesn’t have to be changed every two years, it depends on the moisture content of the brake oil to decide whether it will be more economical to replace it. It is necessary to change the brake fluid in time. Safety comes first.

A car with a visual thickness of 100000 kilometers in nine years still has 10 millimeters of brake pads that can last for another stage. Although Suiteng has been making a lot of noise on the brakes, the brakes are still very durable. It is planned to maintain brake calipers, light brake discs and replace front and rear brake pads in the second half of the year. Cars also rely on health care when they reach middle age.


 April 1, 2024