Speaking of Q7, I think it is the most successful SUV model so far. Why? Very simply, since the advent of the first Q7, it has directly entered the blockbuster mode, and the price increase and car lift was recognized by the market at that time. Later, although there was no need for a price increase, the sales volume was also in short supply, leaving several X5 streets of the same era. Q7 just came out with the first engine is 3.6 BHK engine, that is, at that time is a very alternative small angle V engine, also known as VR6 engine. At the same time, the Q7 high-end model also has a 4.2 BAT8 cylinder engine, but with the implementation of the environmental protection law, cars with engines above 3.0 have to pay part of the high-emission tax, so many automakers have limited the emission limit to 3.0, including Audi. However, the rule of law of environmental protection limits emissions, but there is no restriction on supercharging technology, so in order to meet the demand of power, 3.0T has achieved the best balance between environmental protection and power.
So after 2011, 3.6 and 4.2 engines were no longer used in Q7 cars and were replaced by 3.0T engines. In order to meet the needs of high and low configuration, 3.0T is divided into high-power and low-power versions. The structure of the two is basically the same, but the high-power program is not the same, at the same time than the low-power are out of a variable valve lift system, other engine components are exactly the same, including the common fault of both, all burn oil.
Today, let’s take this low-power 3.0T engine, code-named CJT, as an example to see how to solve the stubborn problem of burning oil.
-Burning engine oil analysis
In this world, everything has cause and effect. Burning engine oil is no exception. If you don’t understand the pathology of burning engine oil, how to solve the confusion of burning engine oil?
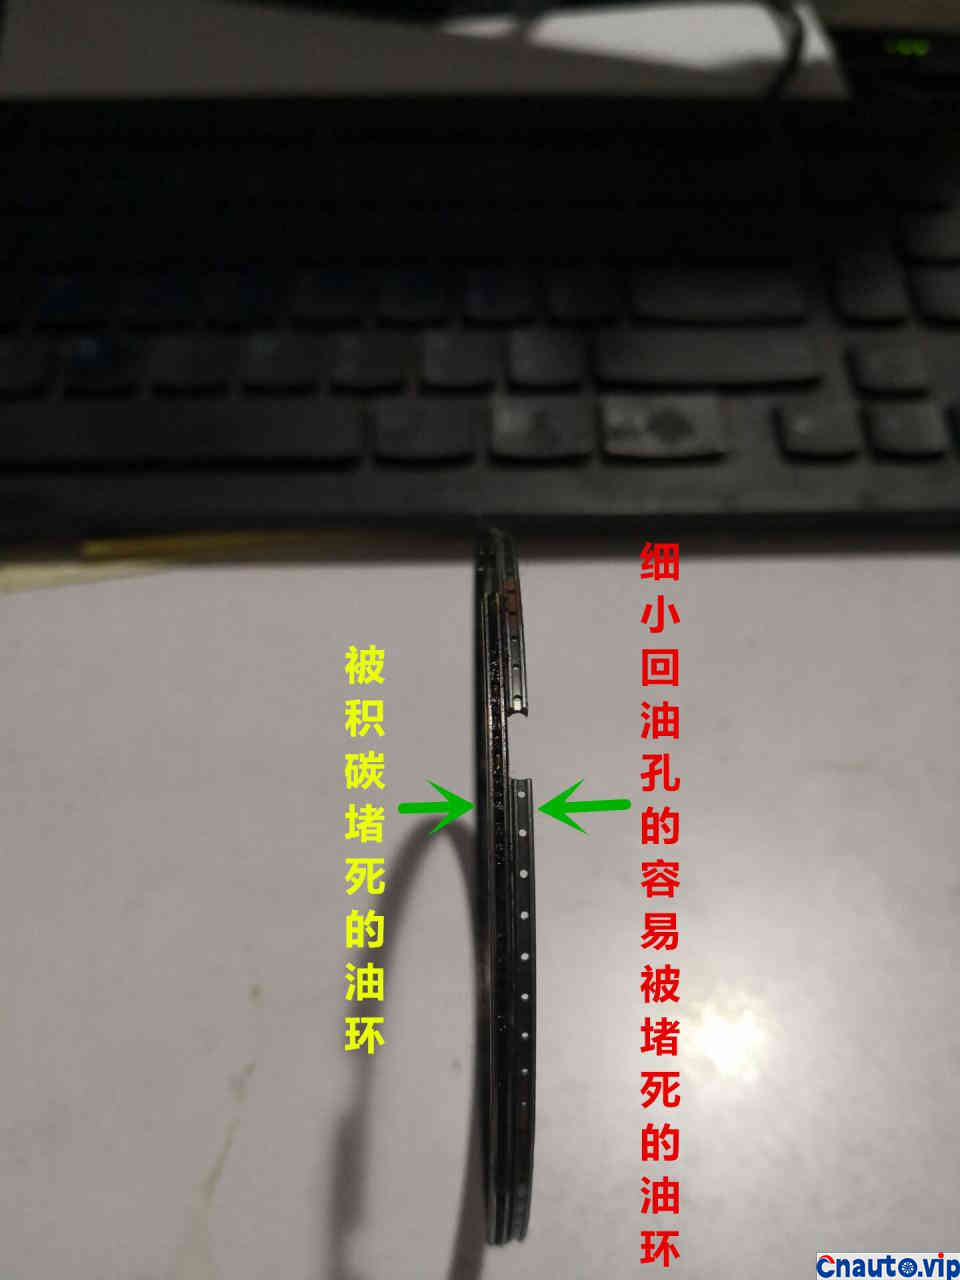
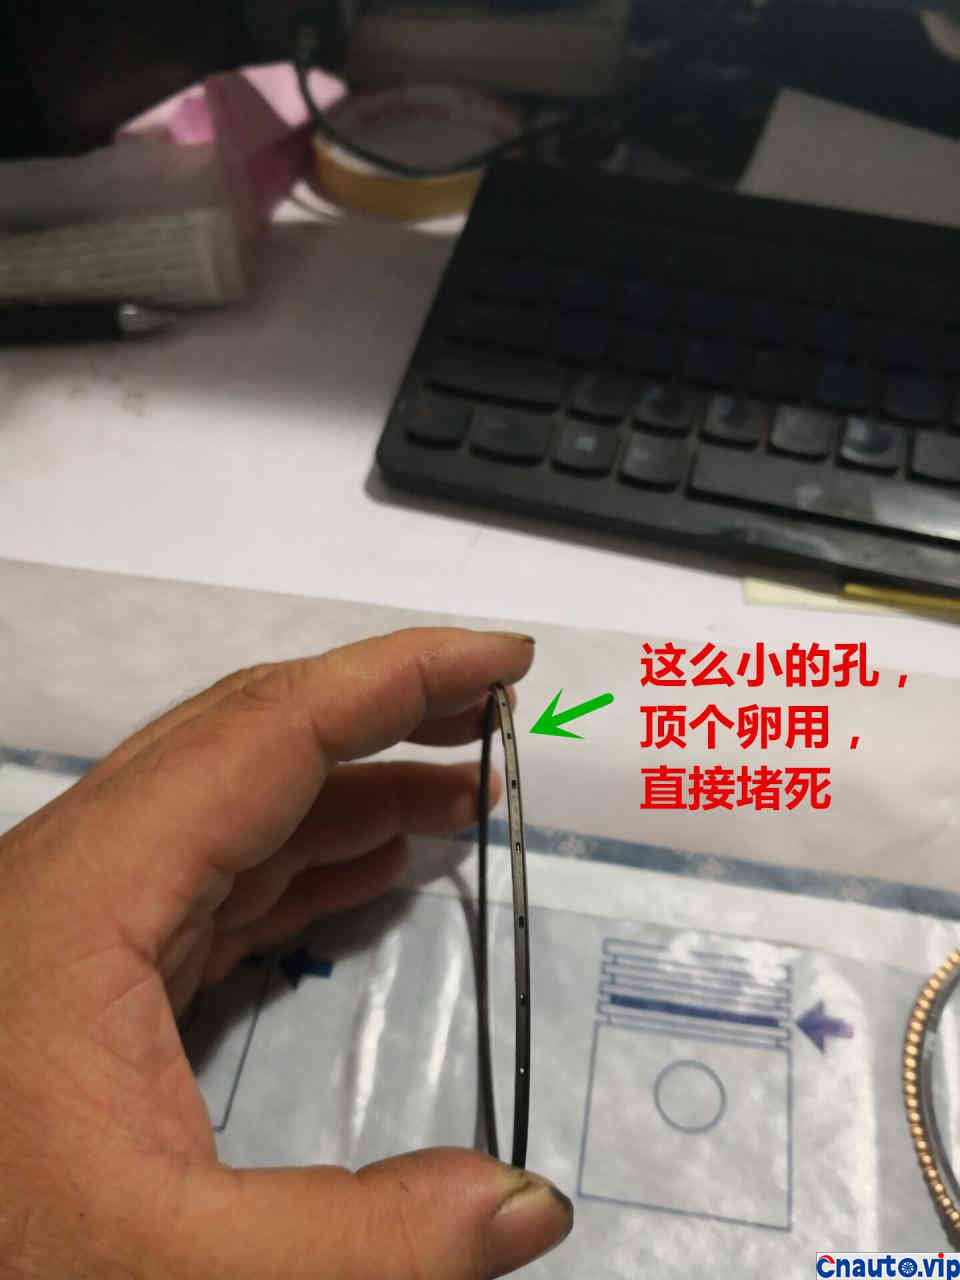
First of all, Volkswagen and Audi adopted the wrong structure of the piston ring, especially the oil ring, look at the structure of the new ring, you can see how narrow the oil withdrawal space is, as soon as there is carbon accumulation, it is destined to be blocked quickly. After the blockage, the oil scraping function is lost.
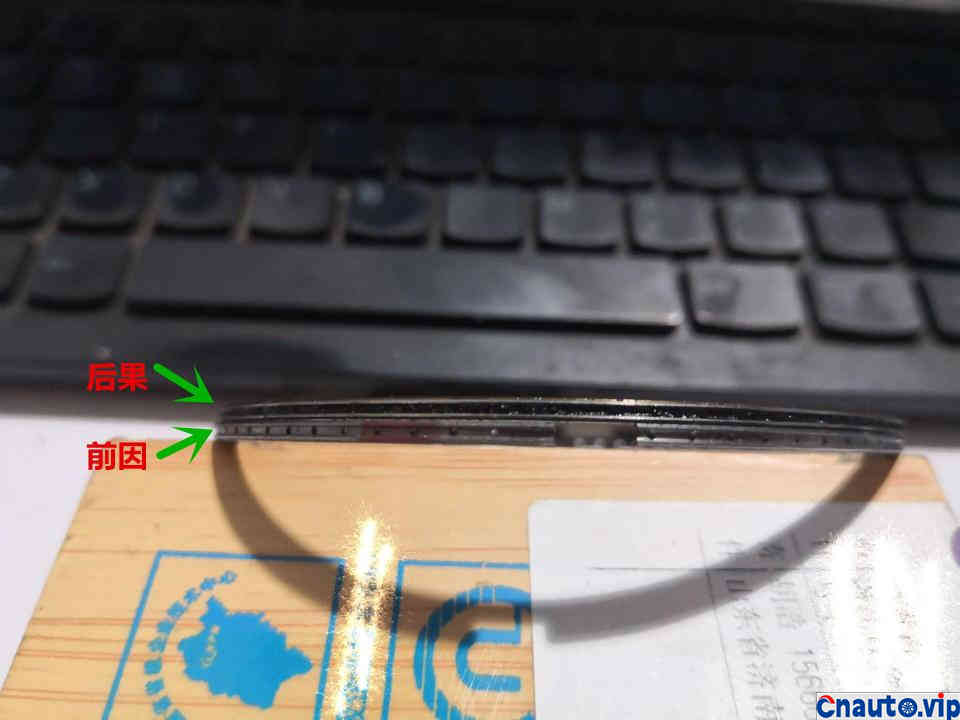
Did you see the cause and effect mentioned before? the antecedent is that the piston ring mechanism is unreasonable, and the consequence is blocked by carbon deposition and loss of oil scraping function.
Here I really want to ask the designers of the masses, what is the purpose of your design and what are the benefits? anyway, I don’t see any benefits.
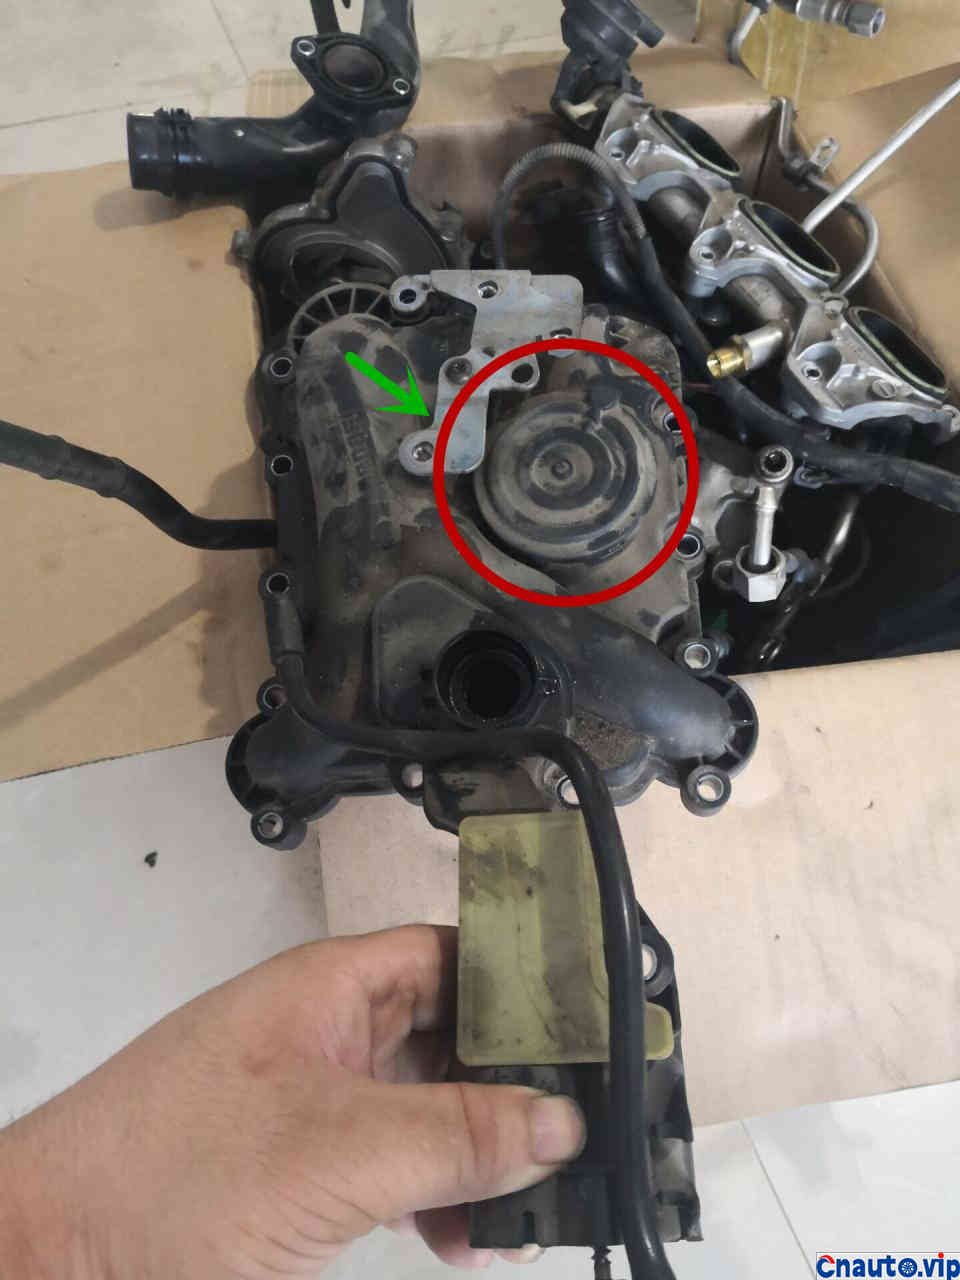
At the same time, Volkswagen and Audi like to use the exhaust valve separation method in the crankcase ventilation system. If the exhaust valve does not fail, once it fails, the exhaust gas will not be separated. The exhaust gas in the crankcase exhaust gas with engine oil steam has been introduced into the combustion chamber so far, and you know the consequences.
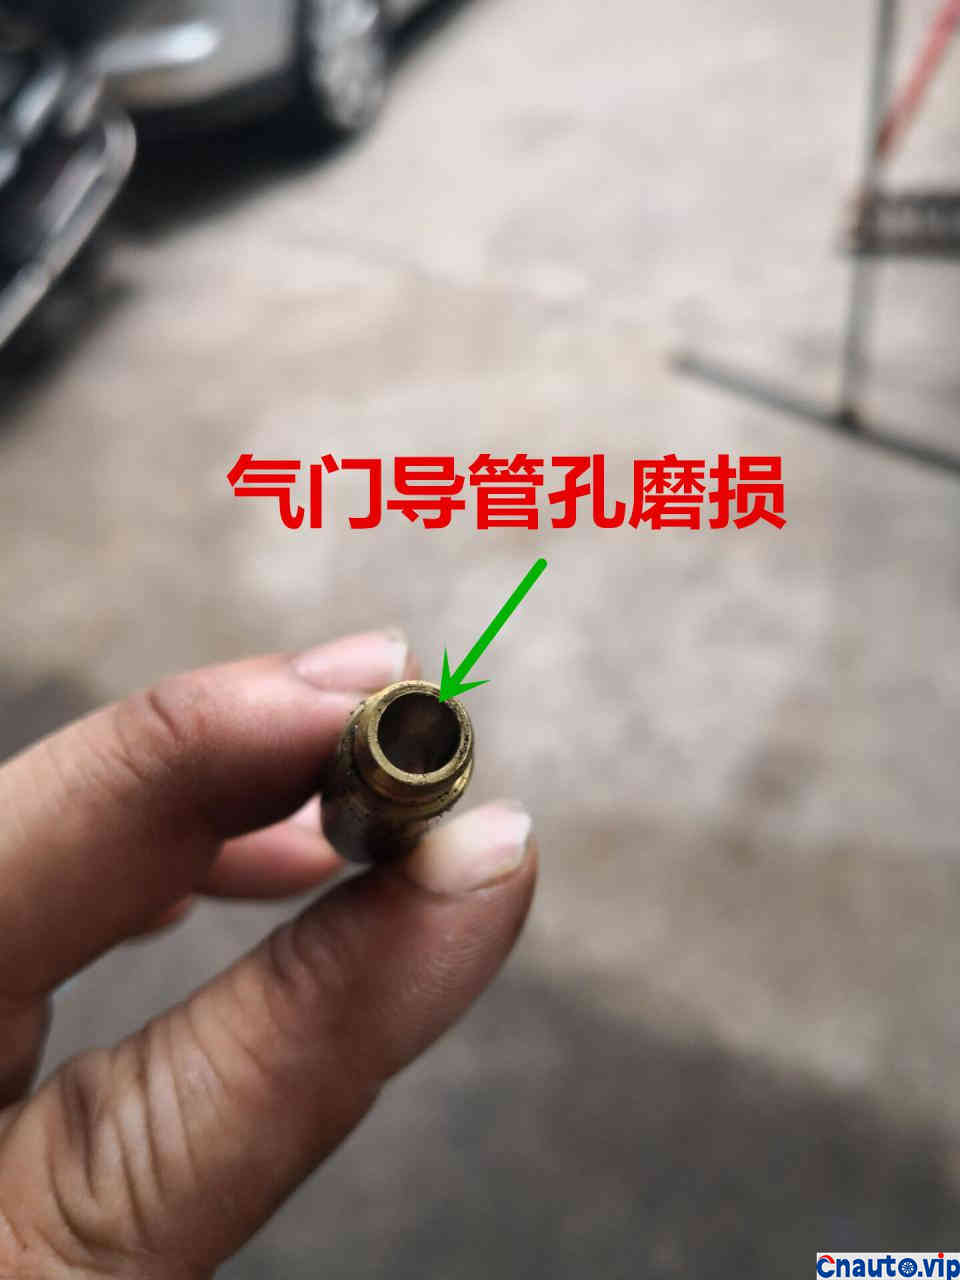
If the vehicle is used for a long time, the valve will be opened and closed for hundreds of millions of times, and the valve guide is easy to wear. If the gap between the guide and the valve rod becomes large, the oil will run away.
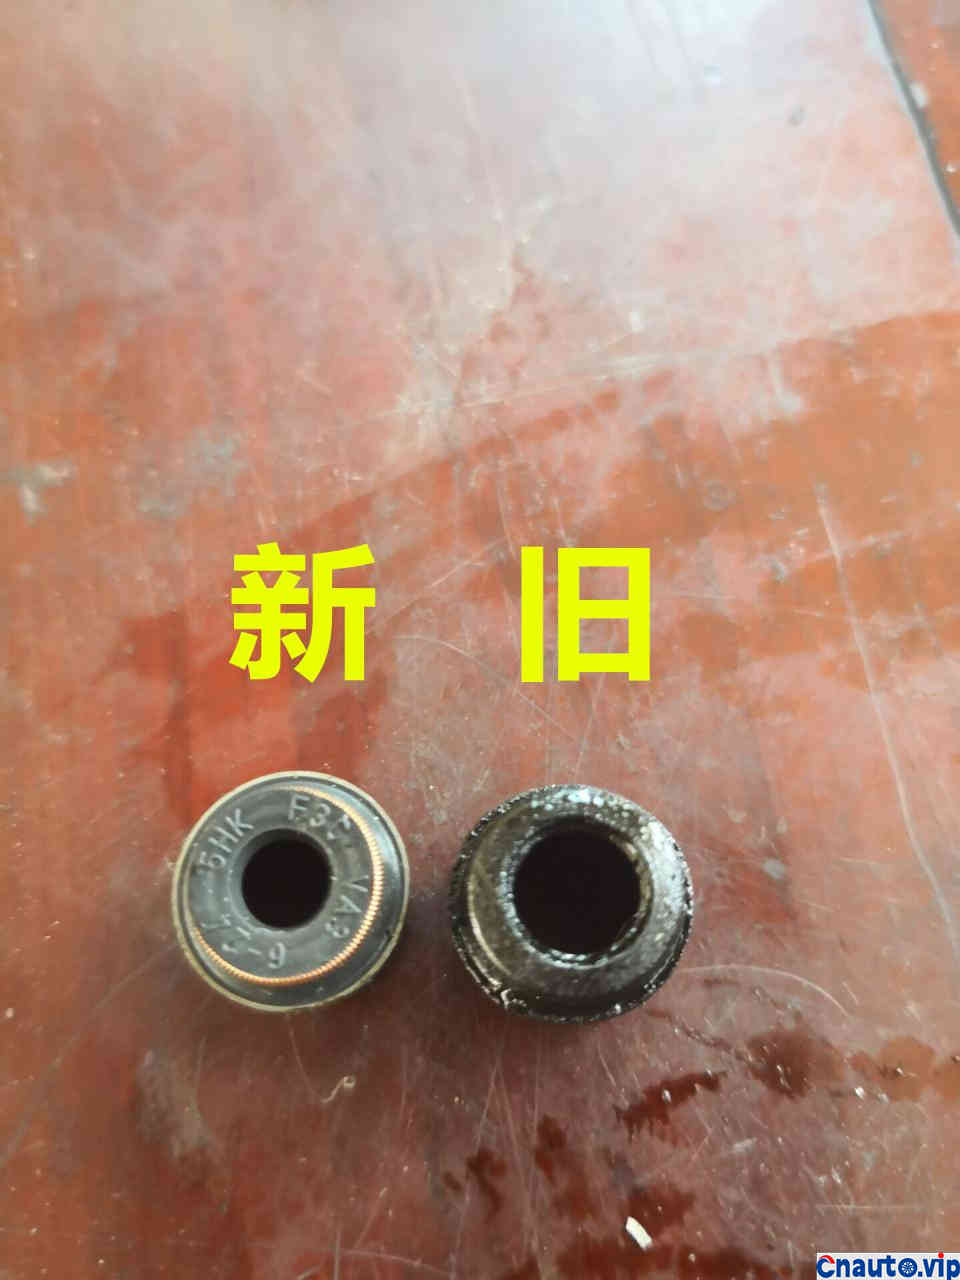
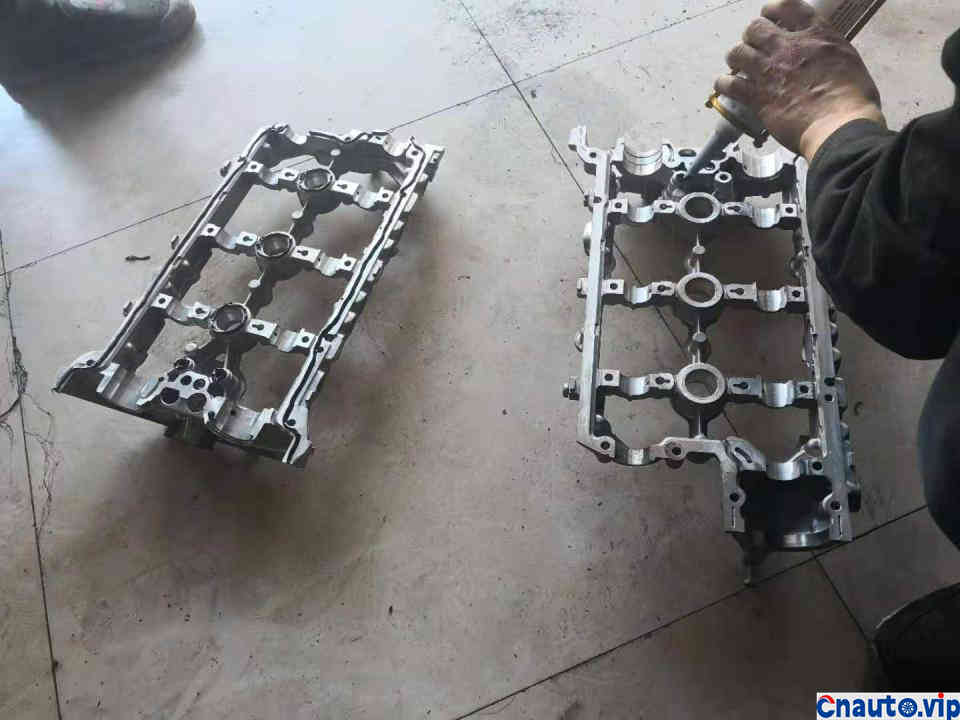
Valve oil seal as a rubber part, in the case of engine high temperature, high pressure and oil, even the oil-resistant rubber will age. The picture always shows the comparison of new and old valve oil seals, one is as tight and elastic as a girl, and the other is as relaxed and rigid as an aunt. The way I play here refers to the skin of girls and aunts, don’t think wrong.
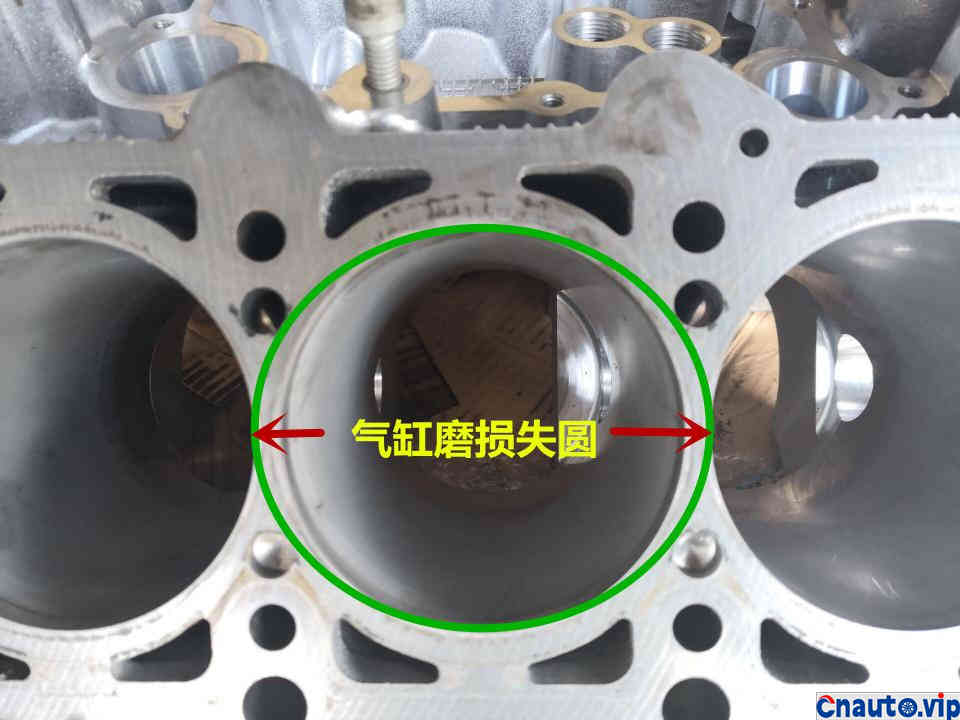
Aluminum alloy cylinder block has many advantages, but it also has a disadvantage that can not be avoided, that is, it is not wear-resistant. The cylinder wall of aluminum material is scraped by steel piston ring, so it is easy to wear and lose circle.
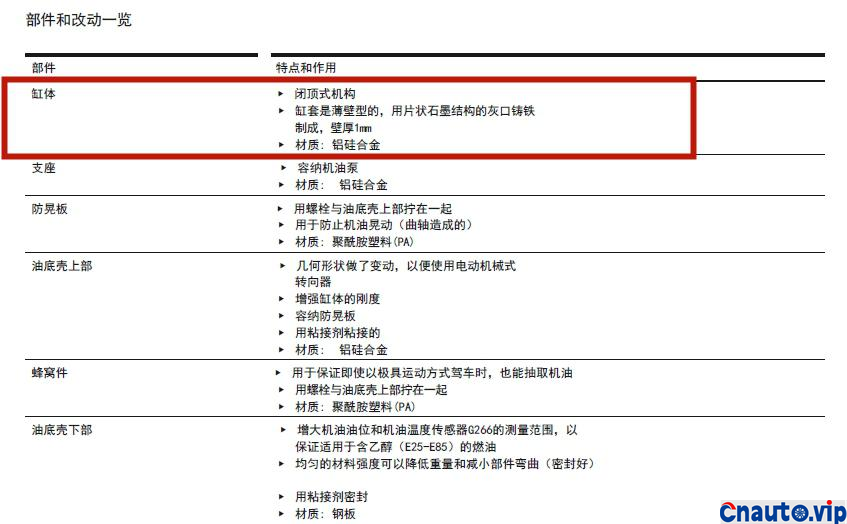
In fact, Audi manufacturers are also aware of this problem and have taken remedial measures, that is, a thin-walled cylinder liner with a thickness of 1 mm is embedded in the aluminum cylinder block. Because the iron sleeve is wear-resistant, it can effectively reduce the problem of cylinder out of circle.
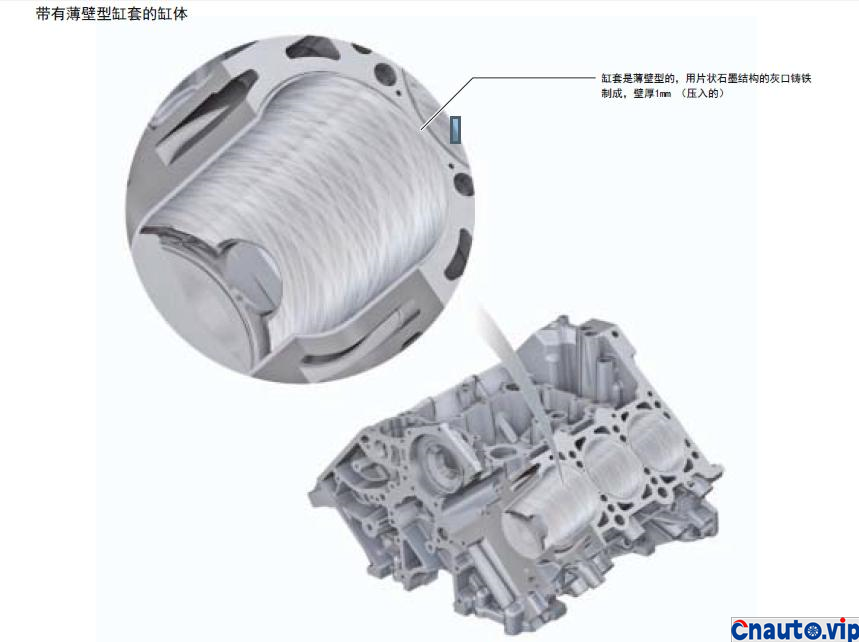
Take a closer look at the structure of this aluminum embedded iron sleeve, this is the original factory structure. For the early all-aluminum cylinder block engine, when we do maintenance outside, we also insert an iron sleeve into it, coincidentally, it is also 1 mm thick. The design idea of the original factory coincides with the idea of external maintenance, which explains? Great minds think alike!
-disassembly and inspection section-
Practice is the sole criterion for testing truth! We have done an analysis of burning engine oil before, so let’s take this engine as an example to see whether it burns oil or not.
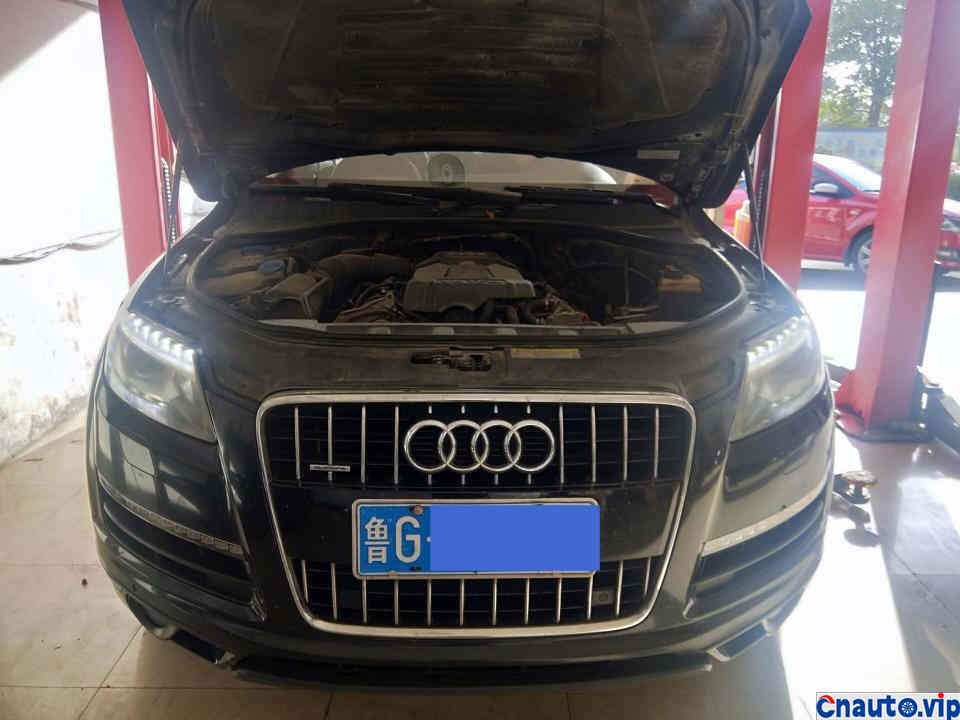
This is today’s protagonist, Q7 slightly modified PA version, in fact, the original and PA as long as look at the headlights with LED beads to know. In which era of tearful eyes, it seems that many cars like to stuff a few LED inside the headlights, and those without LED tear-eye pearls are embarrassed to go out and say hello to people!
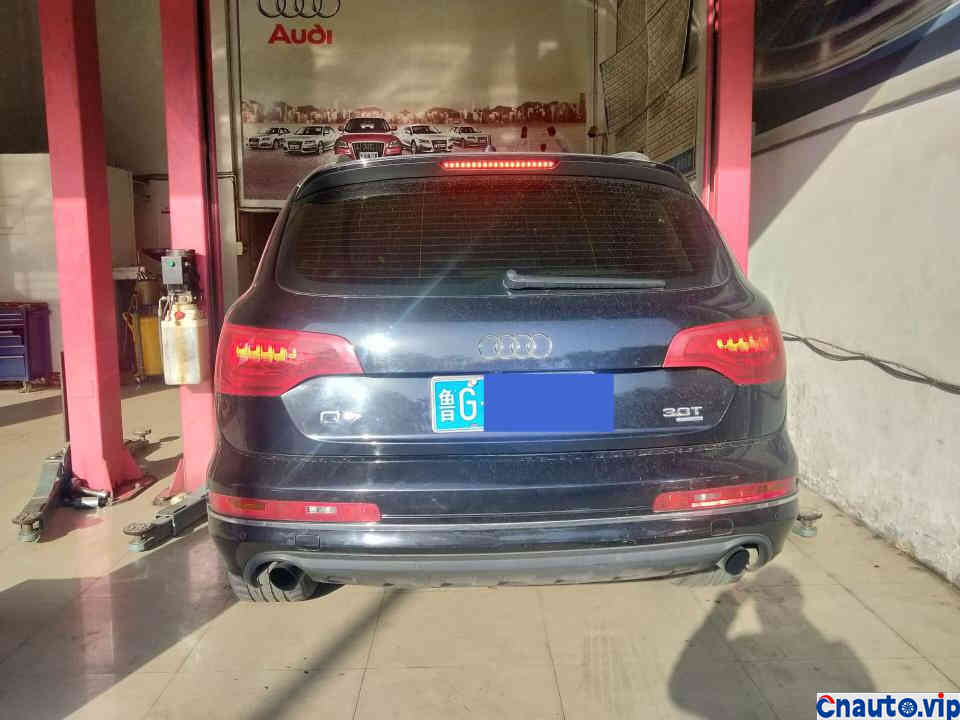
Similarly, the Q7 taillight has also been changed to an all-LED bead structure, changing the old incandescent bulb structure, although the failure rate is low, but once broken, the cost of replacement is also very high.

This can be regarded as an ID card, with ID number (frame number), date of birth, birth nationality, mother’s address.
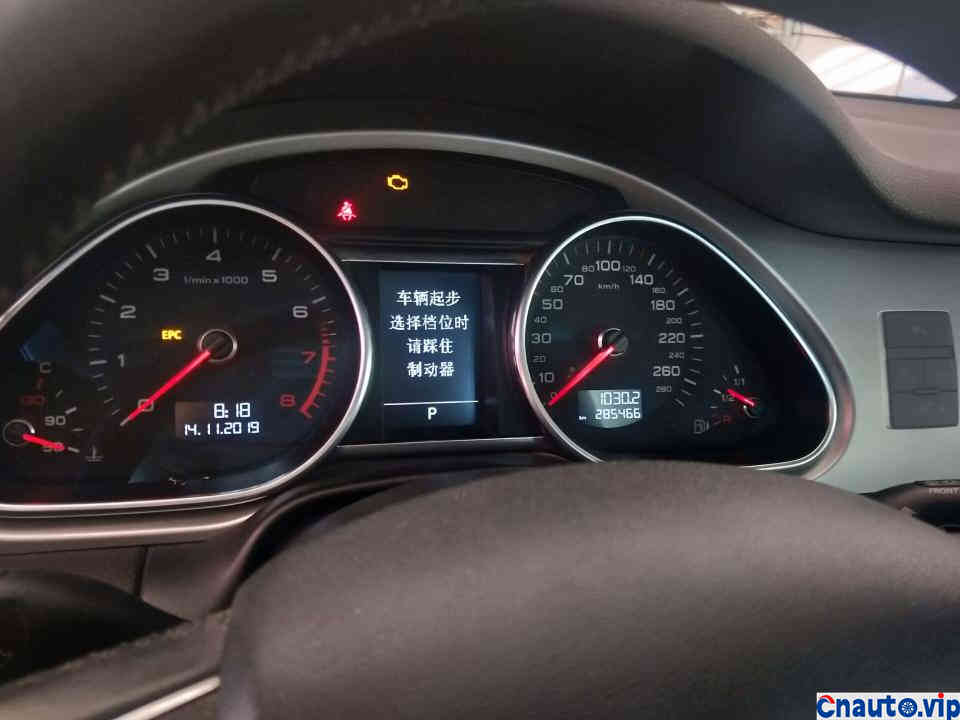
The actual mileage is close to 300000, which is enough to run
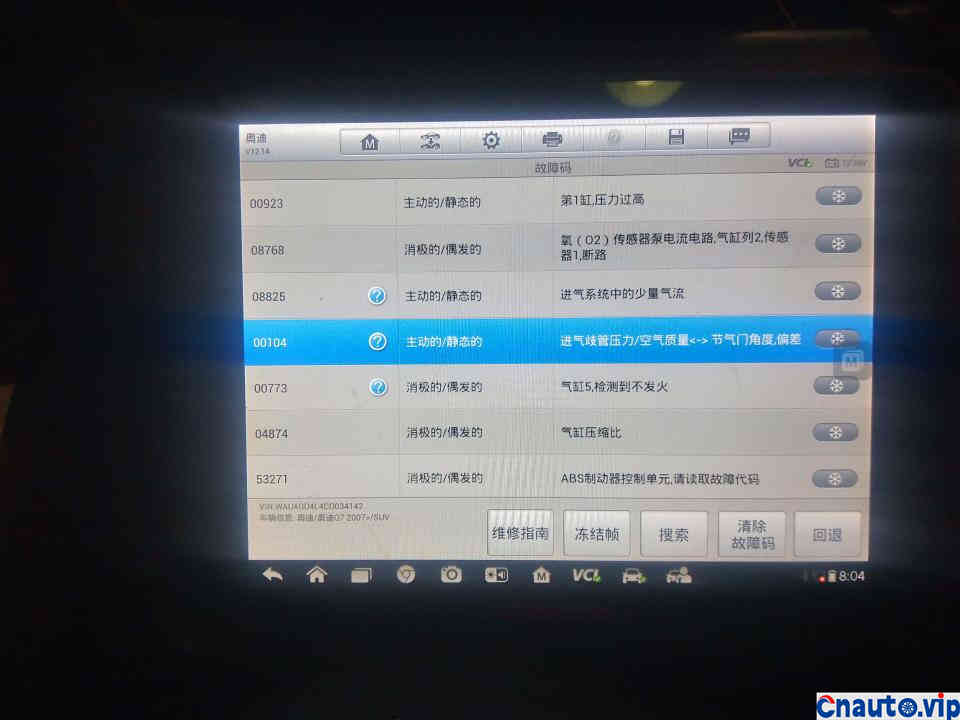
My own testing computer was borrowed, and the Daotong system borrowed next door read the fault code.
Explain one by one: the pressure in the first cylinder is too high, because the carbon deposition in the oil of the burner is serious; the failure of the oxygen sensor is very simple, and the oxygen sensor is broken; a small amount of air flow in the intake system, air leakage, and the source of air leakage is caused by the whole ejection of the waste valve on the oil-gas separator; the intake manifold pressure air quality throttle angle deviation, both because of serious carbon deposition at the throttle and a broken vacuum tube on the intake pipe, resulting in air leakage. Cylinder 5 is not on fire and the ignition coil is useless.
What’s next is the complication, not the cause. If you don’t explain it, you can delete it when you finish repairing it.
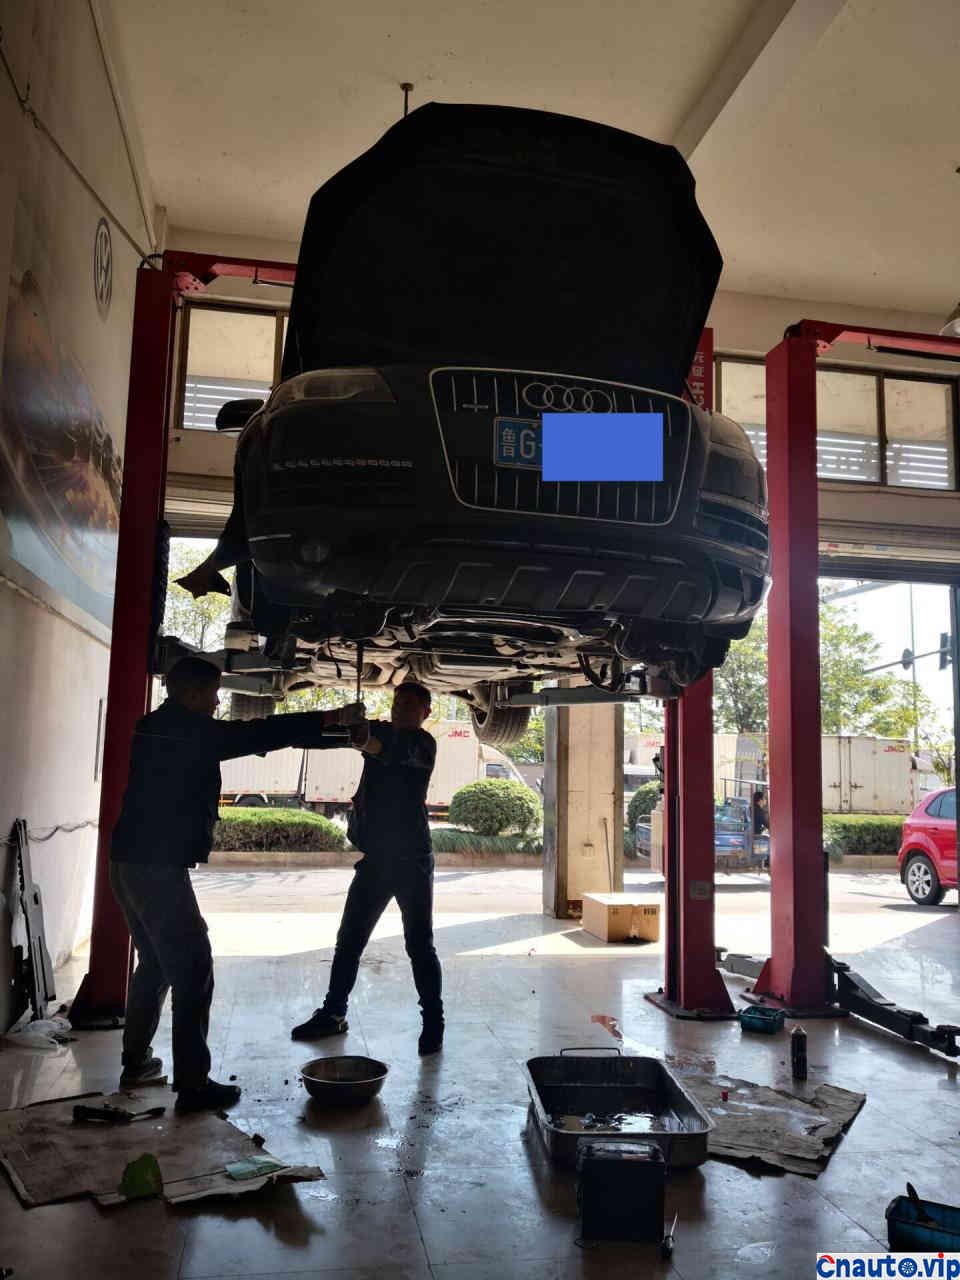
The car was jacked up, put off the oil and water, and began to decompose.
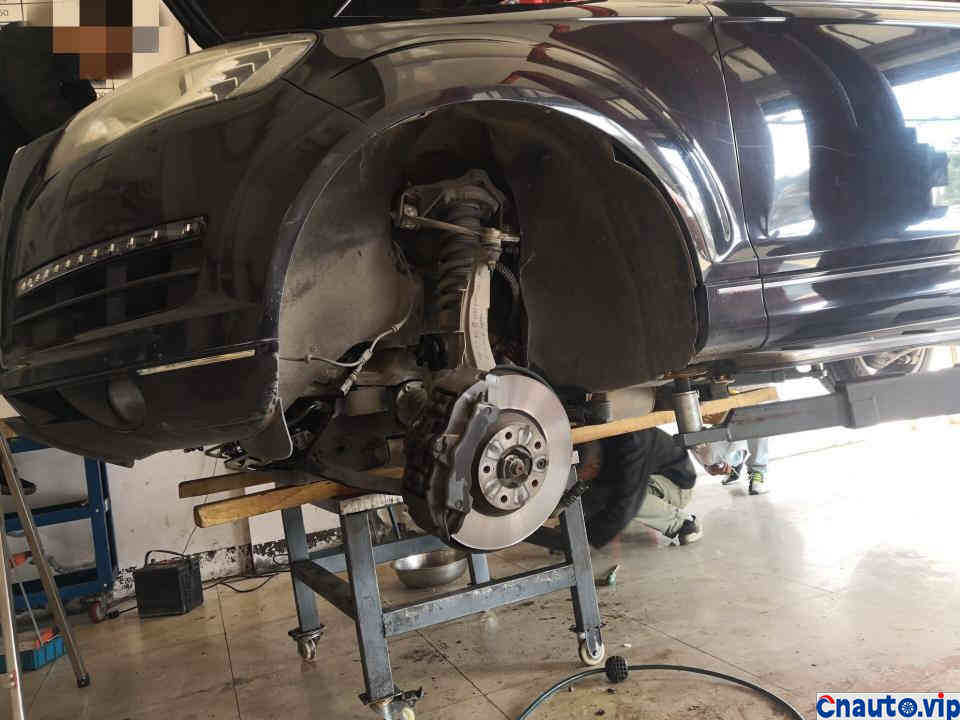
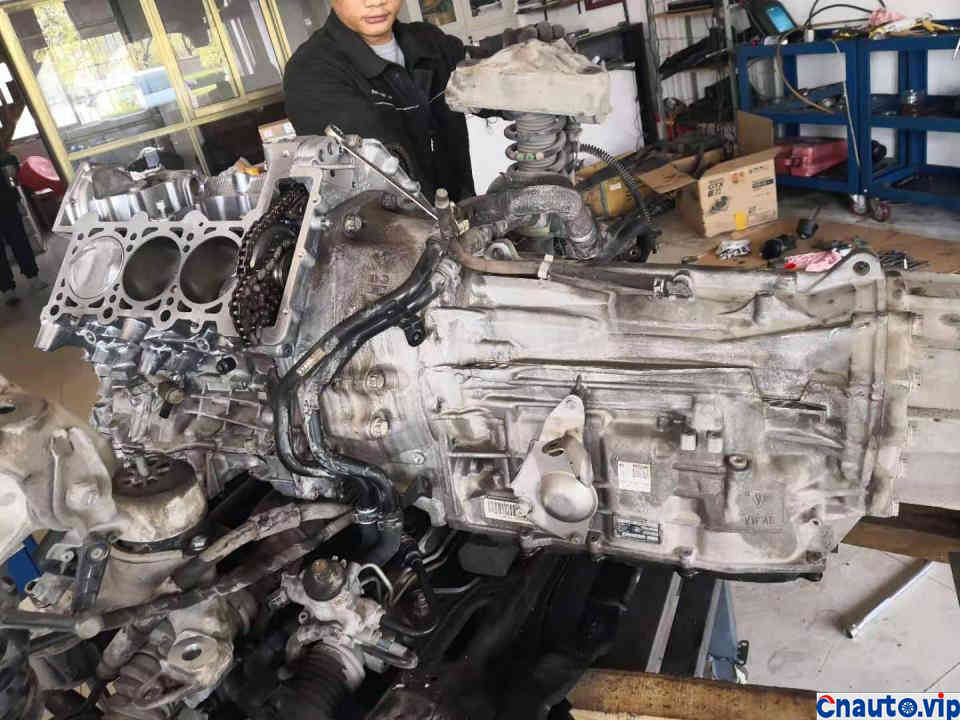
Break all the lines between the engine gearbox and the body, loosen the bracket screw, lift the body, the engine gearbox and the body are about to separate
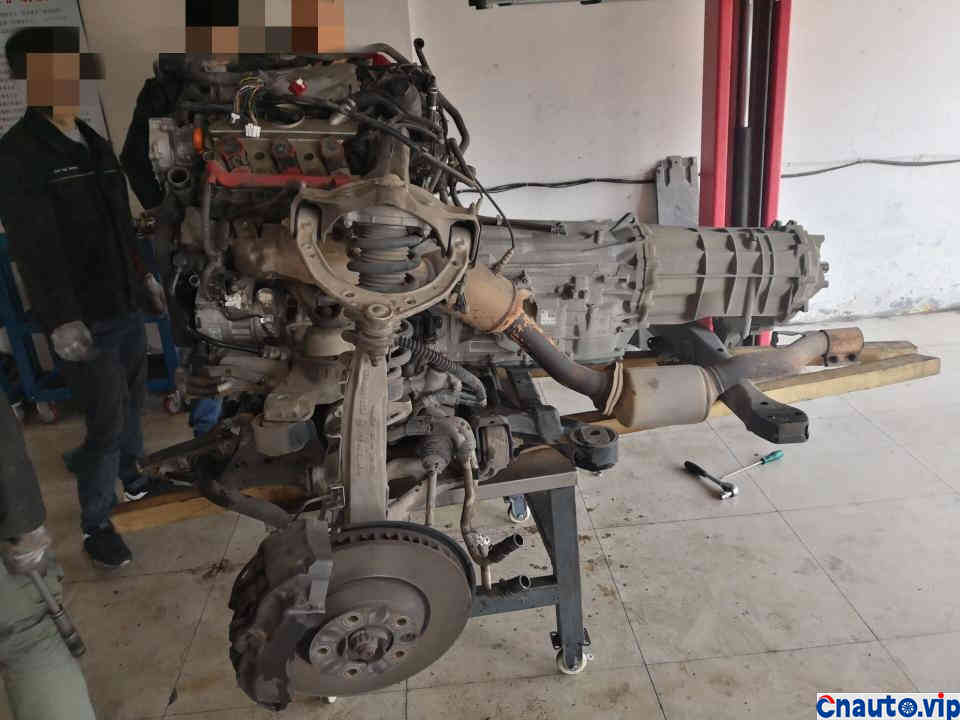
Together with chassis and engine gearbox assembly and body separation
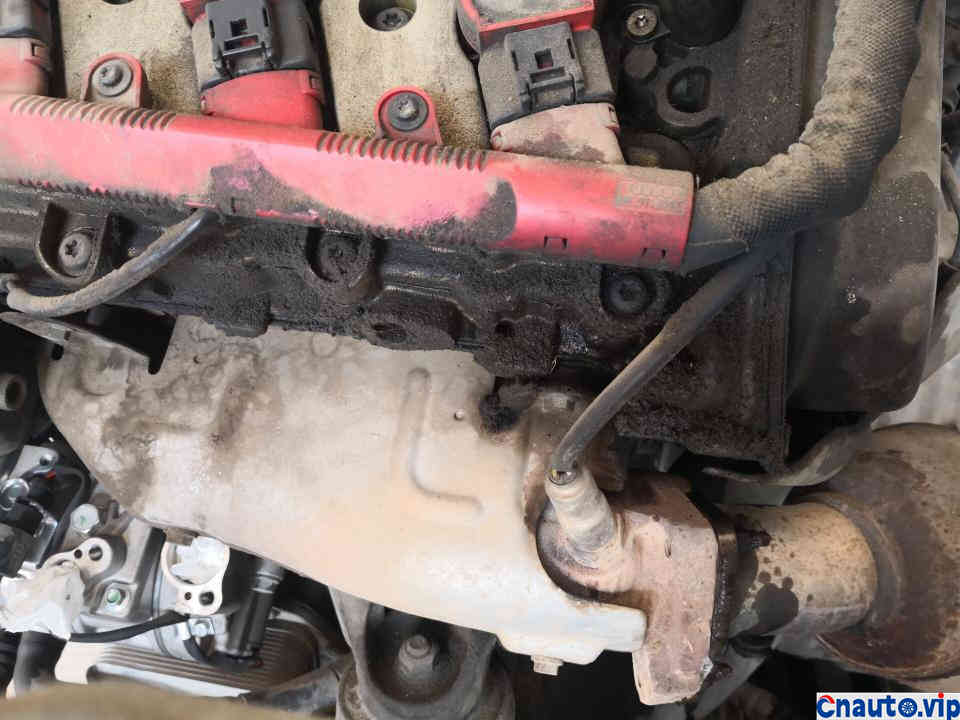
Take a closer look, oil is leaking everywhere, it’s terrible to see.
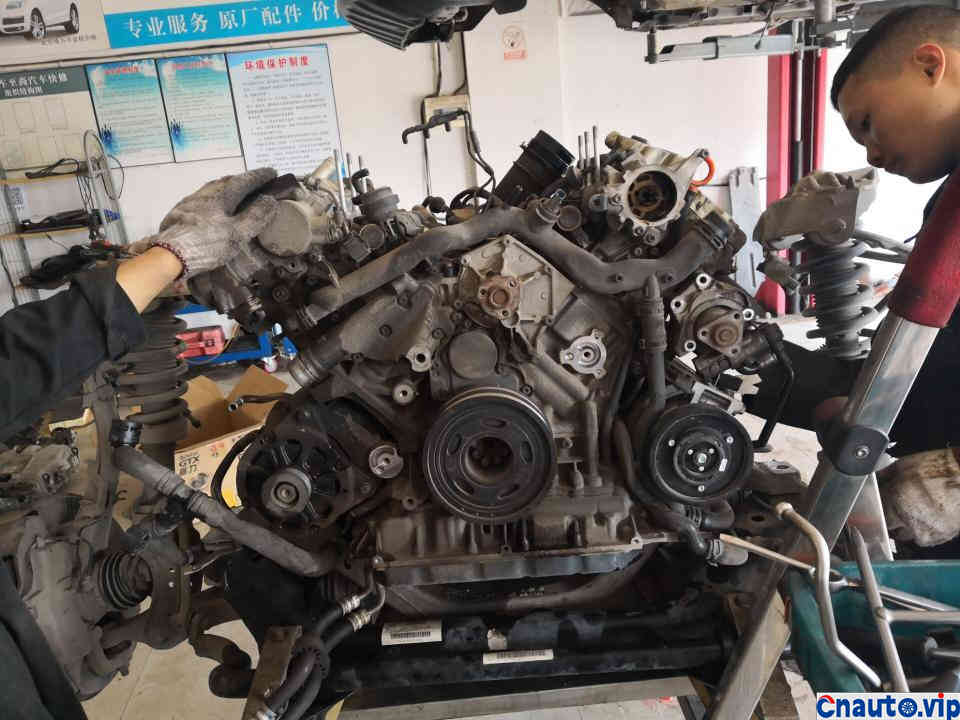
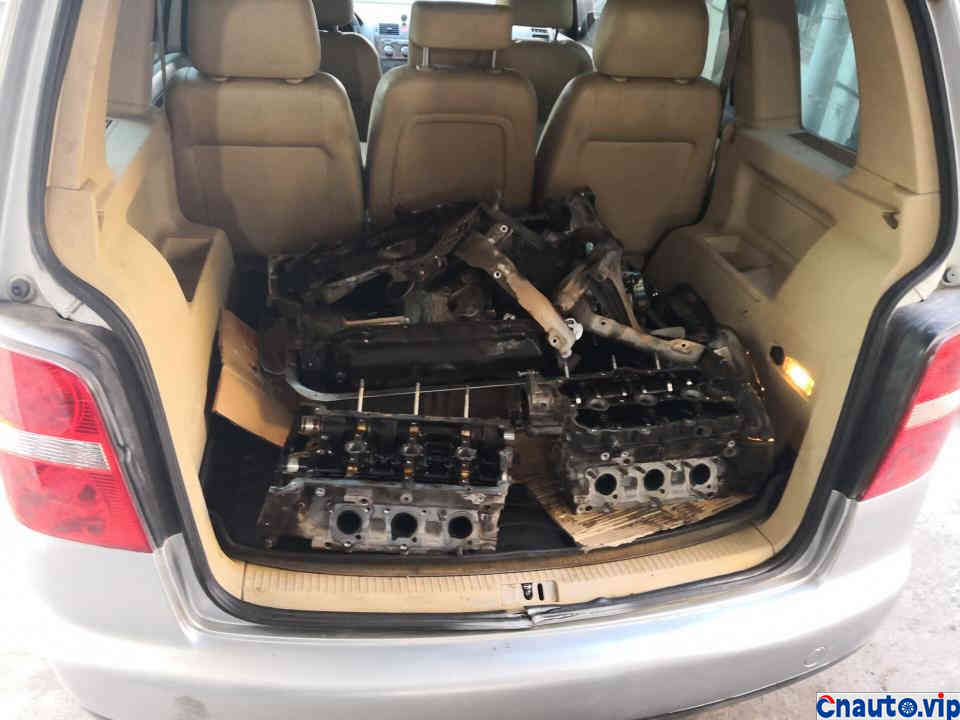
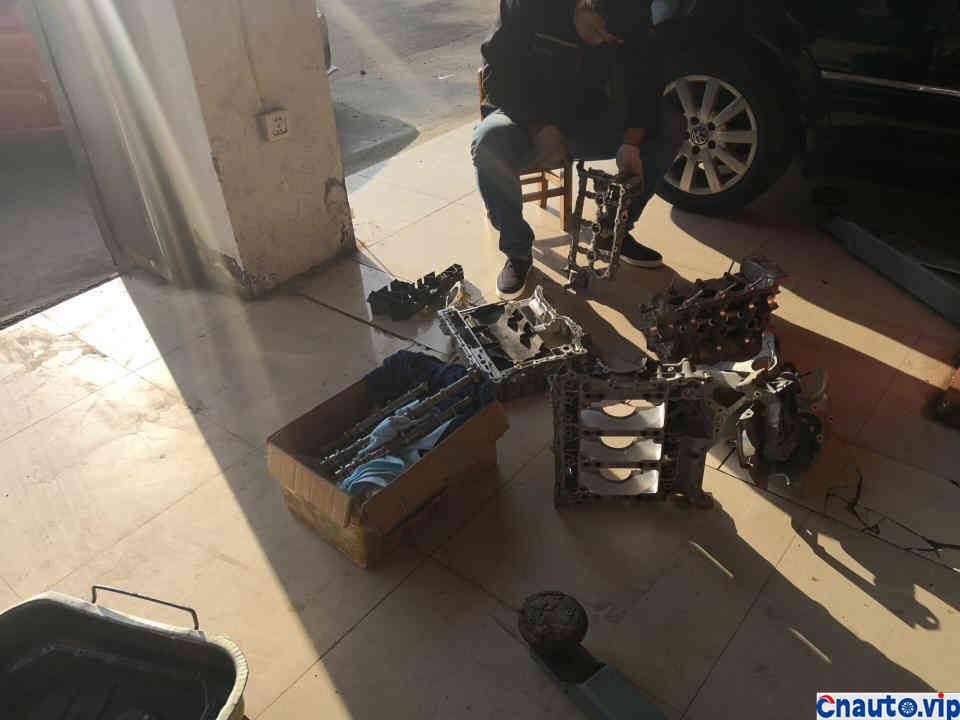
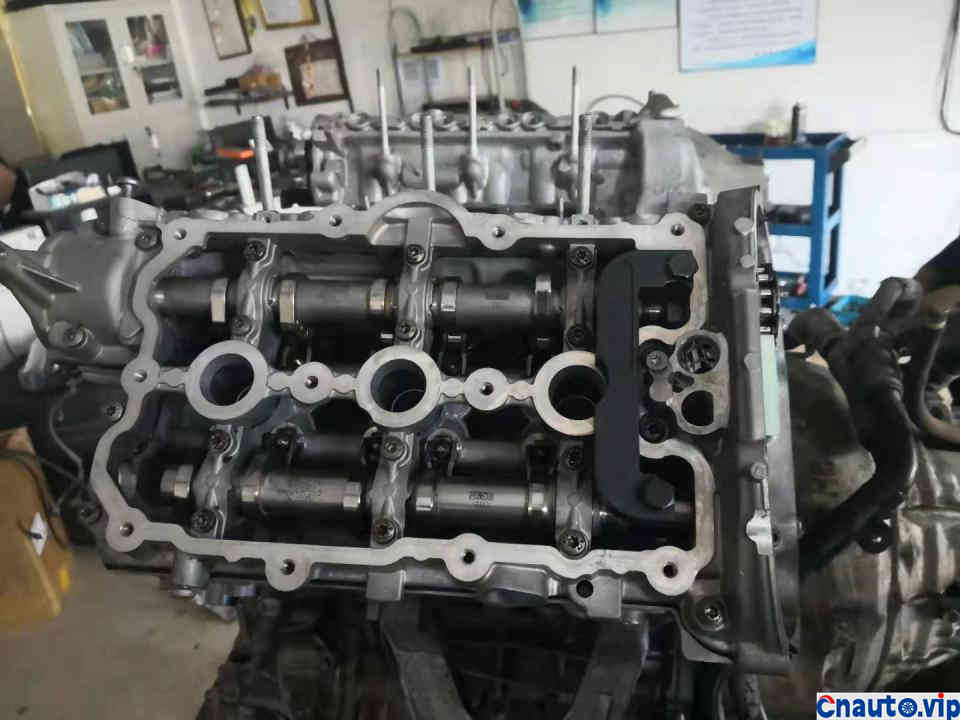
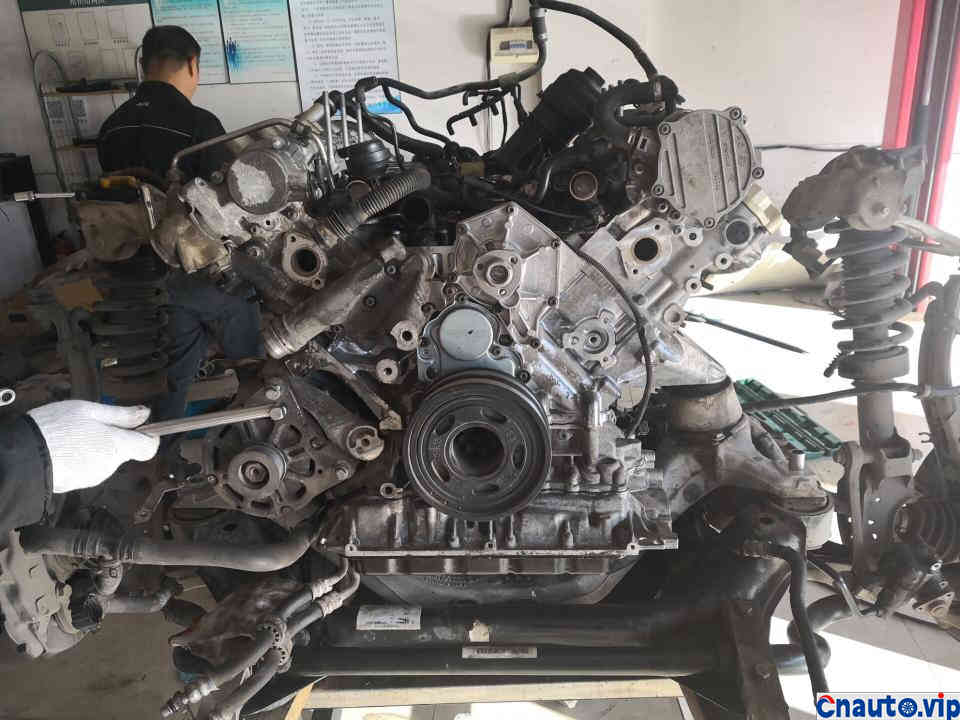
Gradually decompose the engine, this engine is no better than EA888, there are many accessories and pipelines, which is more troublesome.

After opening the valve chamber cover, he found that the sludge was very serious. He asked him what kind of oil he used, and he said Castrol multi-pole protection. I said it’s impossible. Castrol oil is good. It can’t be so dirty. He said that because of burning oil, one liter has to be added for every 400 kilometers, and he hasn’t changed the oil for a long time.
So I suddenly realized that I was in the same place.
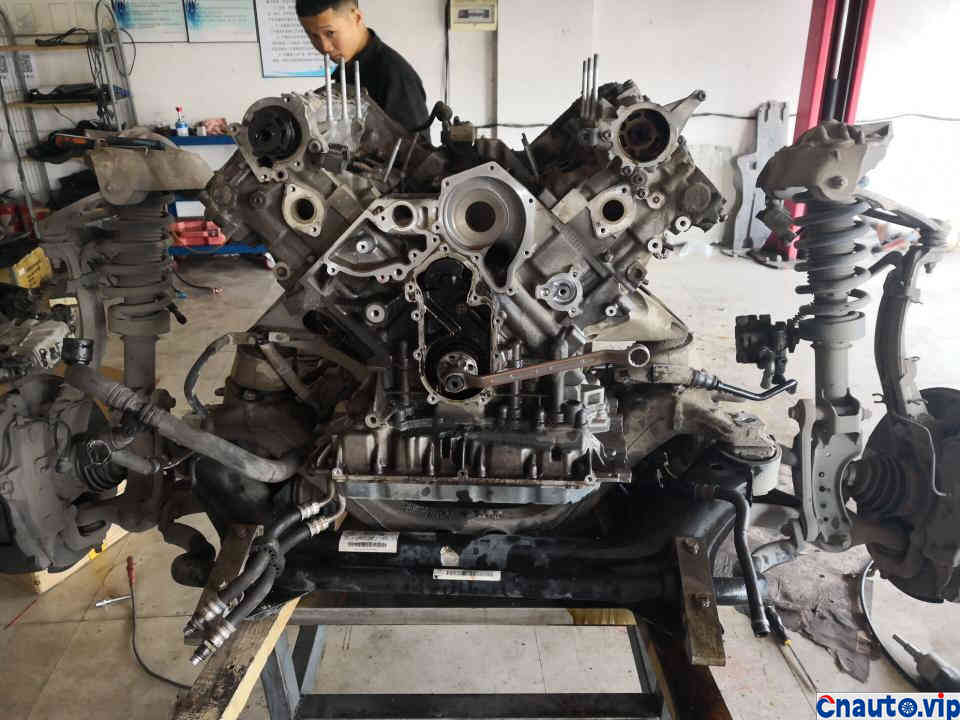
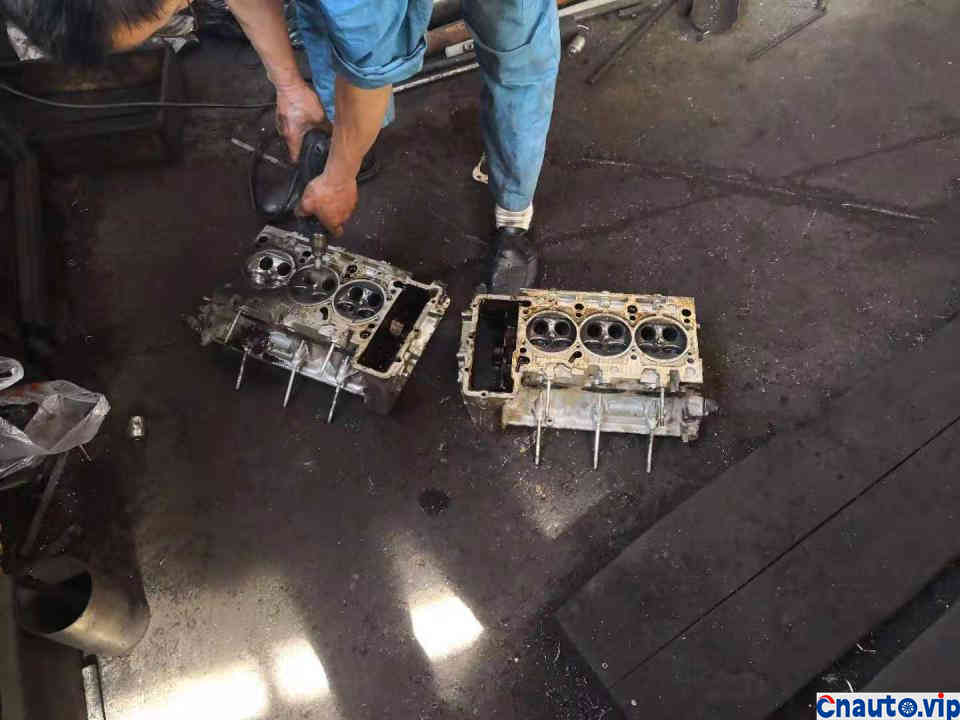
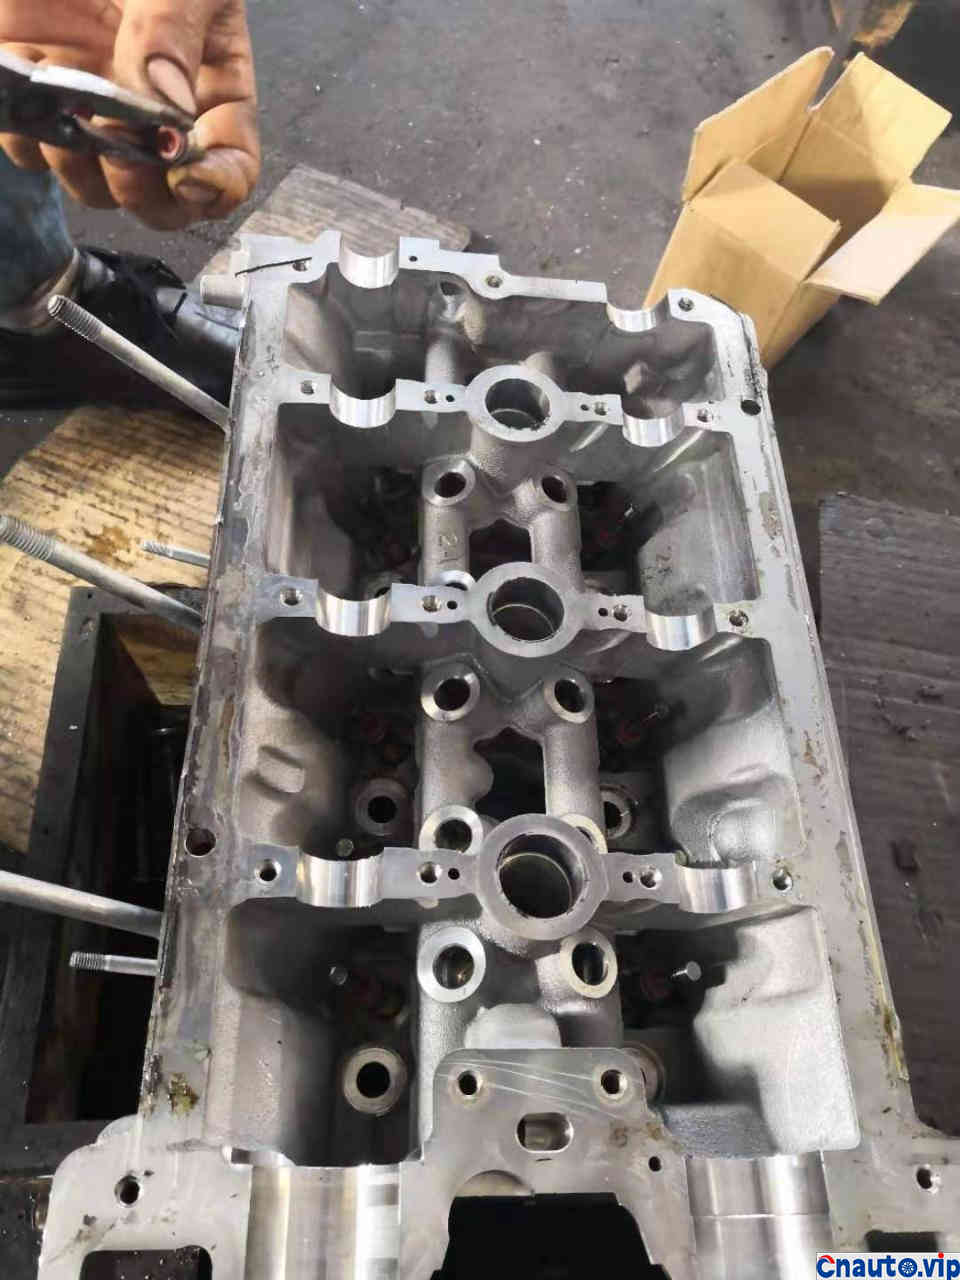
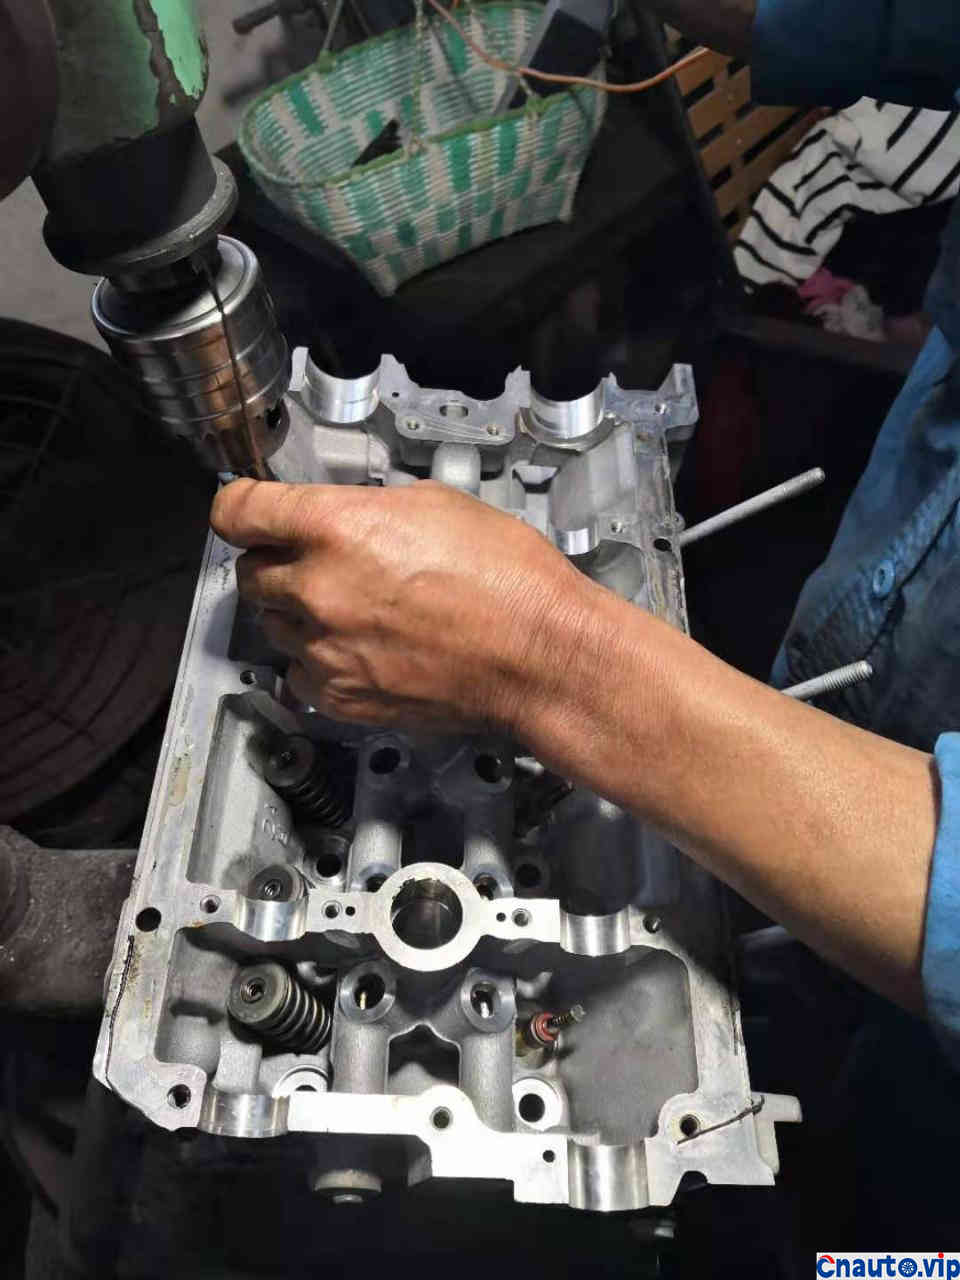
Gradually peel off the outer accessories, remove all kinds of end cover oil seals, and gradually decompose the engine.
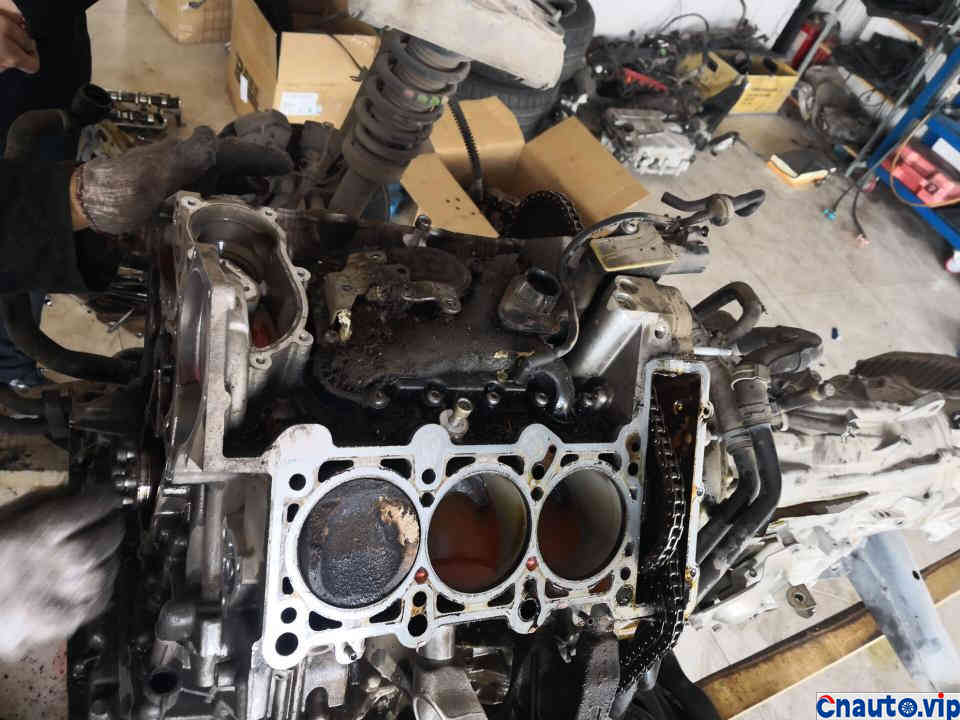
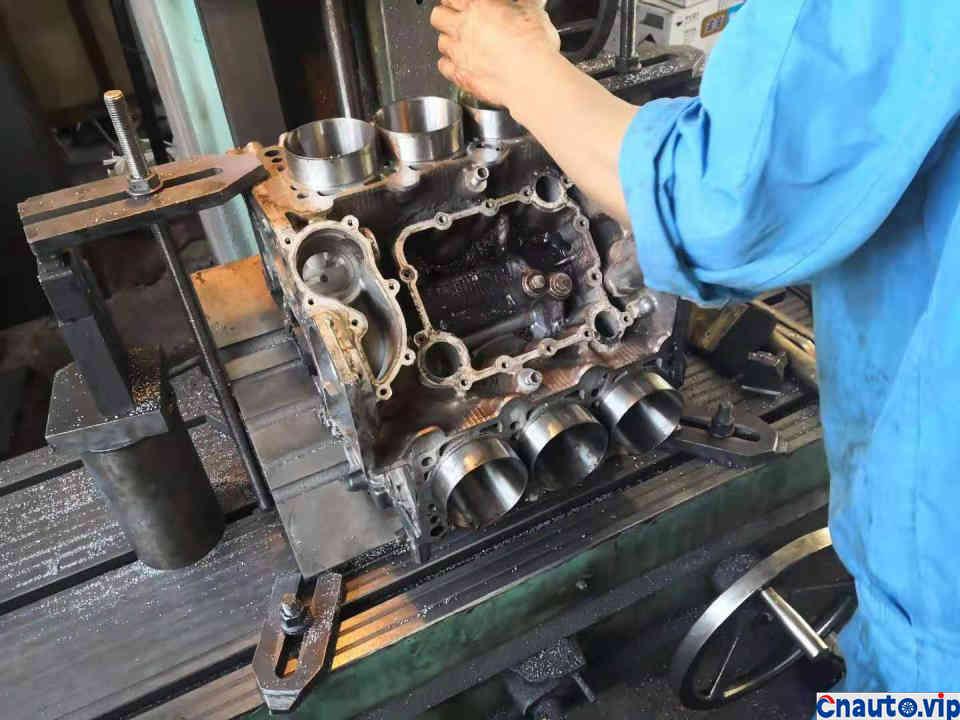
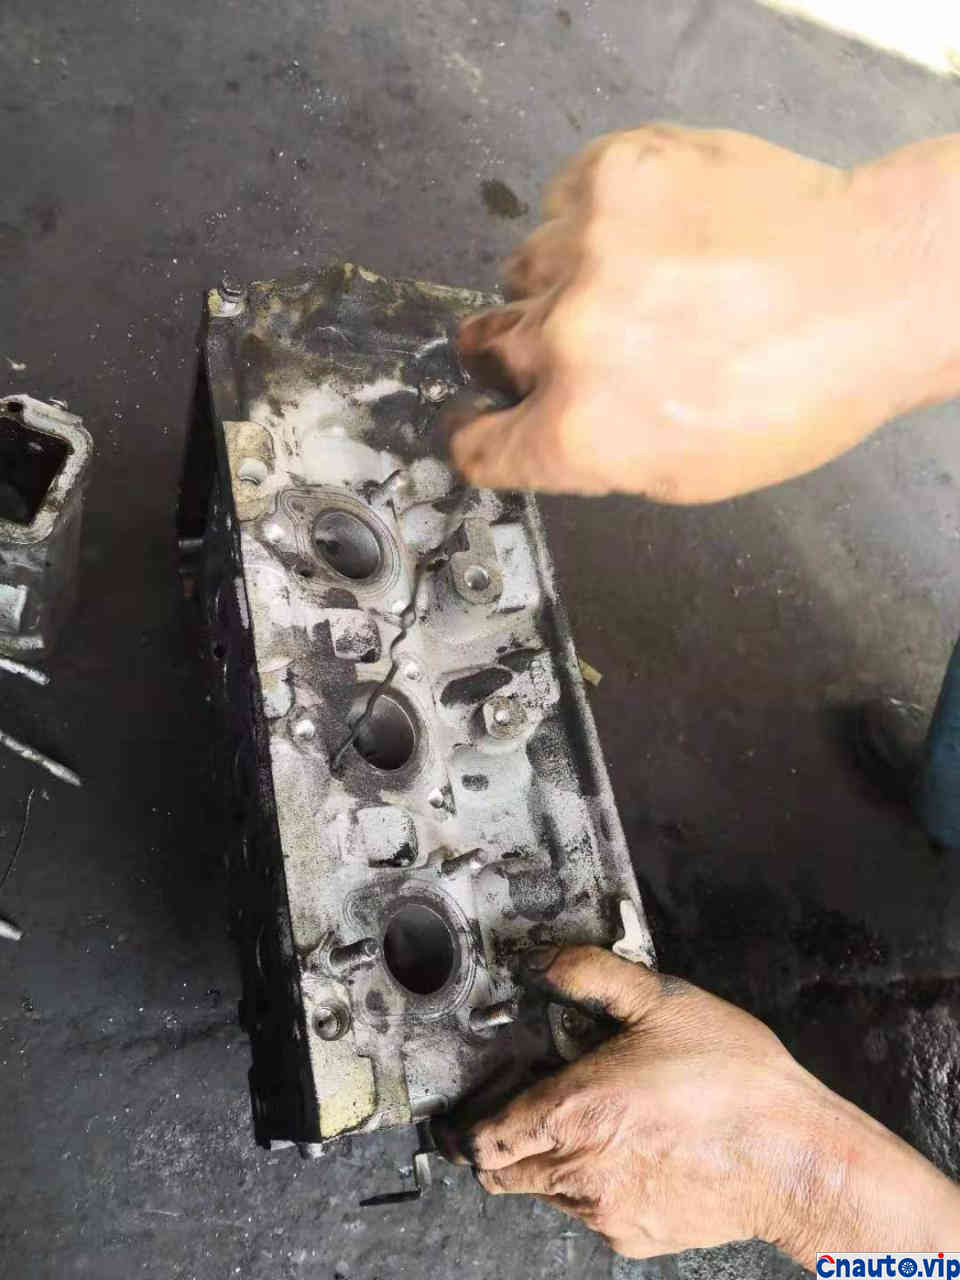
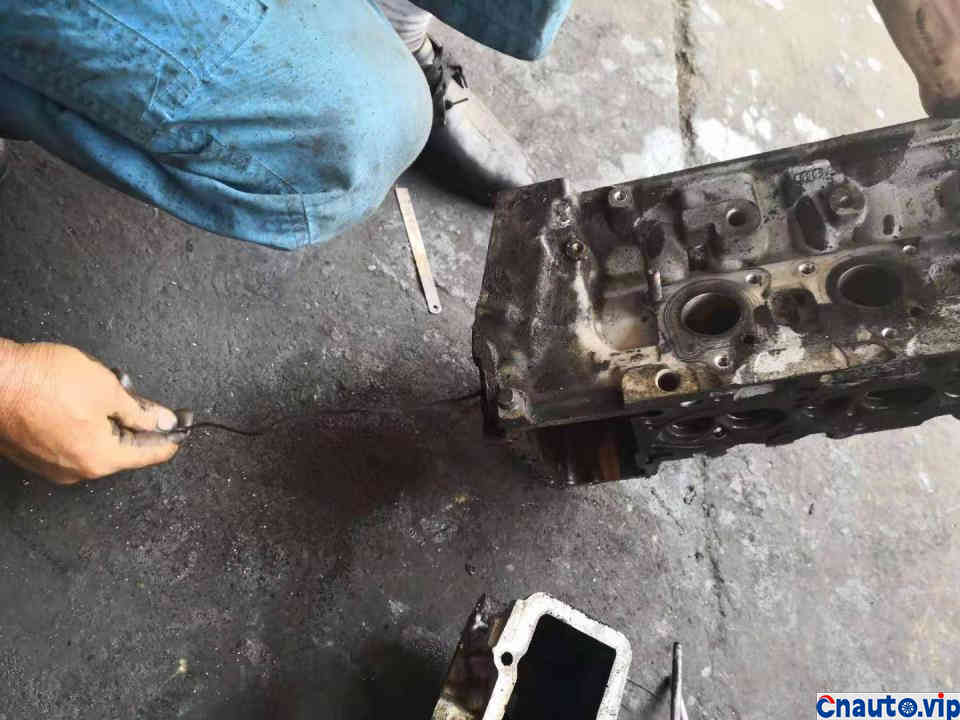
Take off the cylinder head and expose the cylinder piston. The carbon deposition at the top of the piston is very serious. It is normal to think about it. Burning engine oil always leaves some marks, right?
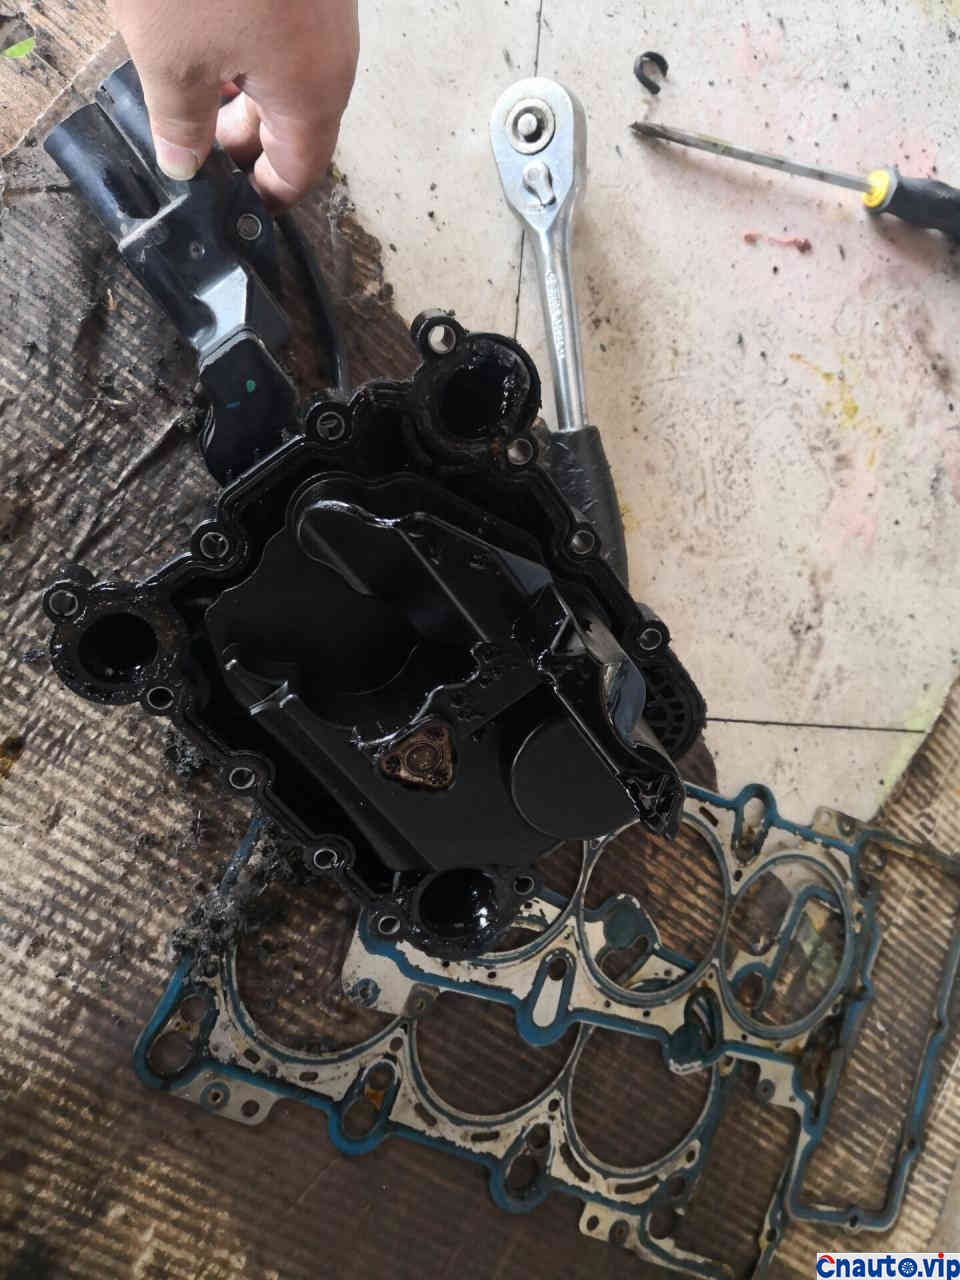
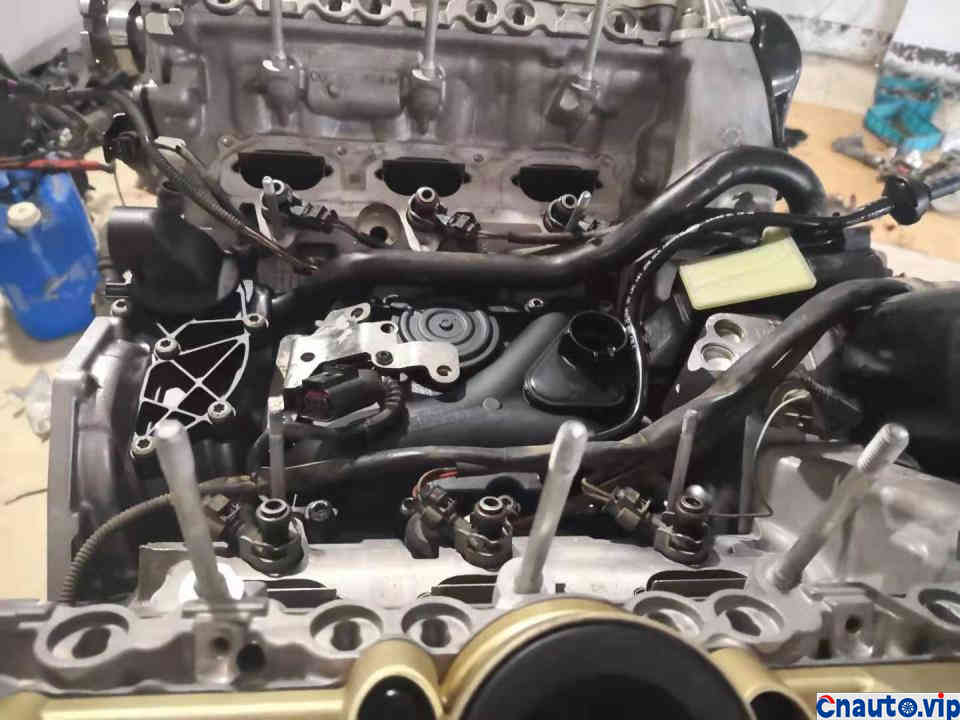
And look at this separator. The waterway sealing ring is broken, no wonder there is less antifreeze. At the same time, the waste gas valve at the top has protruded and the assembly must be changed.
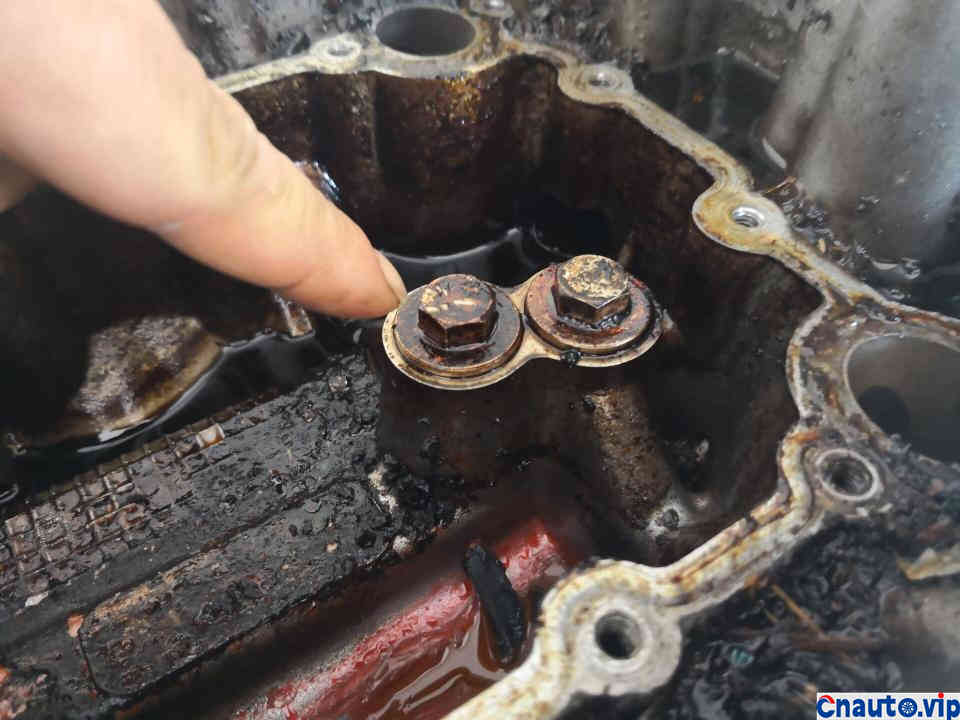
If you look at the Jerry-built design of the original factory, it is obvious that there should be two one-way valves, which is to change the prince for the raccoon cat and turn it into two cheap caps. After a while, you will understand.
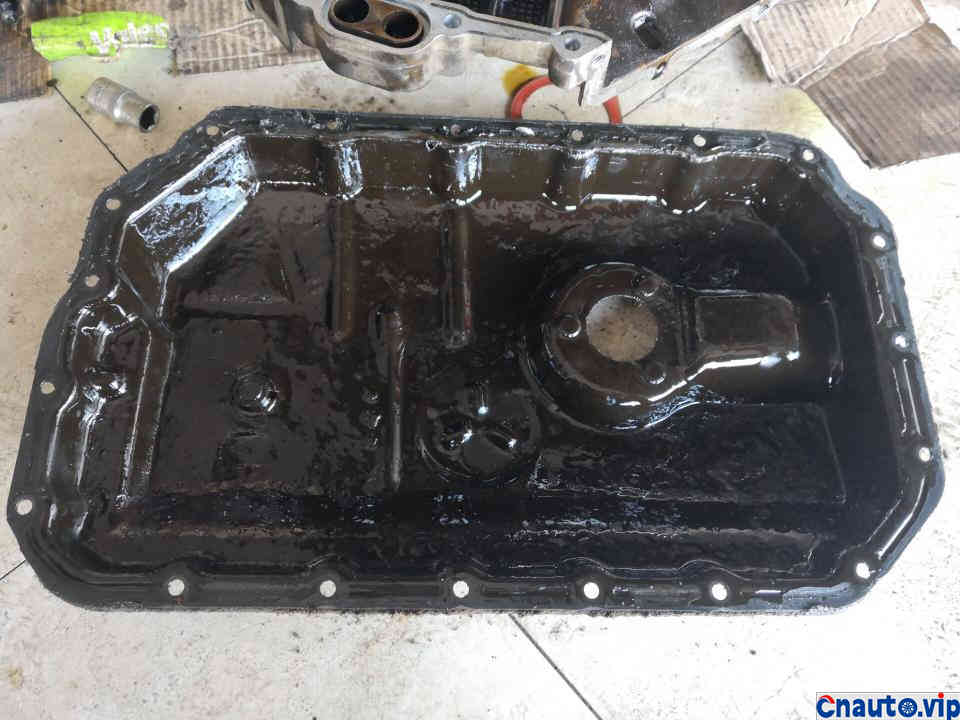
The mud in this oil pan, Amitabha Buddha, Amen Jesus, who will rescue this car?
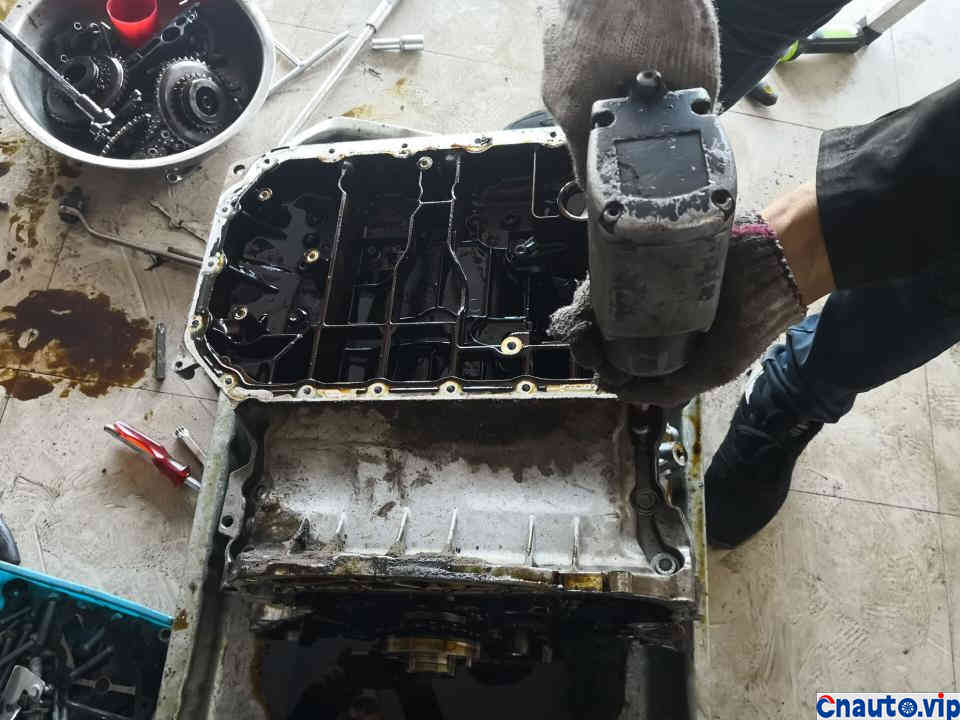
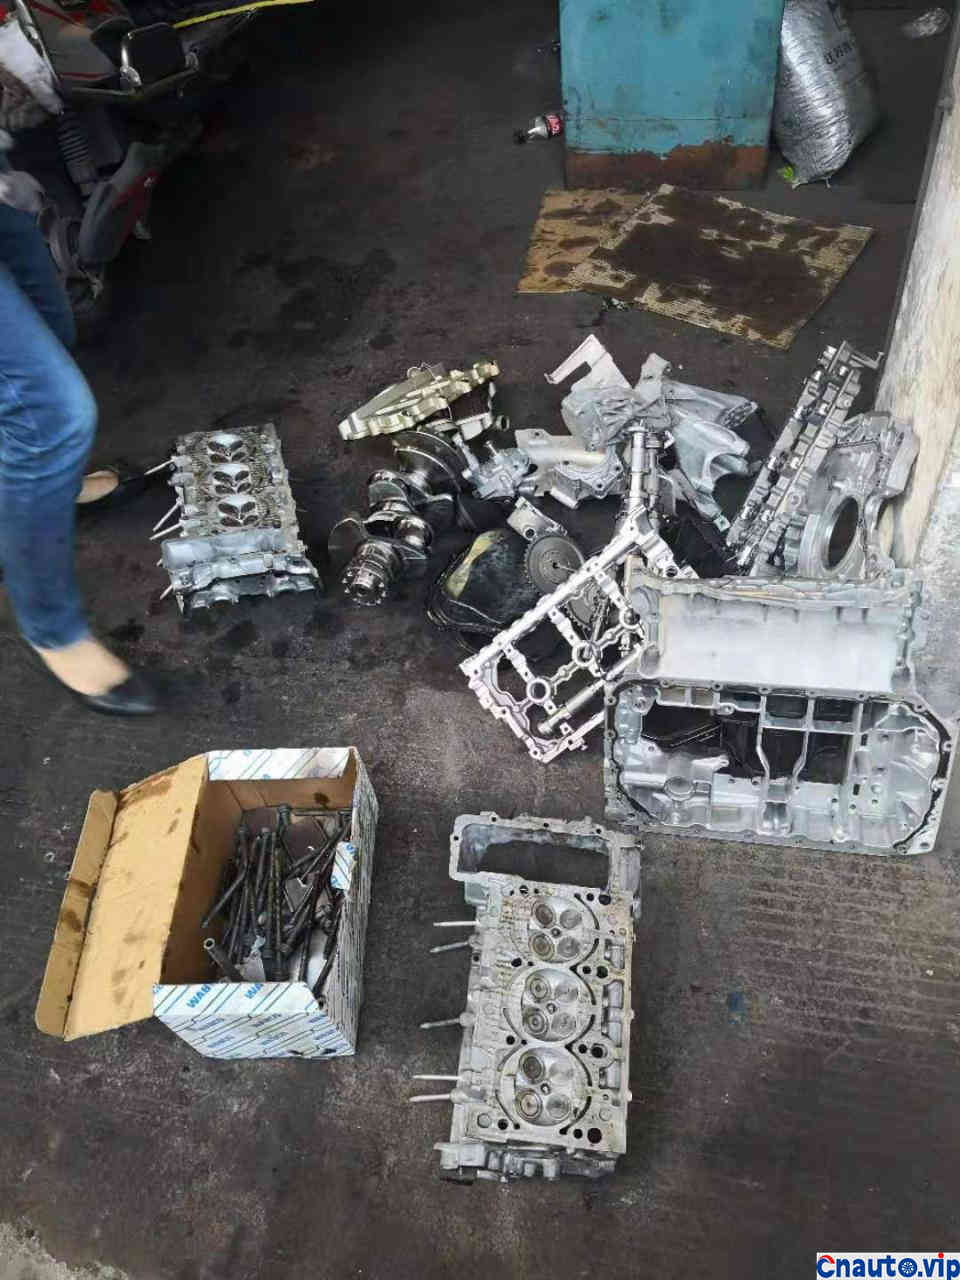
Regardless of whether it is dirty or not, continue to decompose the engine
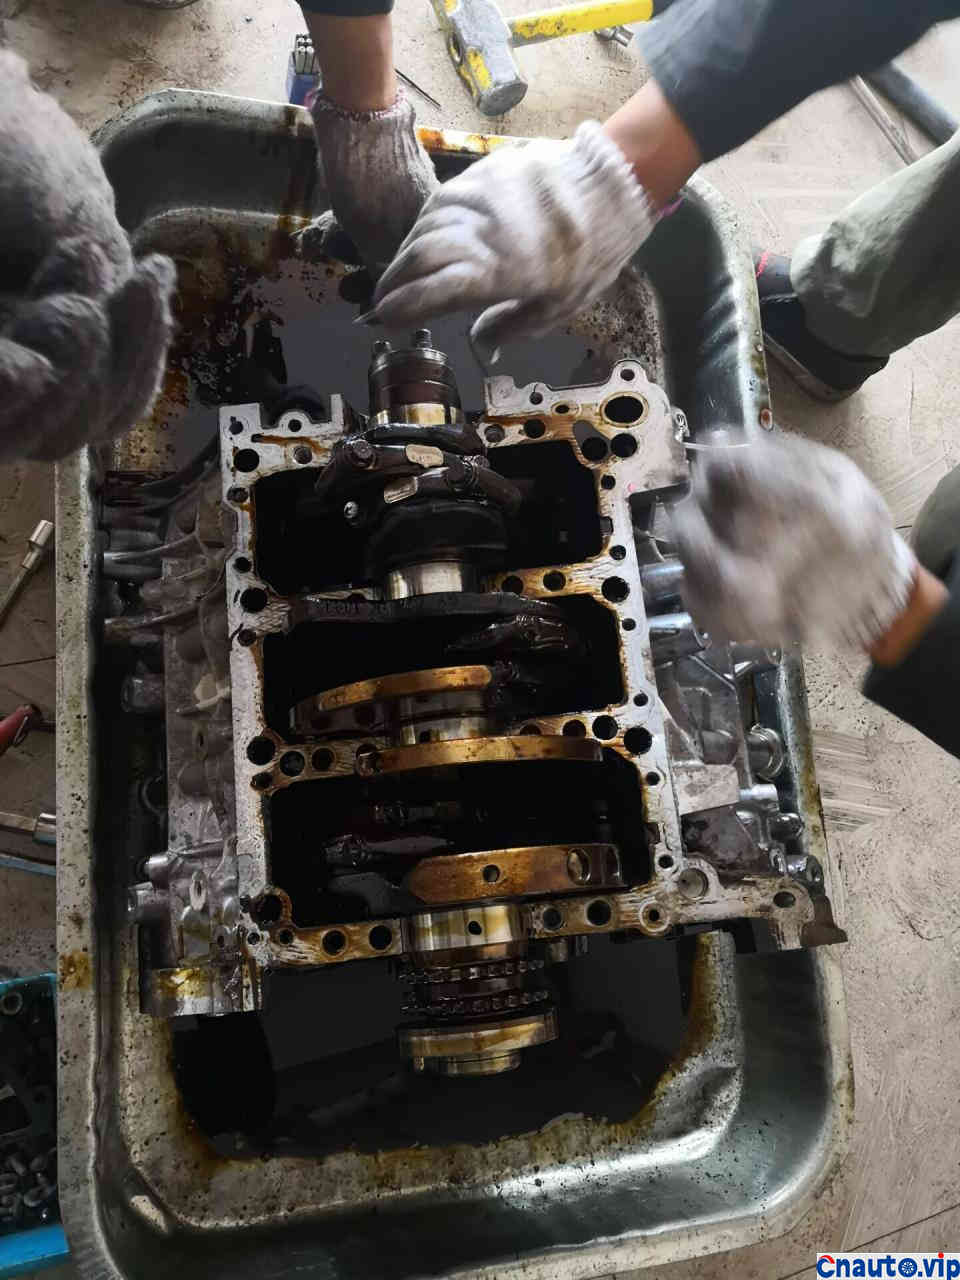
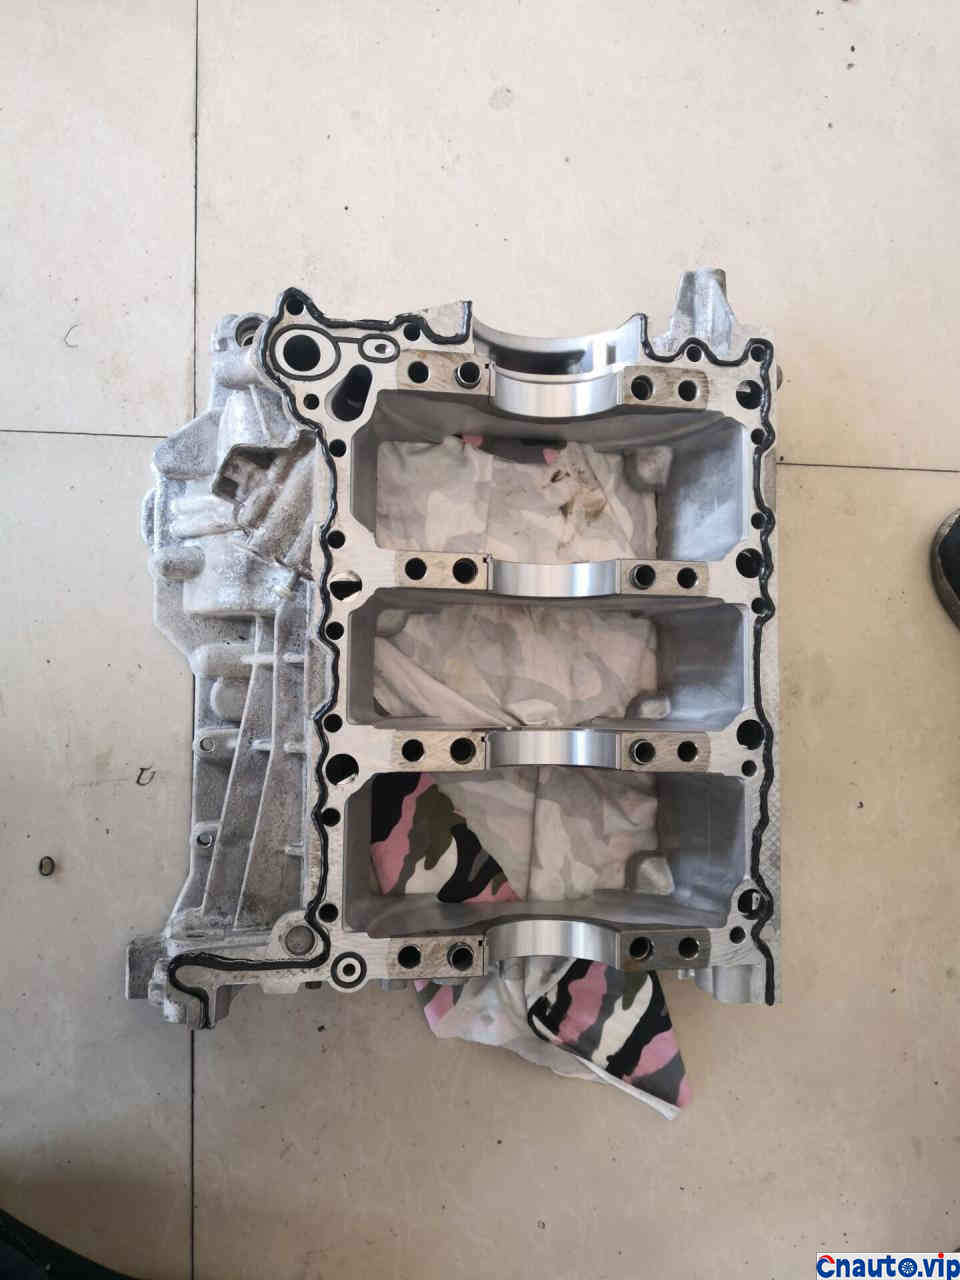
Until you see the crankshaft connecting rod.
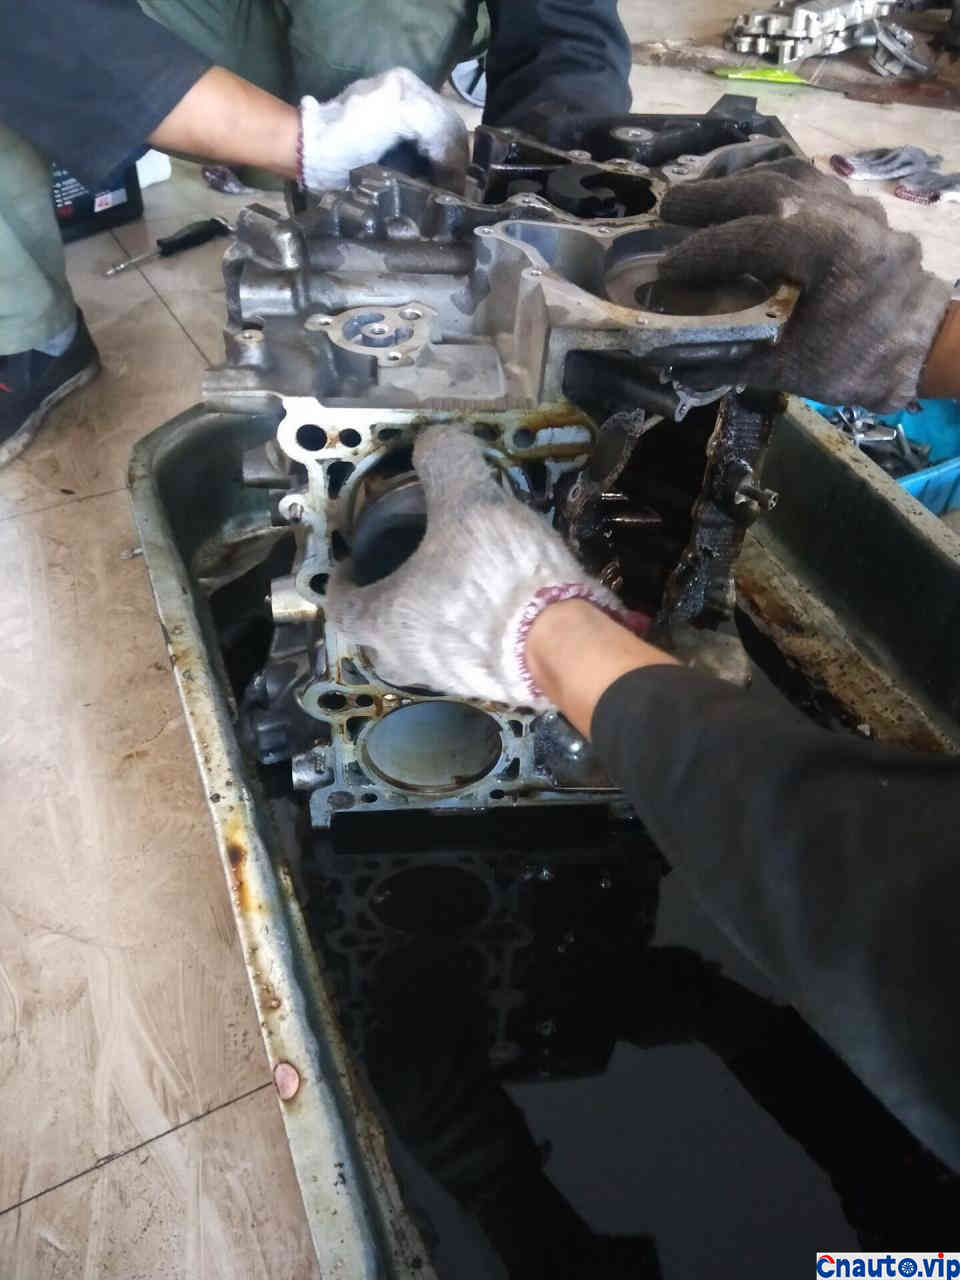
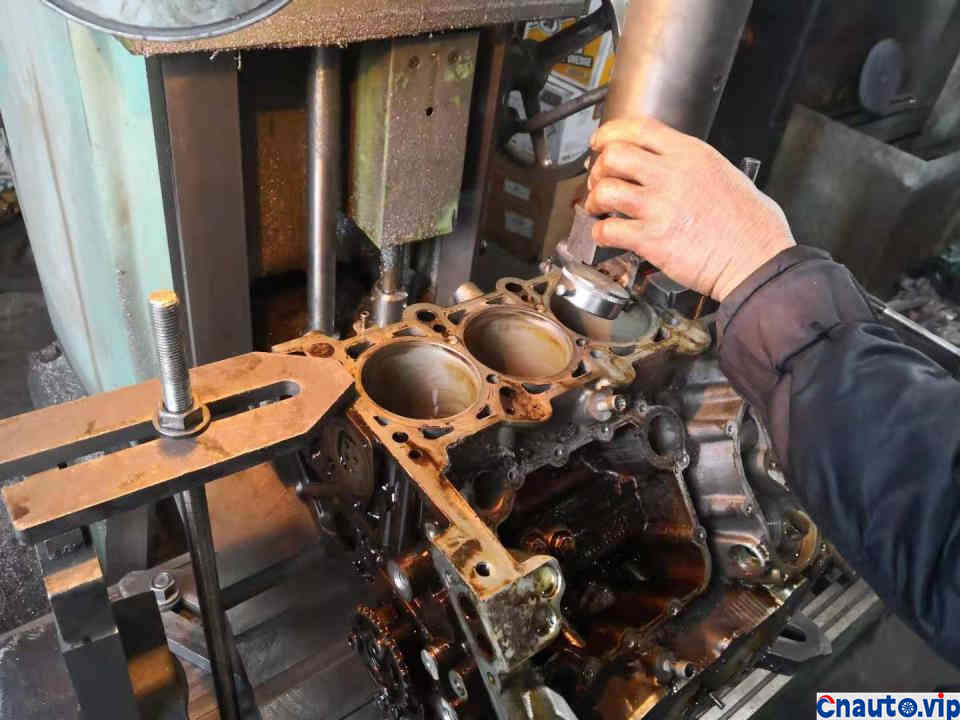
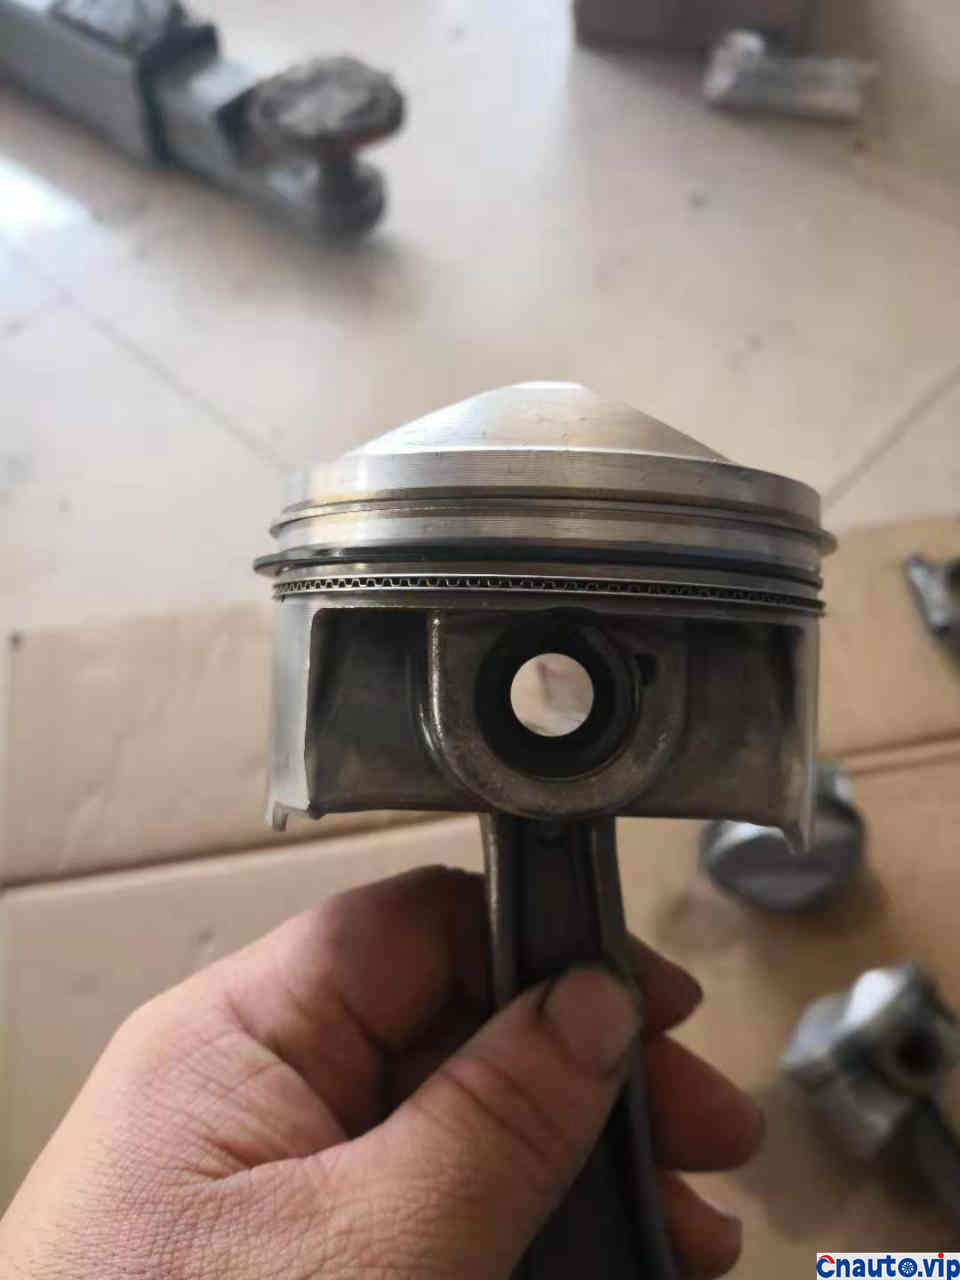
Poke out the piston and catch it on the other side
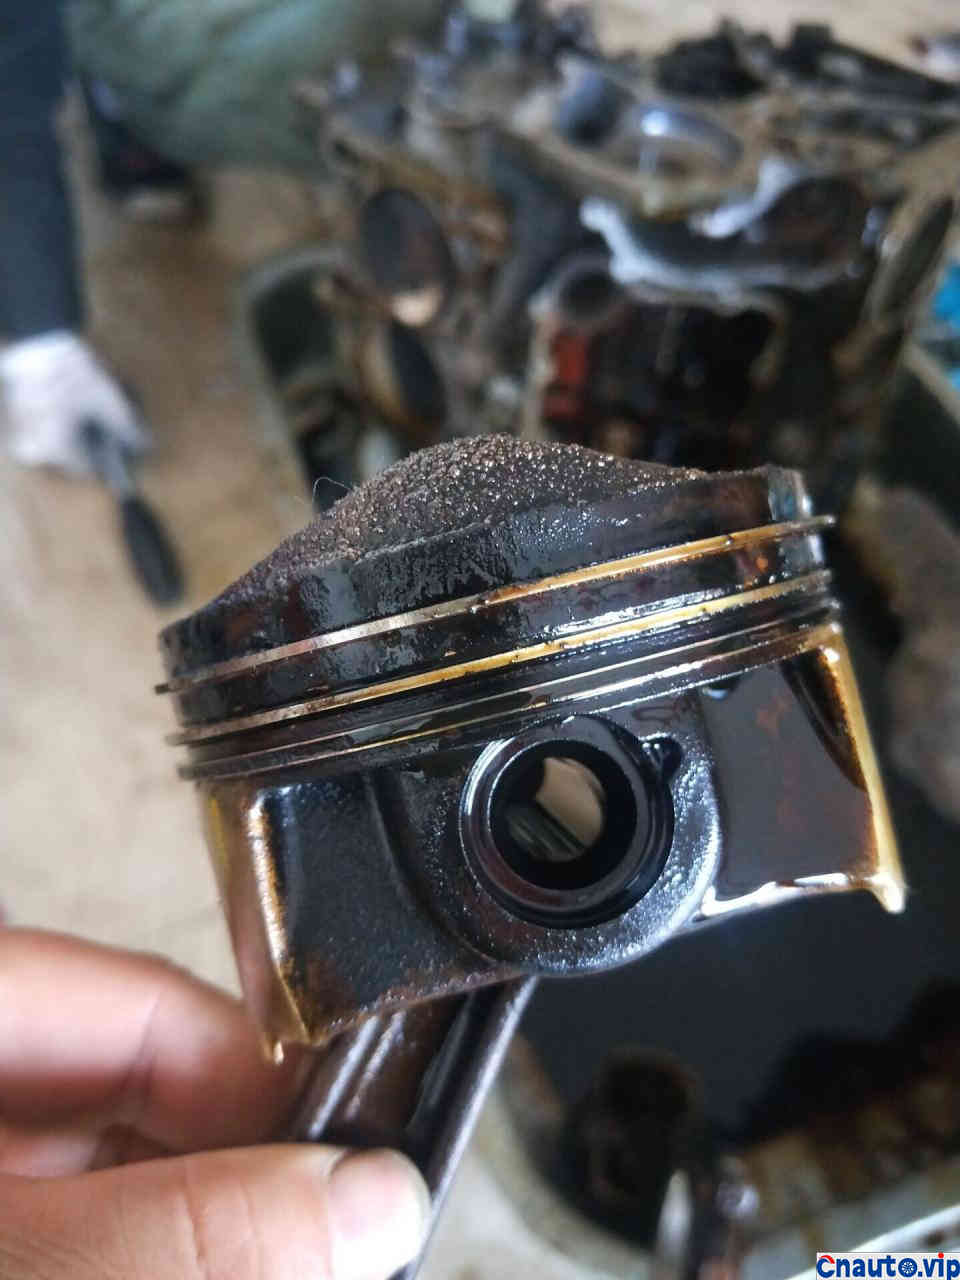
Take a closer look at the piston ring, is it seriously blocked by carbon deposition, I am not lying to you, burning oil, ten out of ten piston rings are blocked by carbon deposition.
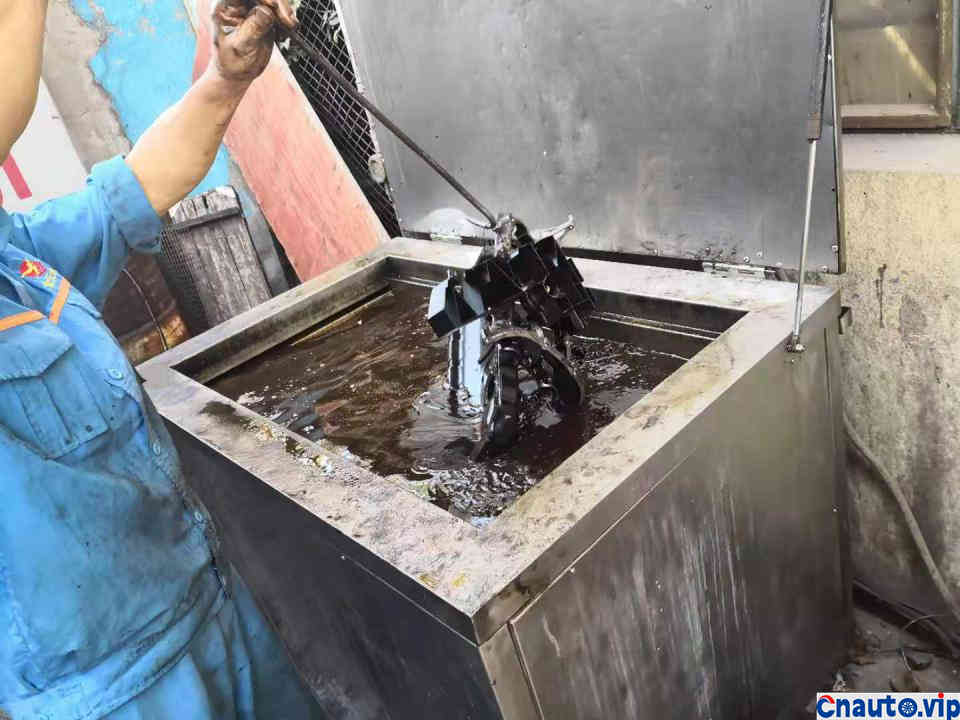
Pull up a cart slowly and do ultrasonic cleaning. Looking at such a dirty engine, it is estimated whether the head of cleaning is going to be too big.
-cleaning and processing boring cylinder grinding shaft piece-
Where there are people, there are rivers and lakes, and where there is a repair shop, you have to boring the place where the cylinder grinding shaft is cleaned. Come here today and pick up this engine.
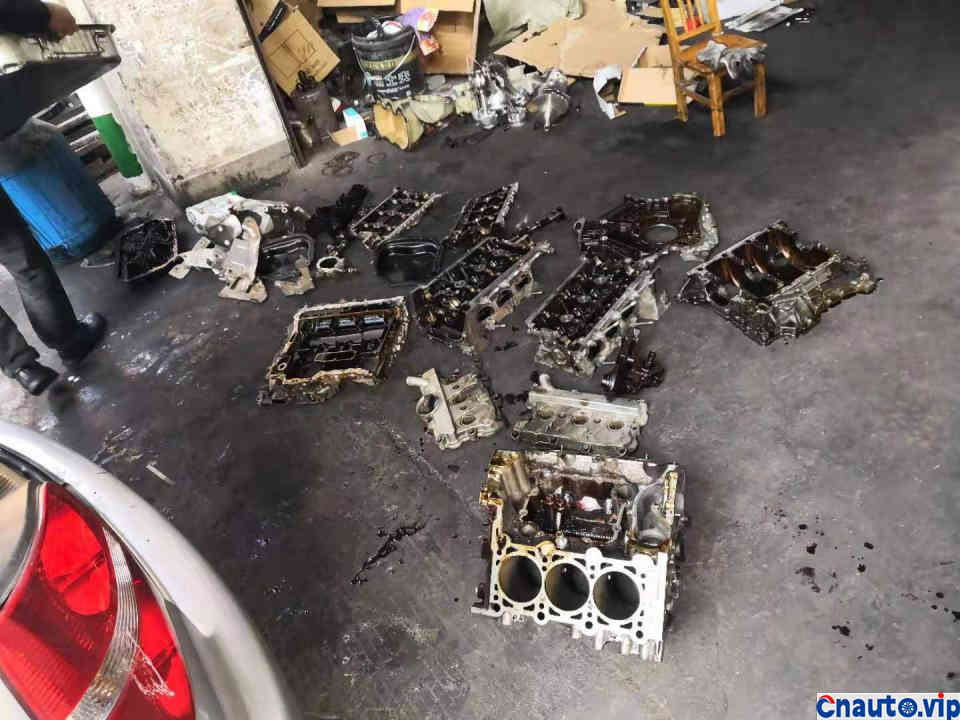
These are all things that need to be cleaned and processed.
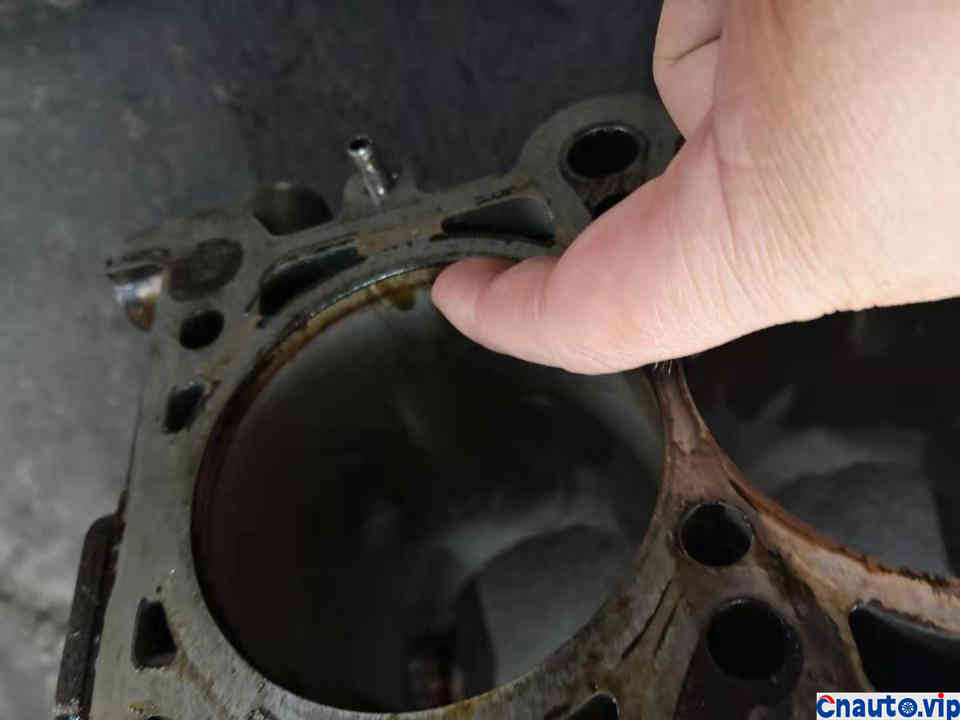
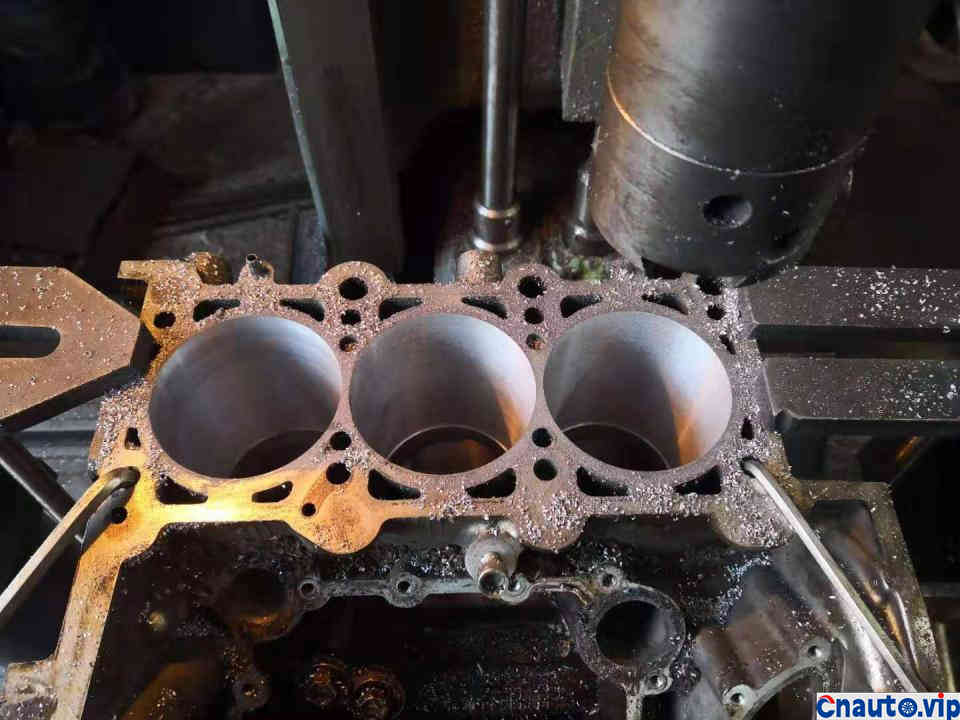
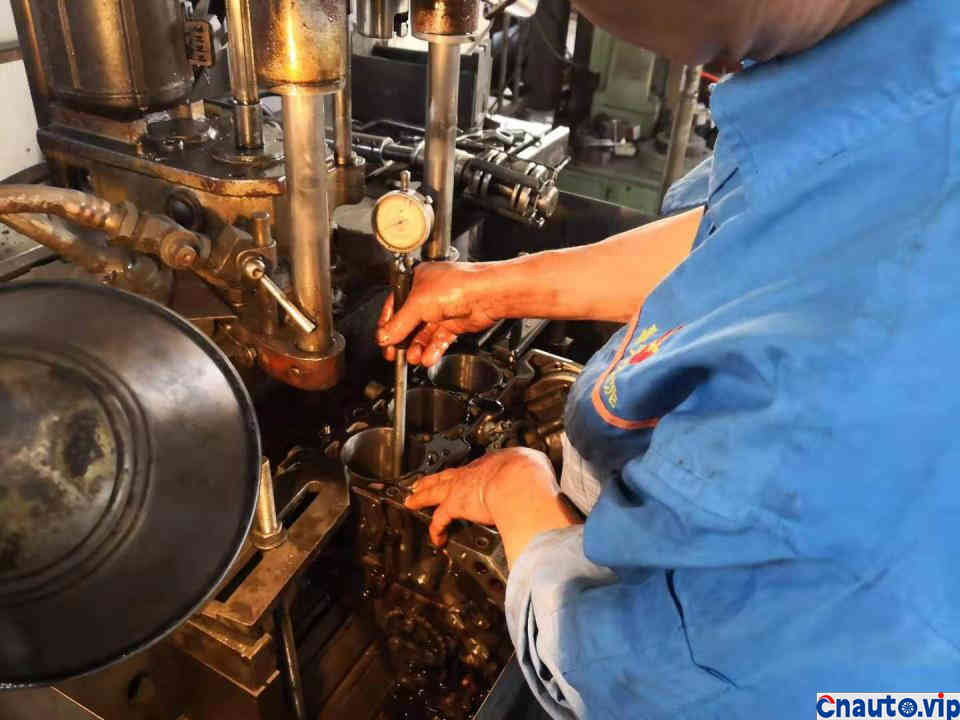
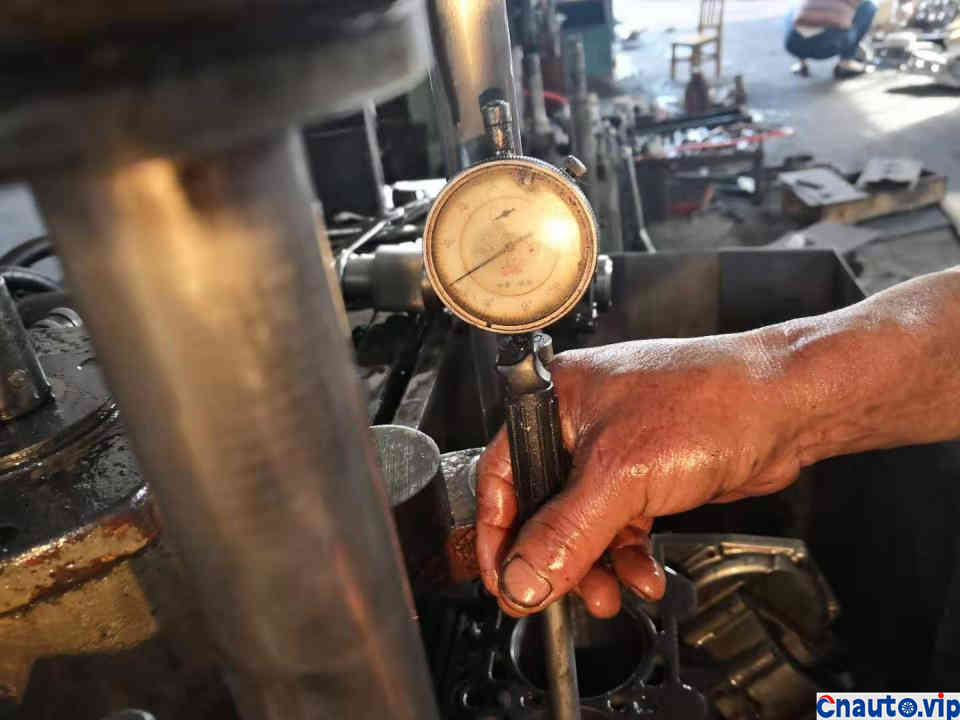
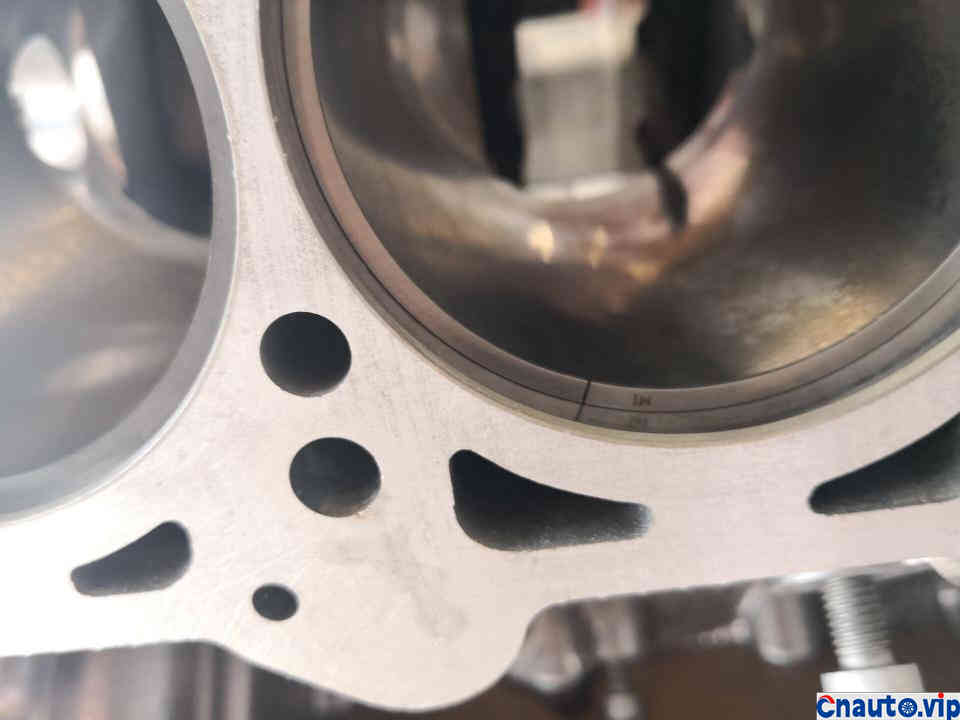
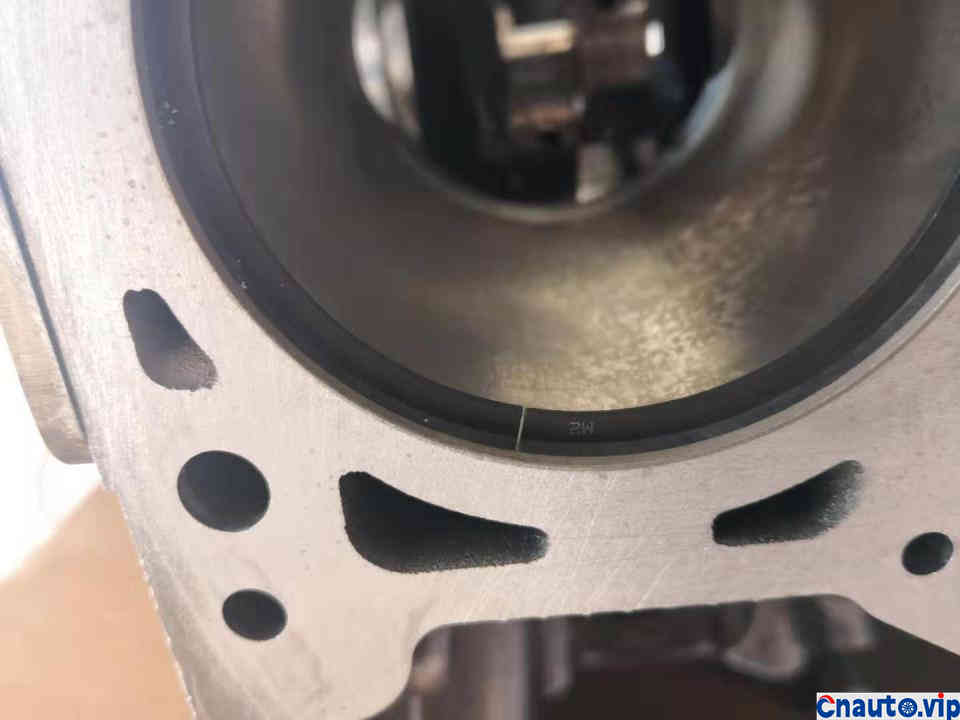
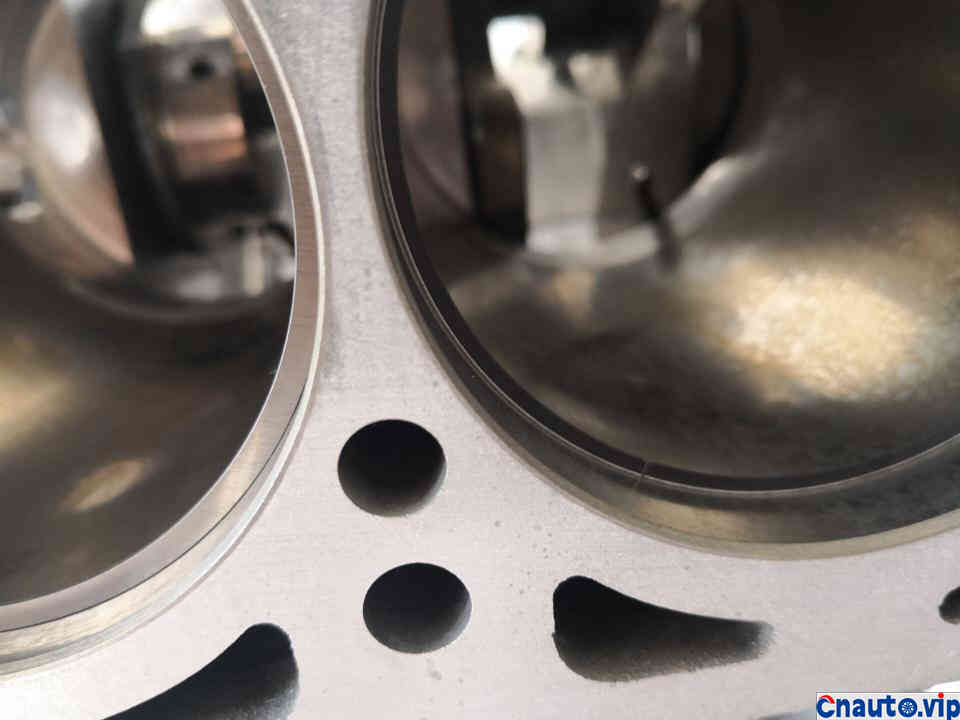
Touch the upper edge of the cylinder wall with your fingers, and there are obvious steps, indicating that the wear is more severe.
After the measurement, it is found that the wear of 12 wires is 0.12. According to the maintenance manual, the cylinder must be repaired if 8 wires are worn. If it does not run away, the cylinder must be boring.
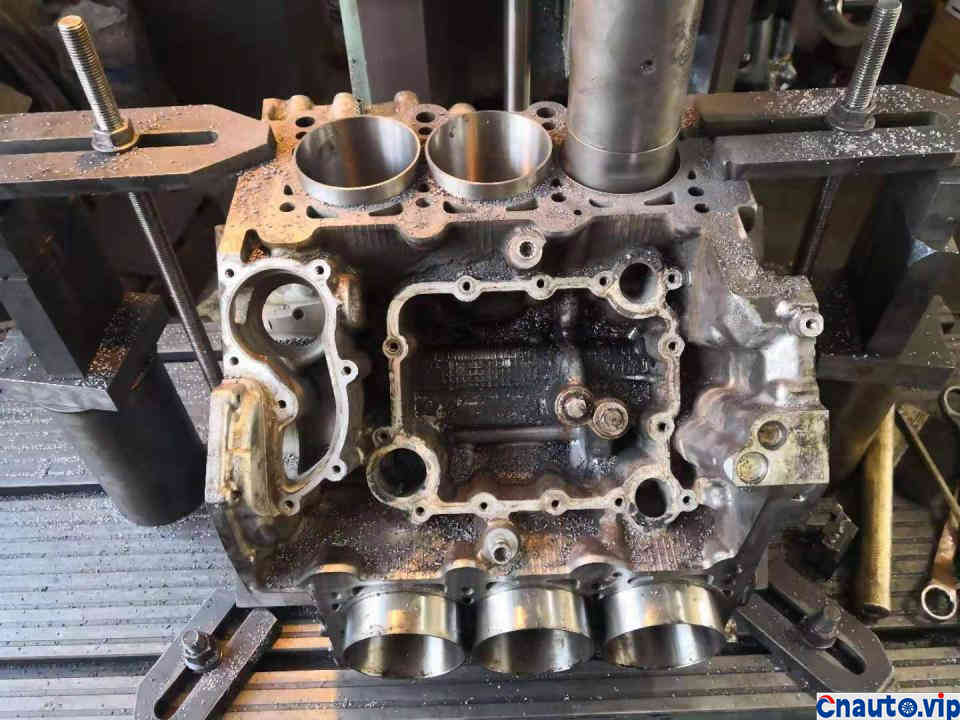
Boring the cylinder of this car is difficult because the cylinder is too large and the distance between the cylinder is too narrow, that is, the hole is too big and less flesh. You see, in the state of no boring cylinder, the shortest distance between the two cylinders is only 6MM. If the boring cylinder digs a larger hole, the middle distance is narrower, and there is less meat, the strength of the cylinder body will not meet the requirements.
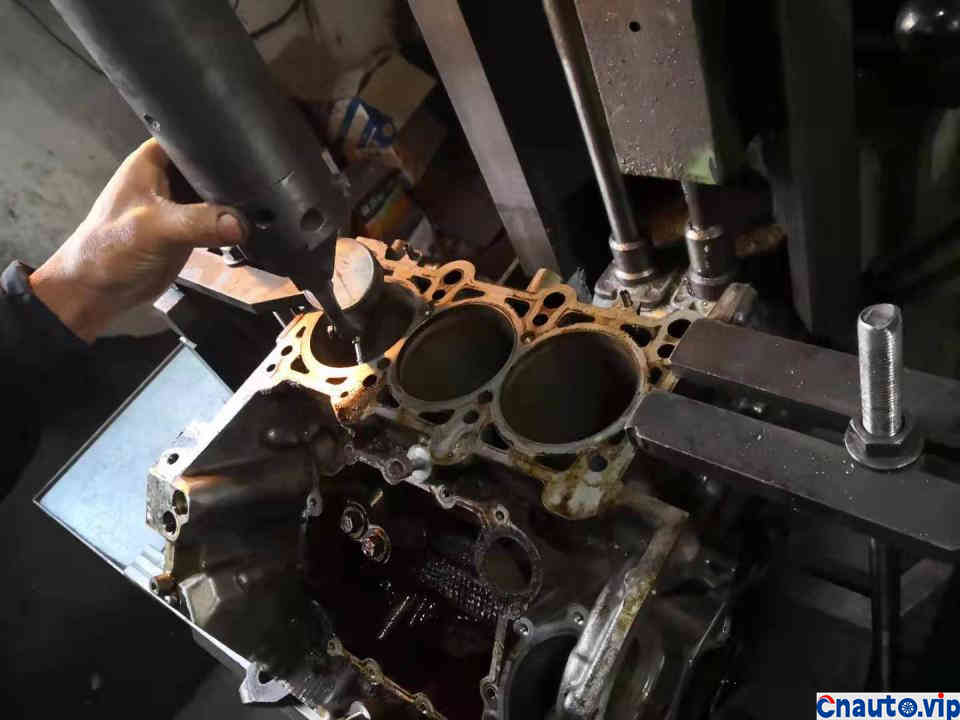
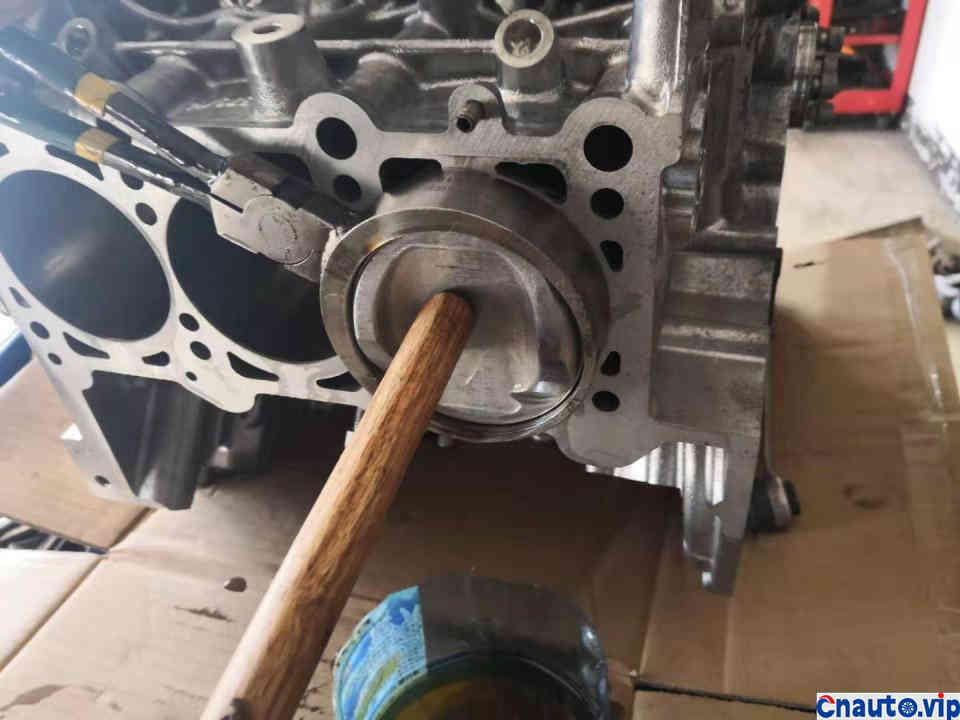
First find the position of the center of the first cylinder
Then the position of the center of the third cylinder, the center of one and three are all right, and the center of the three cylinders is horizontally aligned.
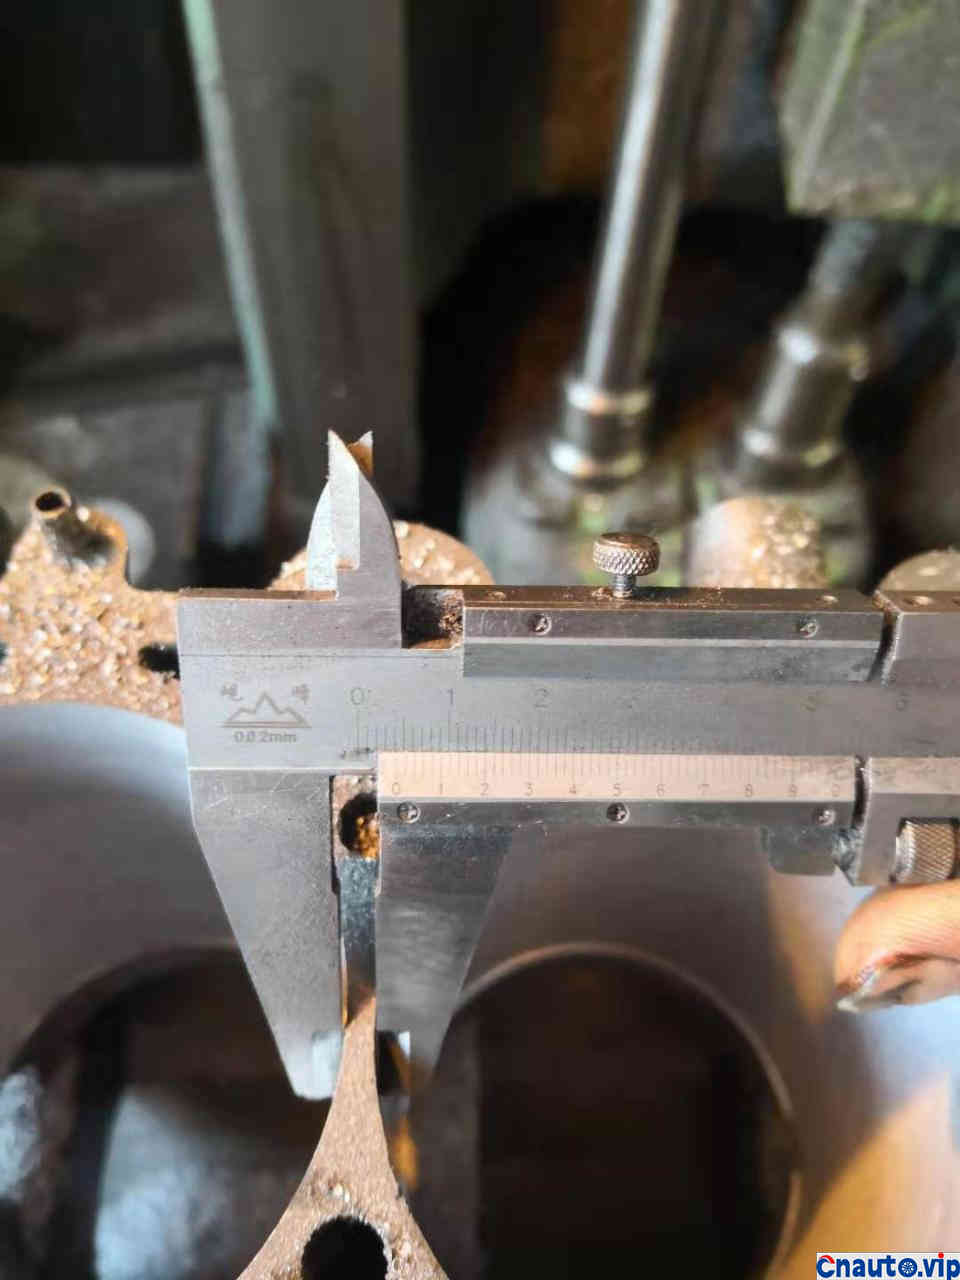
Take out the custom cylinder liner. The dimensions of cylinder liners are generally integers, such as 87MM outer diameter cylinder liner, 86MM outer diameter cylinder liner. As for this car, if you use the cylinder liner of 87MM, the hole is too big, there is too little meat between the holes, and it is easy to crack. If you use the 86MM cylinder liner, there is enough meat between the hole and the hole, but the cylinder wall is too thin to withstand the pressure in the cylinder, so it will explode the cylinder, so under the compromise, the cylinder liner manufacturer developed this 86.5 outer diameter cylinder liner.
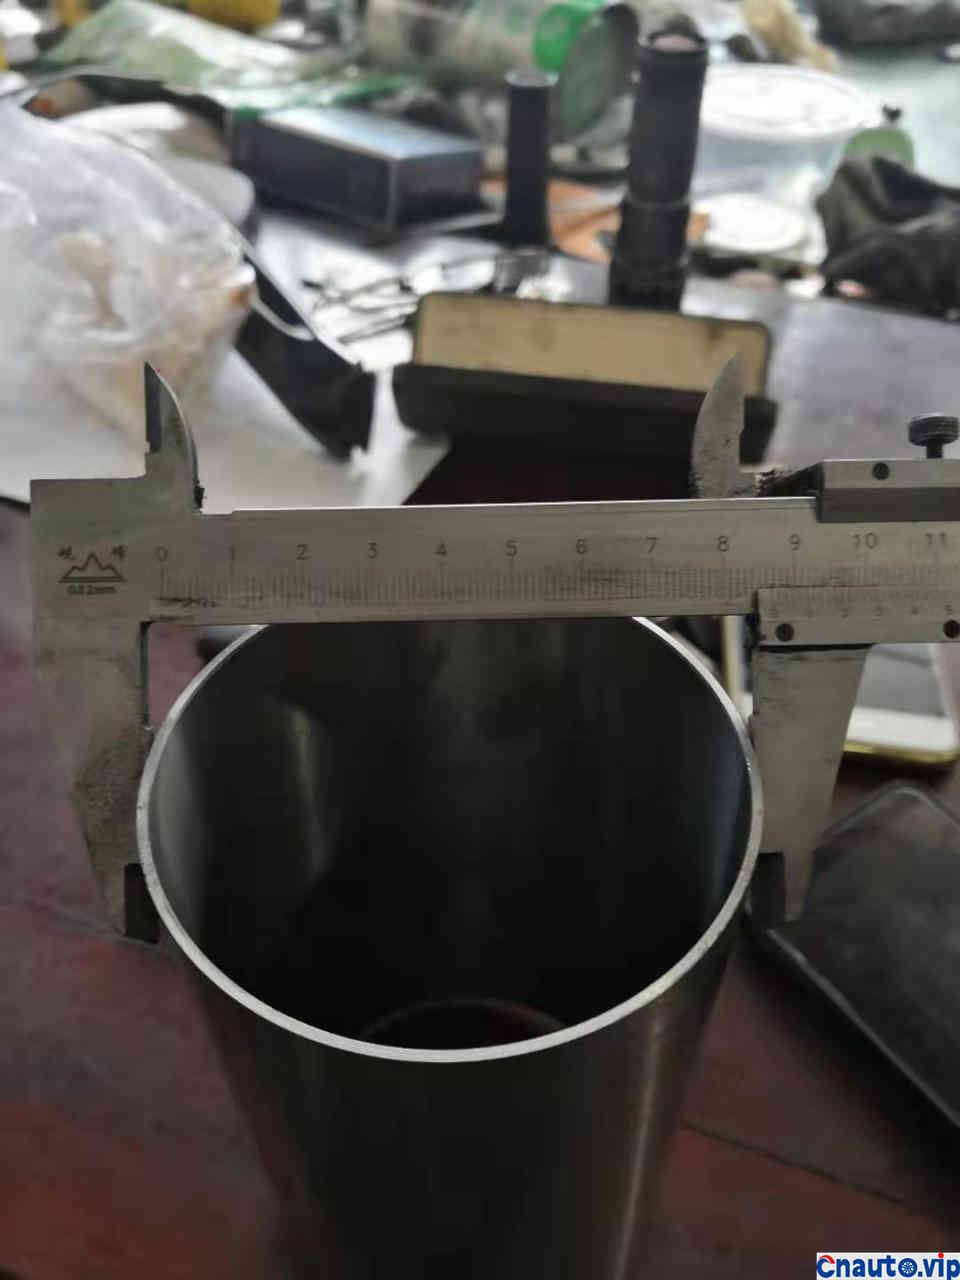
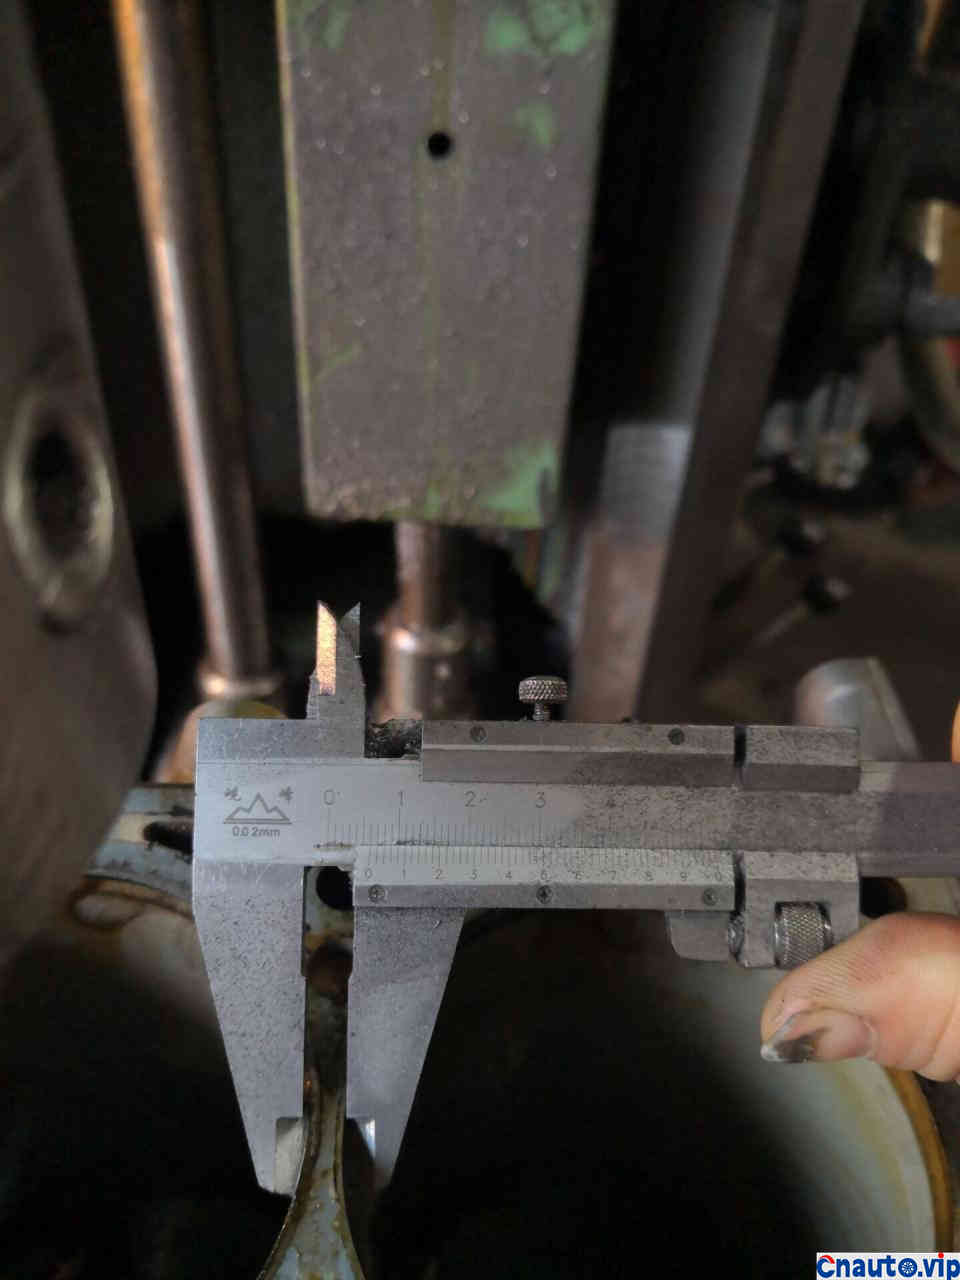
Then let’s measure it. What size is it?

Take a closer look. Is it 86.5?
Start boring the cylinder and dig the hole, and when the hole is dug, you can set it down.

This is the hole that hasn’t been dug yet. This cylinder has an angle of 90 °, the upper cylinder is horizontal, and the one here is vertical, hehe.
All right, when the three holes are dug, I feel that the hole is bigger and the meat between the holes is less.
Measure again, the thickness is only 4MM, this value is the safety red line of the cylinder block, if less than this number, it is easy to crack. Before many other this engine, using 87MM cylinder liner, after finishing, the distance between the cylinders is only 3MM, as a result, many are cracked.
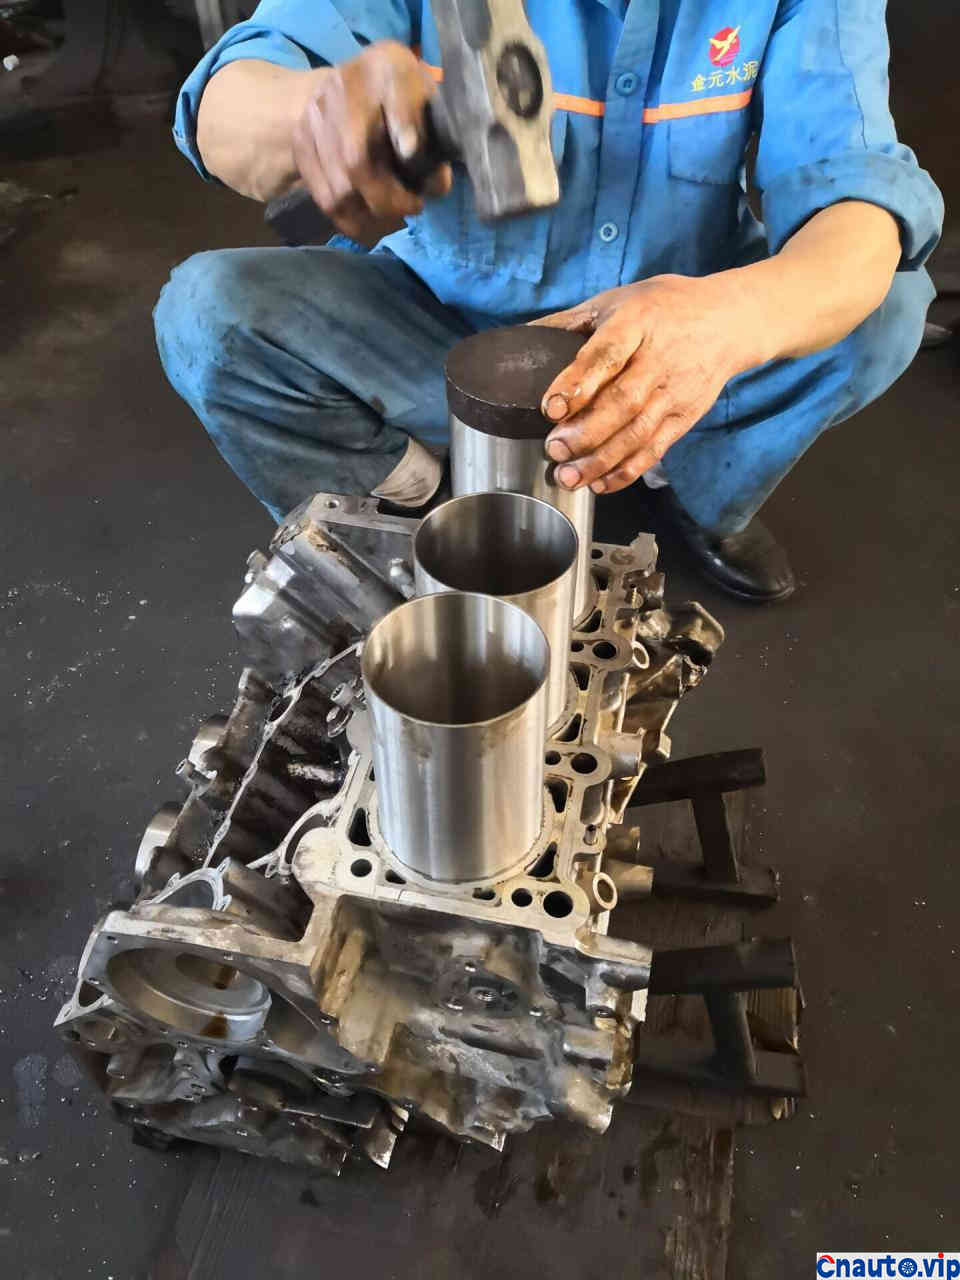
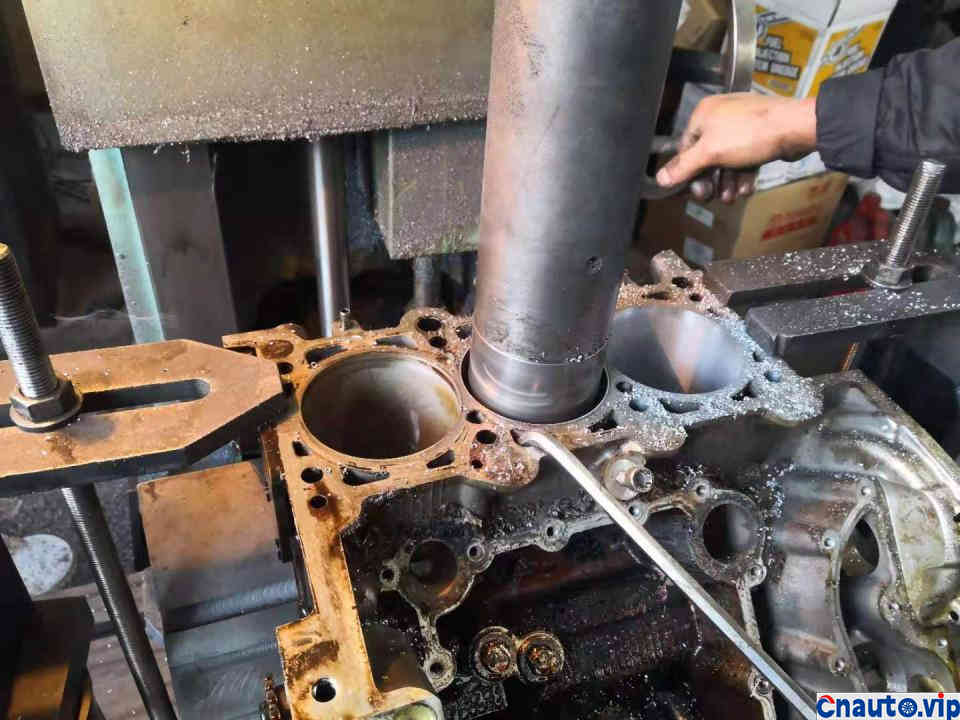
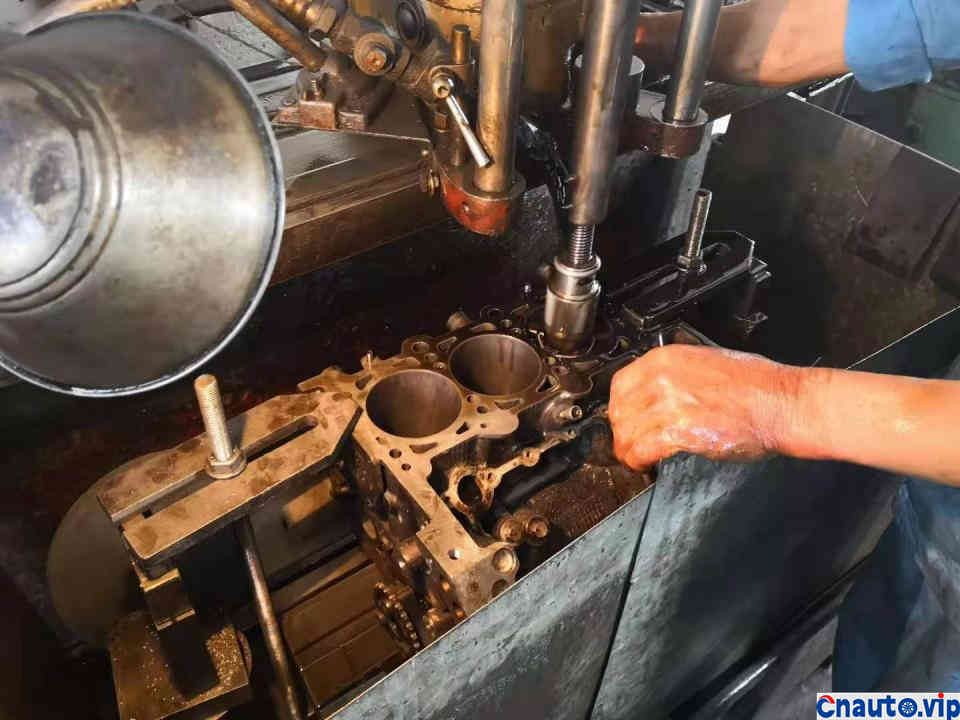
Then knock in the cylinder liner. It should be noted here that it is easier to heat the cylinder block first, let the hole expand, and knock into the cylinder liner.
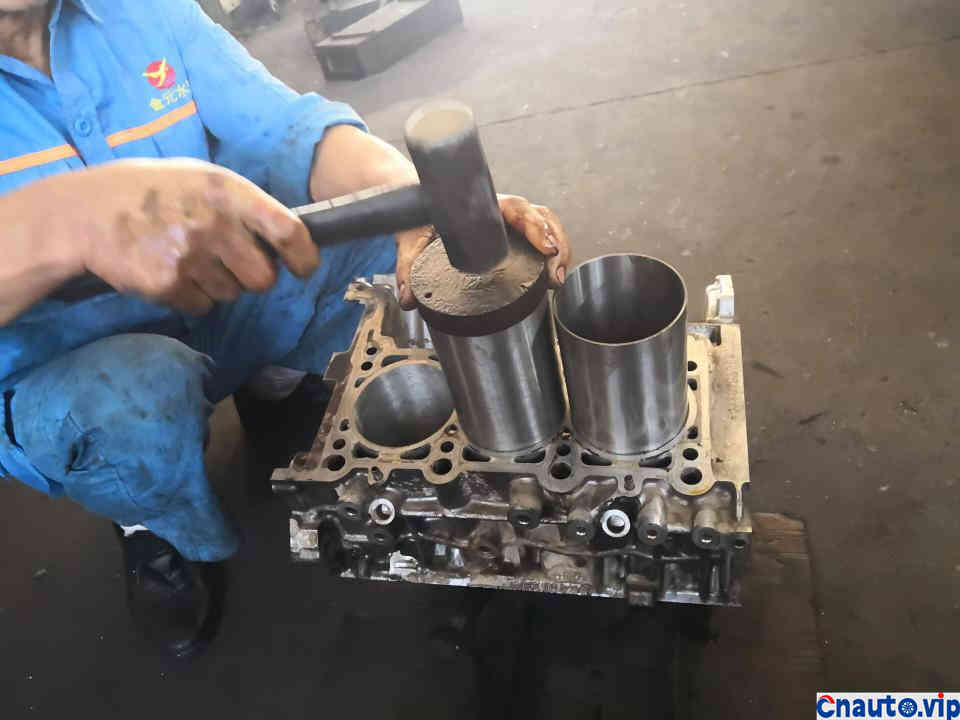
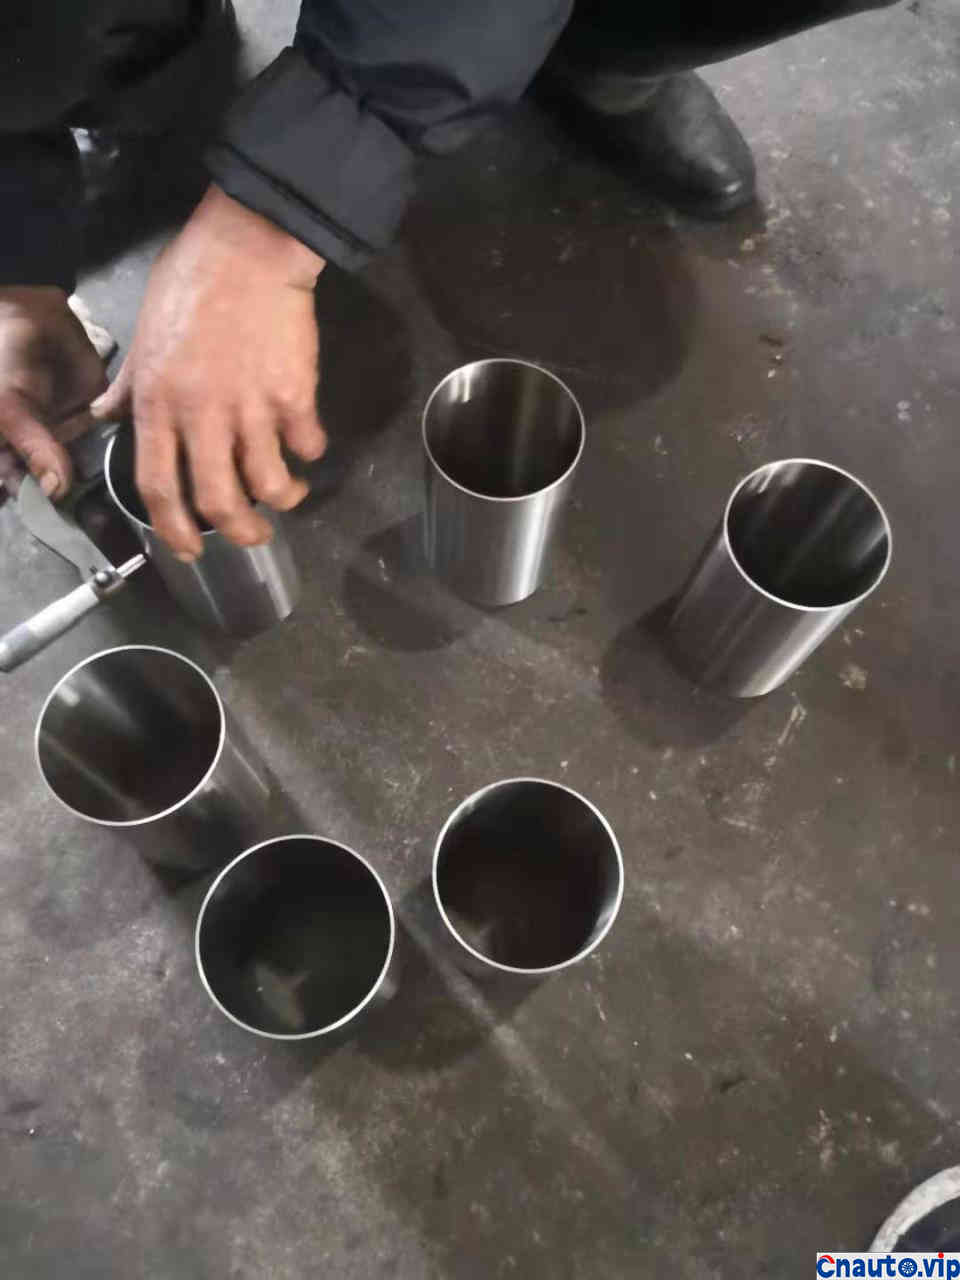
Knock in one by one
It looks like a gun barrel, doesn’t it? it doesn’t matter. The inner wall of the cylinder liner should be cut to the original factory size, and the higher part should also be cut off.
Starting to process the inner diameter of the cylinder liner.
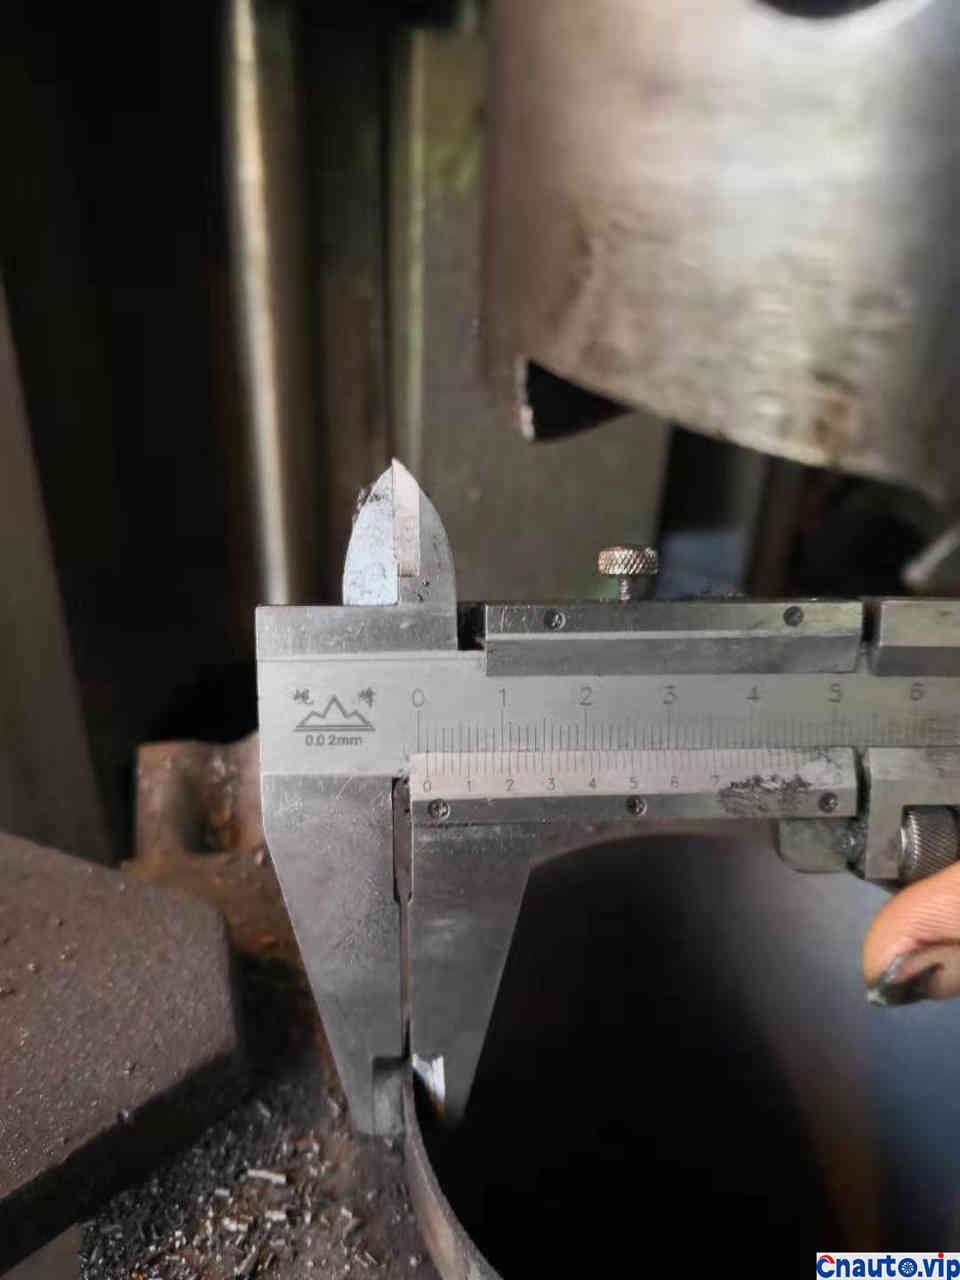
After processing, before the last cylinder liner is cut off, keep an eye on it and take the opportunity to measure the cylinder wall thickness, just 1MM, you see, it coincides with that written in the previous manufacturer’s training materials.
Then grind the cylinder wall to achieve the final perfect size and perfect surface roughness.
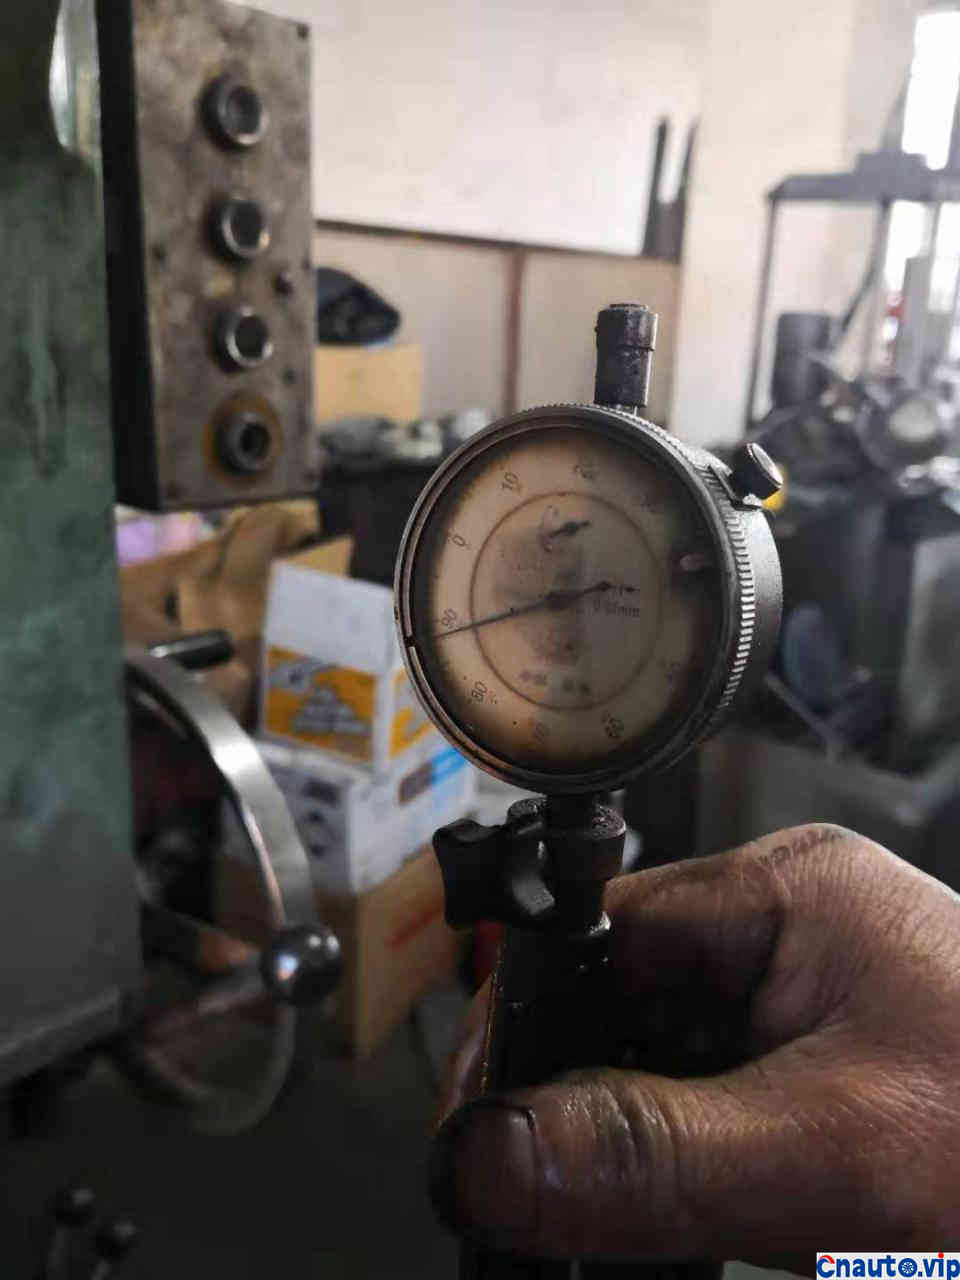
Measure cylinder size
The error is “0” and the factory size can be restored perfectly.
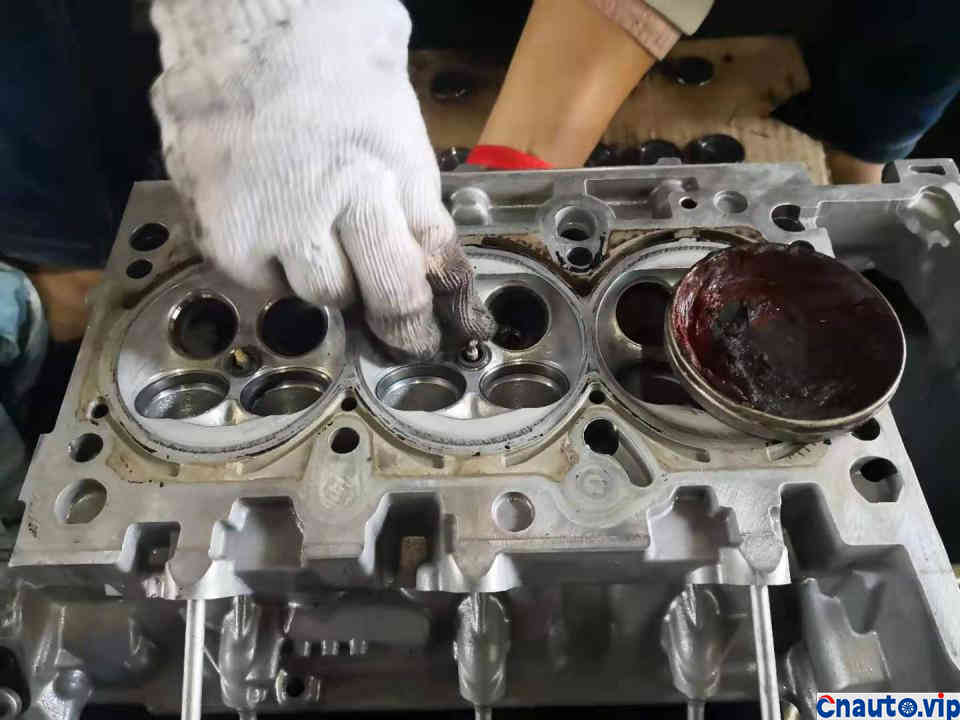
The next step is the cleaning work, first brushing the carbon deposits on one side of the cylinder head with a wire brush.
The carbon deposit in the hole of the secondary air intake should be dug up with iron wire.
Look, there’s a lot of carbon dregs out of it.
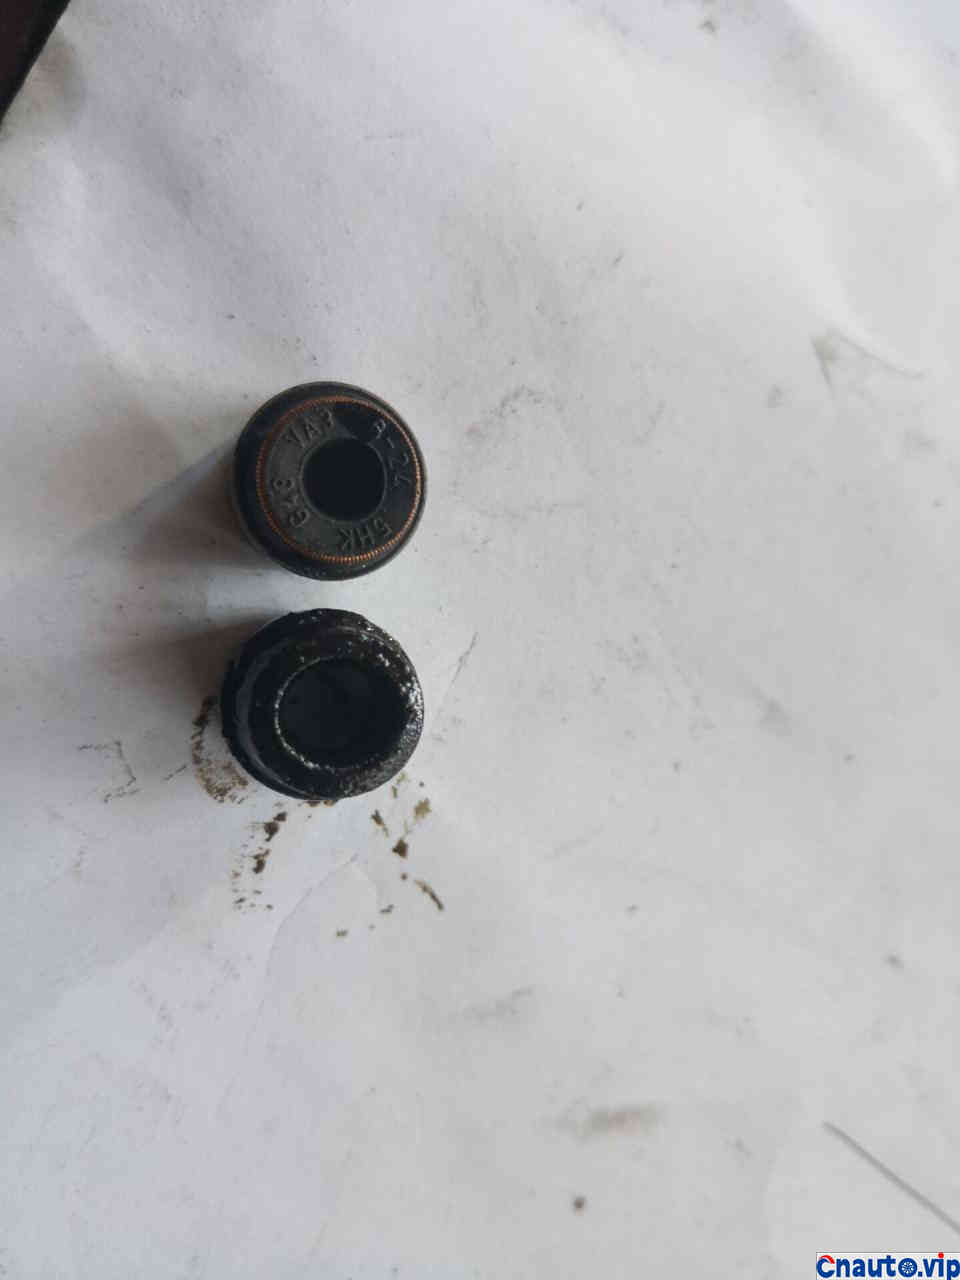
Pick up the removed valve oil seal and make a comparison with the new one. You know the result.
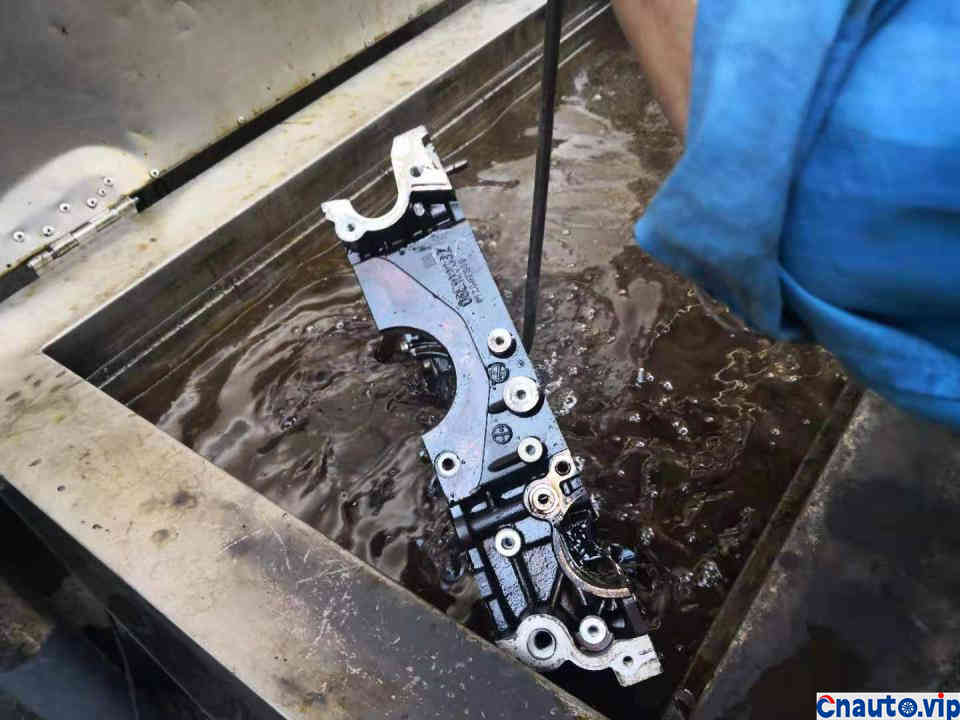
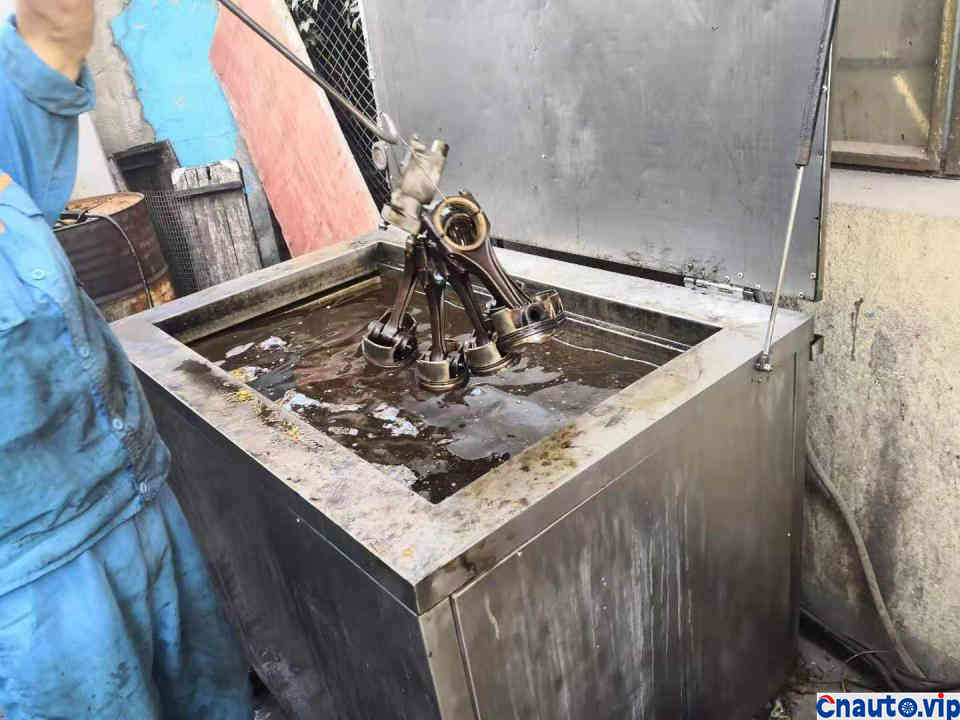
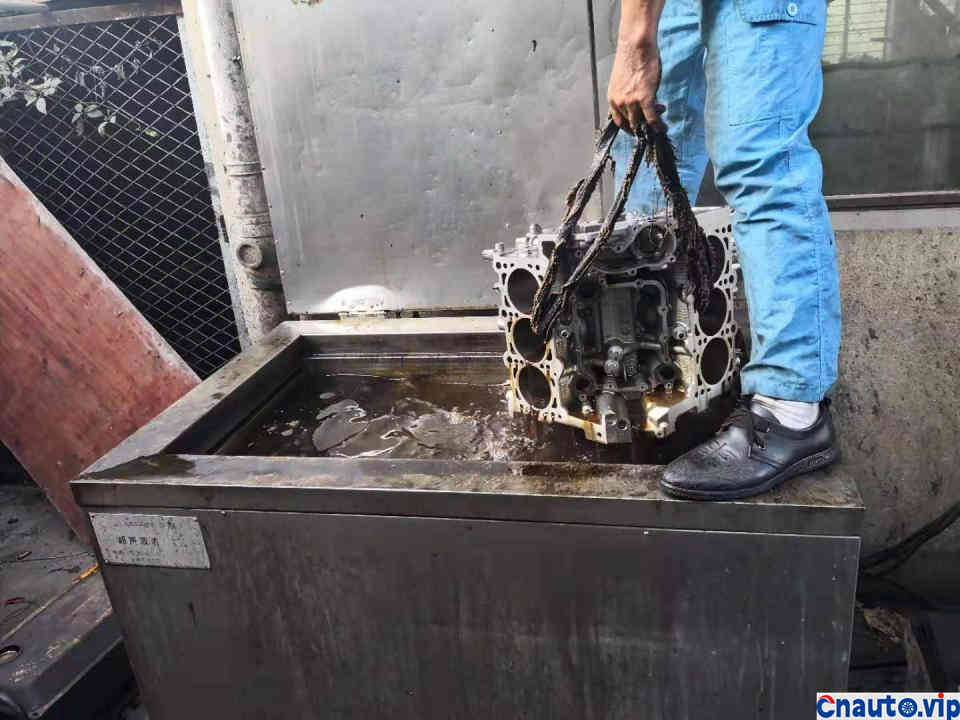
Each part is put into the ultrasonic pool for cleaning.
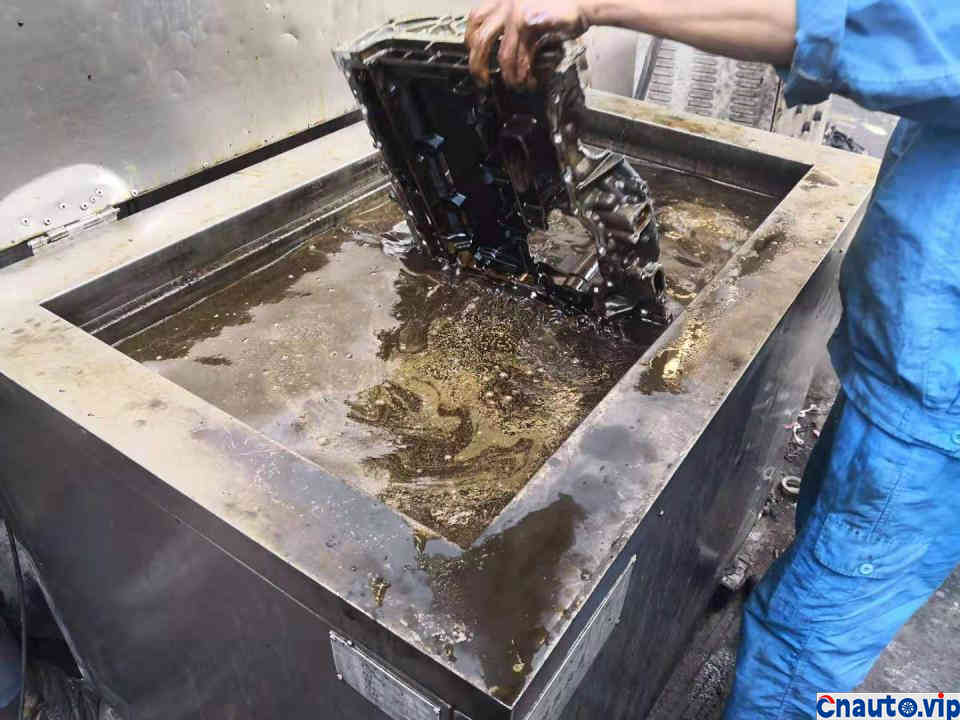
Throw it all in.
Throw it all in. You’re welcome.
The piston needs to be washed, too.
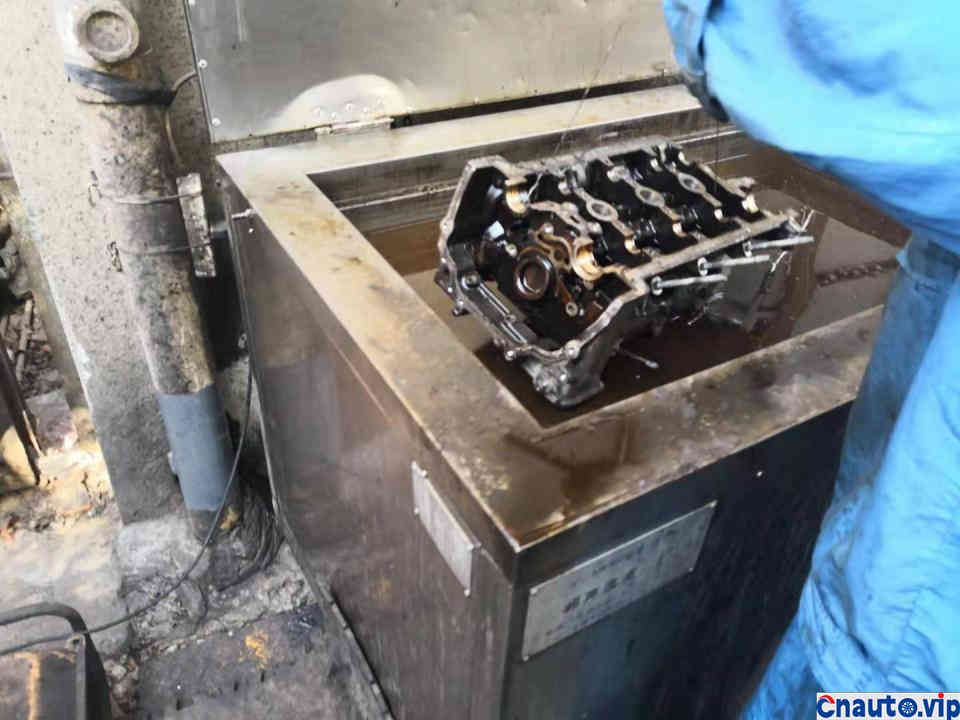
The cylinder head also needs to be washed.
Clean the valve while you clean it.
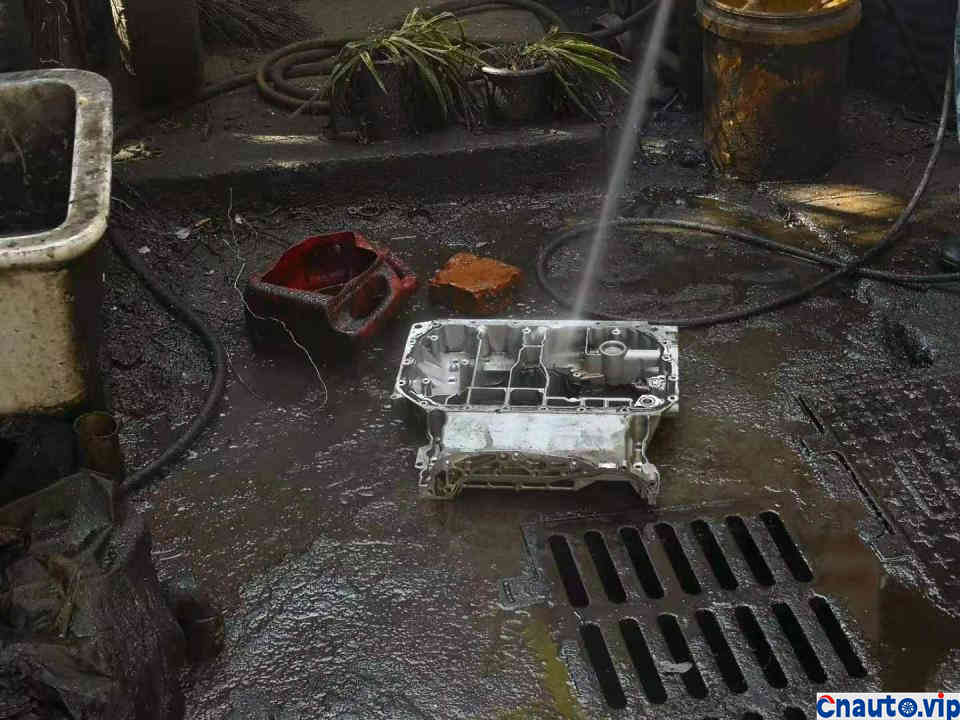
After washing, fish it out and rinse the water cannon clean.
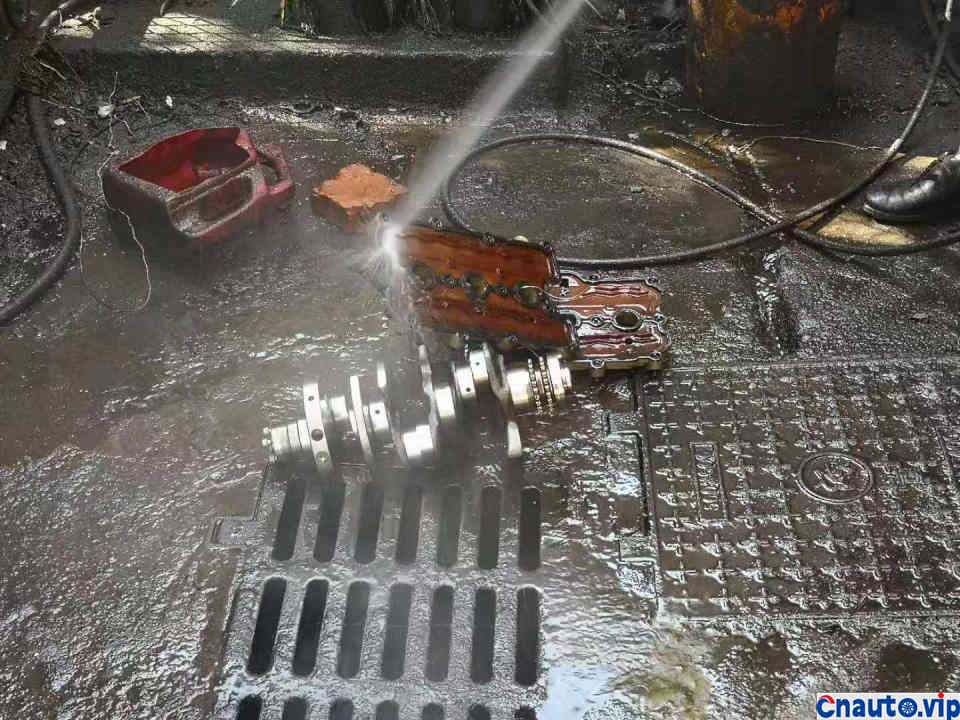
Take it all out and rinse it clean.
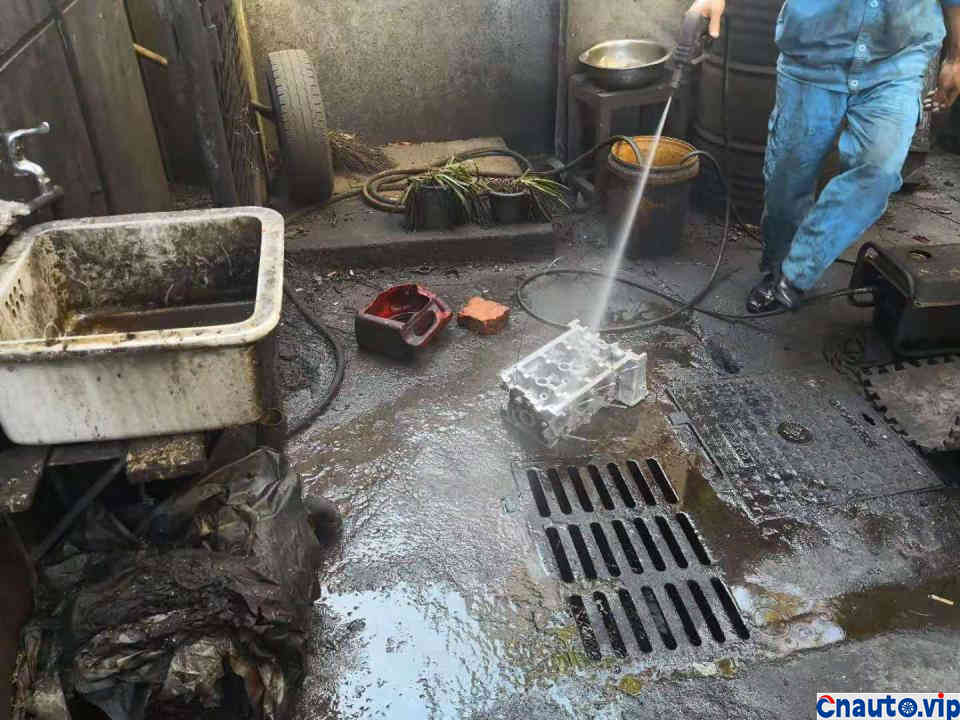
The cylinder head is also removed and washed clean.
The cylinder block is also fished out.
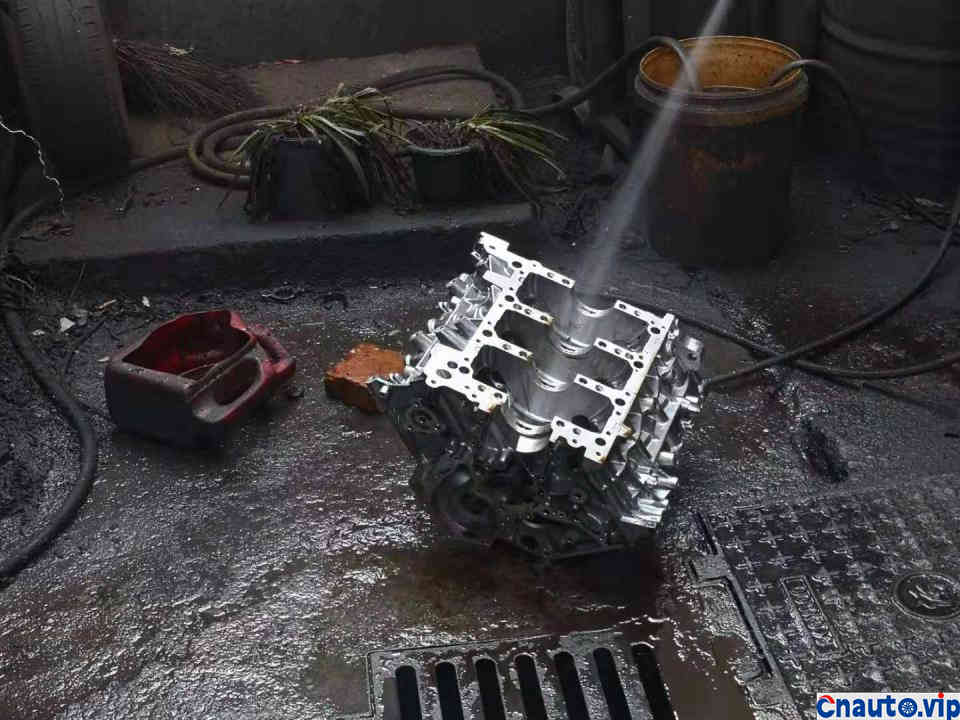
Rinse the cylinder block clean
Then check the valve contact area.

The red mark is perfect.
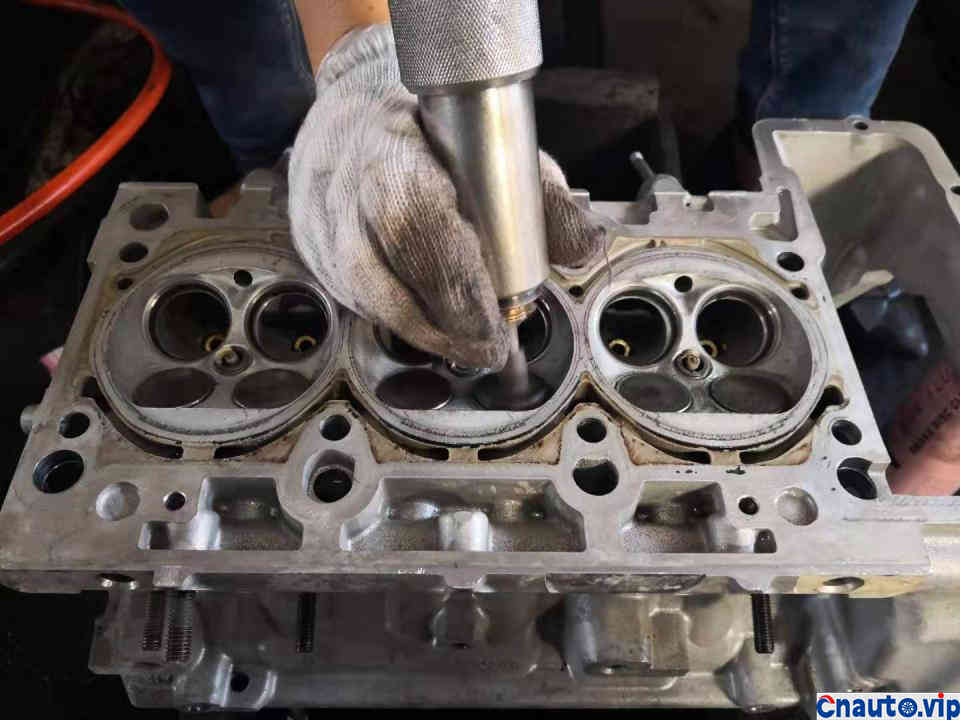
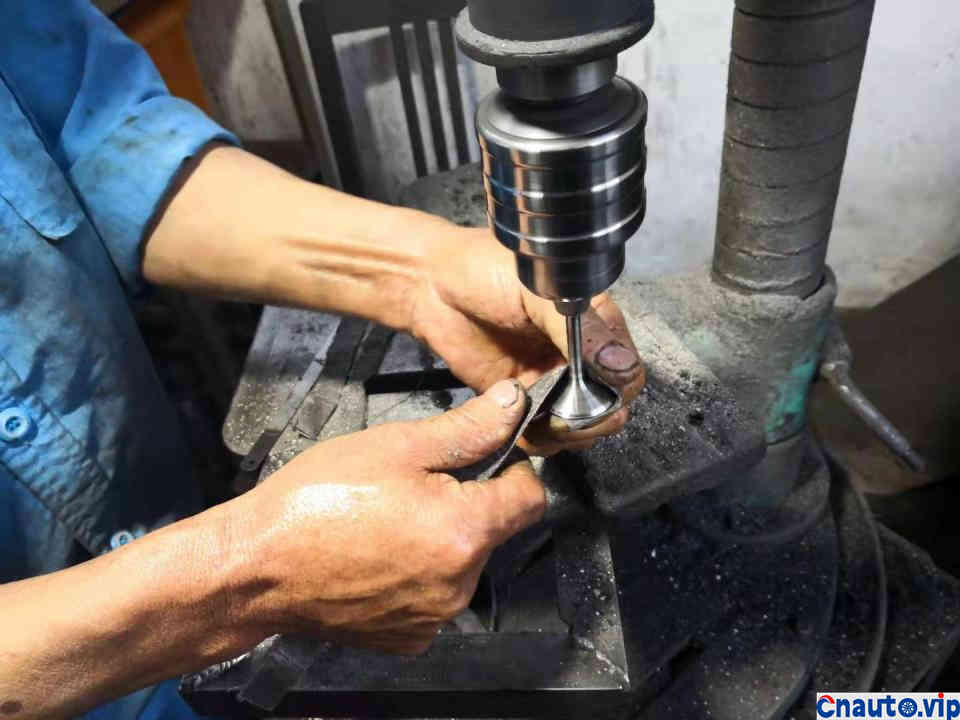
Apply abrasive and grind the valve to ensure the tightness of the combustion chamber.
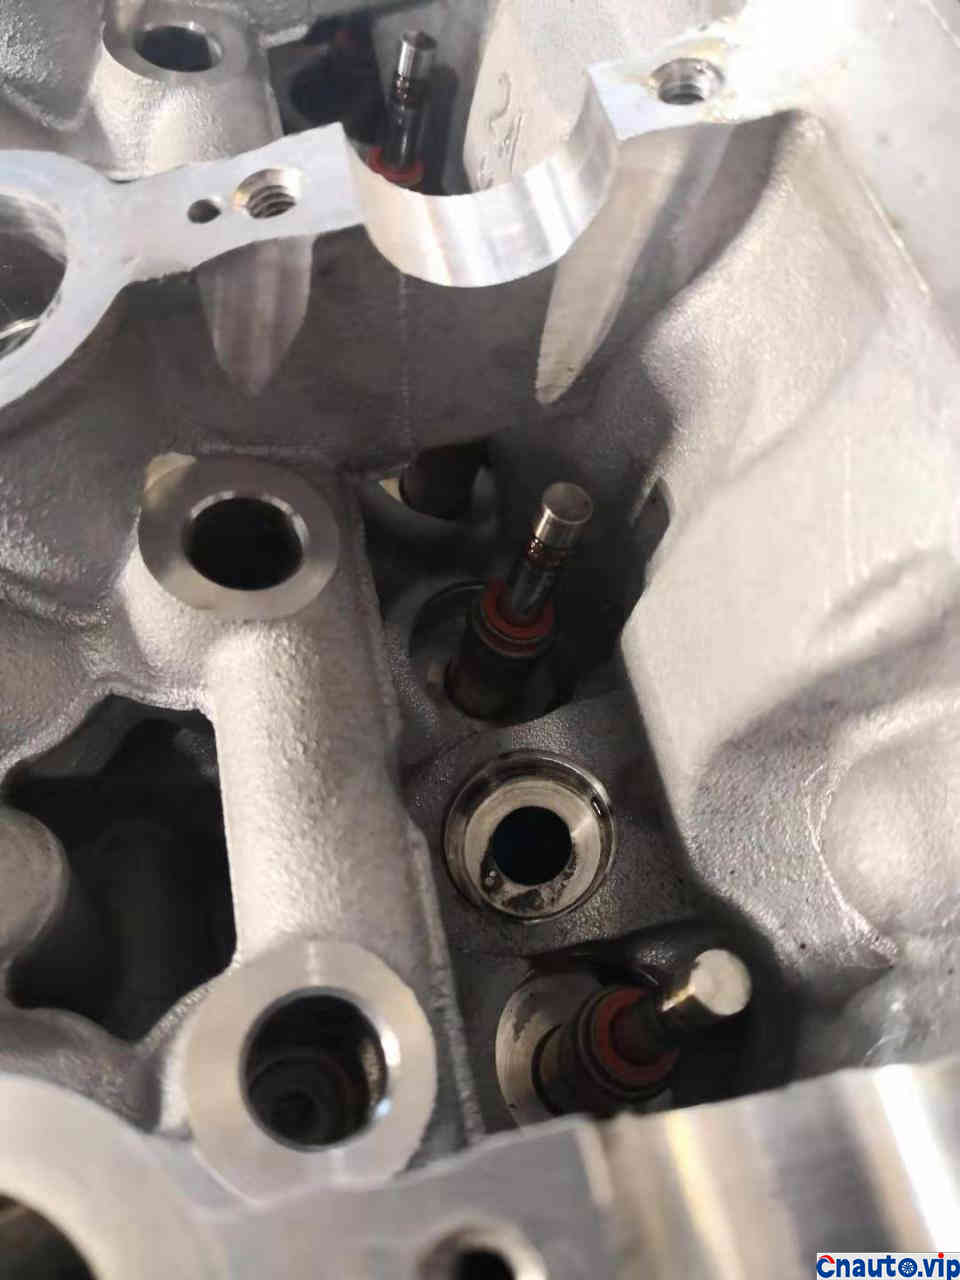
Put on the new double-seal valve oil seal, more durable, more oil-resistant
The cylinder head on the other side is also putting on the double valve oil seal.
Install the valve spring and lock piece
These are all washed and pulled back.
After pulling back, further clean up the residual glue and dirt
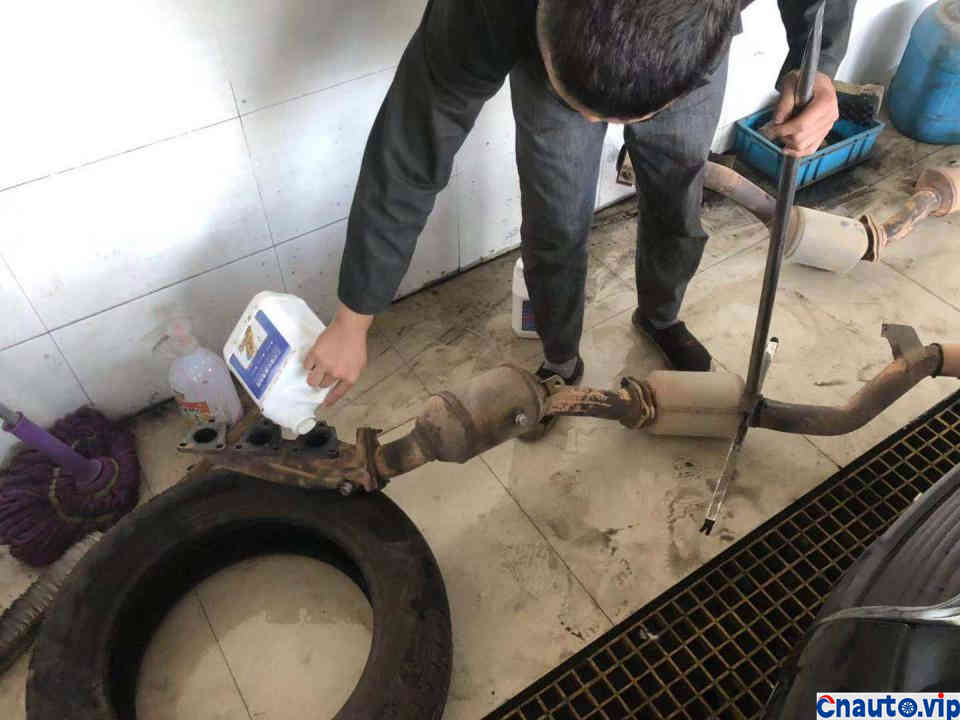
Take advantage of the opportunity to soak the ternary catalysis, washing is healthier!
-accessory material section-
Material selection is also very important for good maintenance quality. Some improvements need to be improved, and some from the original factory should be used. If you have a big brand, you have to use big brand accessories. Resolutely put an end to fake and shoddy products and despise repairmen who use auxiliary factory parts.
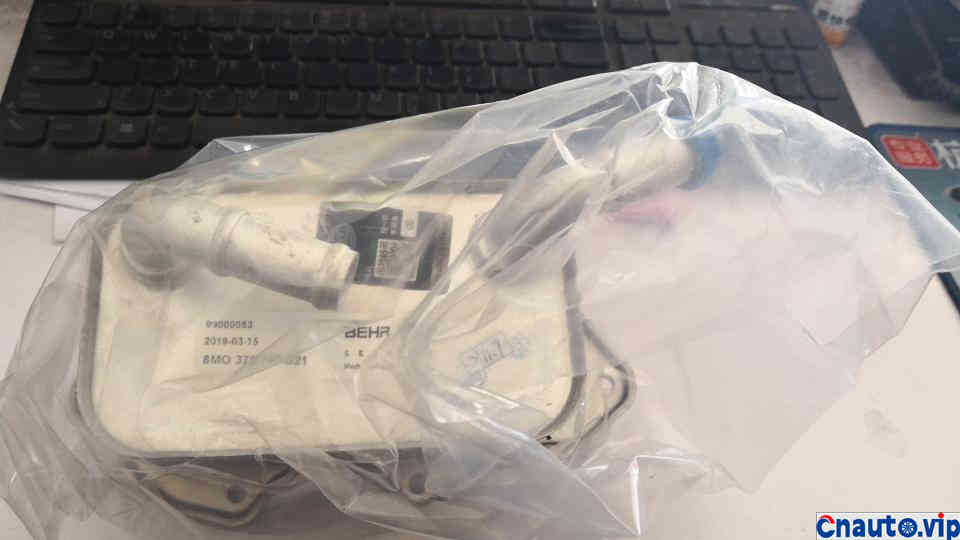
Hella’s oil radiator, big brand, no problem.
Carburetor cleaner, the car washed a whole box and a half
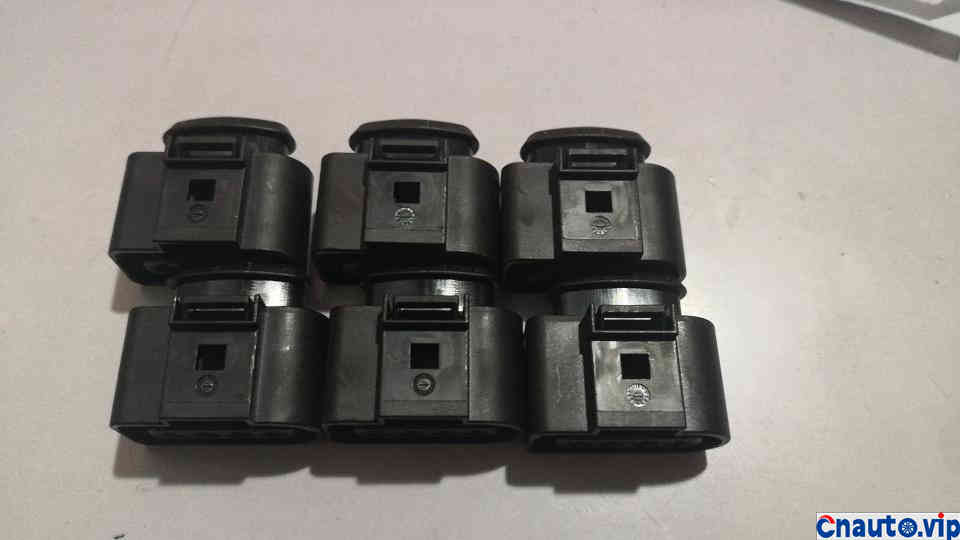
The ignition coil plug should be replaced if the original car is damaged.
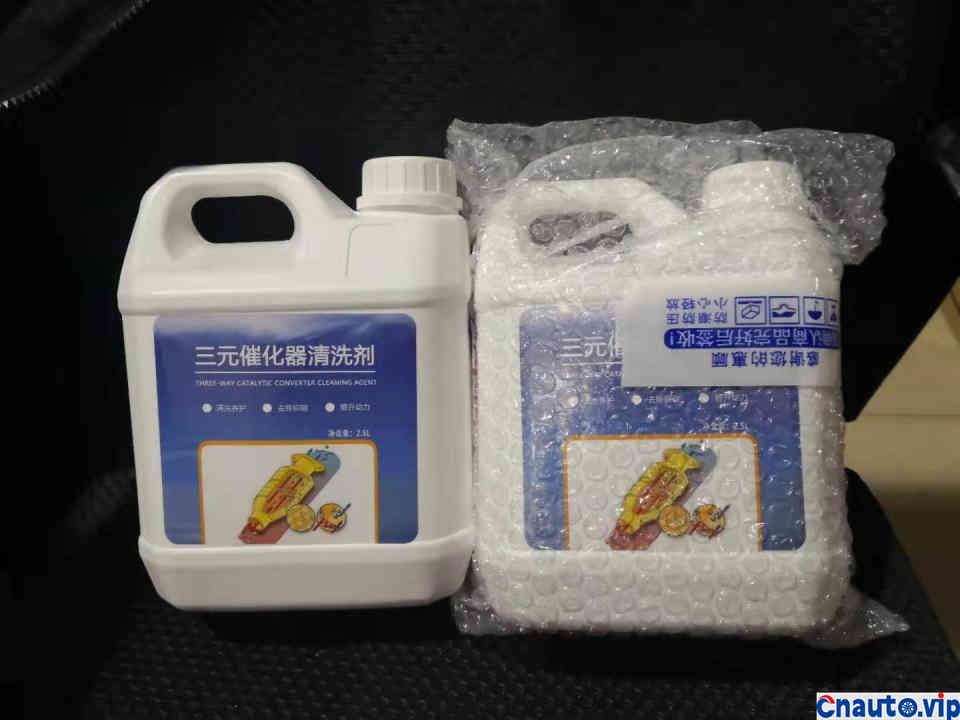
Ternary catalytic cleaning agent
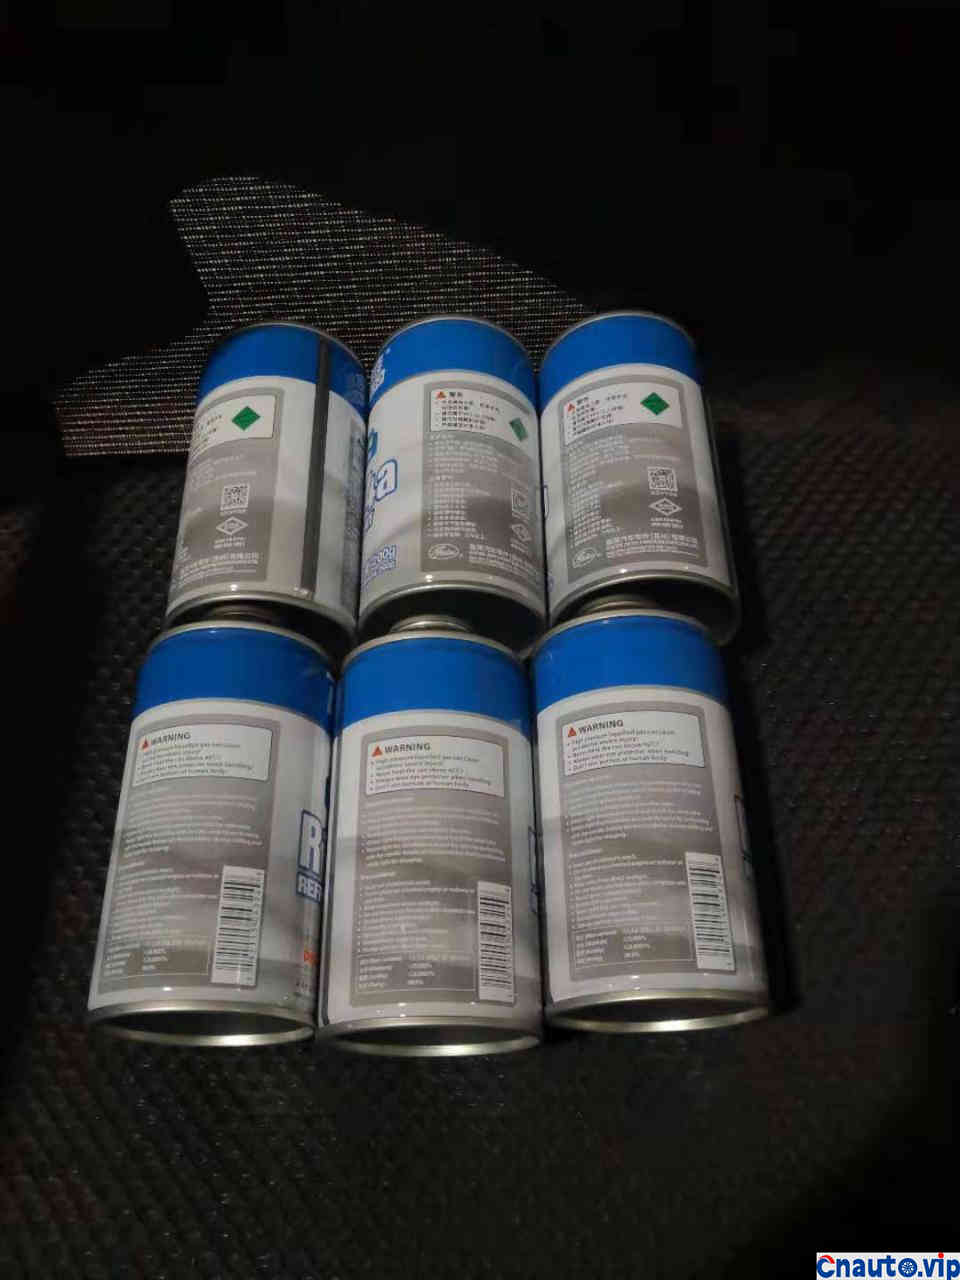
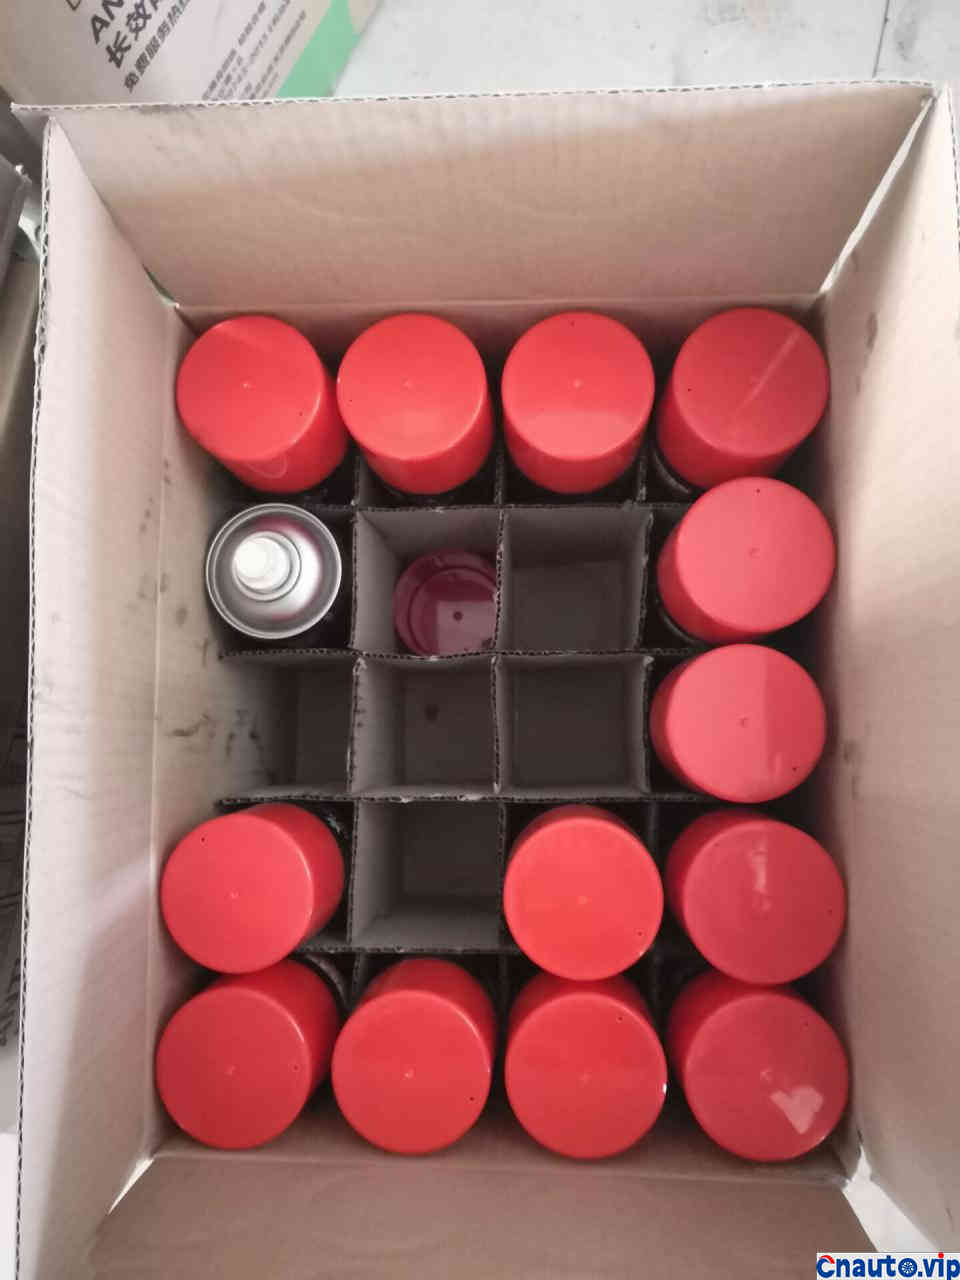
Refrigerant, this car needs to add 1050 grams of refrigerant, the refrigerant on the market is generally insufficient, so it needs 6 bottles, 1200 grams, to remove the part lost during filling, it is about 1050 grams.
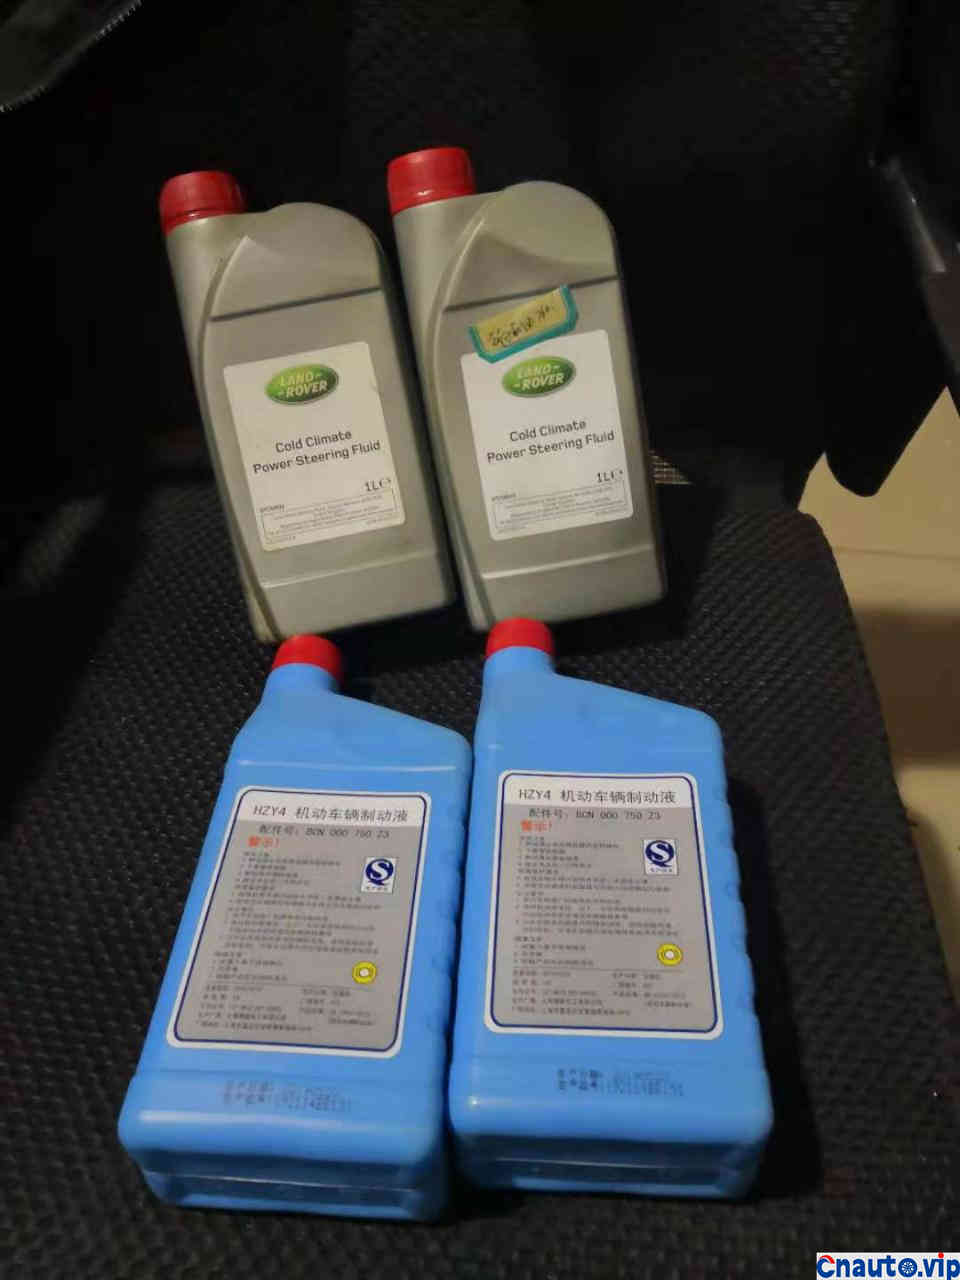
Power oil and brake oil. To help Oil Land Rover, and one of Audi’s factories made it. Brake oil Volkswagen’s, and Audi’s also the same mother, but the packaging is different.
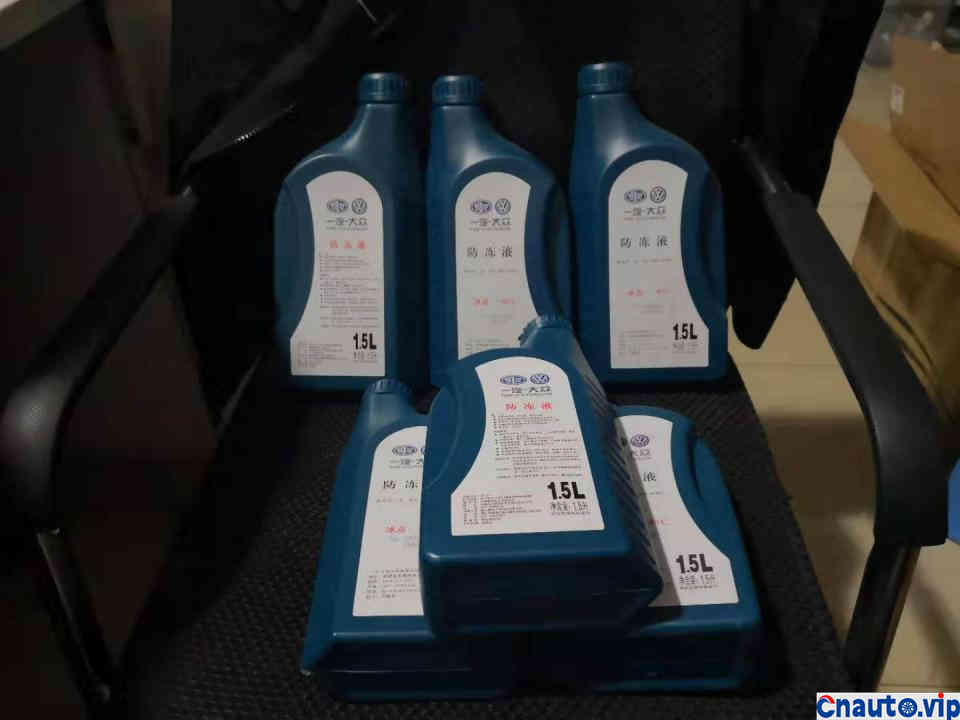
Antifreeze, FAW-Volkswagen, is the same as FAW-Audi, but the packaging is different.
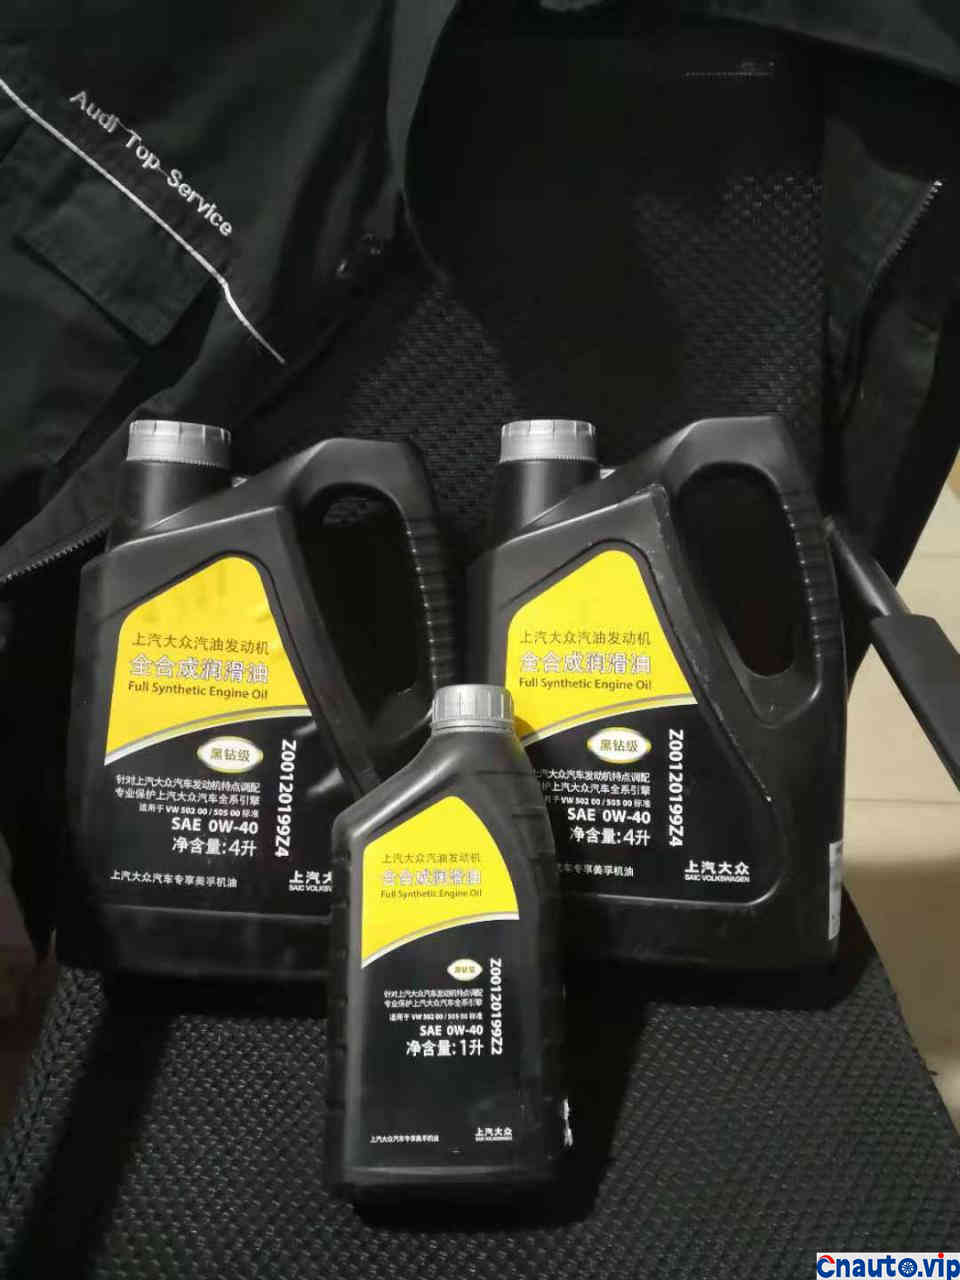
Black drill Mobil oil is very suitable for Volkswagen Audi engines.
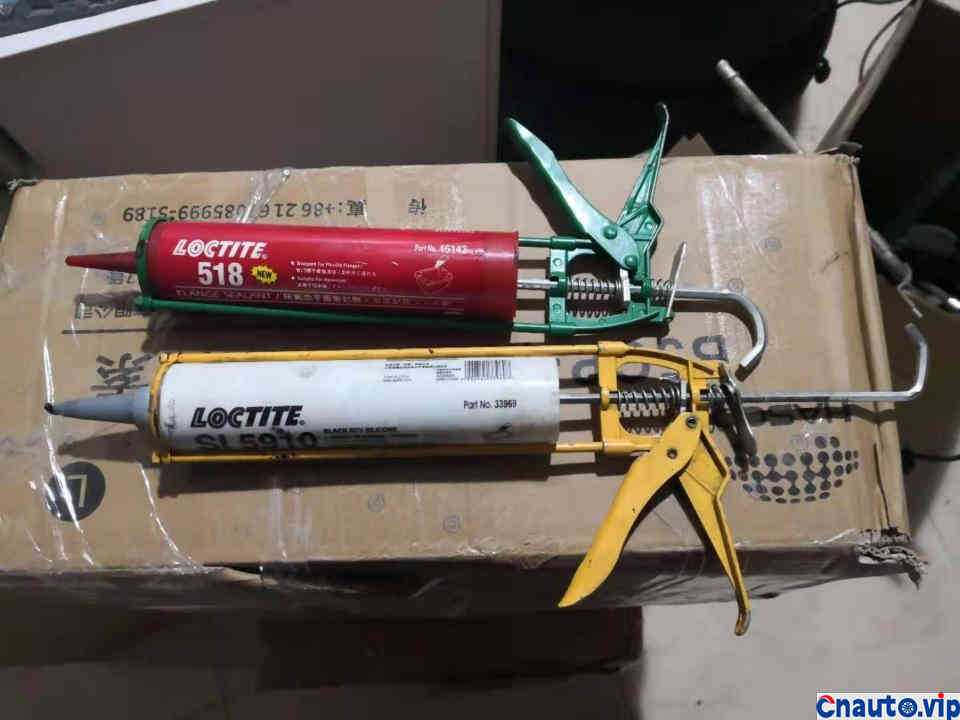
Black gum and red rubber, Henkel, original OEM.
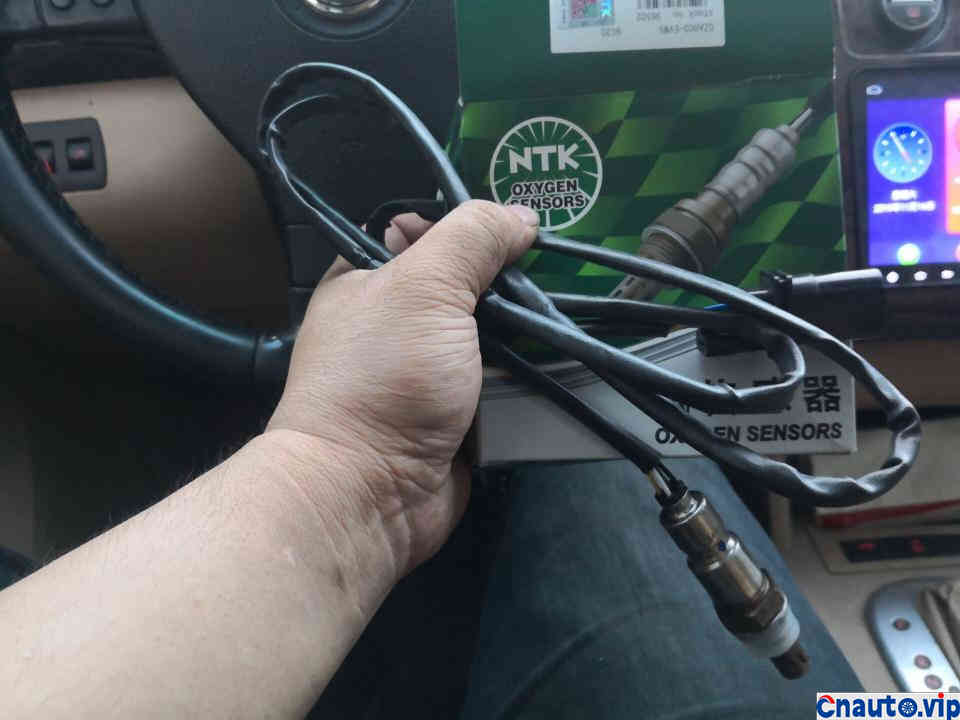
NTK original factory oxygen sensor. Some of Audi’s models are doctor’s, but all six-cylinder engines are made by NTK.
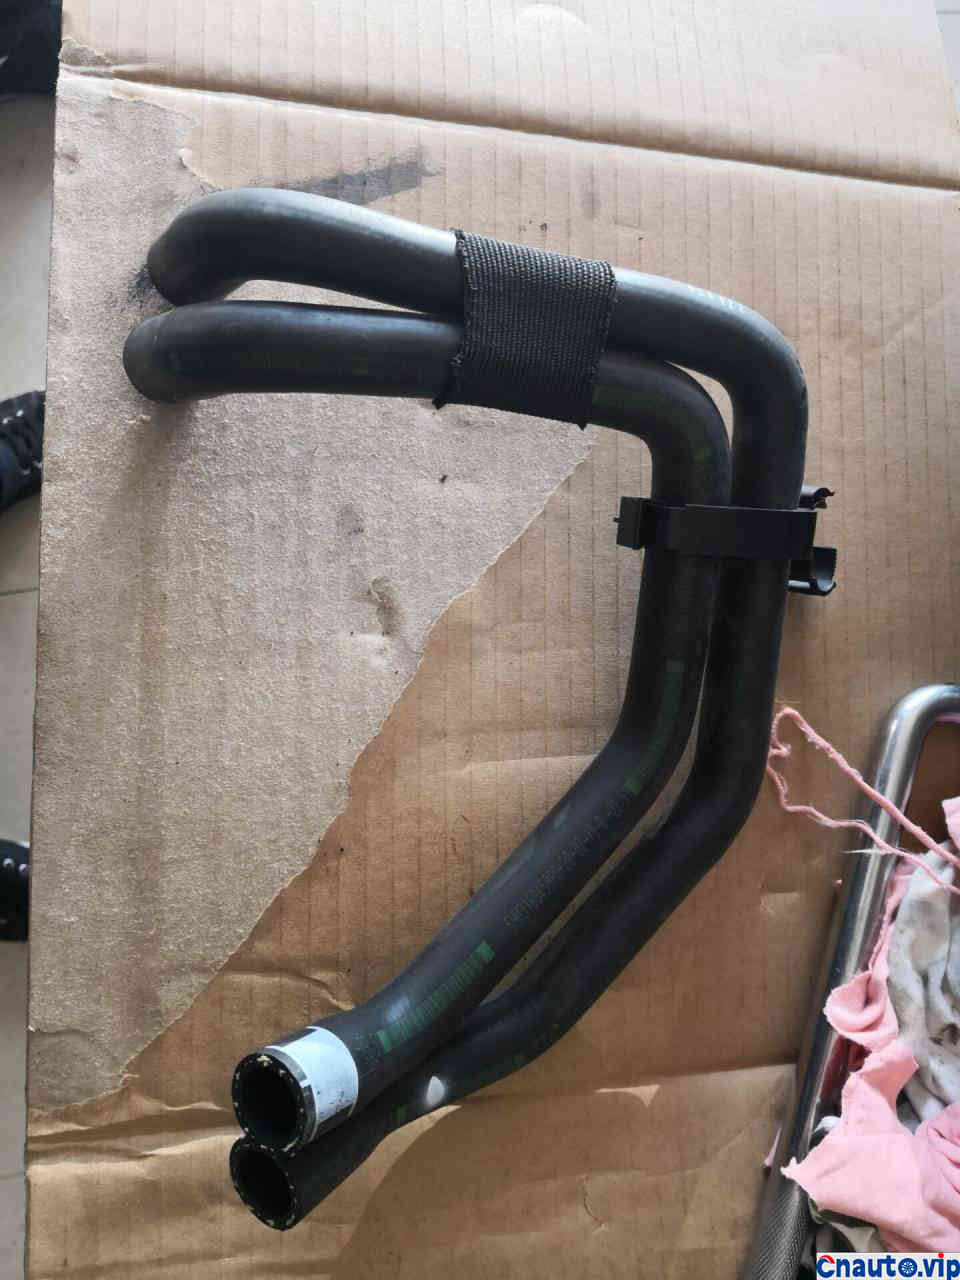
One of the warm air pipes is aging and swollen and must be replaced.
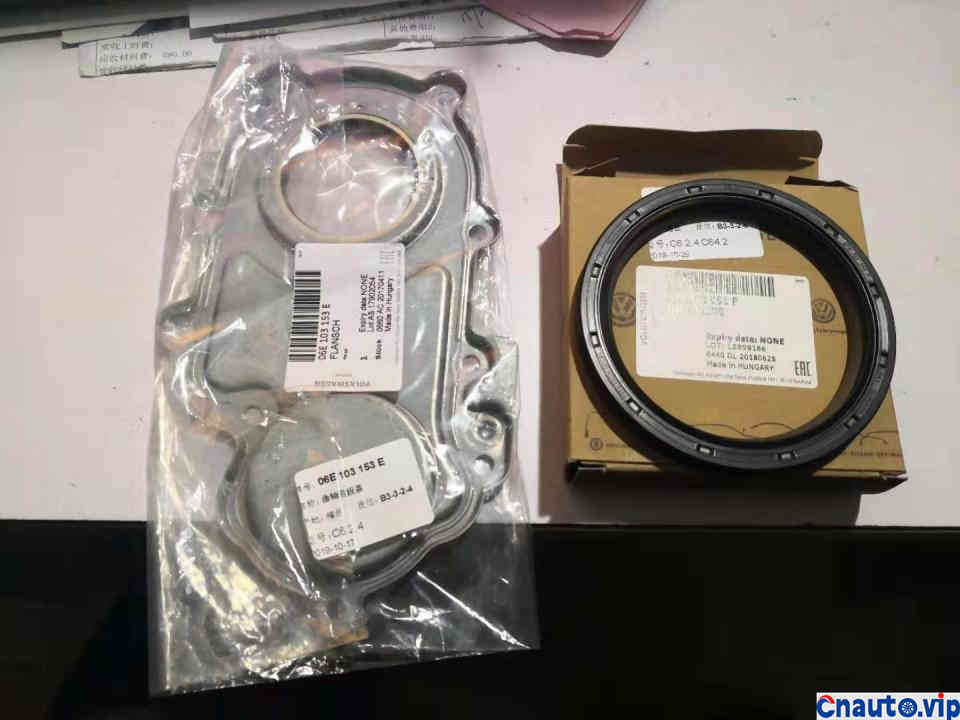
Crankshaft front oil seal and rear oil seal, original.
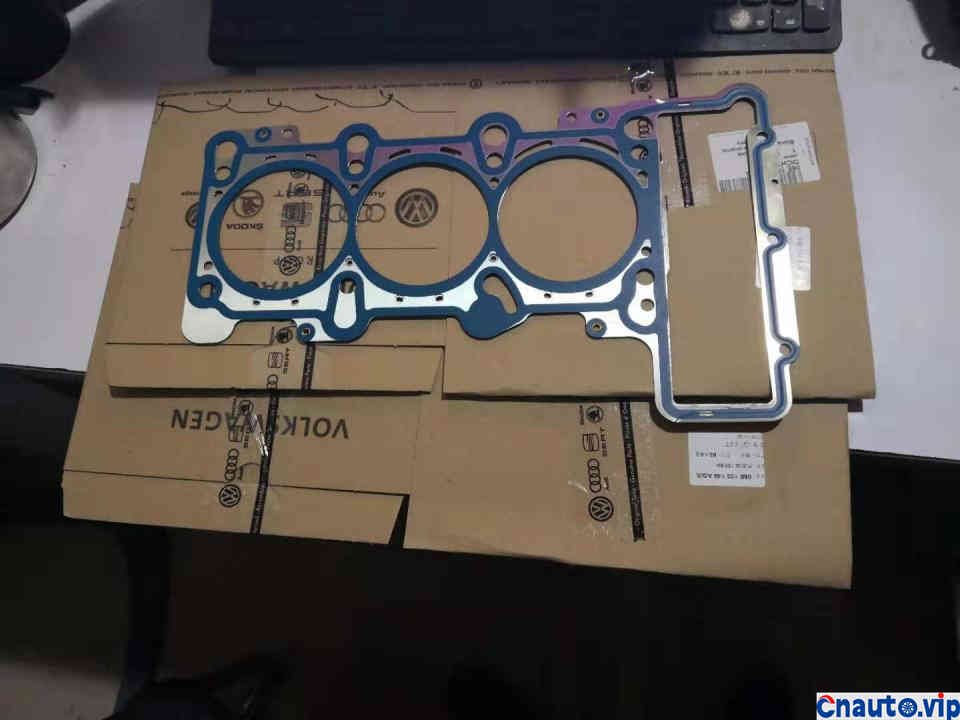
Cylinder gasket, original
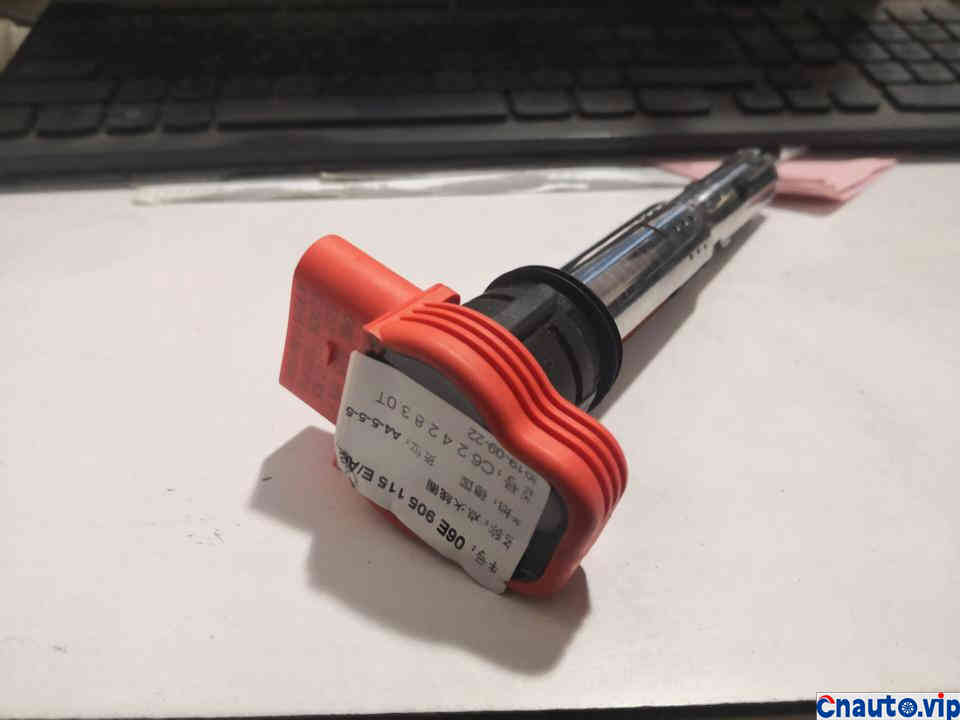
An original ignition coil
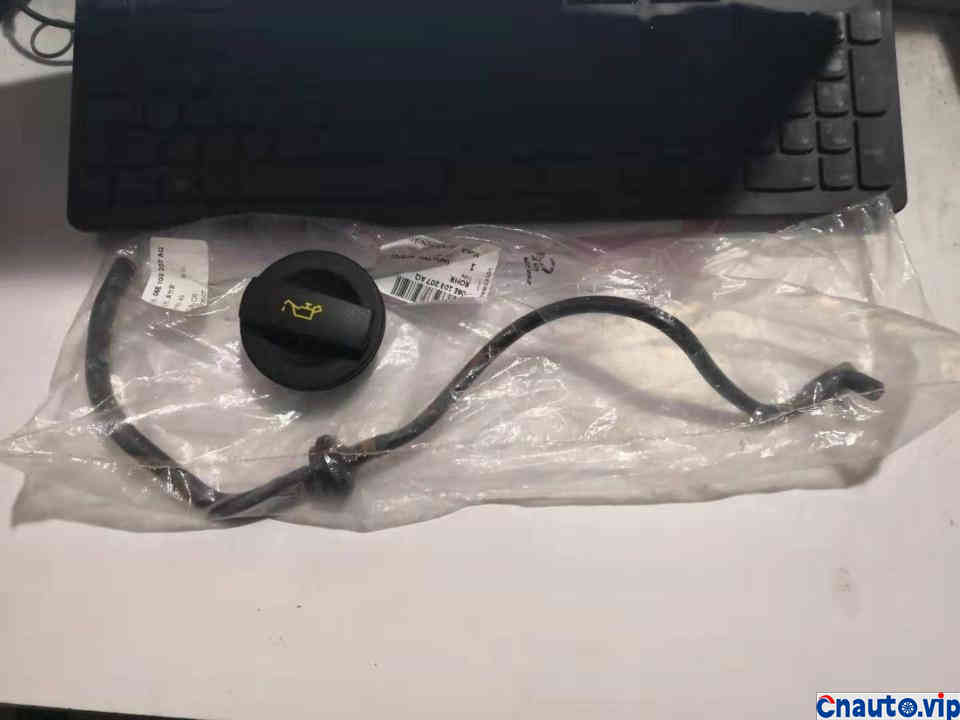
Original oil cap. This driver was also funny. After filling up the oil in the high-speed service area, the oil cap was lost somewhere. As a result, he bought a Passat B5 oil cap and put it on it. It was a little smaller. This time, he changed it back.
The vacuum pipe on the side was from the oil and gas separator to the branch of the air intake pipe in front of the throttle. As a result, the rubber broke, and the repairman wrapped it with electric tape and decisively replaced it this time.
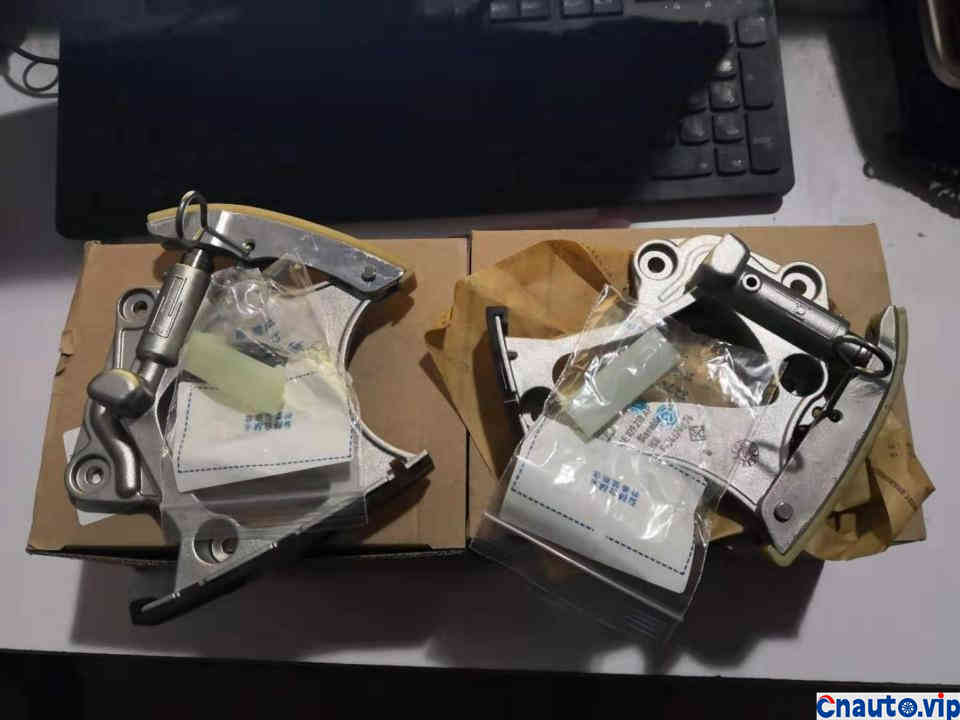
Timing chain tensioner and timing chain track, original parts
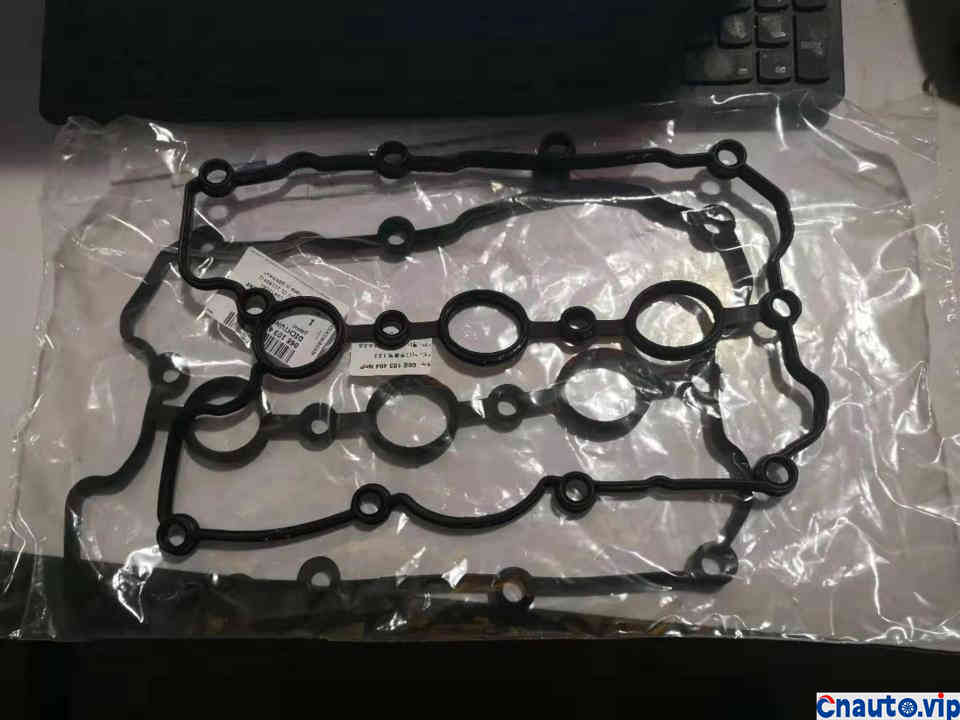
valve chamber cover gasket
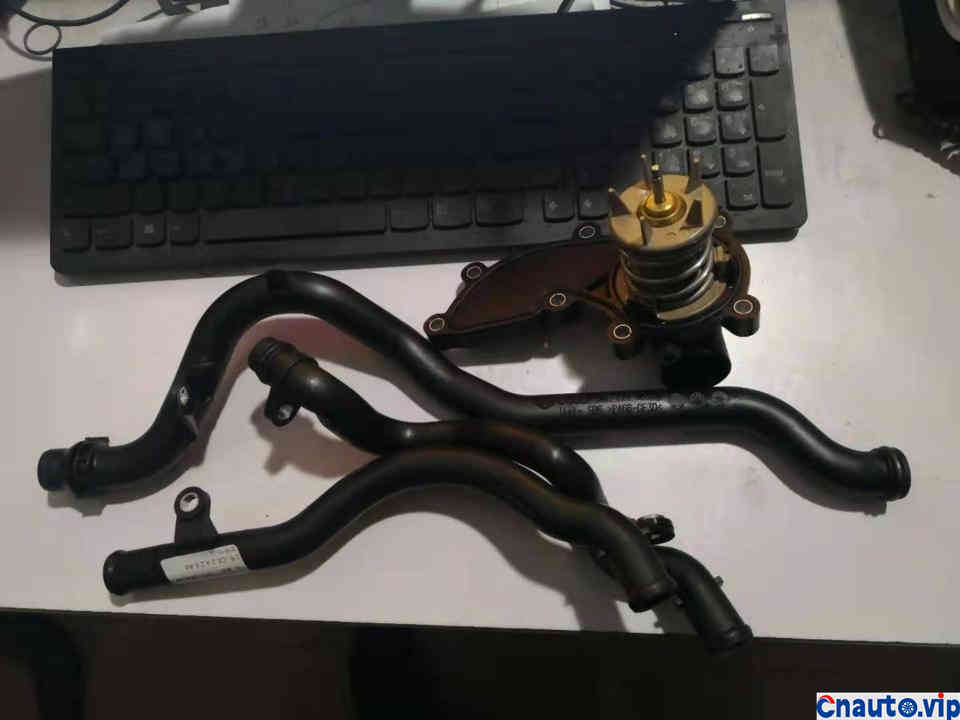
Oil radiator water pipes, thermostat and thermostat water pipes, original parts
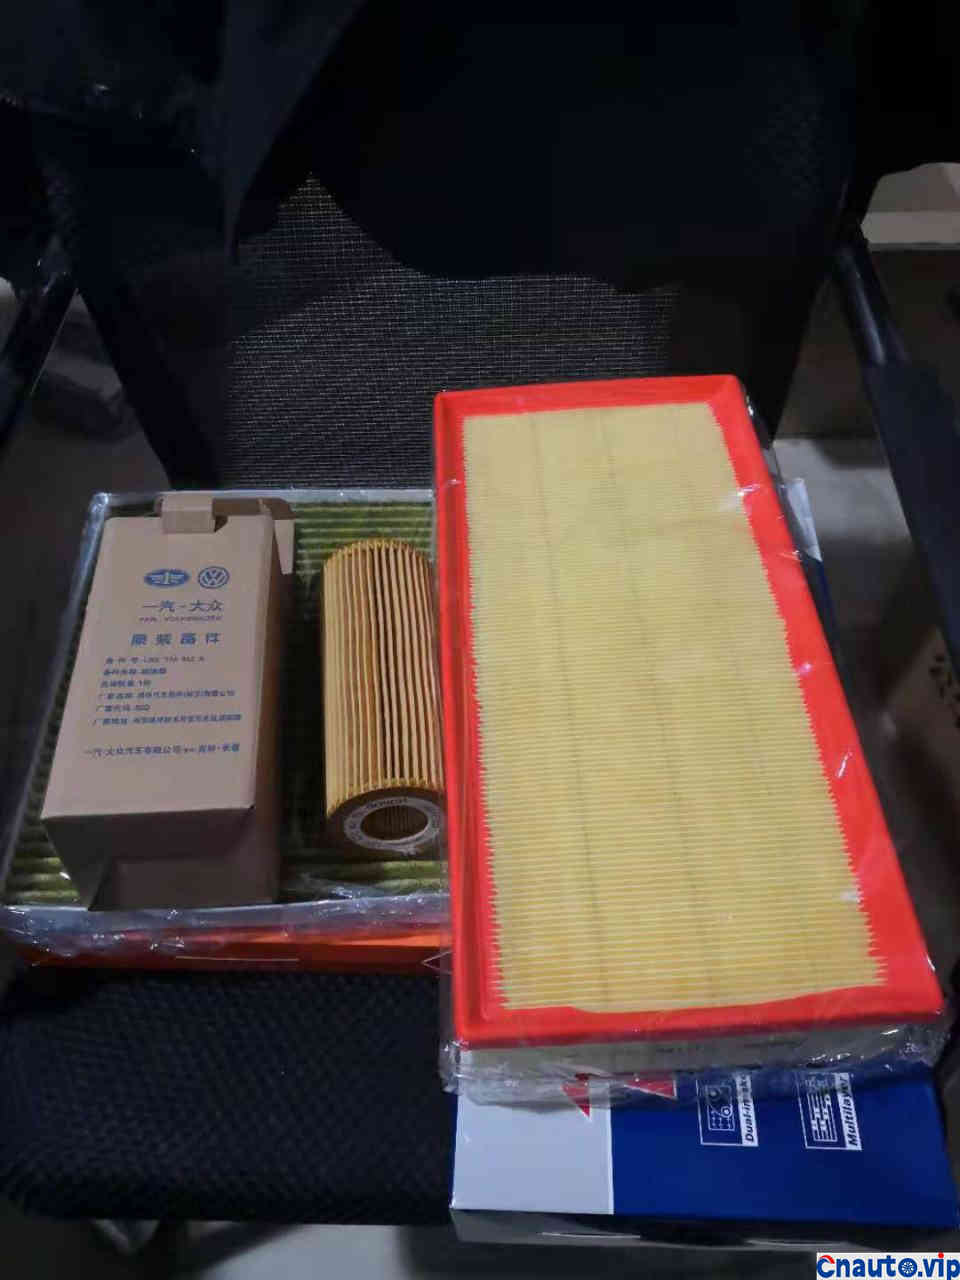
Three filters, no explanation
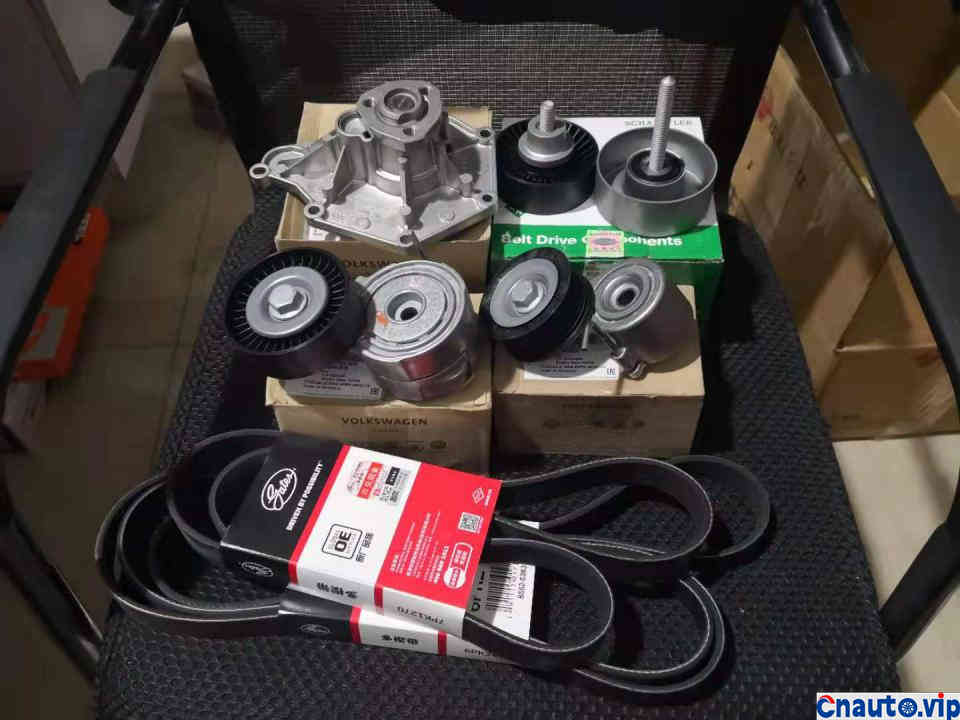
Original water pump, two original tensioners, Gates belt, original plastic idler pulley, Ina matching iron idler pulley, proper

Original spark plug, VDO original matching fuel injector and two simplified original check valves

Various seals, plugs, flywheel screws……
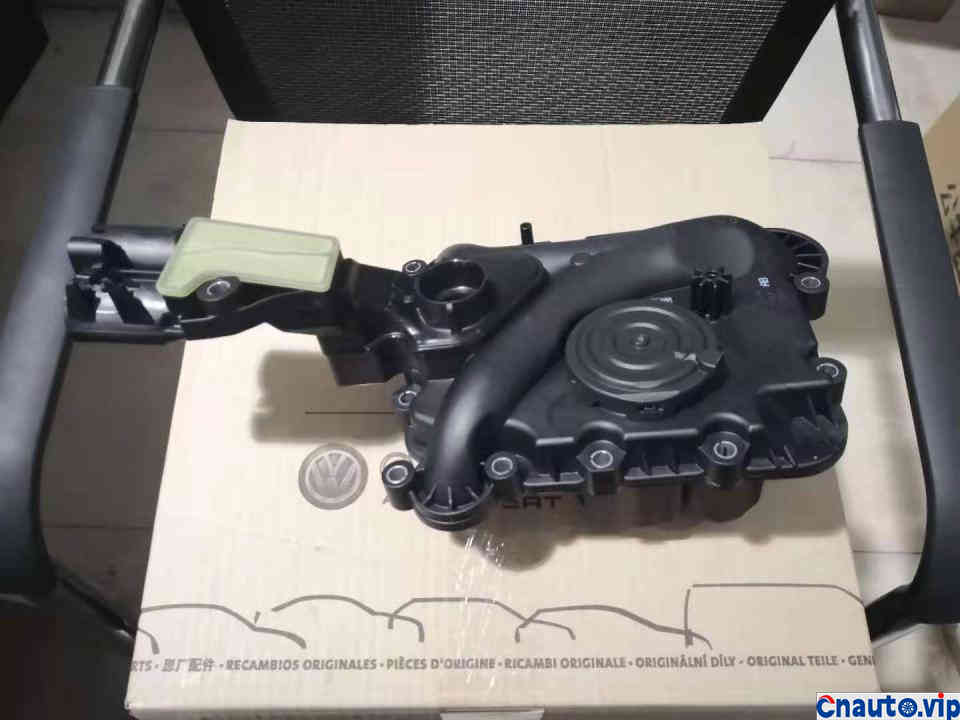
Oil and gas separator, which must be replaced during this overhaul, an improved version
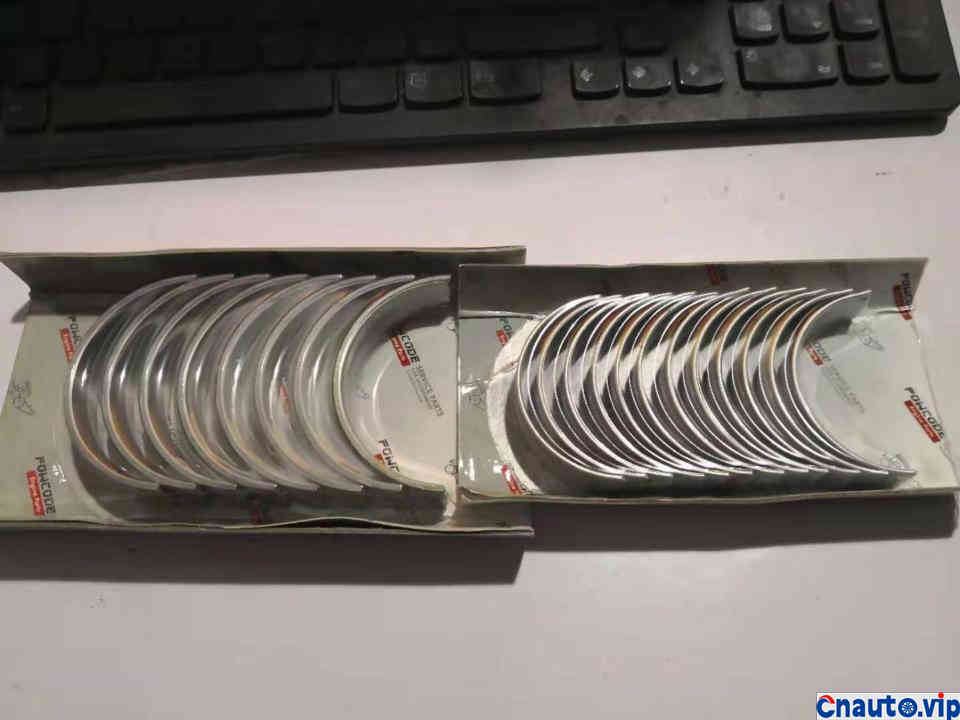
Large and small tiles, with ceramic layer
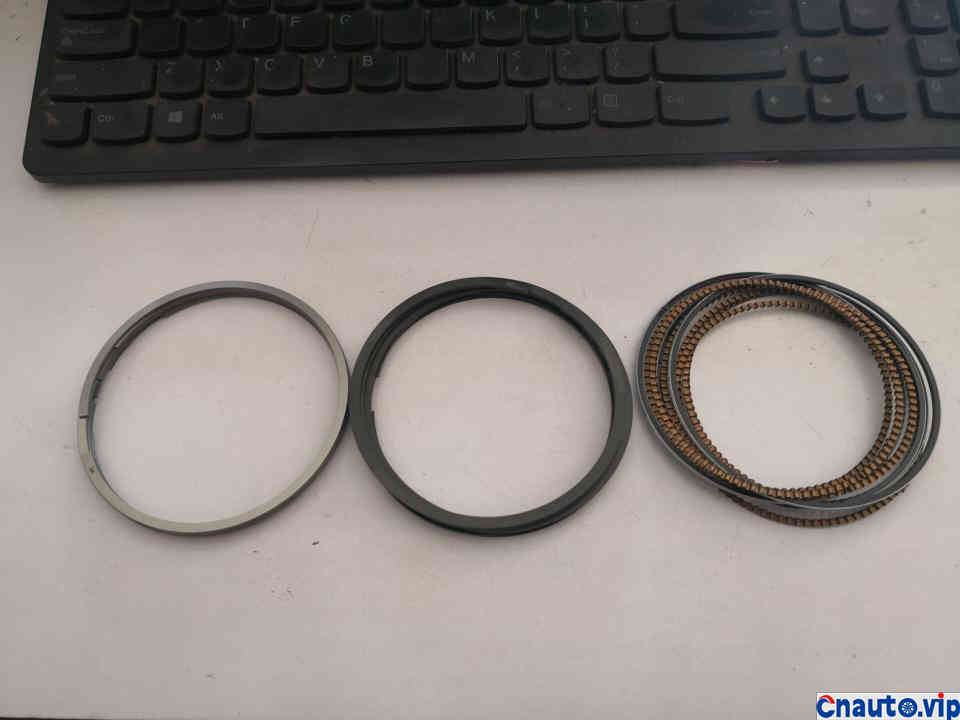
Improved piston rings. In particular, the oil ring has been improved into a wave-scraper ring, which is not easily blocked by carbon deposits and can be supported for a long time
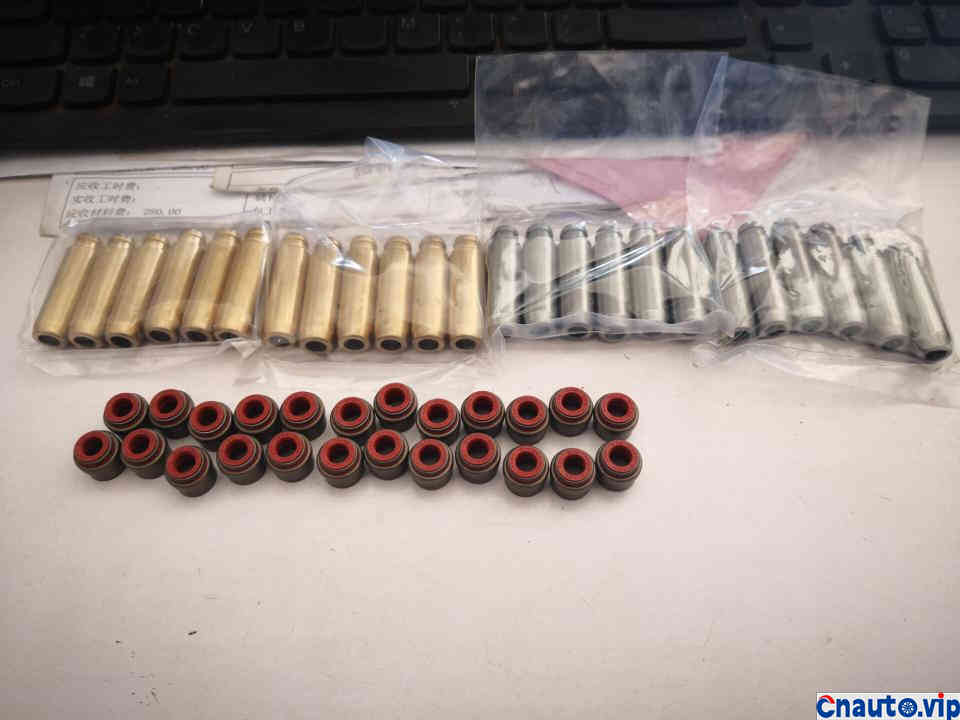
Valve guides and double-sealing valve oil seals are the patron saint of burning oil.
—————Installation and Delivery Chapter———————
Everything is ready, only the east wind is needed. All previous efforts have paved the way for this step. Let us strictly follow the original factory standards and manufacture a qualified and defect-free engine.

First replace with new big tiles and install the oil nozzle
Glue the big tile cover

Lift up the crankshaft, cover the large tile cover, and lock the tile cover screws according to the specified torque
Check the opening clearance of the piston ring. The first ring is 0.25~0.35MM, and here it is 0.3MM, perfect
The second ring is still 0.3MM clearance, perfect
The oil ring also has a clearance of 0.3MM, perfect
The piston is equipped with a new and improved piston ring, so you no longer have to worry about being blocked by carbon deposits
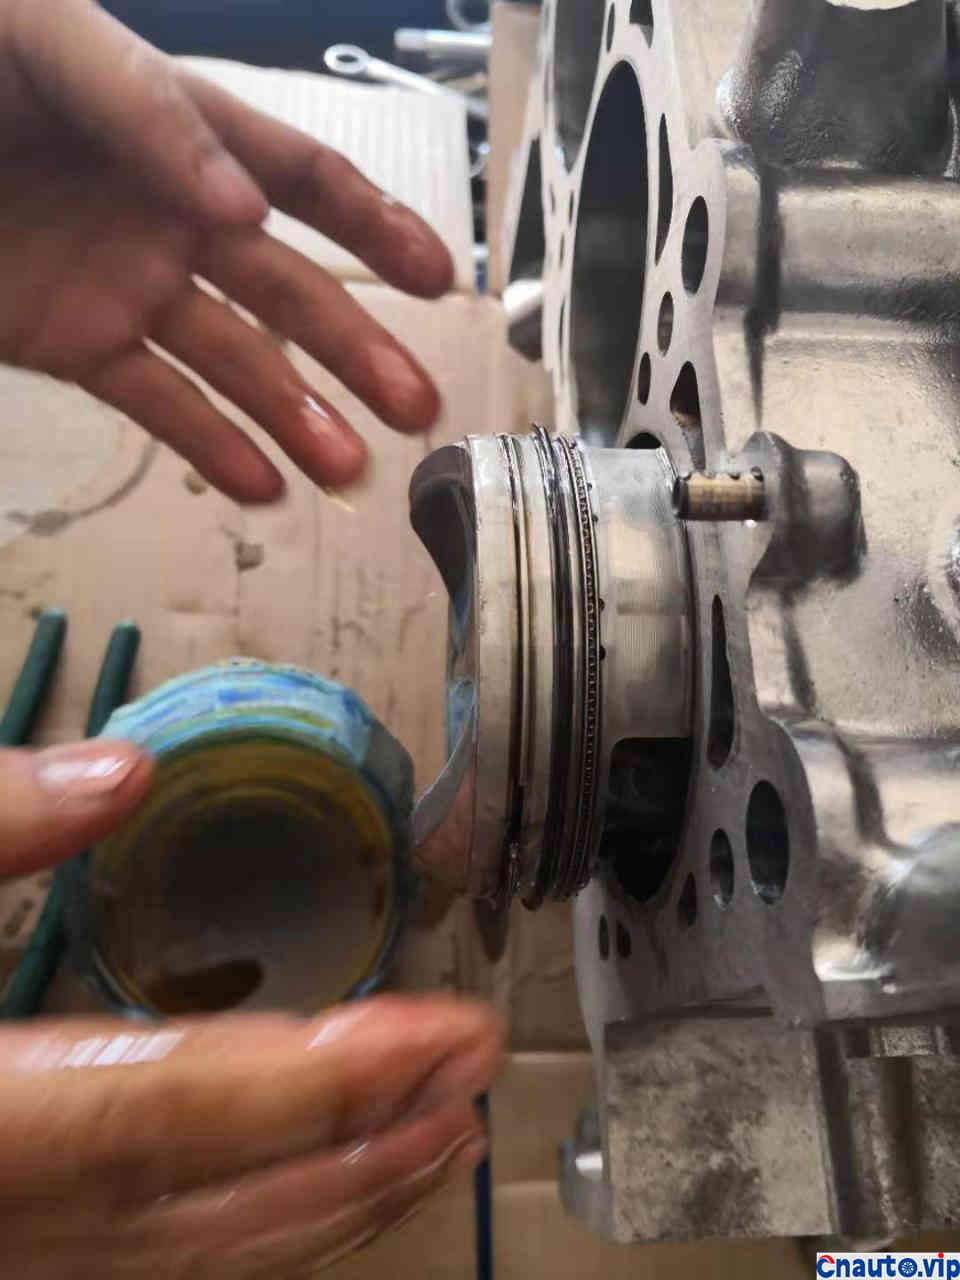
Piston is loaded into cylinder
Use a special fixture to poke it into the cylinder

Replace the heating water pipes while the engine is still outside and the position is large
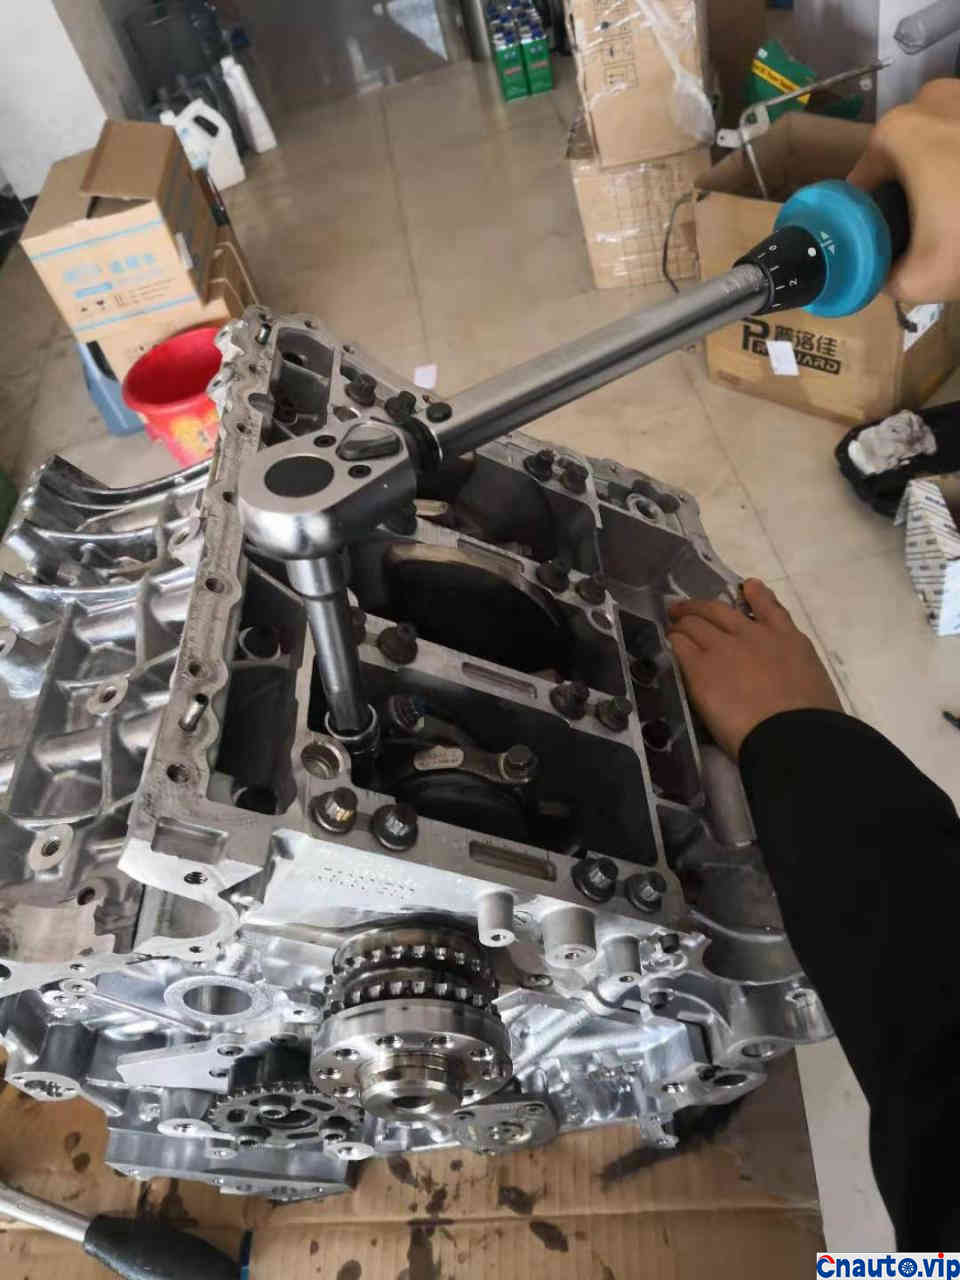
Tighten the screws of the large tile cover according to the specified torque
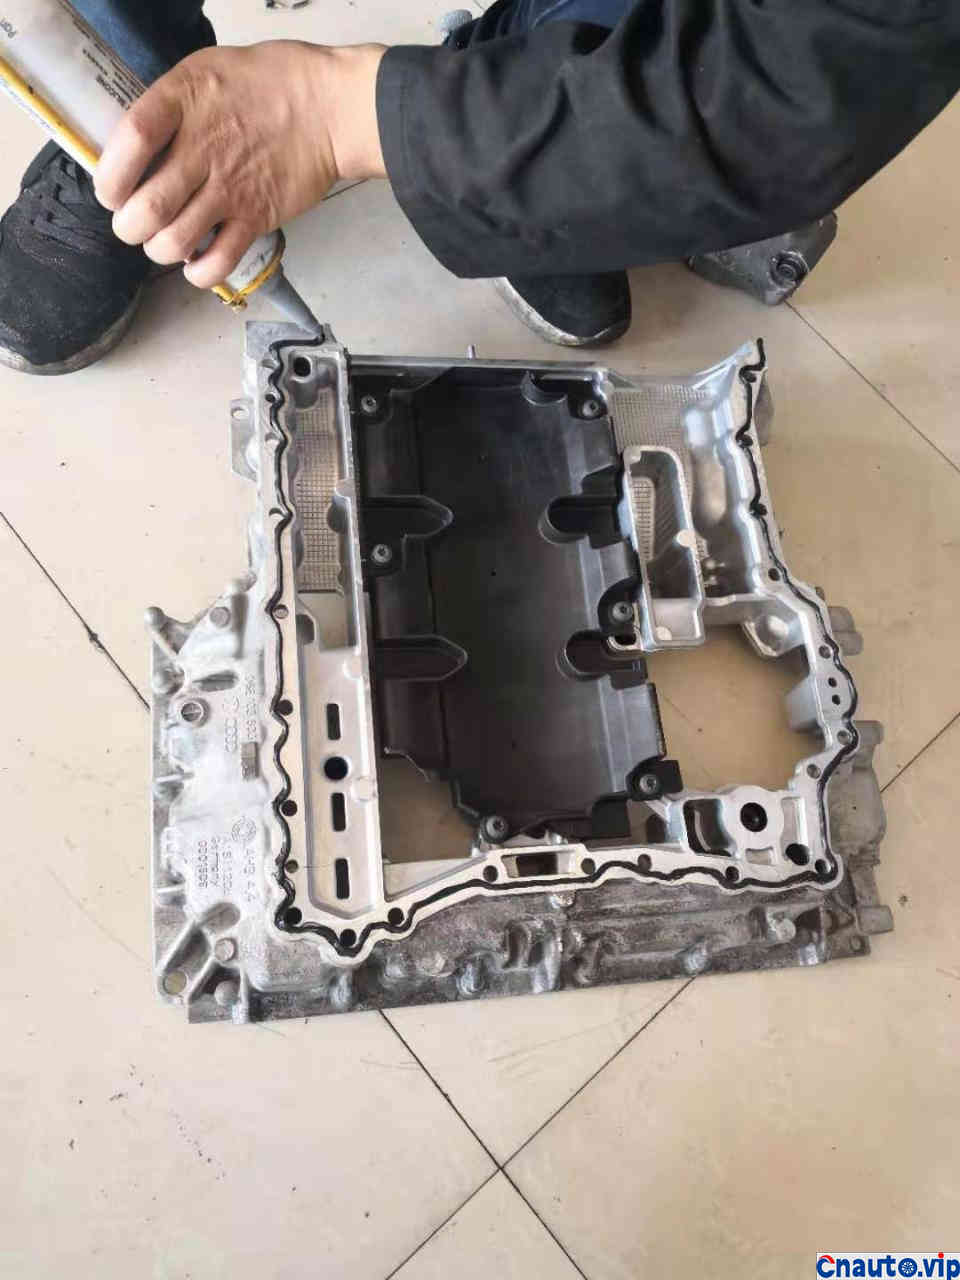
Glue middle oil pan

Cover the middle oil pan
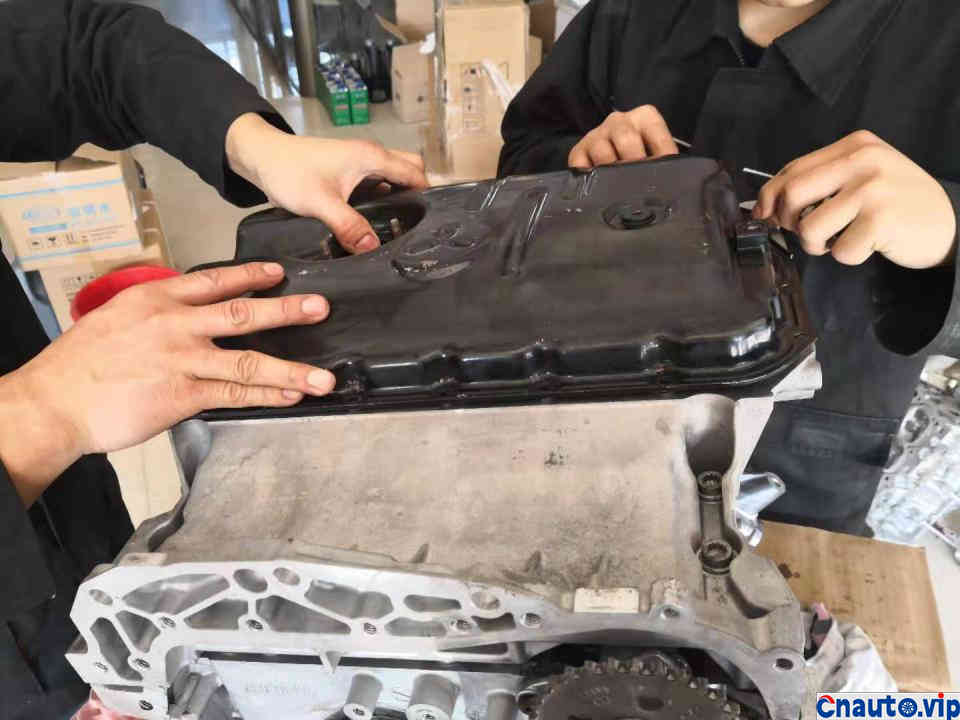
Install the oil pump and oil pan, and turn the engine upside down
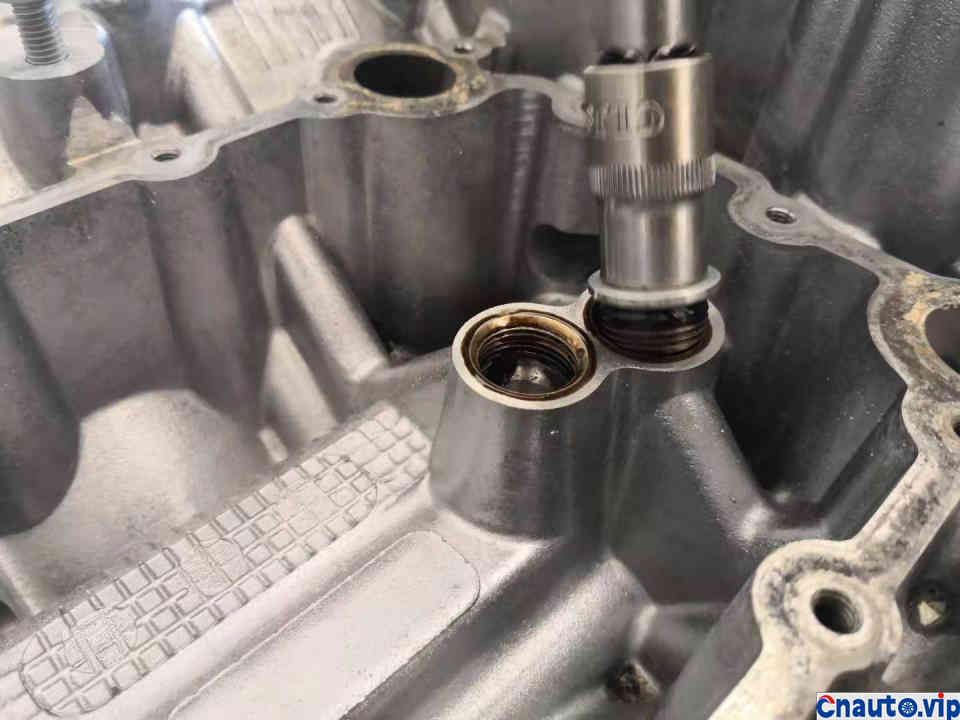
Remove this stupid plug design
Replace it with Audi original check valve and restore the designer’s original intention
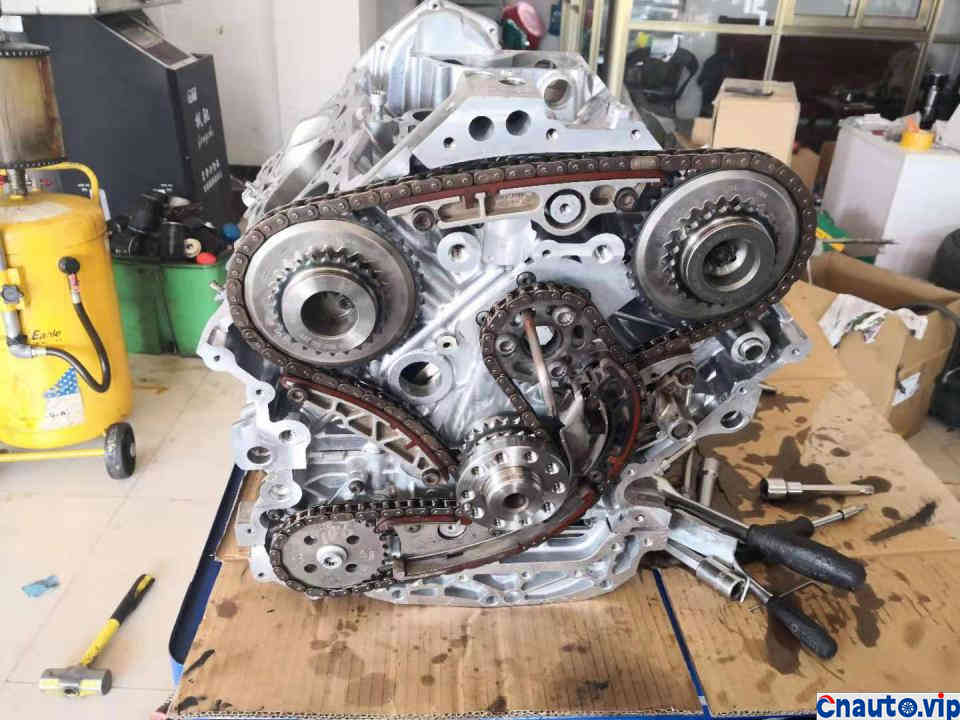
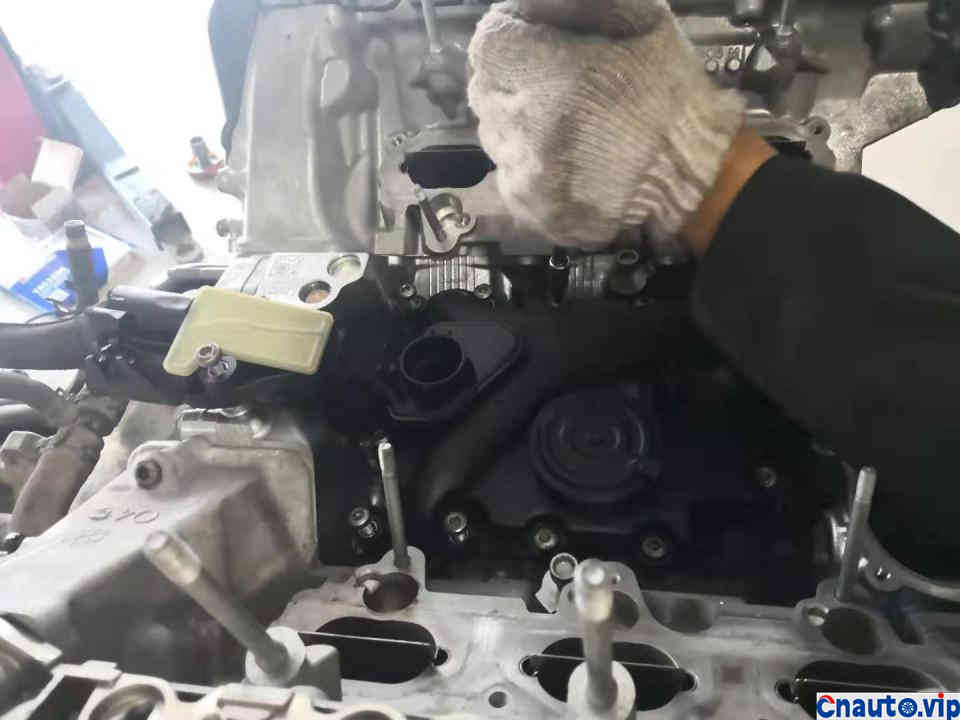
Install the drive chain at the back

After covering the rear cover, install the crankshaft rear oil seal with a special tool
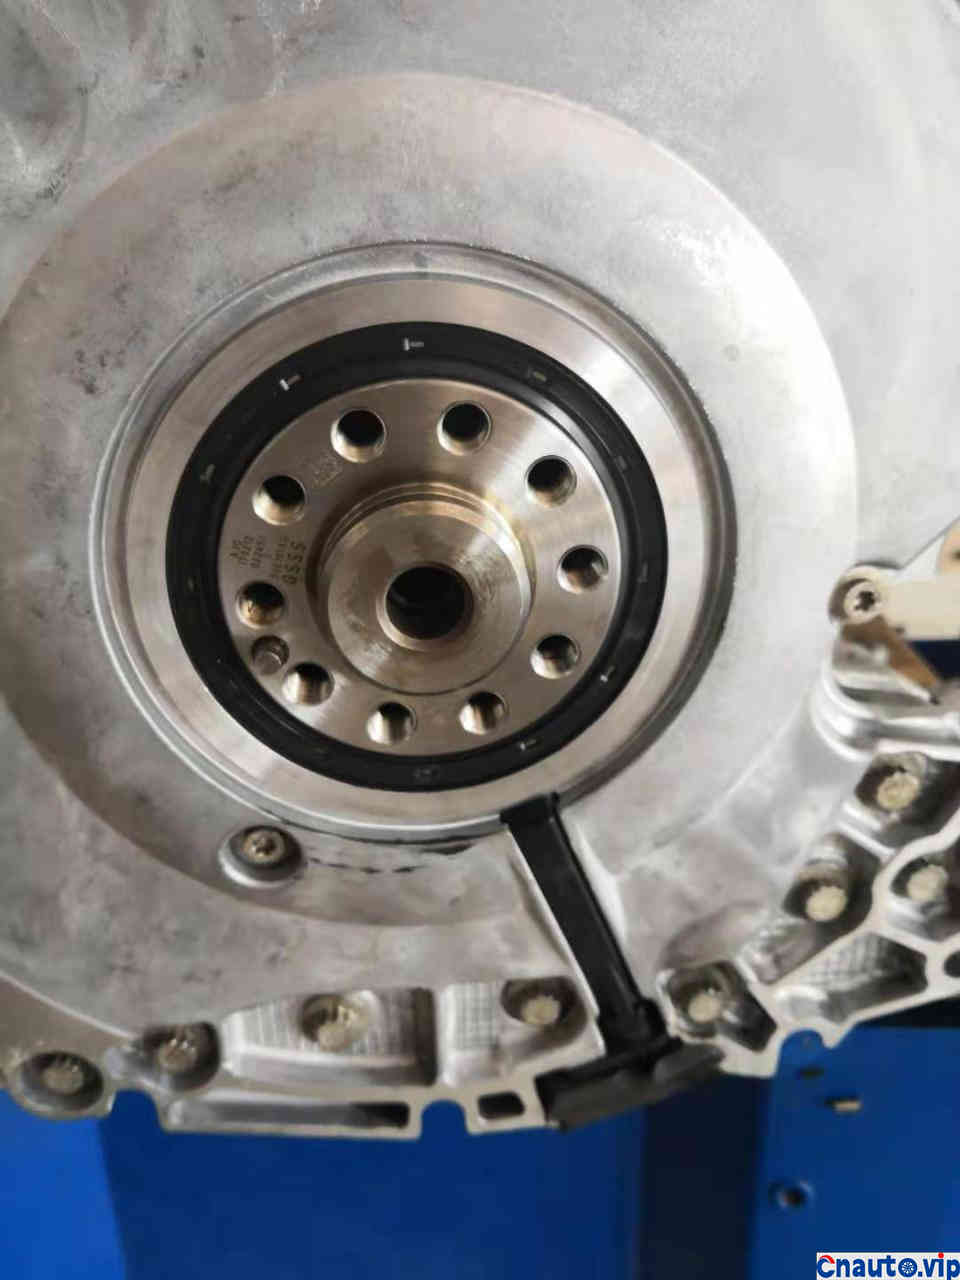
Perfect installation of crankshaft rear oil seal
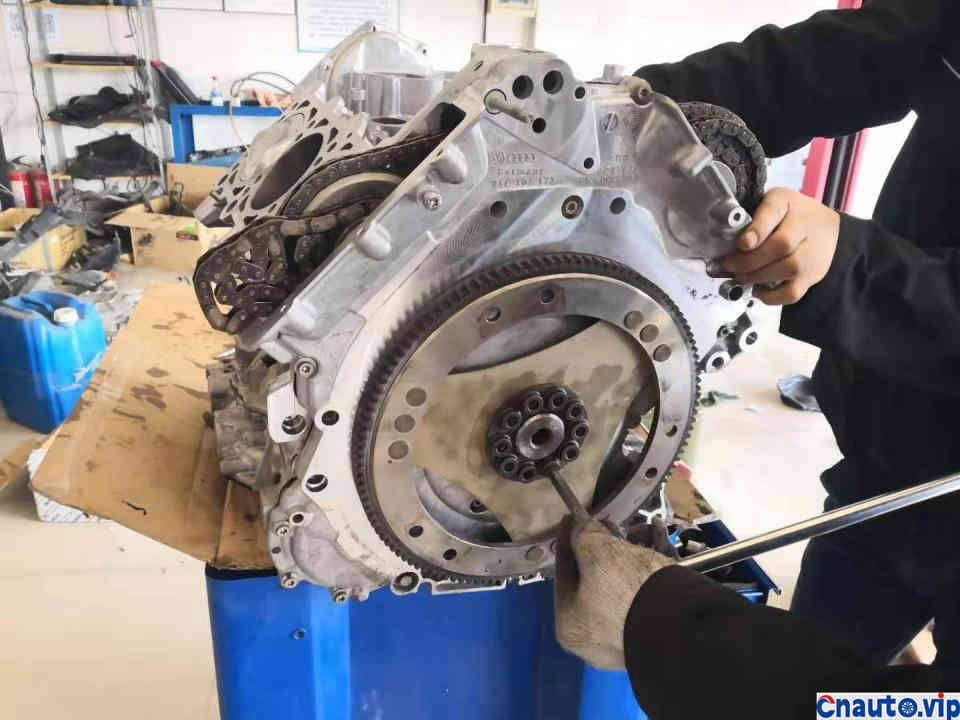
Lock the flywheel disc screws
Bring the assembled cylinder block over and connect it with the gearbox
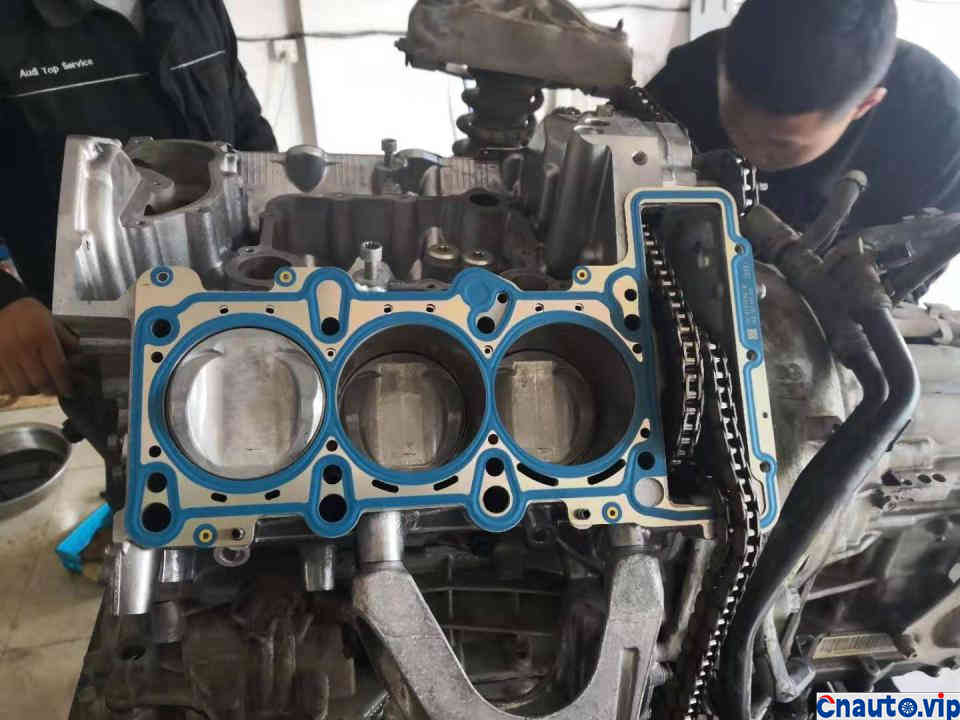
Lay the cylinder gasket
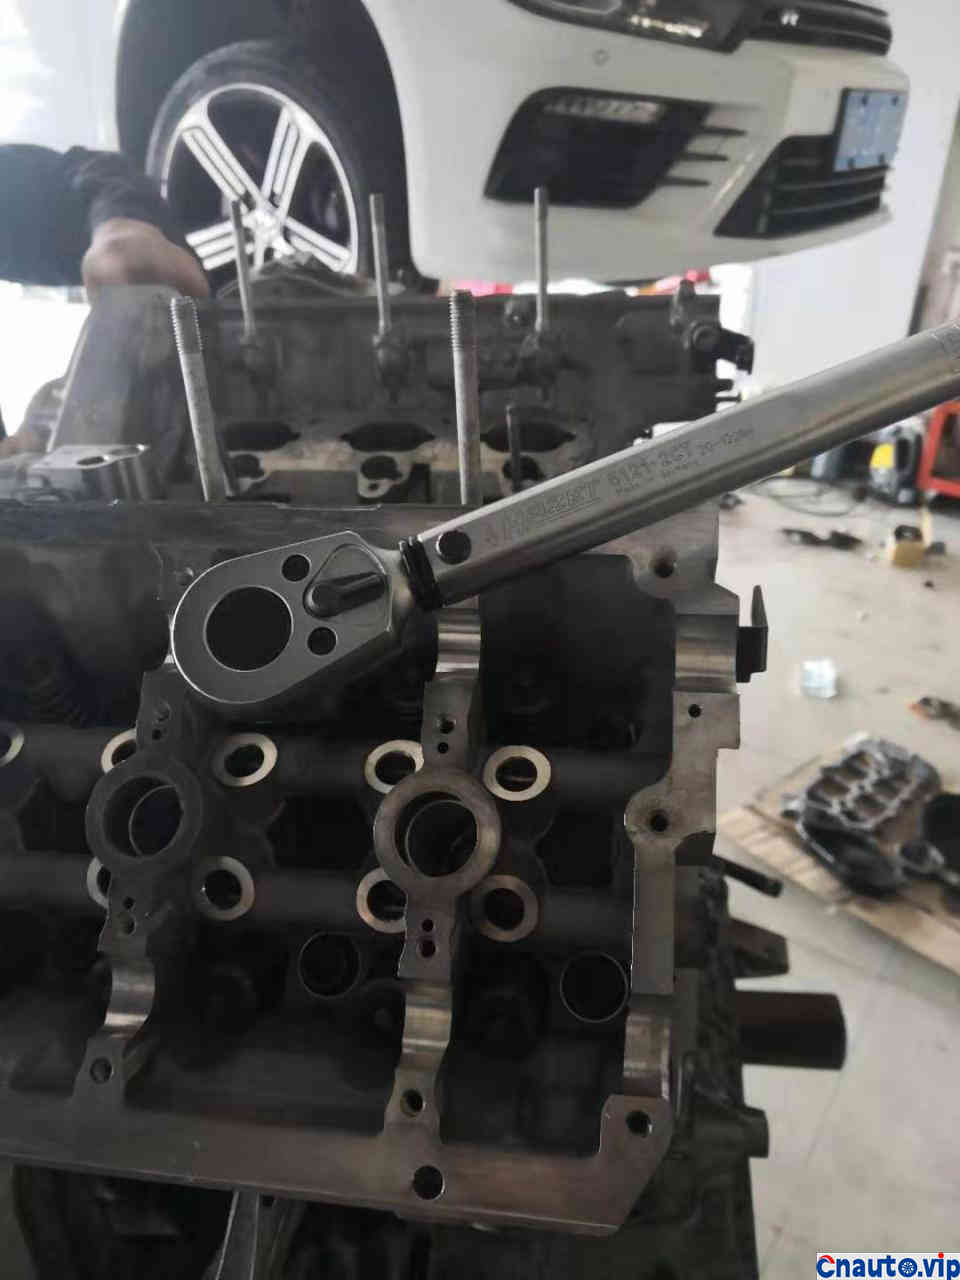
After installing the cylinder head, use a torque wrench to tighten the cylinder head screws according to the original factory order and torque
Glue the valve chamber cover. There are two situations here. Glue 13 years ago, red glue 13 years later
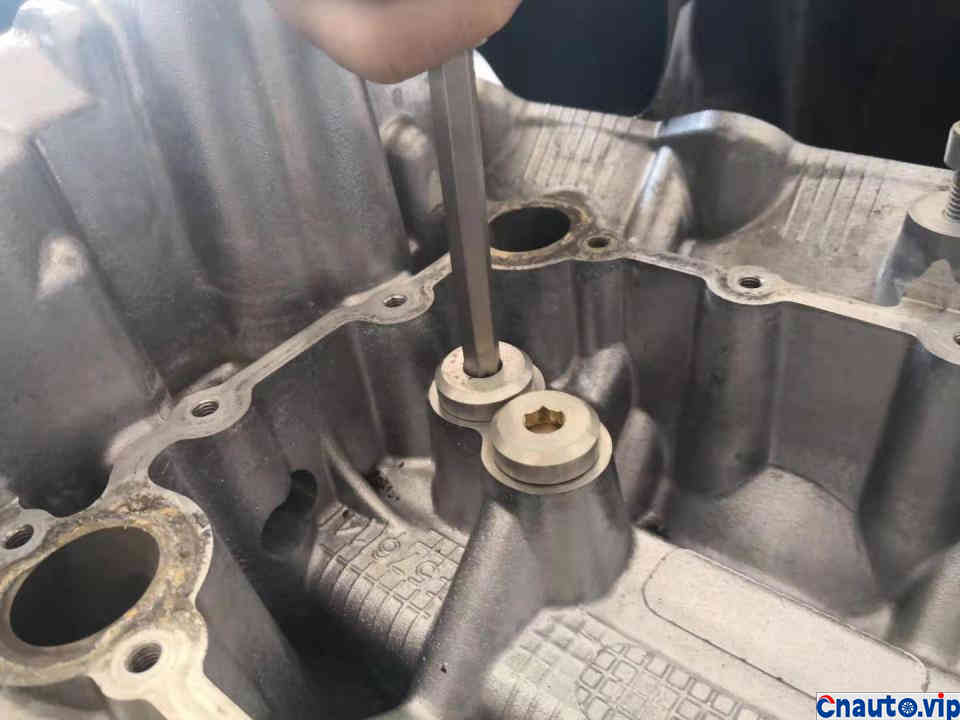
Lock the camshaft and crankshaft with special tools
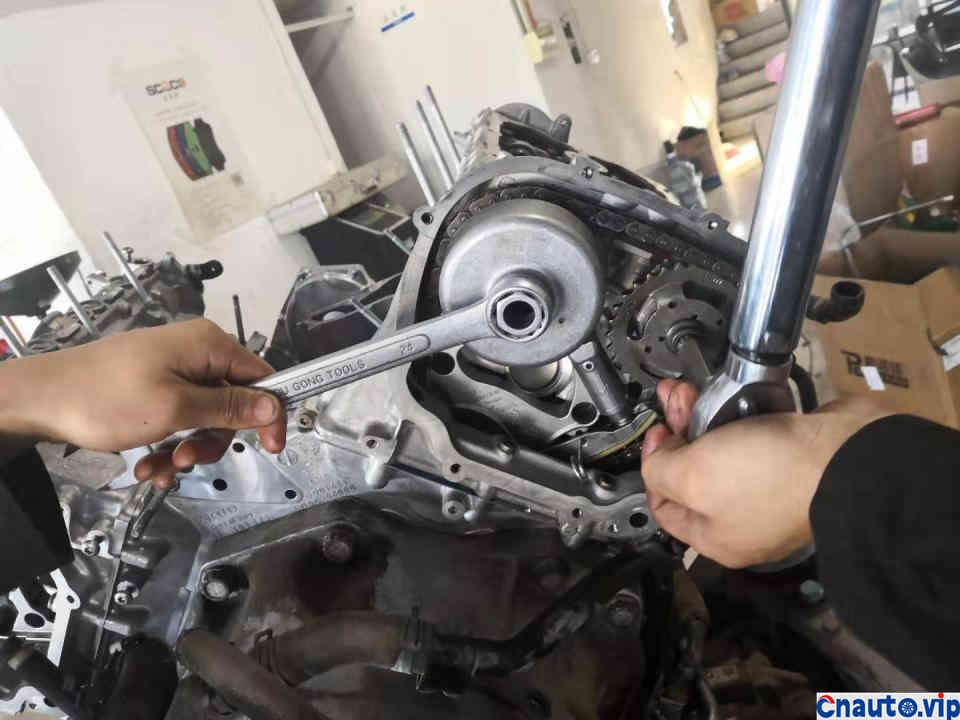
Use a special tool to tighten the rear sprocket screws
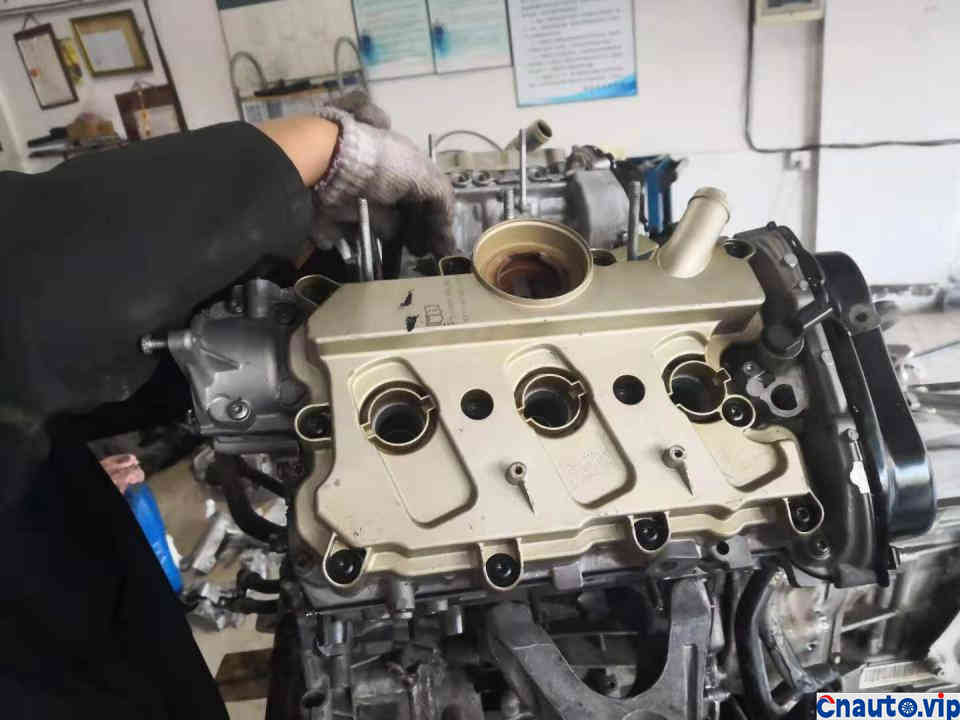
Install the valve cover
Install a new oil and gas separator
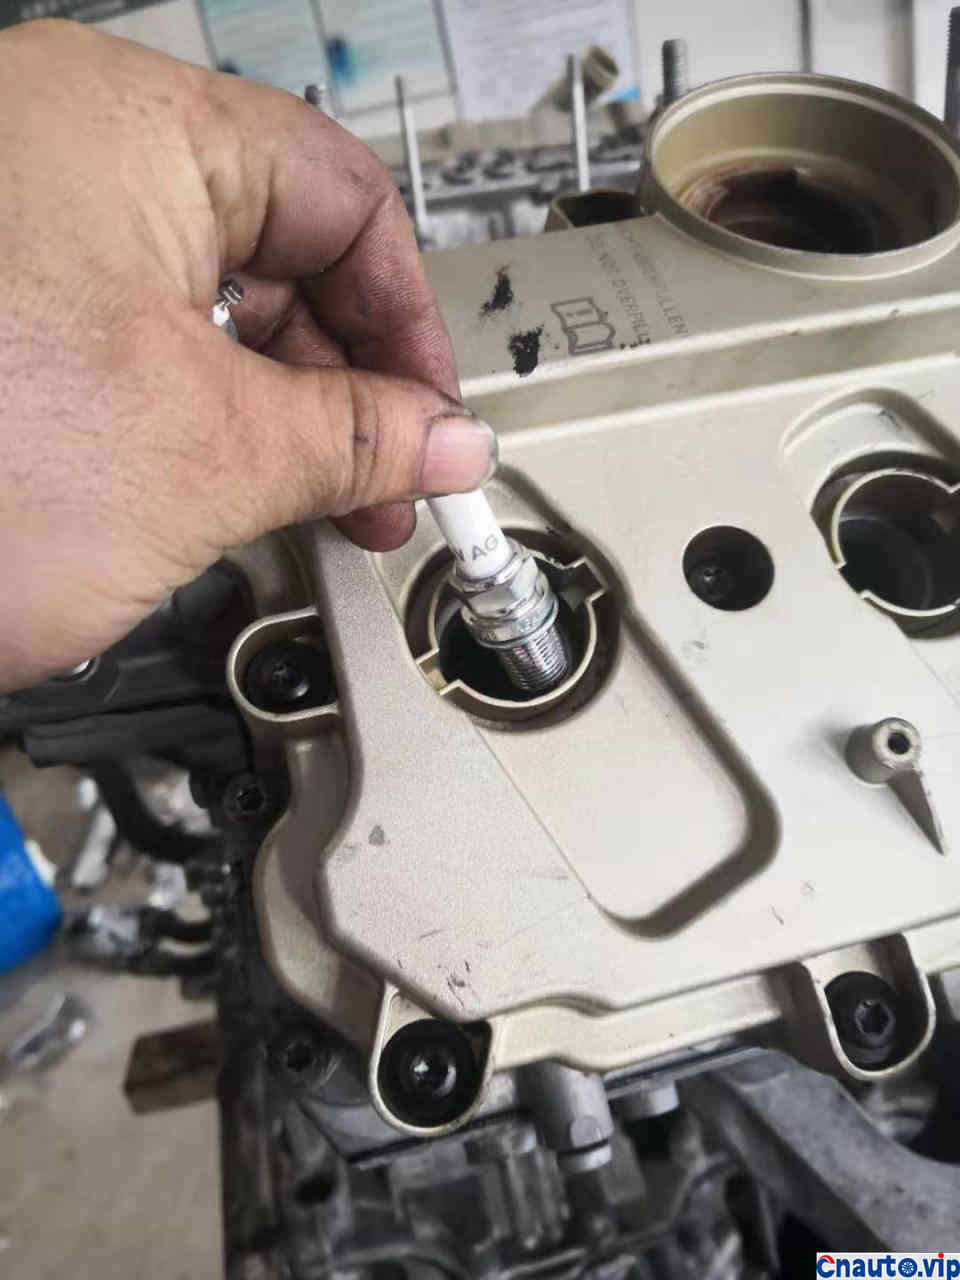
Replace with a new spark plug
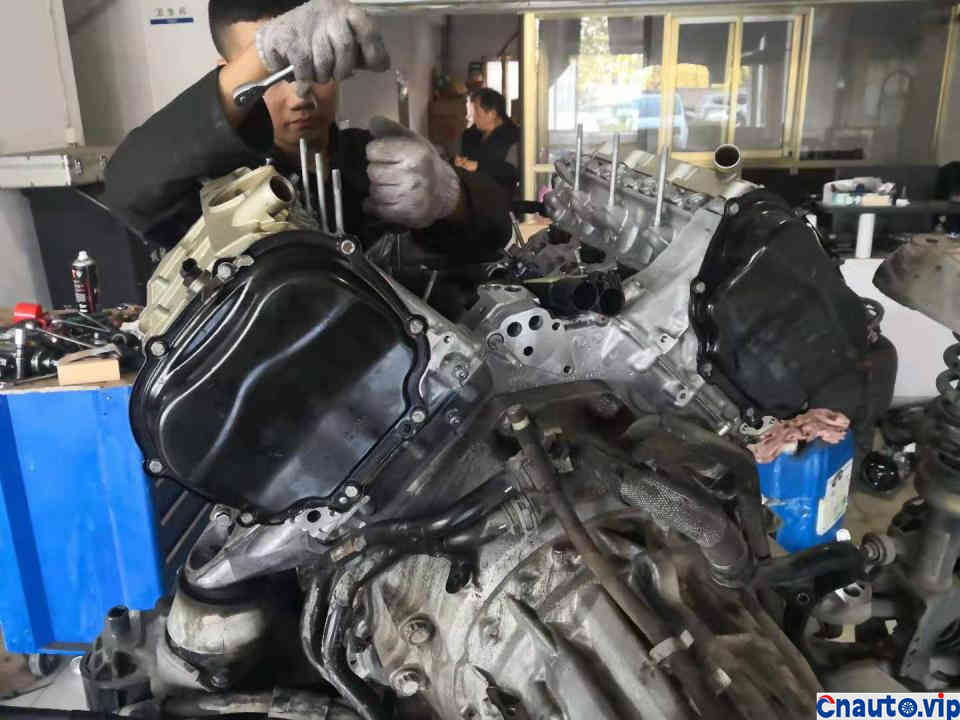
My brother is working hard to install it ~~~~
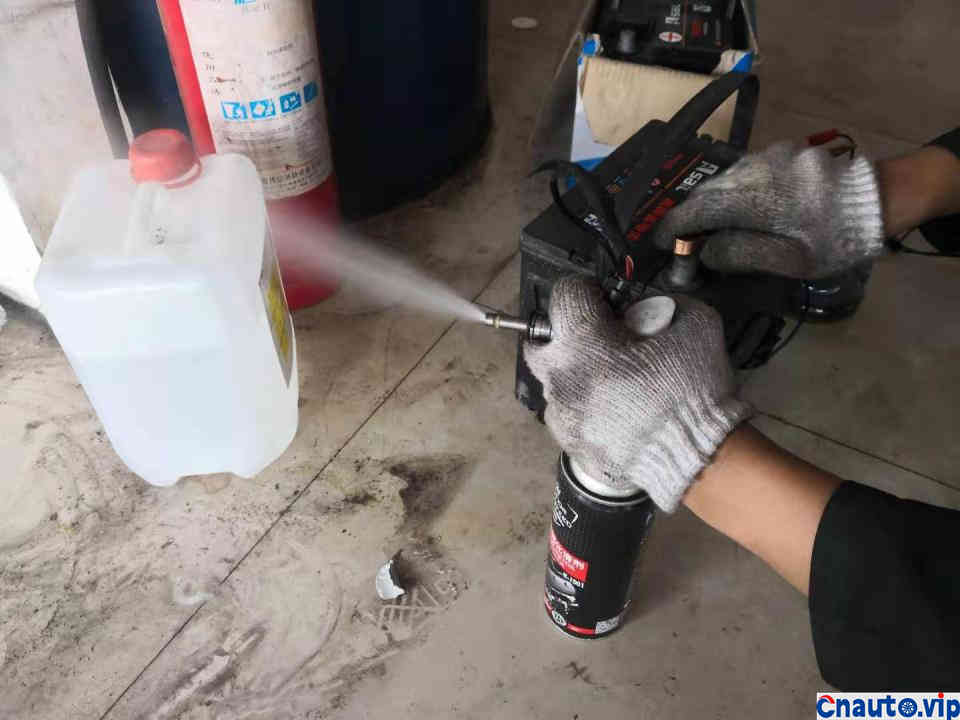
Before installing the fuel injector, clean the fuel injector to see how good the atomization quality is. It’s good
Wash the five fuel nozzles and install a new fuel nozzle
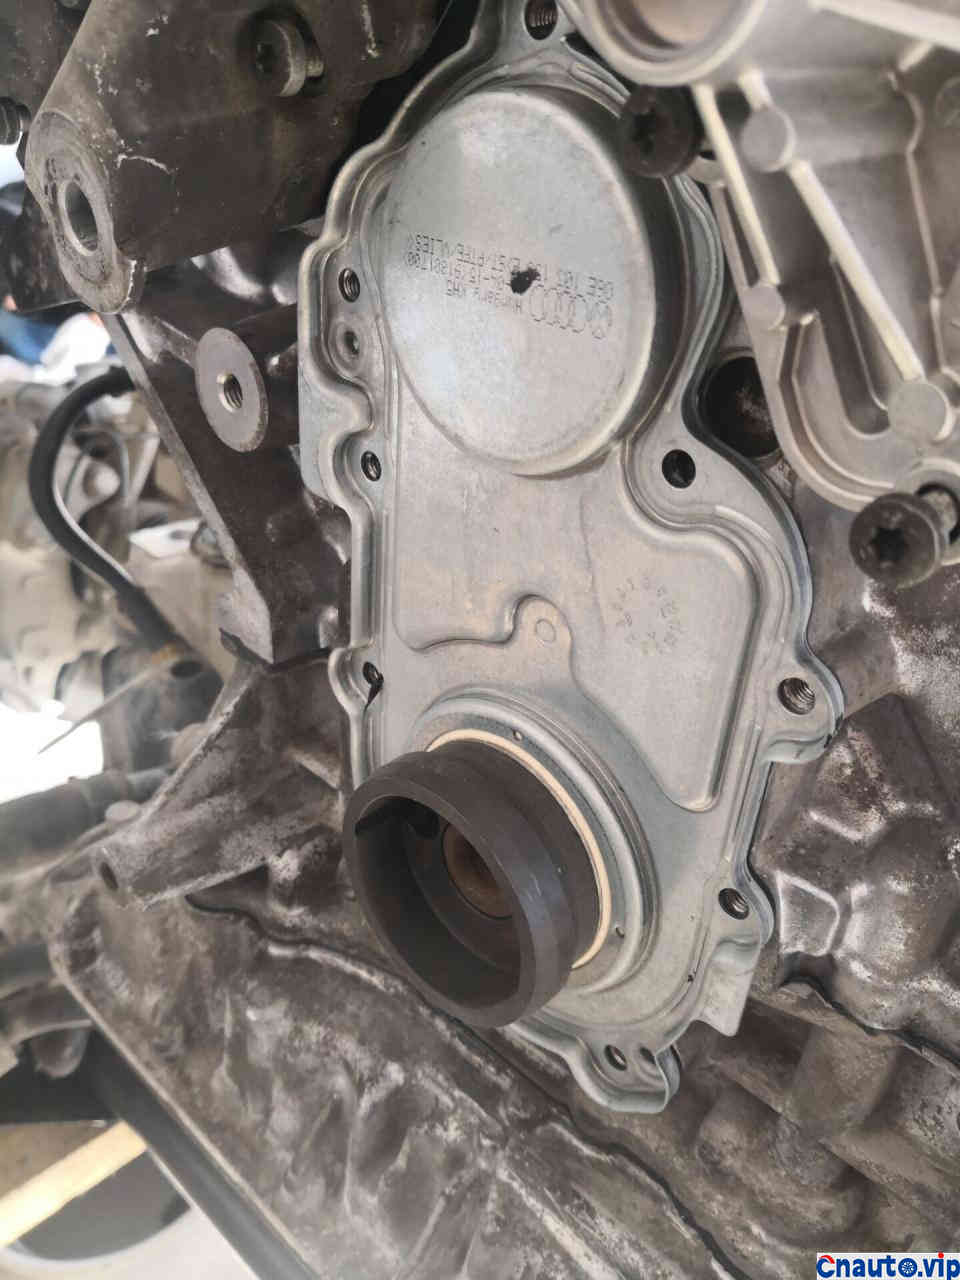
Install the crankshaft front oil seal with a special tool
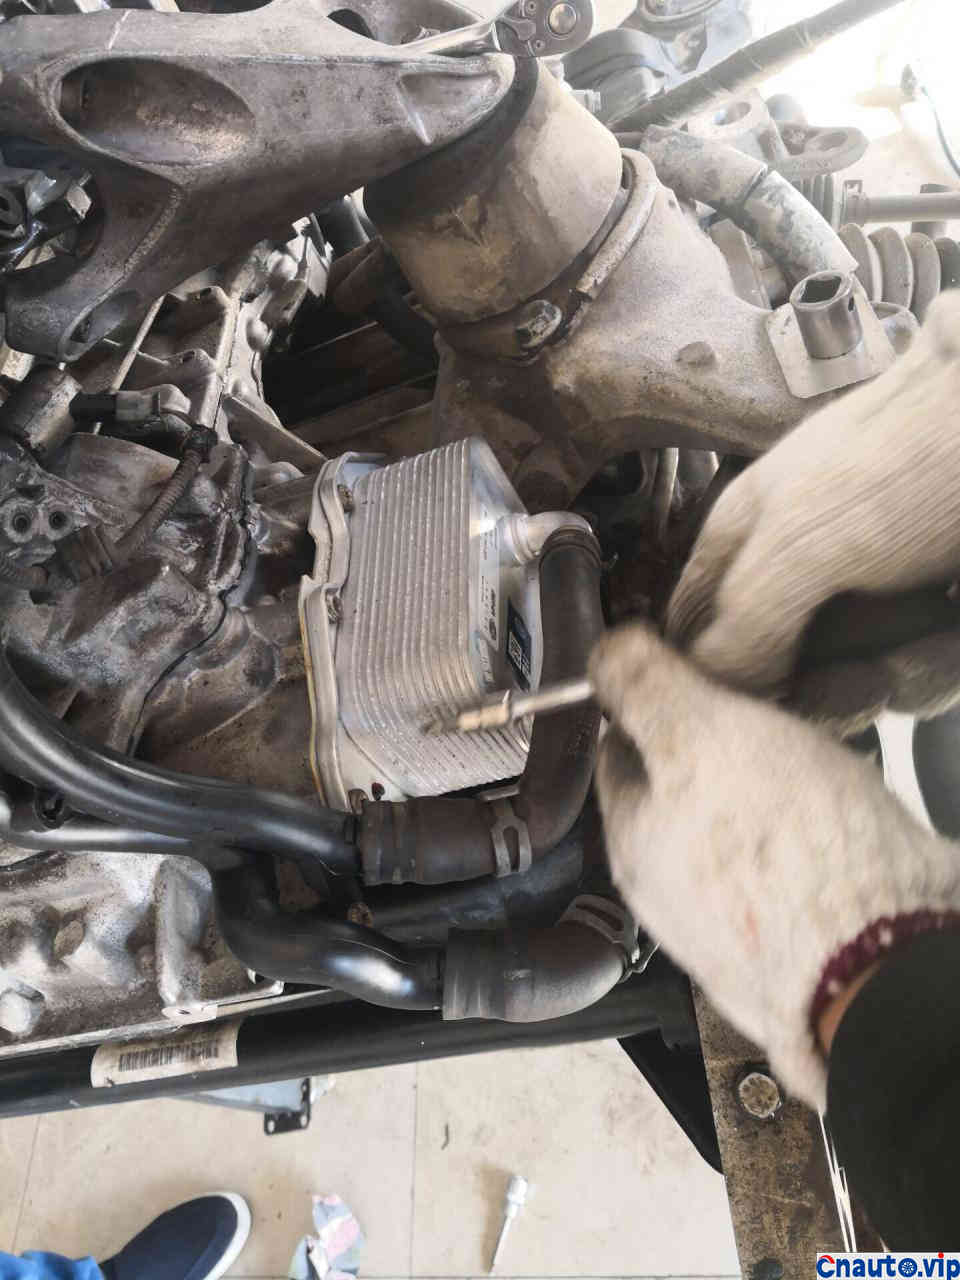
Replace the oil radiator, because it turns out that there is too much sludge. The old oil radiator is blocked with sludge, so you have to replace it with a new one.
Install the belt pulley


 April 1, 2024