Recently, I bought some interior protective panels around the driver’s seat of the old Regal on Xianyu, repairing the damage caused by the violent disassembly and installation of the original unit maintenance factory one by one, considering that there is also something wrong with the wiper assembly. the suspension position of the intermittent gear is always erected on the glass, affecting the line of sight, so I bought an old Junwei wiper assembly. When the weather is not too cold, change the wiper assembly yourself.
Let’s start work while we are free during the holiday. First, check and tidy up the protective panels under the driver’s desk.

Below this is the suede muffler guard board, which is a little deformed and the edge has become fluffy and a little broken. I have bought a car dismantling part to change it quickly, and the wire harness inside is a pile of messy wires to see if it is useless. Let’s clean it up or dismantle it.

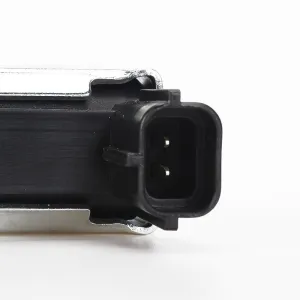
A bunch of messy lines in the guard plate are reconnected to the large wire harness next to the steering wheel post. Take a closer look at it as an anti-theft alarm. It must have been installed in the unit in the early years. The label above is Iron General, which is connected to the constant electricity of the wire harness. There are devices for wireless transmitting antennas. Think of the leakage problem that has always led to the damage of the accelerated battery over the years, all working quietly here, now it is of no use at all, only the side effect of leakage. No matter three, seven, twenty-one, take it apart.

Remove this neatly and neatly, wrap the broken line with nylon tape and fix it on the steering wheel post. This rules out a source of leakage that has been going on for years.

I have bought a muffler guard for dismantling the car.

The back of the guard.

Buy another plastic shield on the rubber side under the steering wheel of the car. The old guard plate was broken by the unit’s repair shop, and two of the three buckles were broken. All the clasps I bought are here, and a new guard plate has been installed. I feel at ease.

Also bought a wiper assembly, look at the limiter rotating mechanism with a plastic cover, very good. My original car has been lost in the unit’s repair shop, no lid will cause dust into the limiter, increasing the failure rate.

After receiving it, first scrub the dust that has accumulated for many years, polish the areas where there is paint removal and corrosion, and then use your spare paint to brush with an old toothbrush, shining as new.

Remove the cover on the limiter and you can see the stop direction of the limiter. After the event, it was found that this position was the position of the intermittent gear, that is, the position where the key was turned off when the slowest gear dropped, and it was also the most direct correct clamping position for debugging and installing the limiter wheel, which was determined by hand-to-hand debugging this time. This is later.
It is said that when you change the wiper assembly by yourself, you have to remove two wiper arms first, but removing the wiper arm is a very painful task, mainly because there are two very powerful small springs on the back of the wiper arm. They let the wiper swing arm close to the front windshield so that it can be scrubbed tightly. However, this has caused great difficulties to the disassembly work, because the small spring is deeply hidden in the slot, there is no way to release the spring retractor beforehand, and generally there is no suitable wiper arm puller horse, after removing the compression nut, you can only use brute force to loosen the connecting longitudinal teeth, and then use a long screwdriver to hold the sled while grasping the swing arm at the same time, because the swing arm is very strong and the swing arm is pulled hard. The wire hole connecting the longitudinal teeth is tight on the thread post, and if the screwdriver is pried accurately, it will be easier to pull out, and it will be unloaded in three or five minutes when you happen to be lucky, but unfortunately, it will not be solved in 20 minutes. The actual process is too difficult. The iron edge of the car body was pressed off the paint by the screwdriver, the big hook pliers were also used, and the paint was bitten off at the base of the swing arm. This is my own hands-on experience of the painful experience, this is later.
First I went downstairs to remove the screw cap cover of the wiper arm, removed the nut with a wrench, tried to break the swing arm, and fastened it motionless. In view of the difficulty, let’s go to the roadside store of acquaintances to change it. Contact the boss in the store and drive over. The boss removes the wiper arm, I find a big screwdriver to help pry, the swing arm on the driving side of the main driver is relatively easy to remove, to the co-driver side of the swing arm is much more difficult, first remove the wiper strip, otherwise the brush strip will hit the hood when pulling the swing arm, it will immediately damage the brush hook clamp fixed buckle, the brush bar is equivalent to waste. It took about ten minutes to disassemble.
Next, the wiper guard plate was removed, revealing the wiper assembly. The three fixing screws inside needed to be removed with a sleeve, and the screw against the fender was removed first. I saw that the boss was turning the wrench. I said it was easier to disassemble after fastening it and then reverse it. It was broken. I said how to remove the broken wire, he said it was impossible to break one, it didn’t matter, the other two were removed smoothly. After removing the three screws, I couldn’t take out the whole assembly. I told him to pull out the front connecting rod and push it to the innermost side. I pried the cap of the connecting rod with a wrench and took it out from the ball head of the limiter, and then slowly took it out with a little rotation.
Replace the purchased disassembly, open the ignition key, try the intermittent wiper position, and end up intermittently staying above the front windshield with the same problem as the old one.
Then my boss and I took apart the metal plate of the rotary limiter on my original wiper assembly to see what went wrong, and it turned out to be just a few layers of metal plates, tightening a spring coil on the outside, as shown in the following picture. After cleaning the dirt and dirt, filling in some lubricating oil, removing the tightening spring ring around it, breaking out the half-moon pin plate of the clip post, manipulating the ball head and center plate to make his parts rotate and lubricate repeatedly and wipe off the dirt, tighten the falling rod clamping spring and falling rod clamping plate. Then replace the limiter on the assembly that has just been loaded.

The shape of the back and the detached coils. It can be seen that there is a slightly curved slot with a clip post in the position of 3F, which is fixed with the half-moon-shaped adjusting plate sandwiched inside, which is used to adjust the moving direction of the swing arm and the suspension position of the intermittent gear and the fall position of the stop gear.

This is the front of the rotation limiter. The upper turntable runs tightly with the motor mechanism. When the limit post on the lower half-moon position adjustment falls in the groove on the figure, it is in the intermittent gear and fast gear. To install the limiter correctly, you need to point the wiper gear switch to the slow gear, then install the retaining post vertically in the groove and parallel to the front windshield on the side of the car body, and tighten the inner six-flower fastening screw at the center point.
I went to the car to turn on the wiper switch. The boss observed and adjusted it next to the wiper assembly. Because I wasn’t sure it would be set immediately, I saw how the action was. I found that when the lubricating oil was added after cleaning, the wheel mechanism operated more flexibly. Try intermittent and closed gears. You can see that there are many flexible changes in the limiter. After about twenty minutes of testing it, I then tightened the center screw, covered the outer guard plate and installed the swing arm. I was also very happy to drive home.
I went back to the community and parked my car in the parking space under the tree. I thought about trying the wiper intermittent gear and stop gear. As a result, there was an unexpected failure and it became the same problem as in earlier years: the intermittent gear was good, but the stop gear swing arm stopped vertically on the front windshield. I tried again many times, but it was the same. I had to turn off the engine when the lever was dropped in intermittent gear to keep the swing arm in a falling state.
In fact, when I first took over this car many years ago, the first time I encountered light snow, the wiper became like this: off gear-the wiper arm was standing, and intermittent gear-the wiper arm could be lowered normally. Later, I went to an unreliable repair shop to repair it, and it turned into closed gear-down lever but intermittent gear-standing to block my view. Until many years later, I have achieved a brief repair again, but the fault reappeared.
I sent a WeChat message to the roadside store owner to tell him about the situation. He said that you are not busy anyway, so you can make careful adjustments by yourself tomorrow. I have something to do this time, and I have to do the disassembly process myself.


 April 1, 2024


