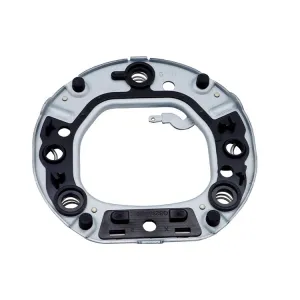
[06 Polo strength] Polo intake branch cleaning operation.
![]()
My old car has never been cleaned, in addition, it is also a personal interest in machinery, so do it.
![]()
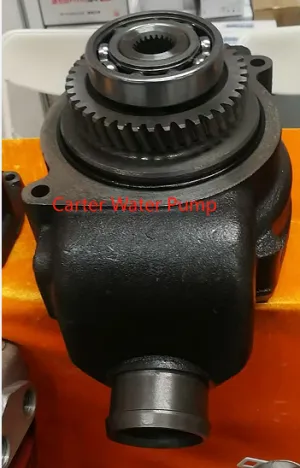
In fact, if you use the habit of fuel oil treasure, I think you can not do it, fuel oil treasure still seems to have some cleaning effect.
![]()
For example, my carbon accumulation does not seem to be serious.
![]()
First of all, the main tools are well prepared.
![]()
[T15] screwdriver / screwdriver head
![]()
[T20] screwdriver / screwdriver head
![]()
[T30] screwdriver head + large flying ratchet wrench (2 long screws at the bottom of the air branch pipe)
![]()
[M8 12 angle] screwdriver head + large flying ratchet wrench (6 main screws for air branch pipe removal)
Second, cleaning the intake branch pipe and changing the oil, from about 9 a.m. to 12:00 noon.
The rest is left to patience! Look at the picture!
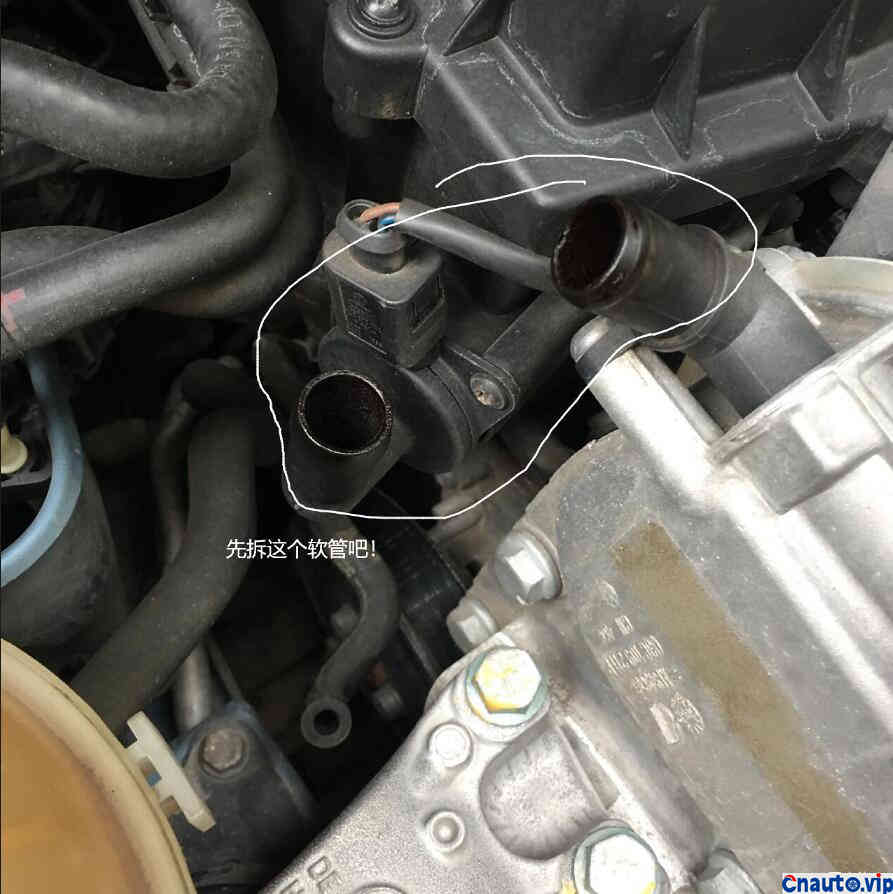
This link hose has to be removed.
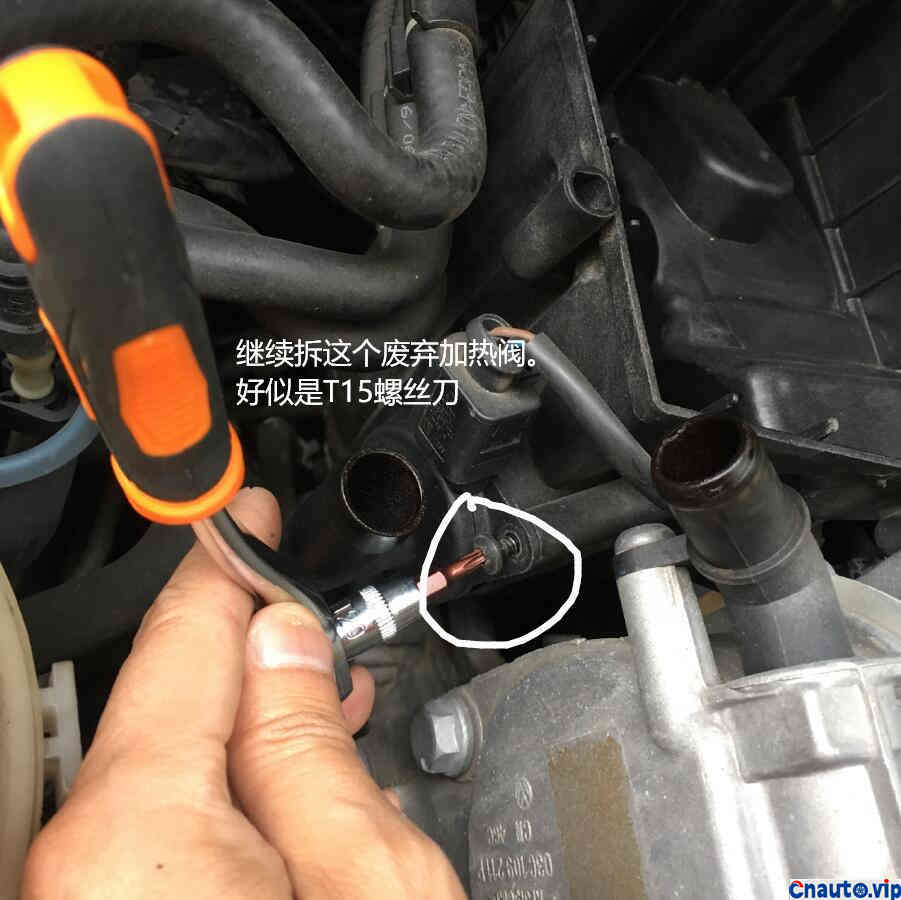
Continue to remove the screw of this exhaust gas heating valve
It looks like a T15 screw.
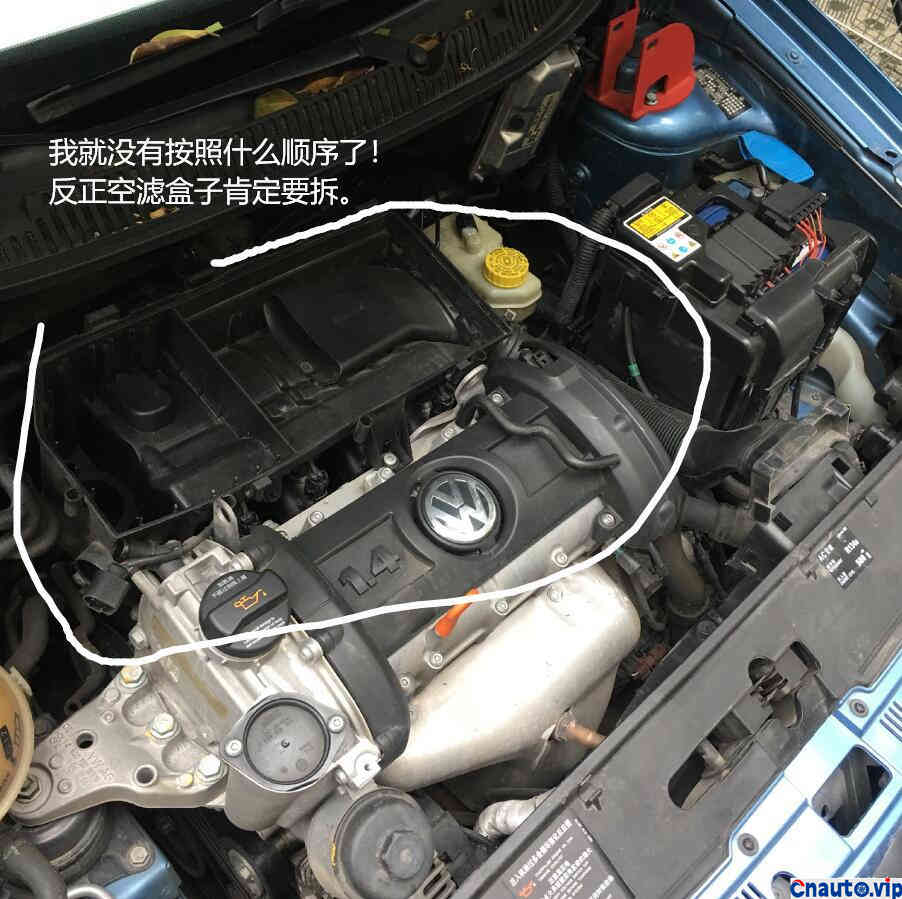
The empty filter box must be dismantled.
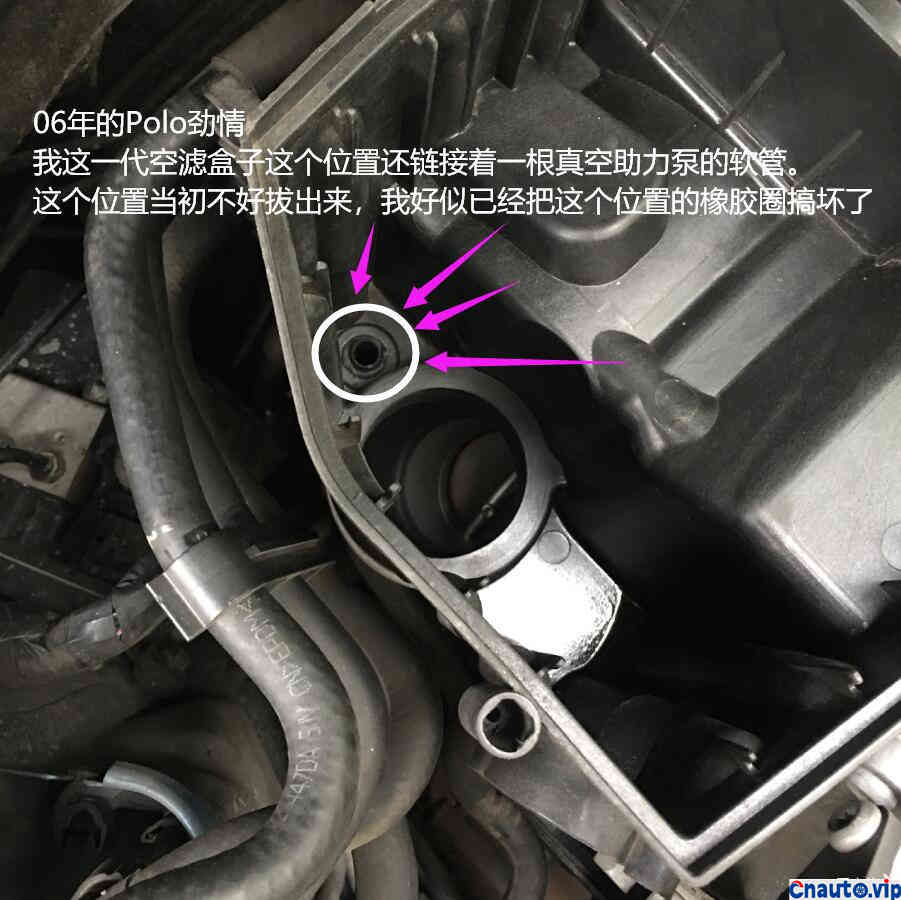
My Polo is also connected with a vacuum booster tube in the air filter box (shown in the picture).
Unplug it at the same time. If it’s not easy to pull out, you need some patience.
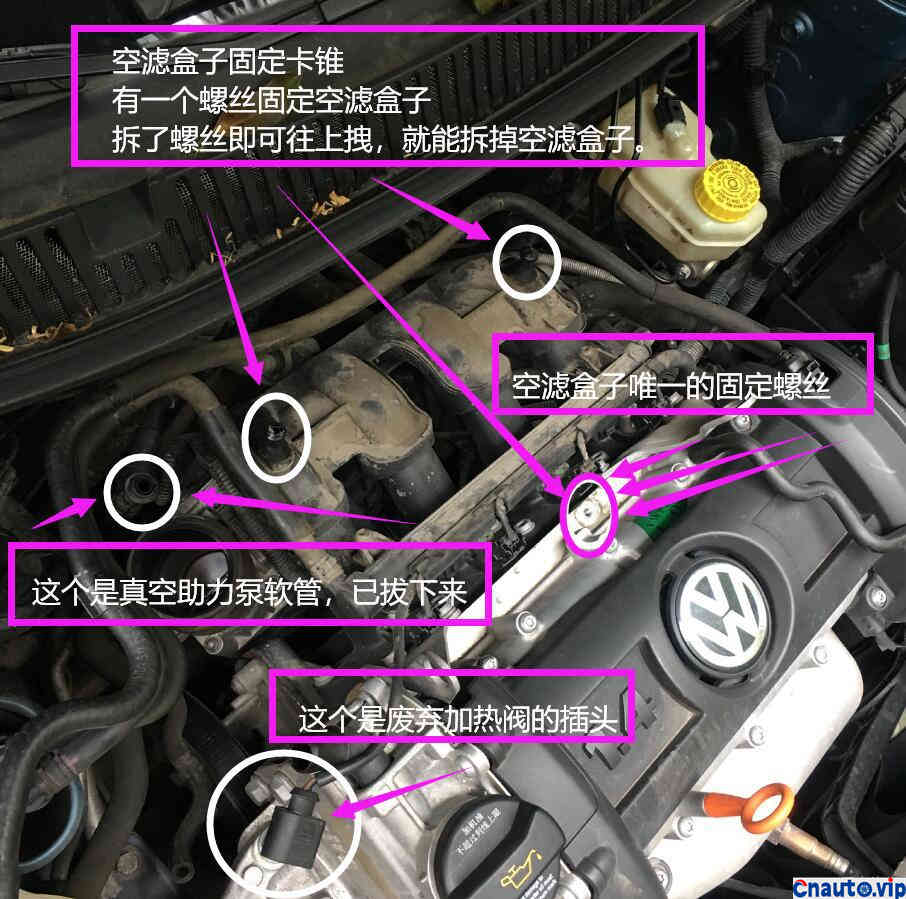
The empty filter box has a screw fixed, and the other two rely on two awls on the intake branch pipe, which are stuck at the bottom of the air filter box.
1-remove one of the air filter screws. 2-remove some hose clasps near the empty filter box. 3-then swing the whole box up a little hard to remove the empty filter box.
Of course, before removing the air filter, you have to pull out the connecting pipe of the nearby air impact port together.
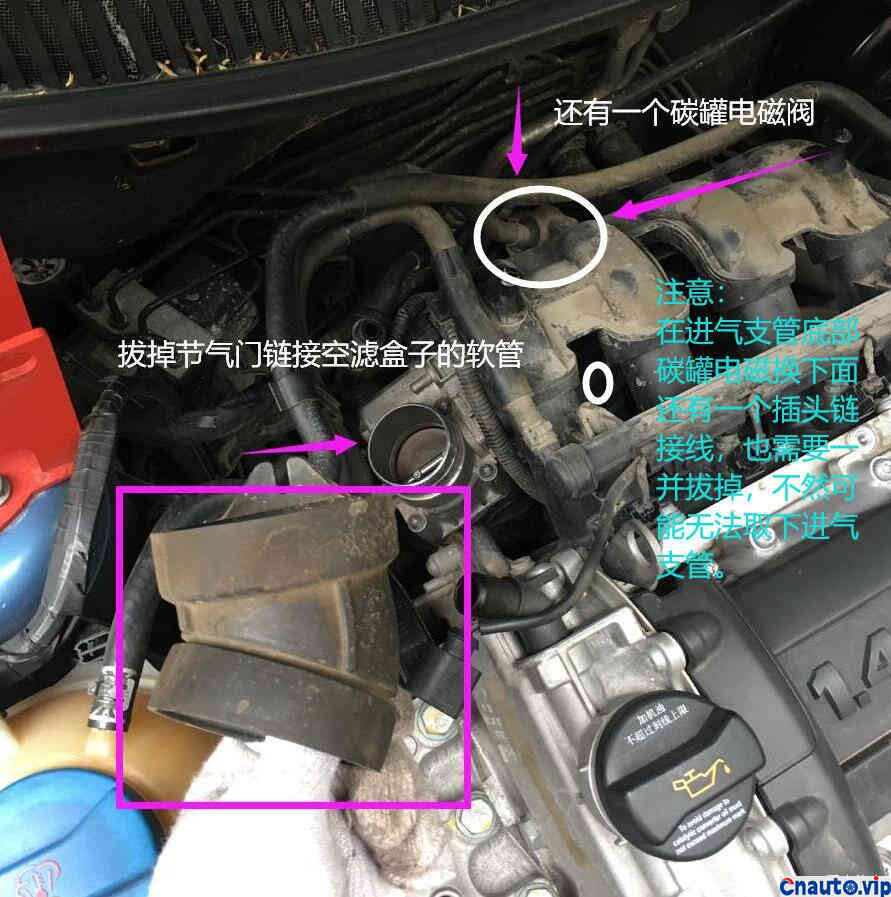
Remove the empty filter box only the linked hose that needs to be removed from the throttle (pictured)
Note: at the same time, you should try to remove some of the hoses behind the intake branch, as well as a wire plug at the back. Cymbal
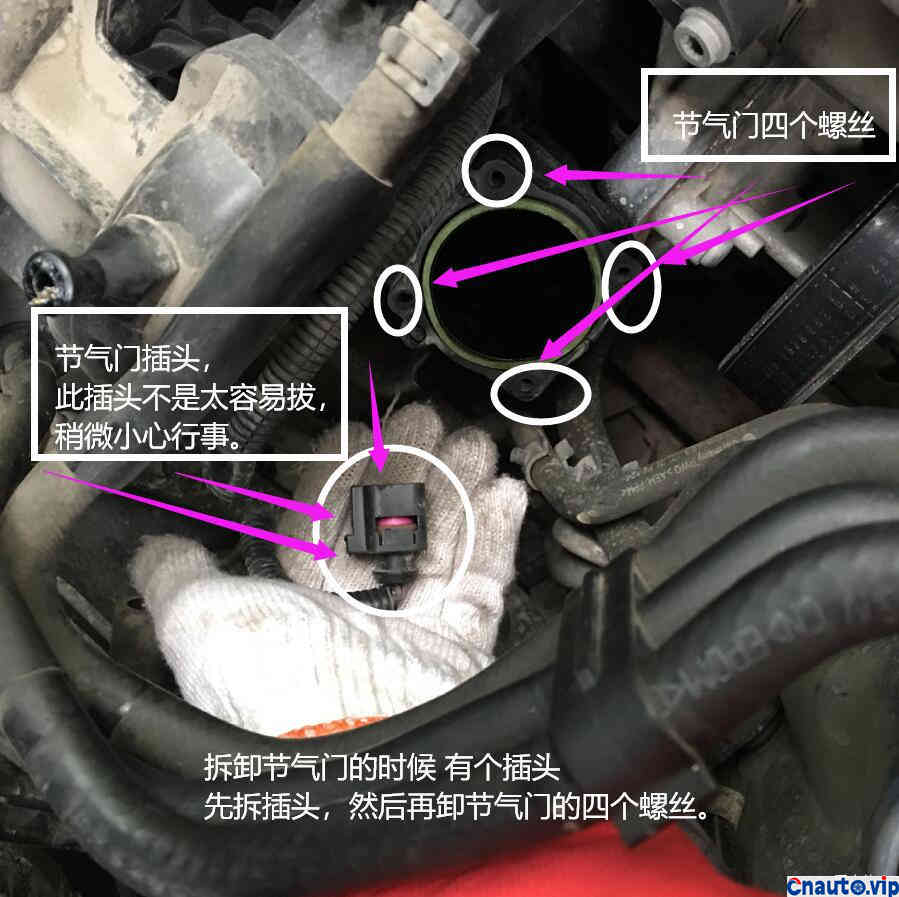
Be sure to unplug the throttle before removing the throttle and be patient slowly.
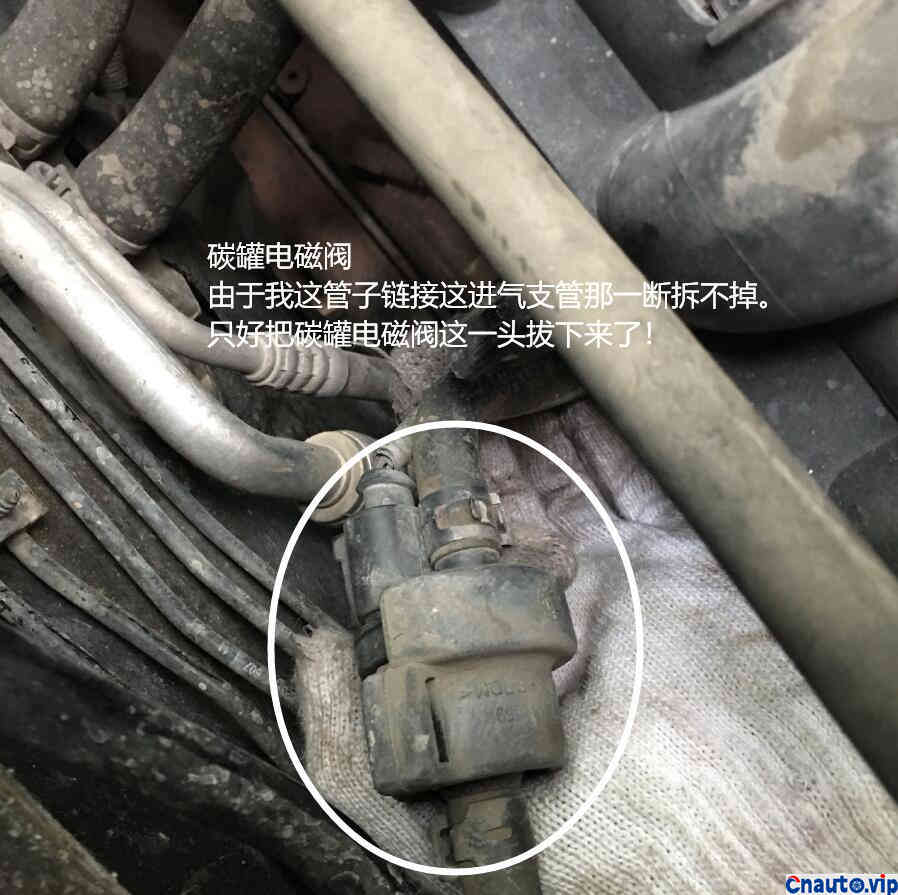
This is the carbon canister solenoid valve (as the Internet says). No, no, no.
Since the other end of the intake branch cannot be removed and is not easy to disassemble, I have to remove this end of the carbon tank solenoid valve!
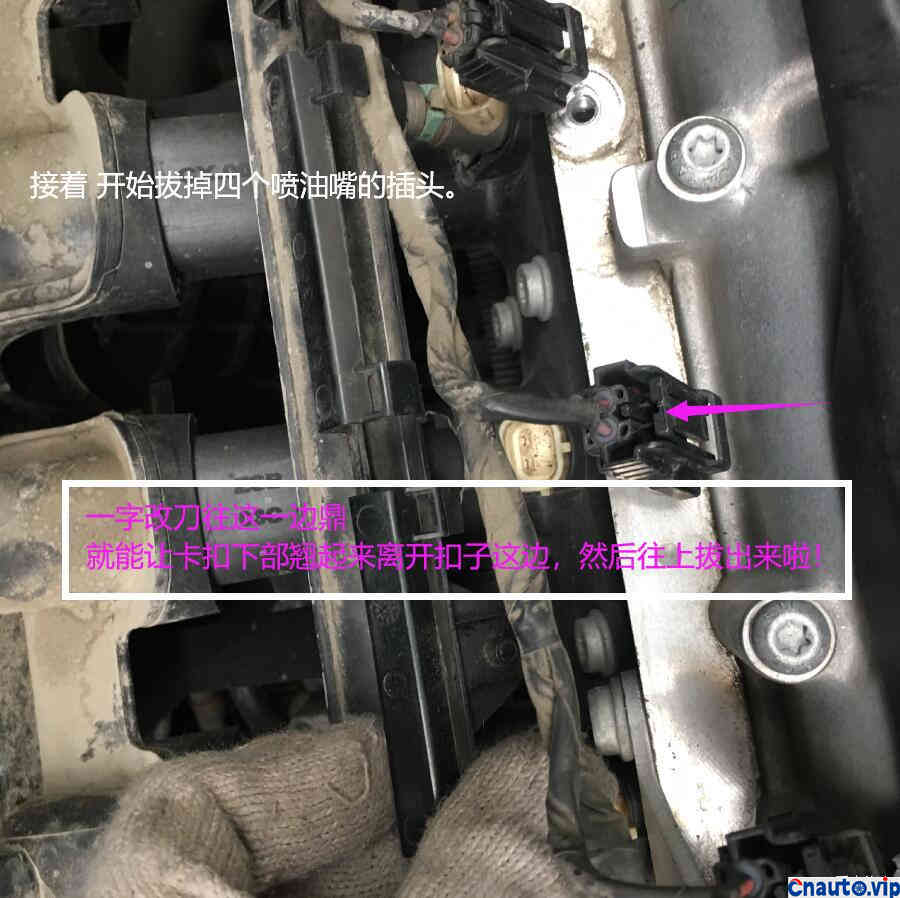
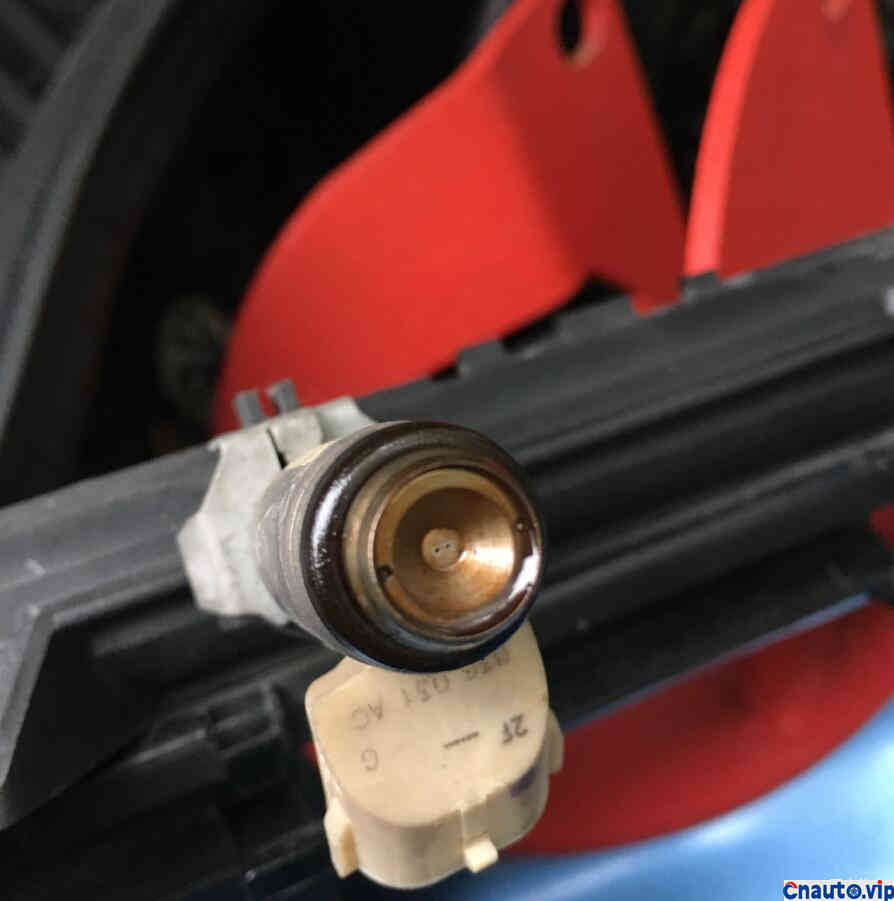
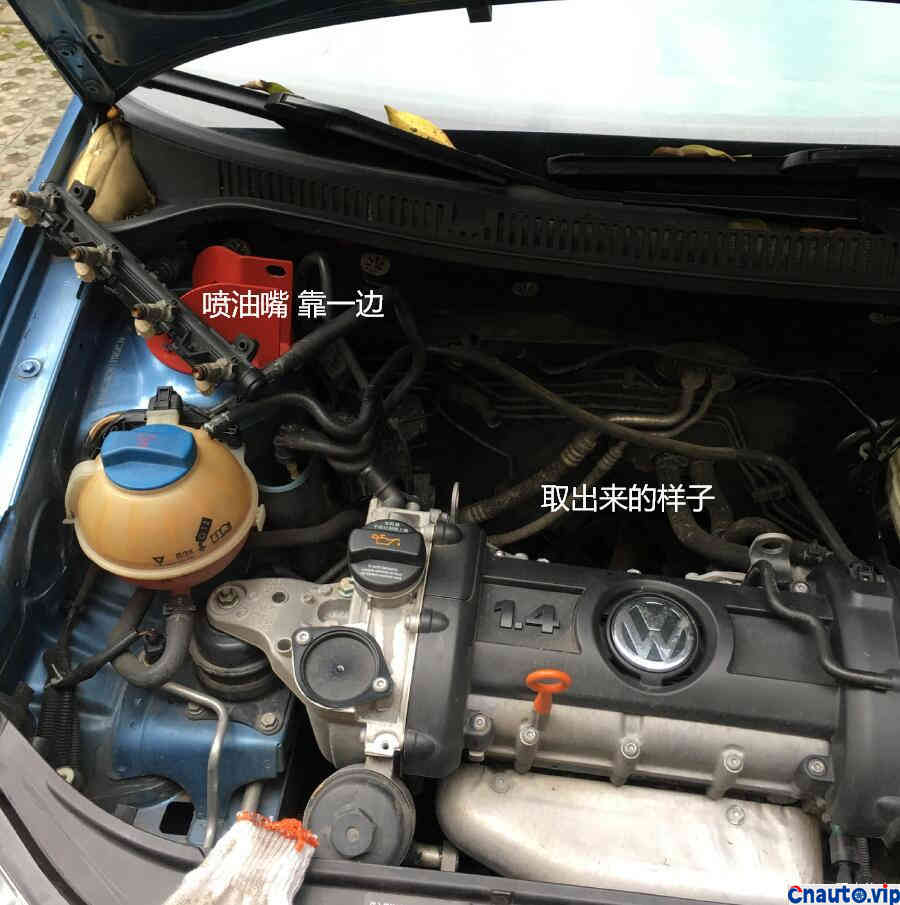
Then we began to find a way to unplug the four plugs of the fuel injector!
For detailed removal, please observe the structure of the plug!

I use a word-by-word knife to one side so that I can easily remove the plug!
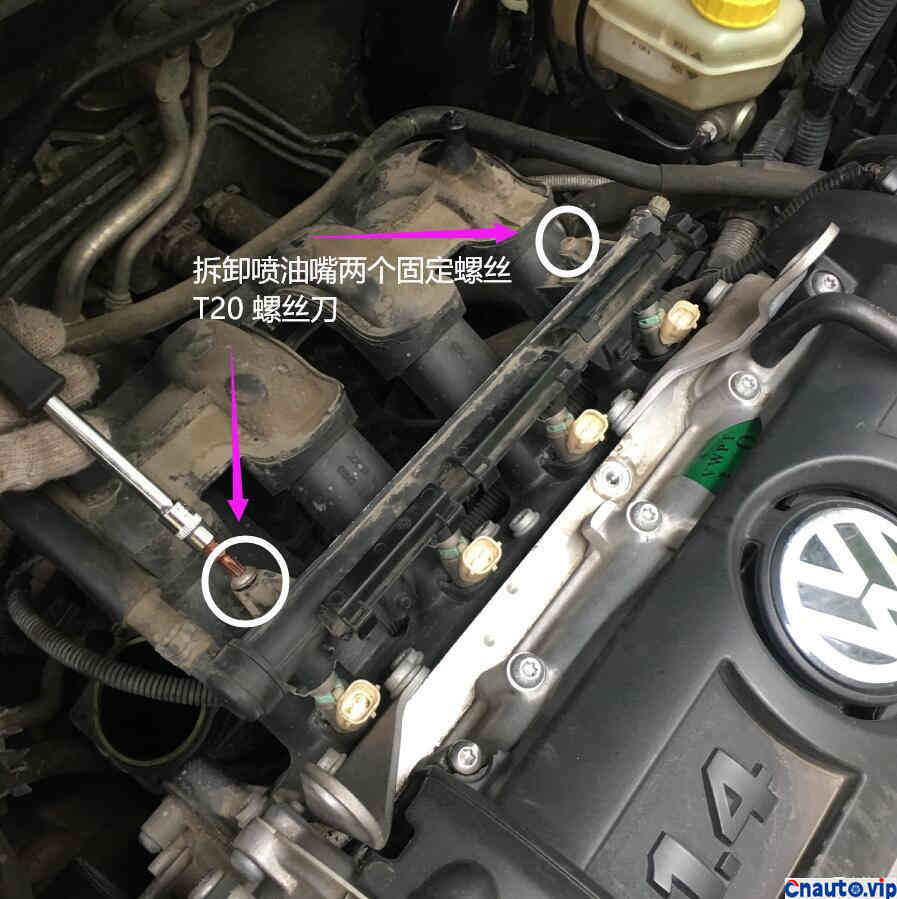
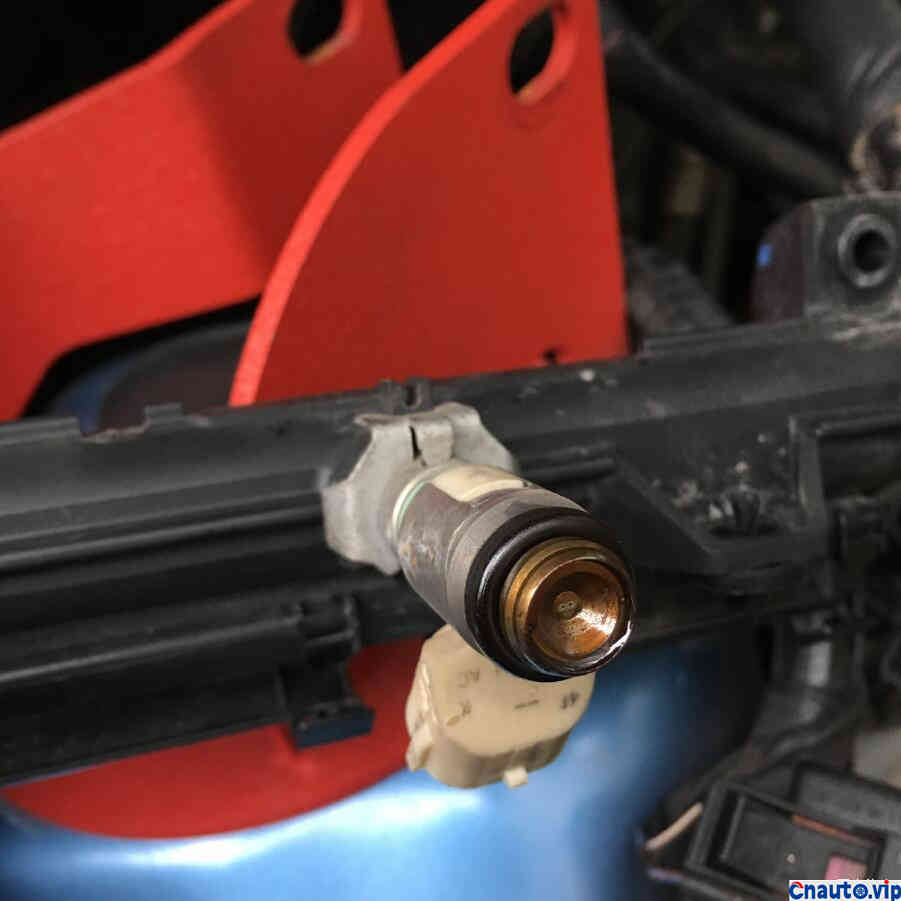
Next, it’s time to remove the two retaining screws of the nozzle! (it looks like a T20 screw)
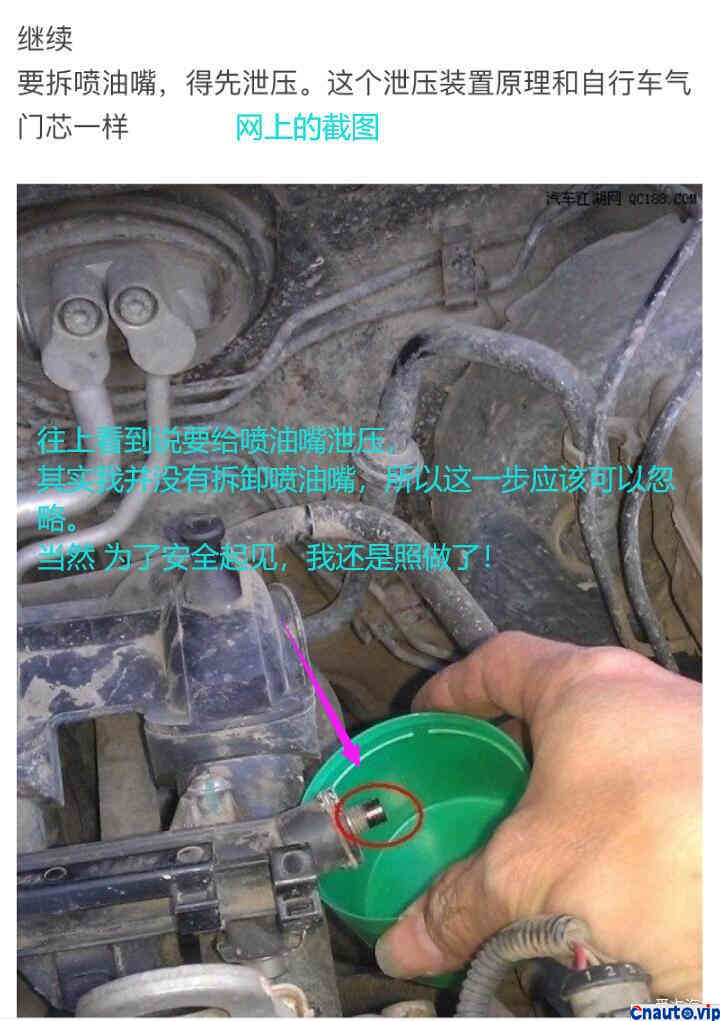
Netmap: as if to relieve pressure to the fuel injection nozzle, as shown in the picture.
Since I didn’t remove the nozzle individually, this step is superfluous!

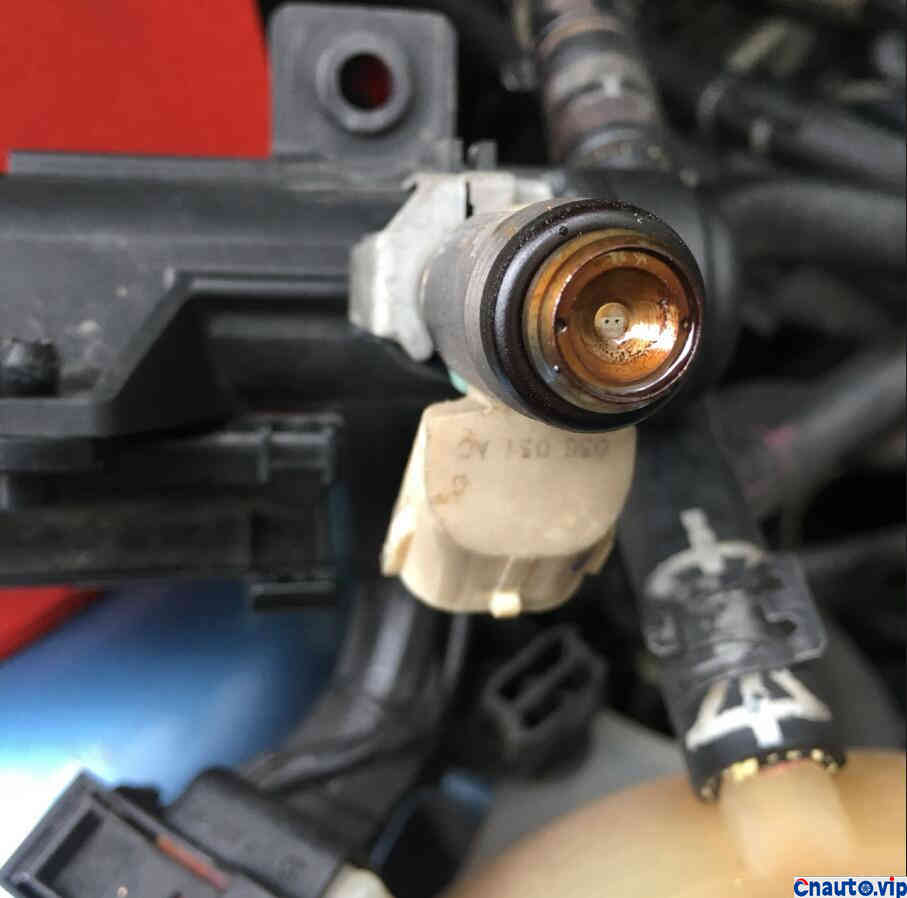
But I did it anyway! Due to lack of experience! After all, it took me a long time to get off the nozzle.
Note: four injector nozzles together, after the screw is loosened, you can pull the four injector nozzles off the net directly instead of pulling them out along the direction of the injector! I made a mistake and began to pull it out in the direction of the nozzle. I couldn’t pull it out. I thought I was going to relieve pressure on the nozzle, but it wasn’t. )
(later, inadvertently, then swinging along the nozzle to our own body, that is, lifting it obliquely to our body, we can easily remove the four linked nozzles! )
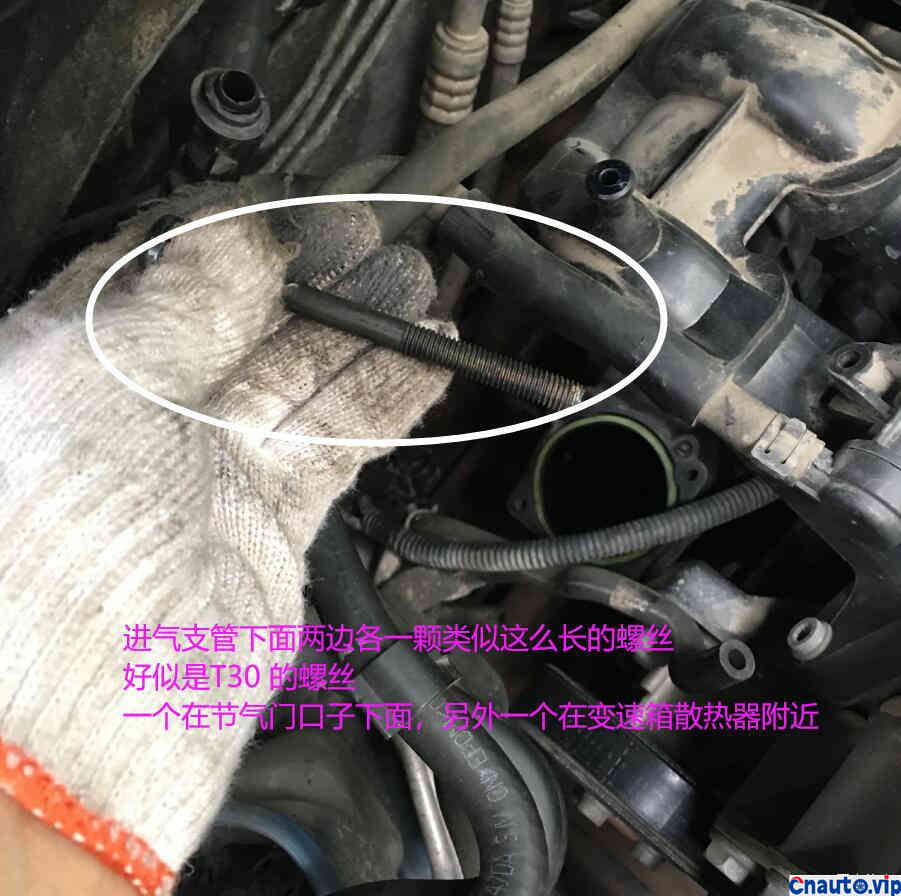
This is the screw is under the throttle, you can touch it with your hand (the screw is about T30)

This screw is also at the end of the intake branch pipe and the transmission radiator, and is also the bottom of the intake branch pipe.

The long screw on this side is a little more troublesome in the whole process!
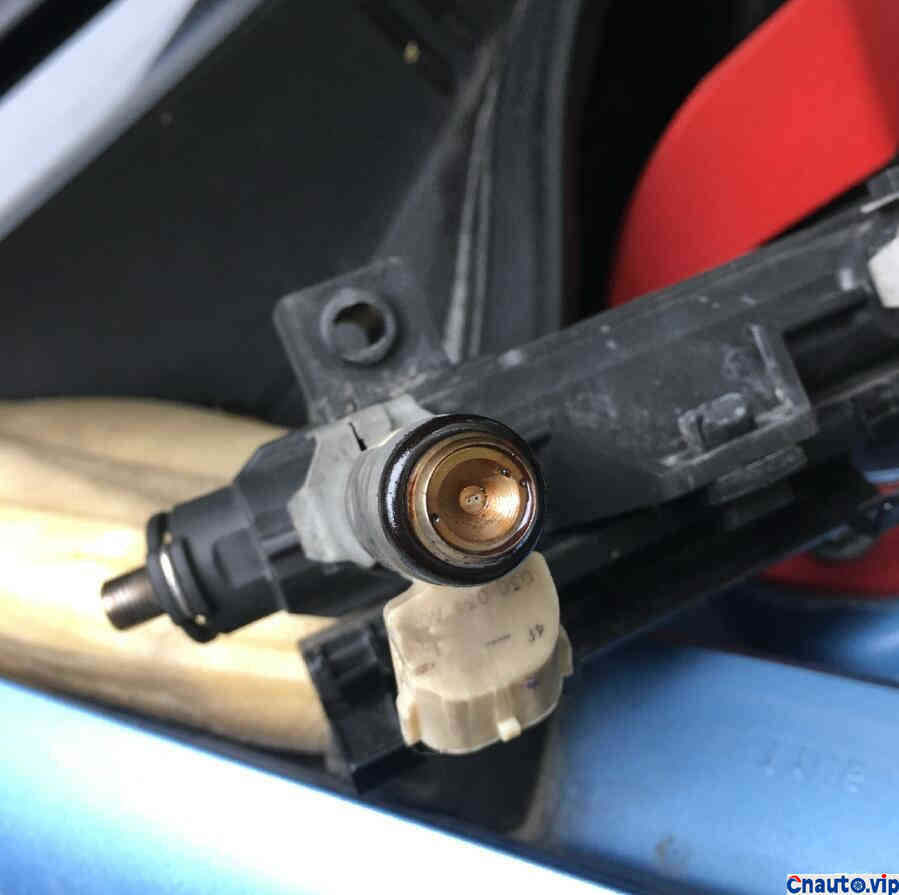
Look at the four nozzles. One of the injection nozzles
The second part of the nozzle
The third part of the nozzle
The fourth part of the nozzle
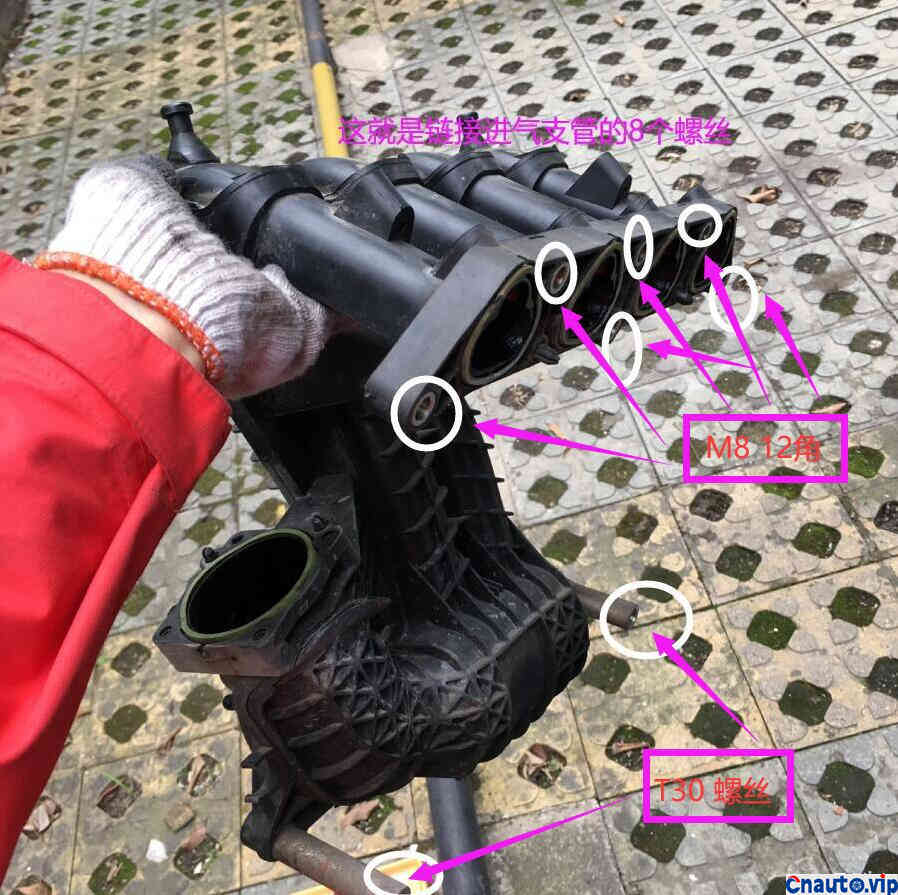
Finally, the whole intake branch pipe was removed.
The main tools are used here!
M8 12 angle screwdriver head.
T30 screwdriver head
Take it out like it’s empty. I didn’t unload the nozzle individually.
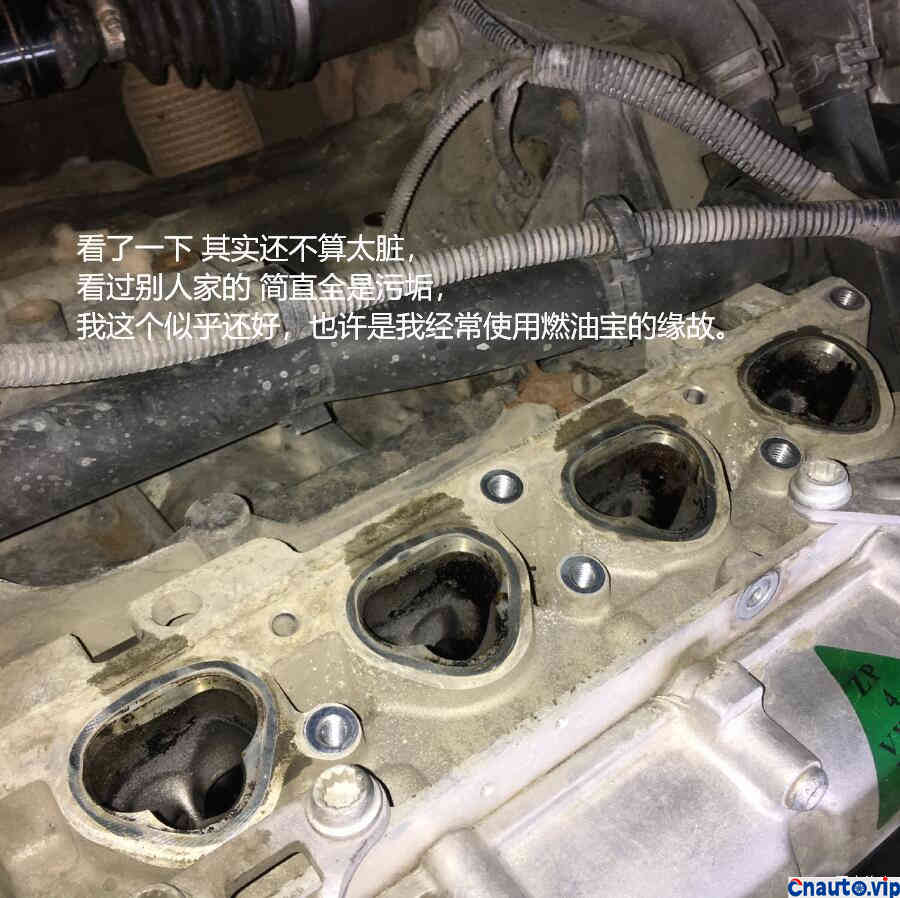
The whole air intake doesn’t feel too dirty.

Take a look at the first cylinder individually.
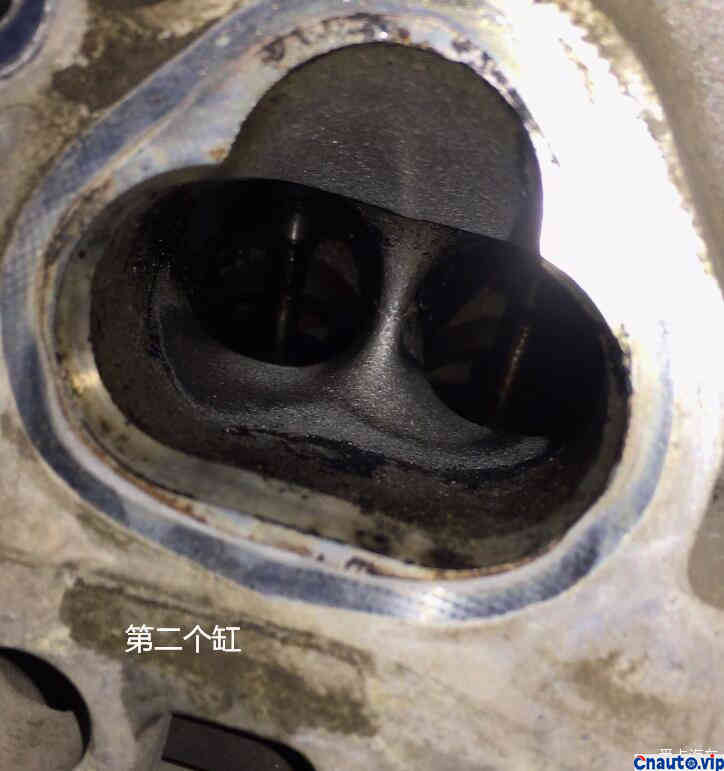
Take a look at the second cylinder individually.
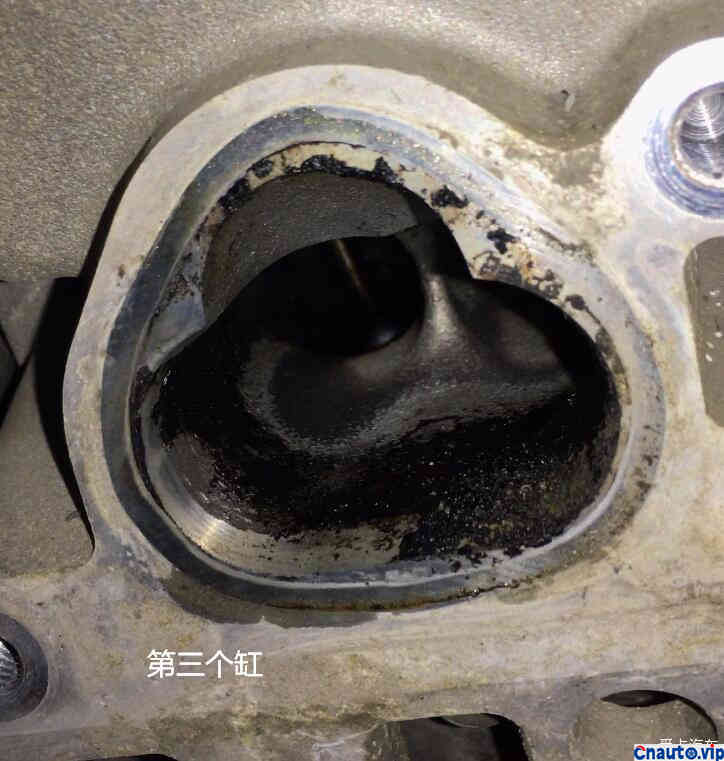
Take a look at the third cylinder individually.
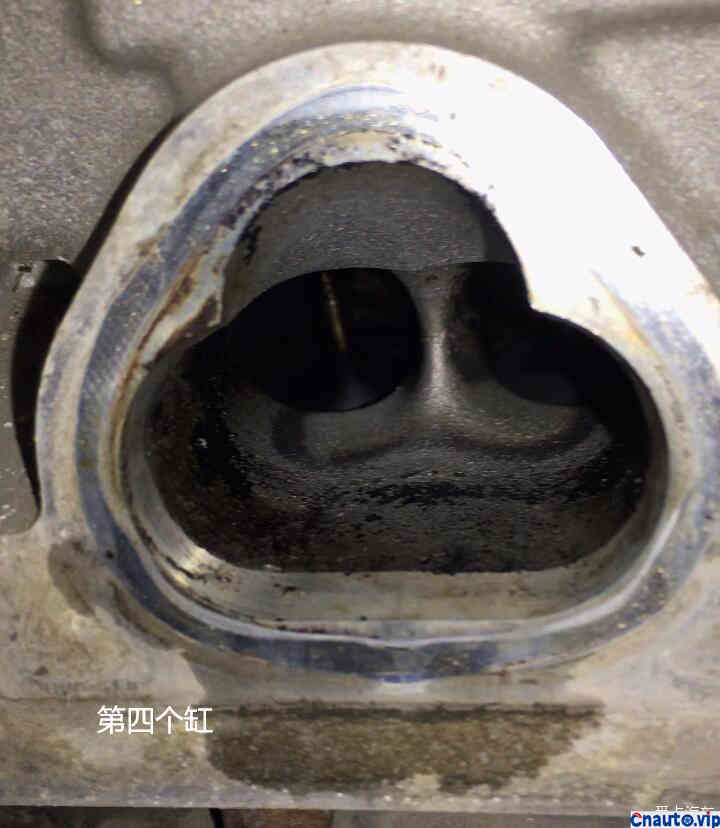
Take a look at the fourth cylinder individually.
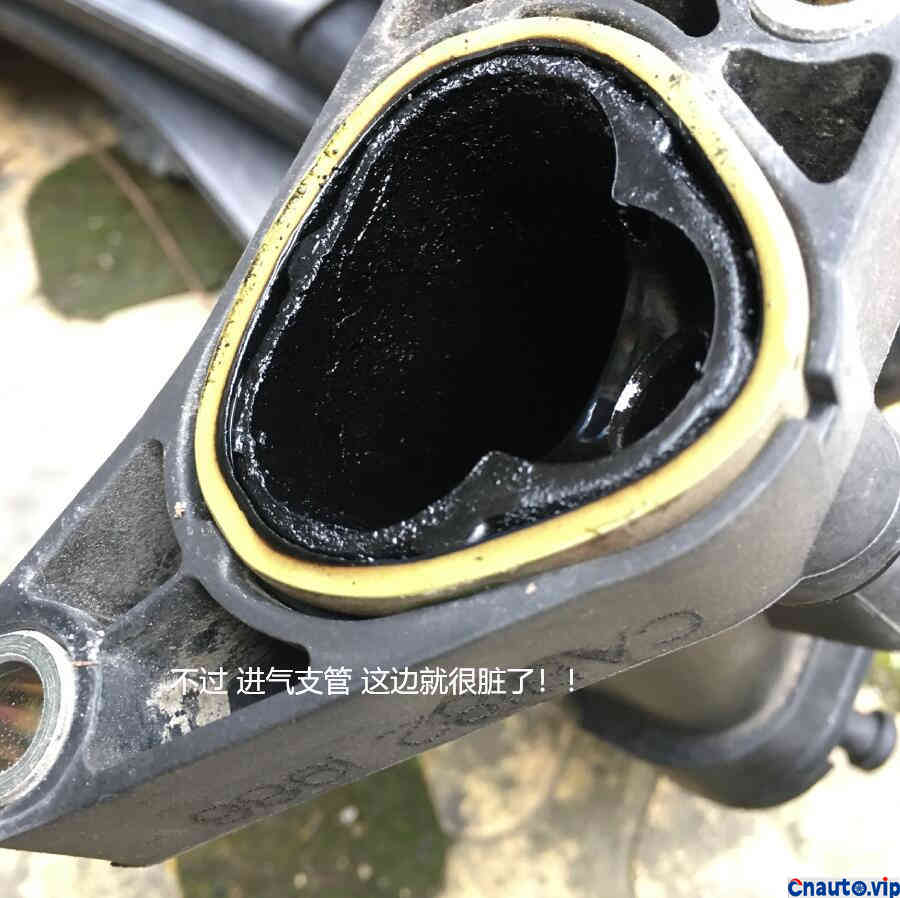
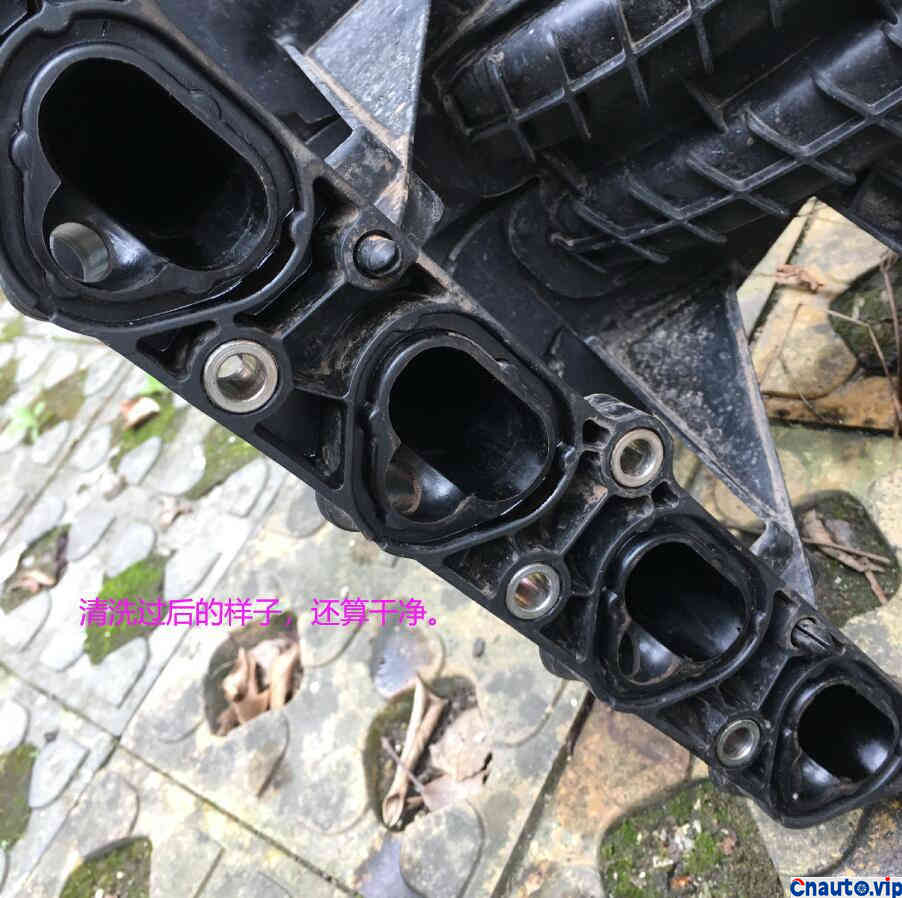
This side of the intake branch seems to be more serious, and there is still some dirt inside.

The rubber ring gasket of the intake branch pipe has some small cracks.
And because of the high temperature, there are signs of blackening.
It is suggested that the prepared partner can be replaced by himself, because I did not prepare anything, so I turned him over and reinstalled it!
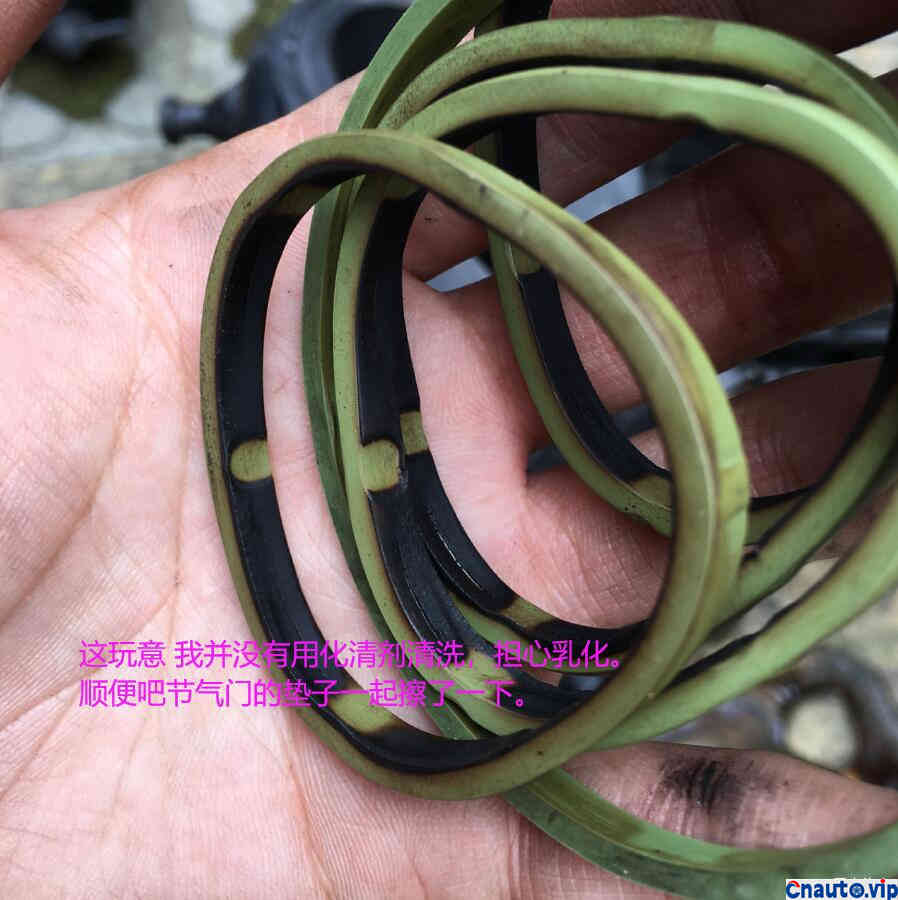
I didn’t clean it with a chemical cleaner either. I’m worried about being emulsified. It’s just a simple wipe with a rag.

The whole operation took four bottles of chemical detergent.
The engine air intake is also sprayed directly with this thing.
Note: when the air intake of the eruption engine, remember to cover the nearby rubber pipe with a dishcloth to prevent the chemical cleaner from splashing out and softening the water pipes and tubing.
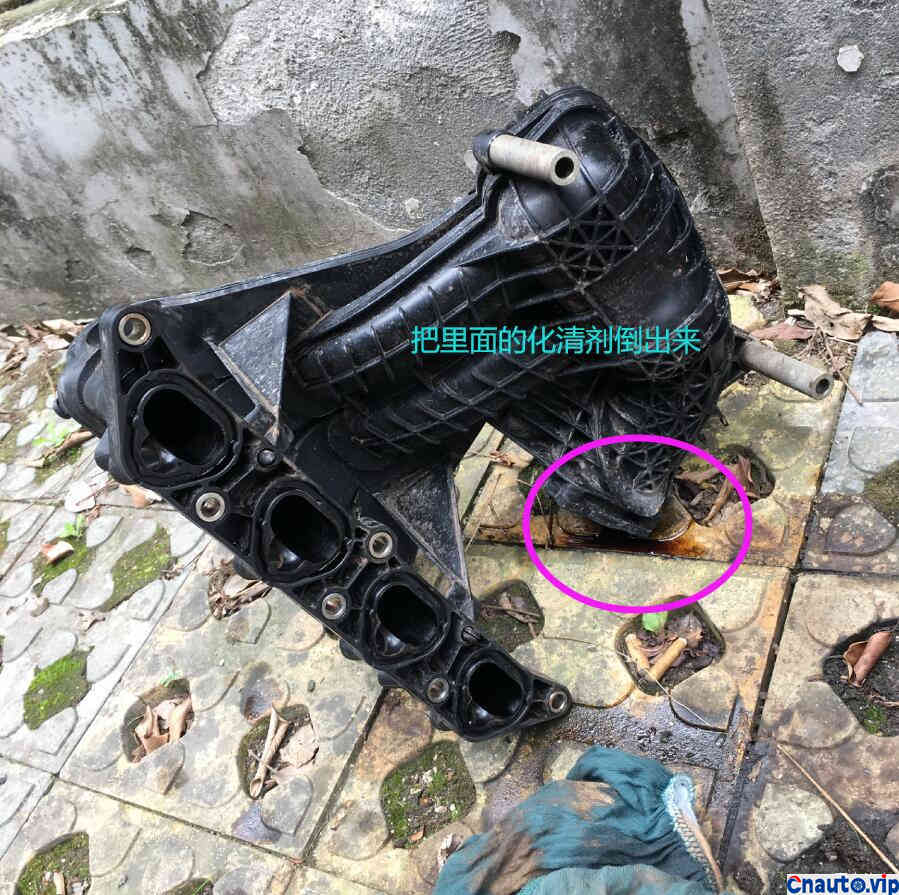
As I sprayed a lot into the intake branch, I had to shelve it for some time to make the detergent flow out!
After cleaning, it looks like OK.
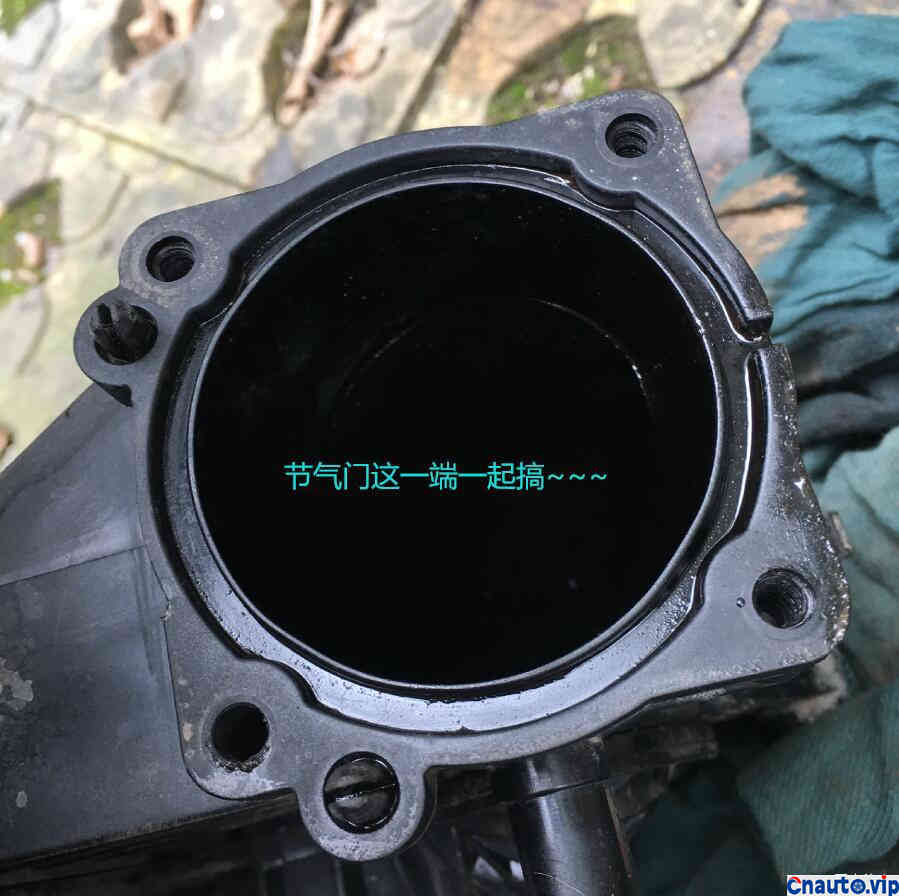
The other end of the solar gate has also been cleaned! The rubber ring cushion is also removed and washed to prevent the cushion from aging and softening.
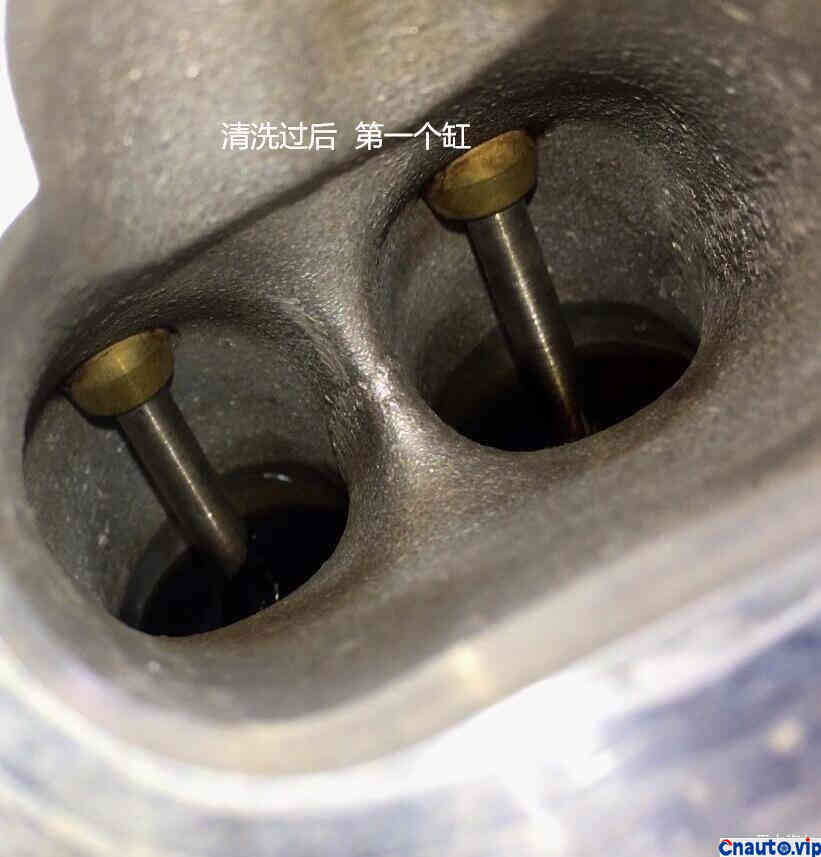
The first cylinder after cleaning.

The second cylinder after cleaning.
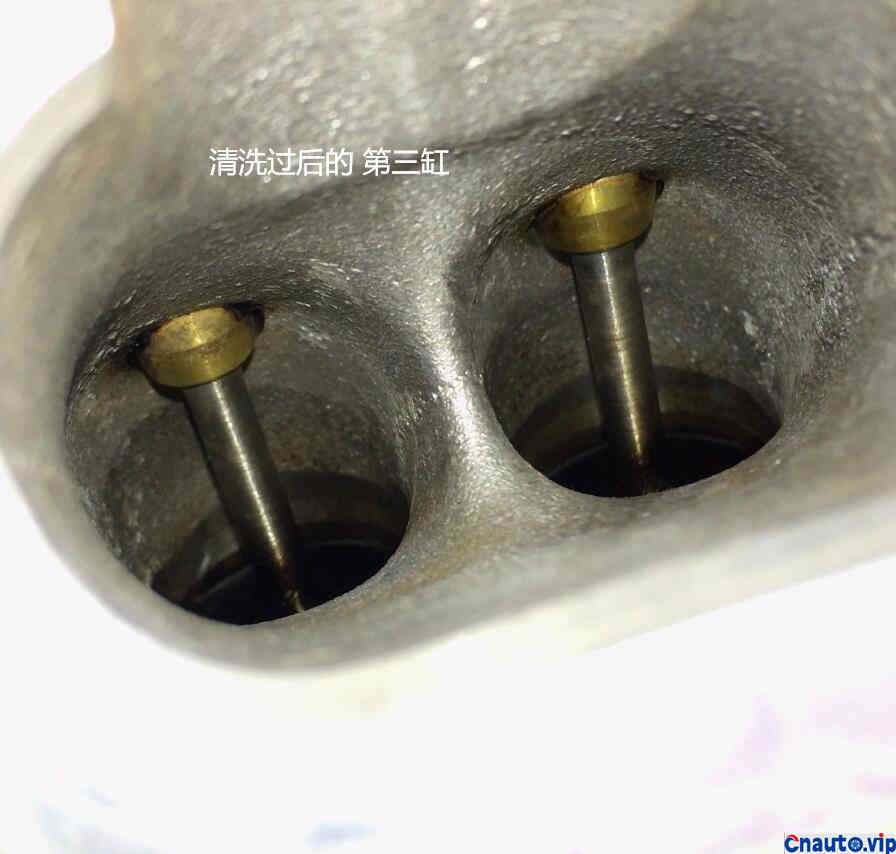
The third cylinder after cleaning.
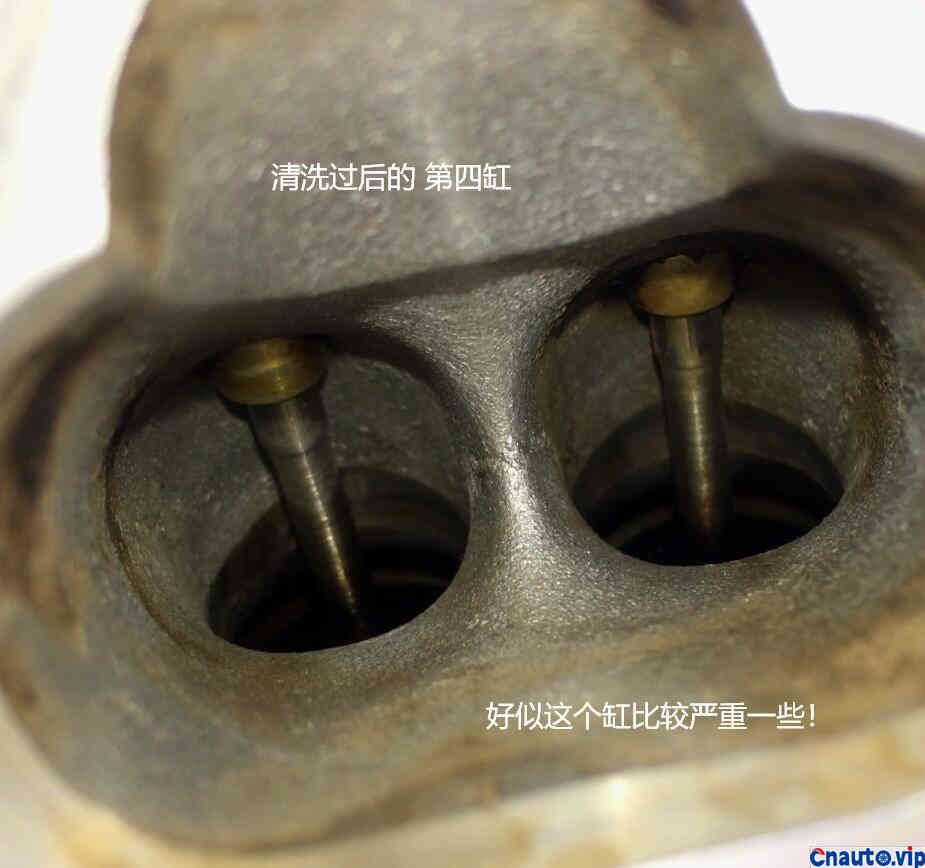
The fourth cylinder after cleaning.
Then it will be installed.
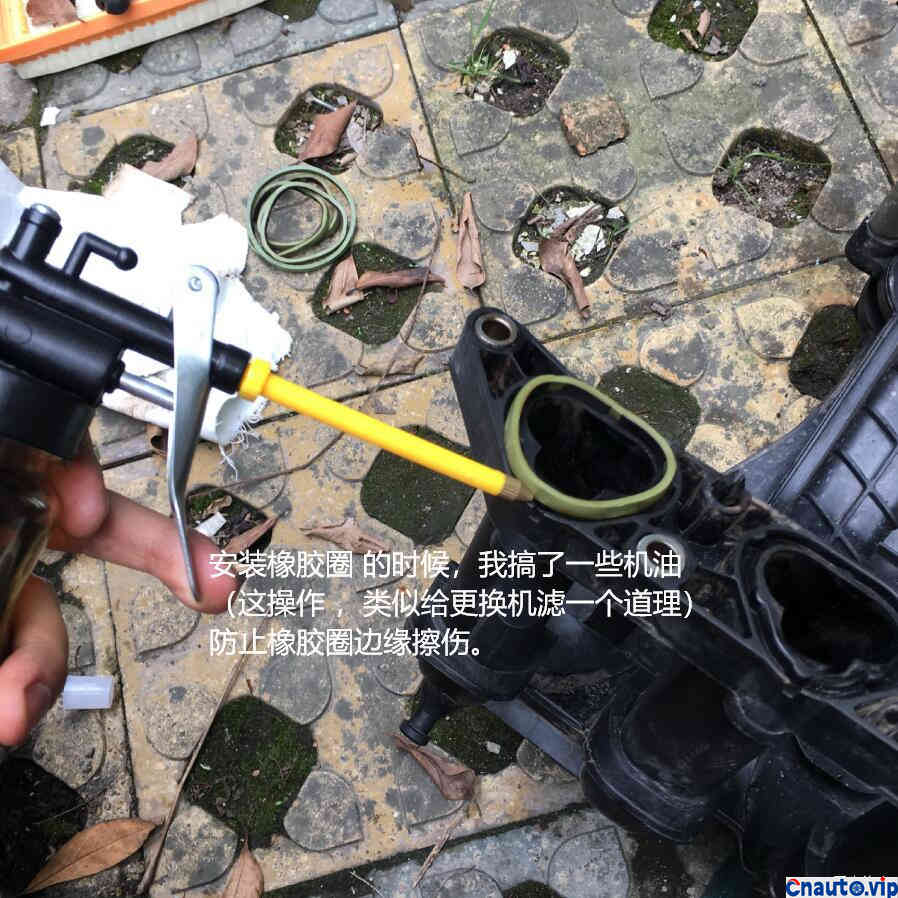
When I installed the rubber ring, I got some oil (similar to applying oil to the filter rubber ring. )
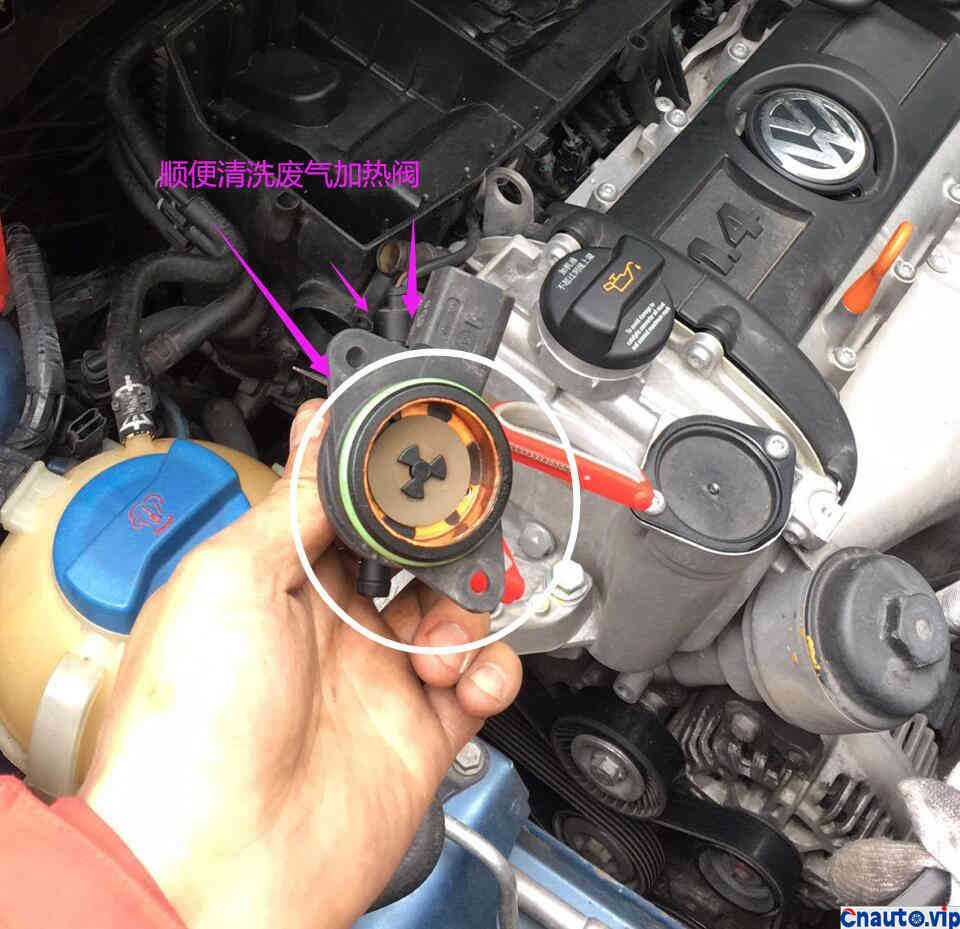
By the way, clean the abandoned heating valve.

After cleaning, replace the brand-new air filter.
Note:
For the next ignition, I have two failed fires.
It may be because the detergent remains in the cylinder, resulting in the concentration of the mixed gas.
So there may be two or more ignition failures, which should be considered a normal range.
Finally, the third engine ignited in the case of severe wobble ~ it will be smooth after 10 seconds.
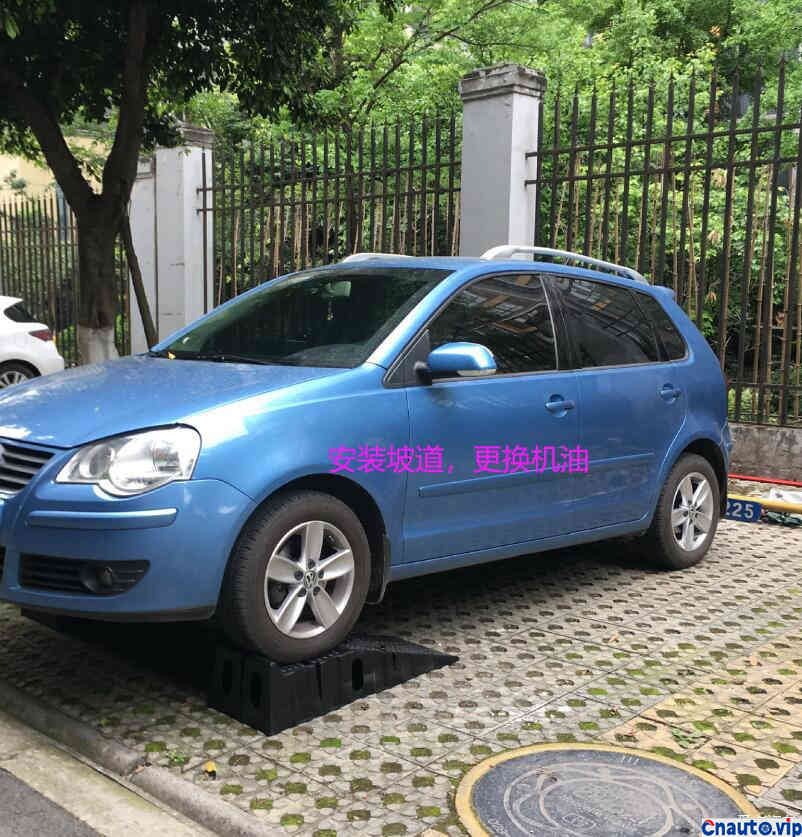
Then the car turned around and installed a ramp to replace the brand new all-synthetic oil.
The cleaning of the intake branch pipe is completely completed.
I drove out for a sneak around and found nothing unusual. As if, as if the throttle is a little lighter.
Haha ~ ~


 April 1, 2024