[Model 17 Jialu] The EA211 is equipped with an oil breather bottle to reduce carbon deposition on the valve.
[17 Jiaru] EA211 installs oil breathable kettle to reduce valve carbon deposition.
In view of the defects in the design of direct injection engine, it seems that this breathable kettle should be installed.
Before the POLOEA111 EFI engine, I made him a simple one.
This time Jiaru direct spray feels that it should be set up even more.
What’s more, when I cleaned the throttle a few days ago, I found that there was a lot of oil in the intake pipe from the turbine to the throttle, which contaminated the whole throttle, resulting in a traffic light in the middle of the car, and the whole car was trembling.
Note when buying products: high temperature rubber hose 16mm inner diameter; length of 2 meters + breathable kettle joint is also 16mm outer diameter; joint direction depends on the individual, there are straight-through type, there are right-angle type.
![]() (if you want to remove the vent pipe of the original car and use it directly, you may have to use a pipe with the inner diameter of 19mm, etc., and the joint of the breather kettle should also be replaced with the outer diameter of 19mm.)
(if you want to remove the vent pipe of the original car and use it directly, you may have to use a pipe with the inner diameter of 19mm, etc., and the joint of the breather kettle should also be replaced with the outer diameter of 19mm.)
In view of the defects in the design of direct injection engine, it seems that this breathable kettle should be installed.
Before the POLOEA111 EFI engine, I made him a simple one.
This time Jiaru direct spray feels that it should be set up even more.
What’s more, when I cleaned the throttle a few days ago, I found that there was a lot of oil in the intake pipe from the turbine to the throttle, which contaminated the whole throttle, resulting in a traffic light in the middle of the car, and the whole car was trembling.
Note when buying products: high temperature rubber hose 16mm inner diameter; length of 2 meters + breathable kettle joint is also 16mm outer diameter; joint direction depends on the individual, there are straight-through type, there are right-angle type.

Online shopping double pot breathable kettle with 2 right angles: 116 yuan + high temperature resistant vent pipe x2 meters: 19.3 yuan + turbocharger ventilation pipe: 45 yuan
The cost of collection materials: 180.3 yuan.
The cost of collection materials: 180.3 yuan.
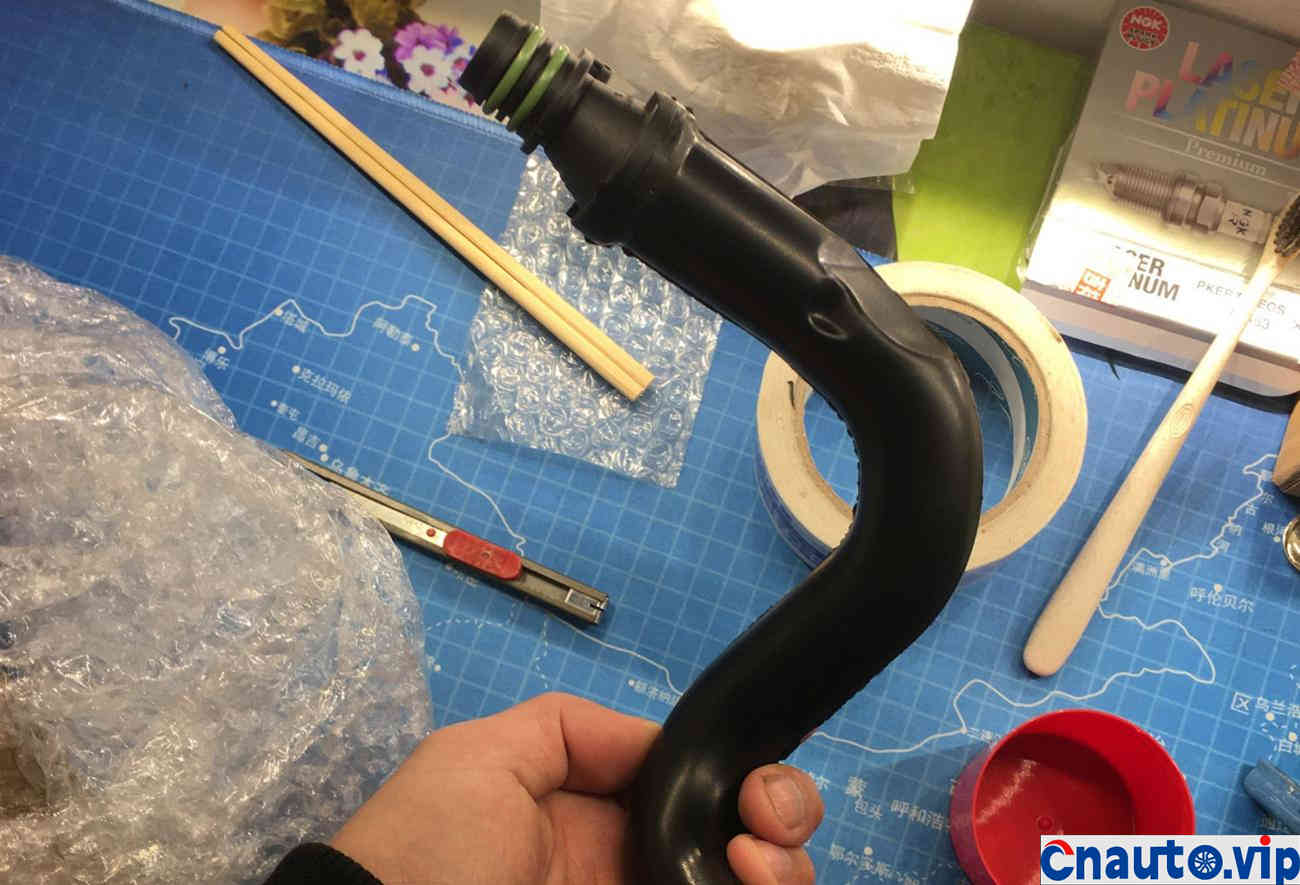
The main reason is that I didn’t find a suitable tutorial on the Internet, so I think about a lot of things by myself.
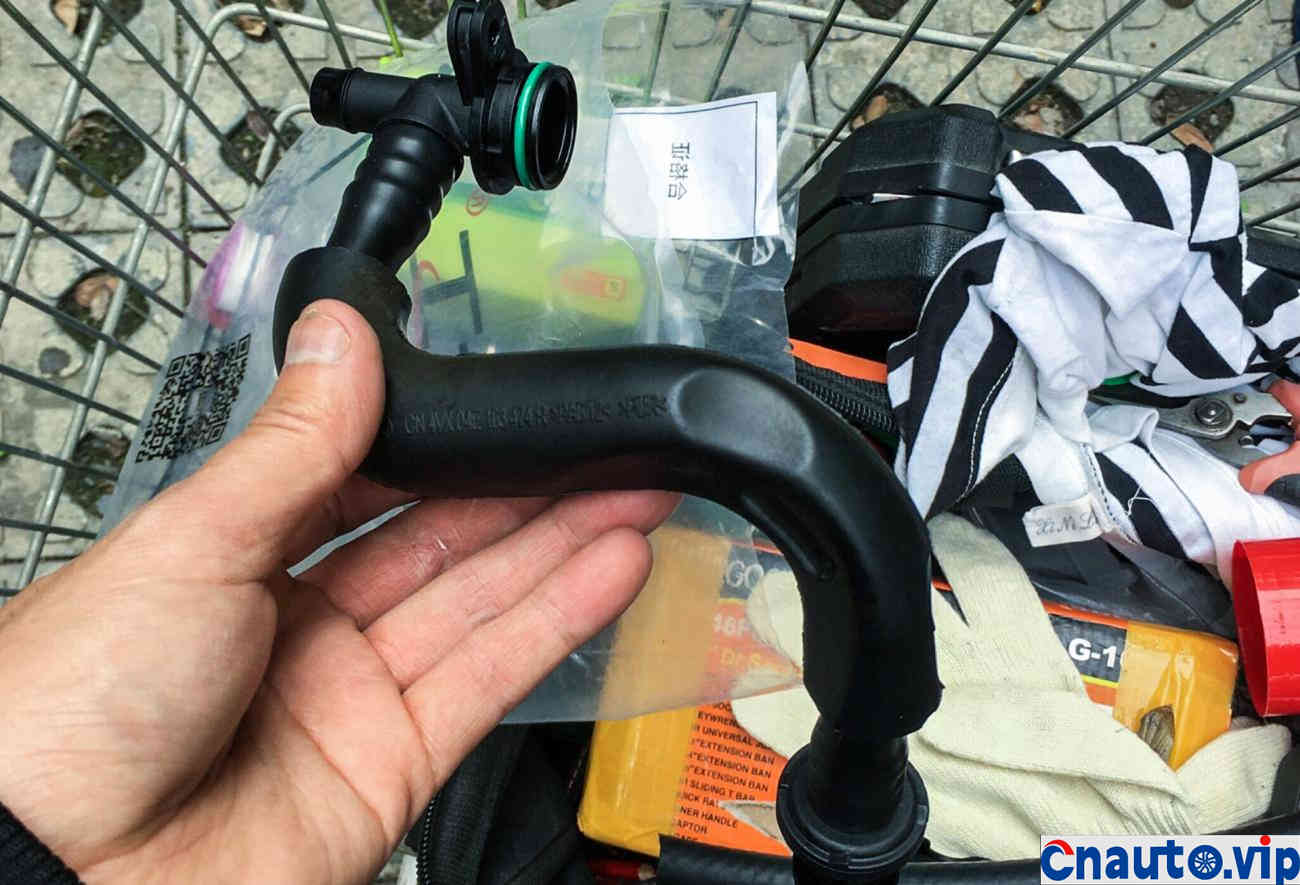
So I bought a vent pipe exactly like the one on the engine online. It’s mainly used to disassemble.
If a partner wants to make this breathable kettle next, you don’t have to buy this one anymore, just use the original car!
Look at the appearance, almost the same as the original factory, the signs are very clear.
I searched this pipe for a long time to find the most cost-effective 45 yuan, and the rest of the merchants are 60 yuan.

A free drain pipe attached to the breathable kettle.

Double pots, breathable pots.
Iron ~ ~ inside the glass jar ~
Iron ~ ~ inside the glass jar ~
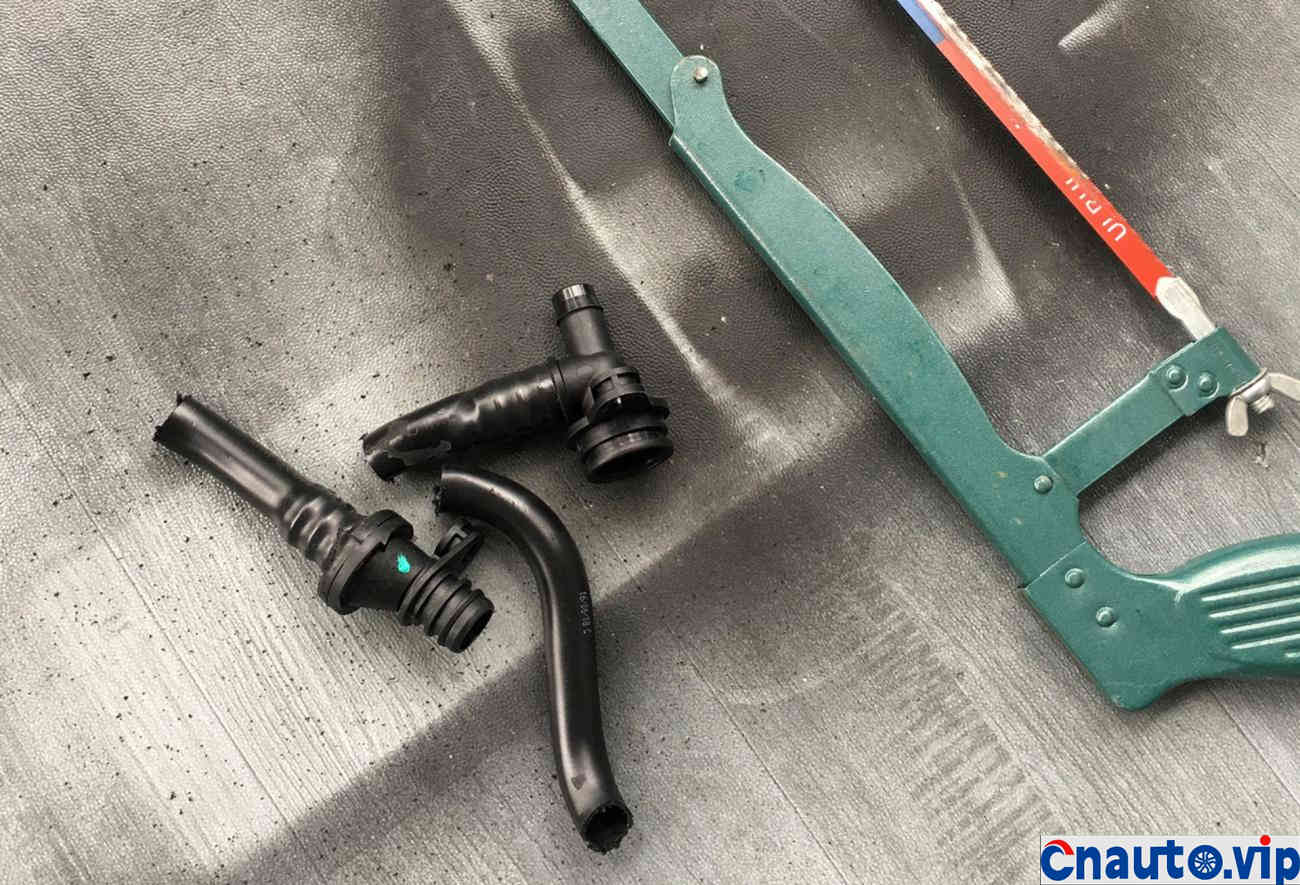
I really wanted to remove this tube from both ends, but the hair dryer could not be removed even after being heated for a long time, and the pipe at the interface should need a 19mm tube to put it on ~ and I didn’t buy a 19mm pipe.
To be on the safe side, I directly cut the new vent into three sections in order to connect the new vent hose.
To be on the safe side, I directly cut the new vent into three sections in order to connect the new vent hose.
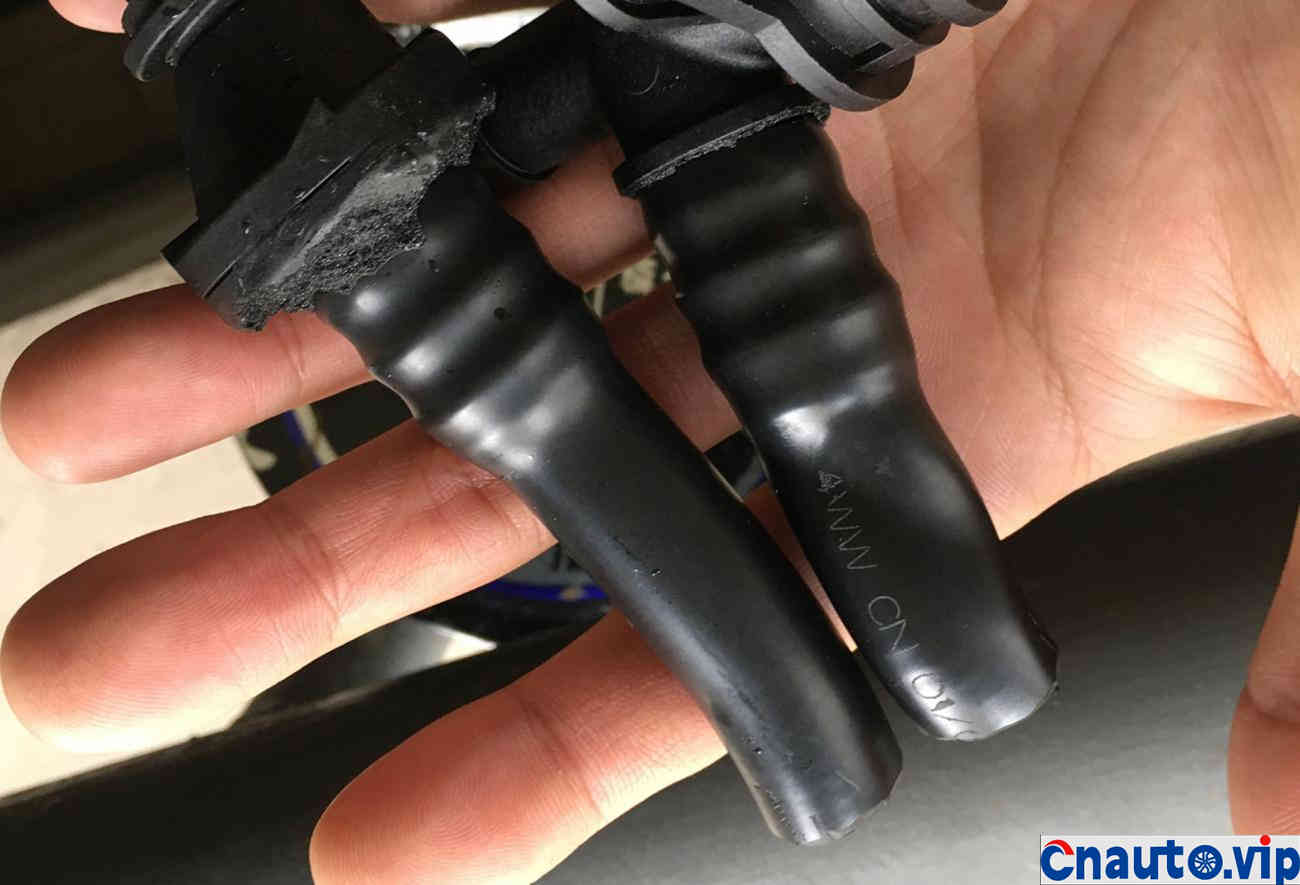
This leader is still a little long, try to leave 2 from the interface to the interface. Because the connection is 19mm and the only ventilation duct I bought is 16mm.
So leave a 2cm to connect the rubber vent pipe.
So leave a 2cm to connect the rubber vent pipe.

The breathable kettle was taken apart and studied the structure inside. The workmanship is still very good.
This seems to be the so-called vortex breathable kettle on the Internet!
This seems to be the so-called vortex breathable kettle on the Internet!
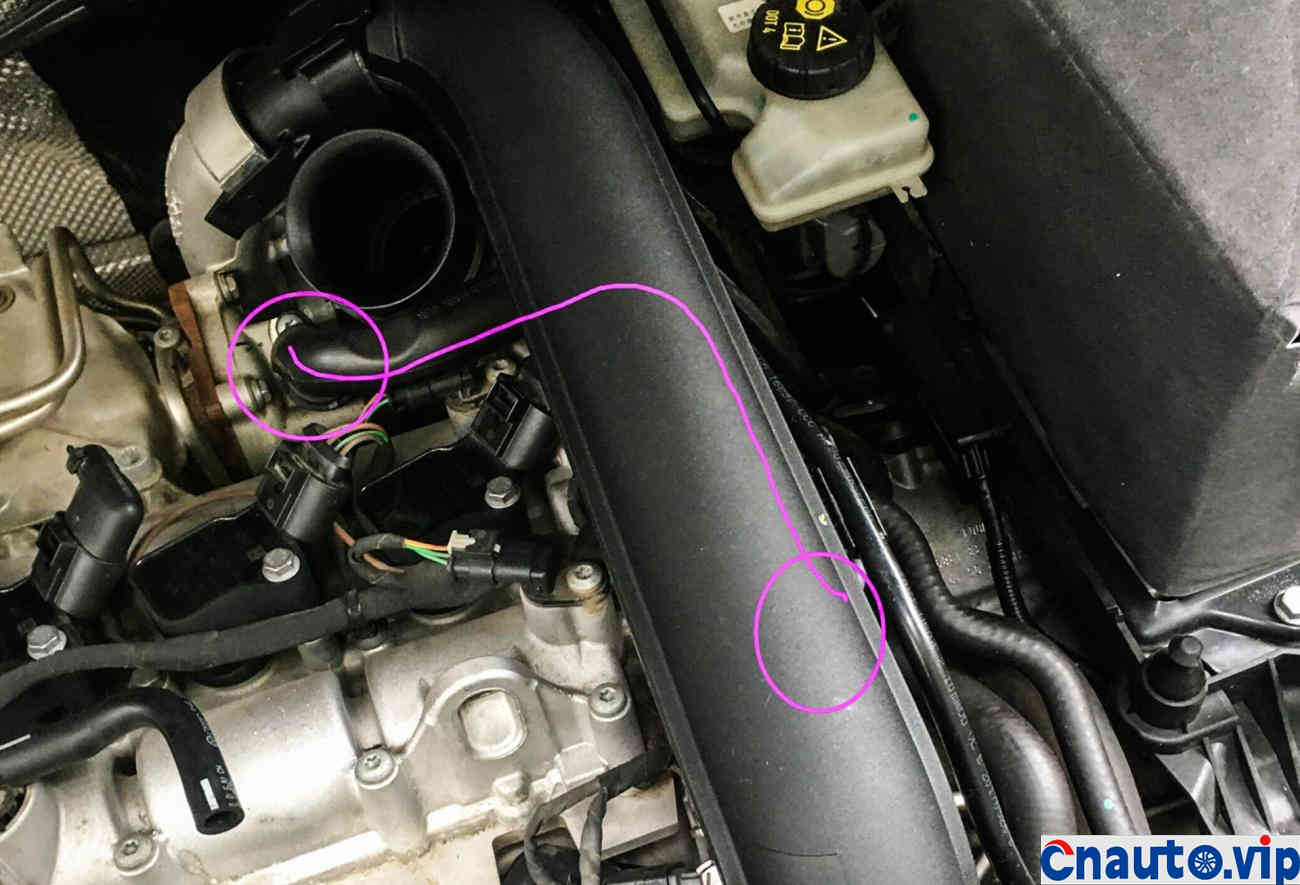
The air filter has been removed, but I found that the tube connected to the throttle by the turbine does not need to be removed.
I have dismantled it several times these days ~ ~ I am really afraid of breaking it!
As shown in the picture, what we are going to remove is the underlined pipe.
I have dismantled it several times these days ~ ~ I am really afraid of breaking it!
As shown in the picture, what we are going to remove is the underlined pipe.
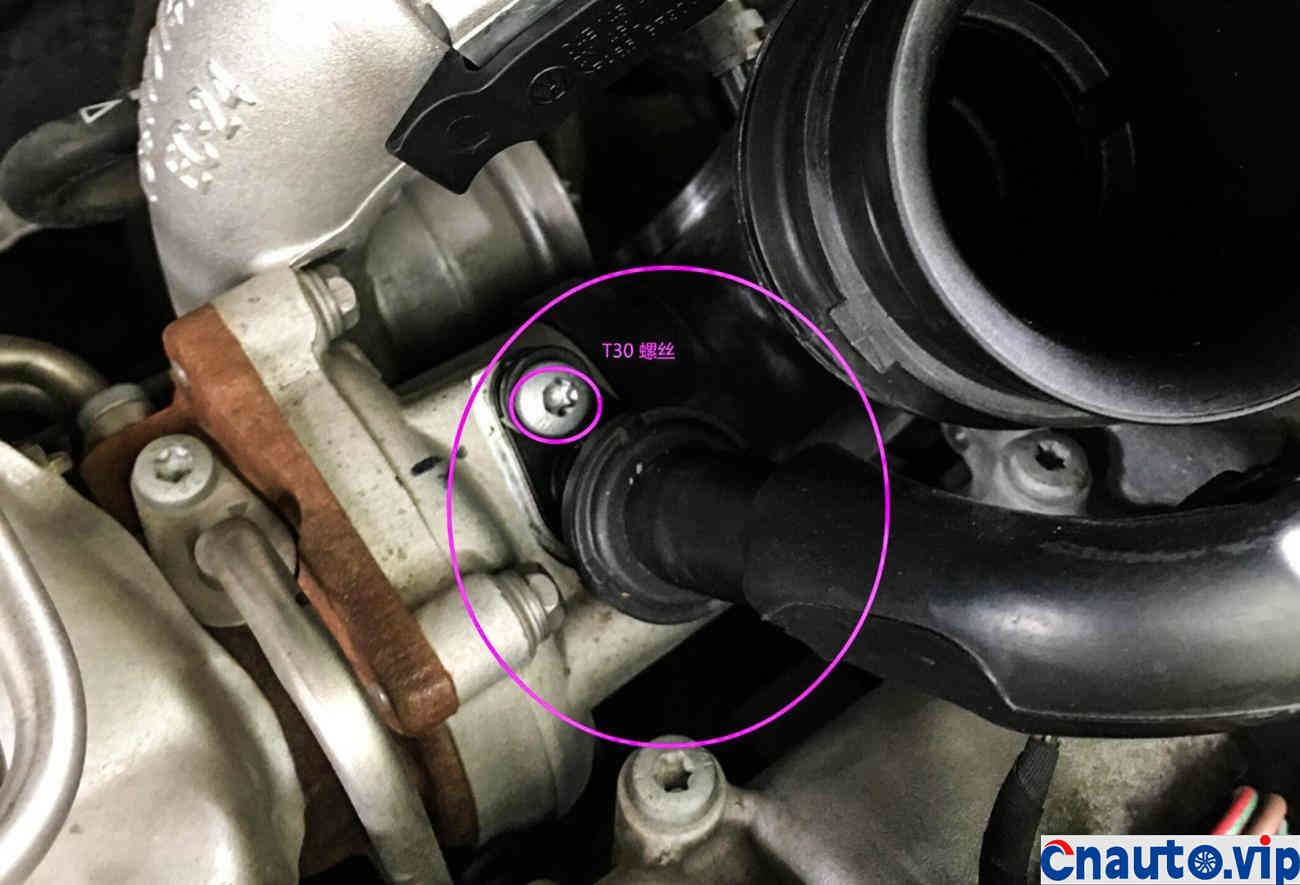
Both ends are T30 screws.
Loosen the screw and pull it out.
Loosen the screw and pull it out.

There is also a T30 screw at this end, and there is also a pipe connected to the outside. There is something on this small pipe that can be pressed, and the small pipe can be removed by pressing the head directly.

Start to link the rubber hose, in fact, it’s all long here, and it should be shorter on this side of the head.
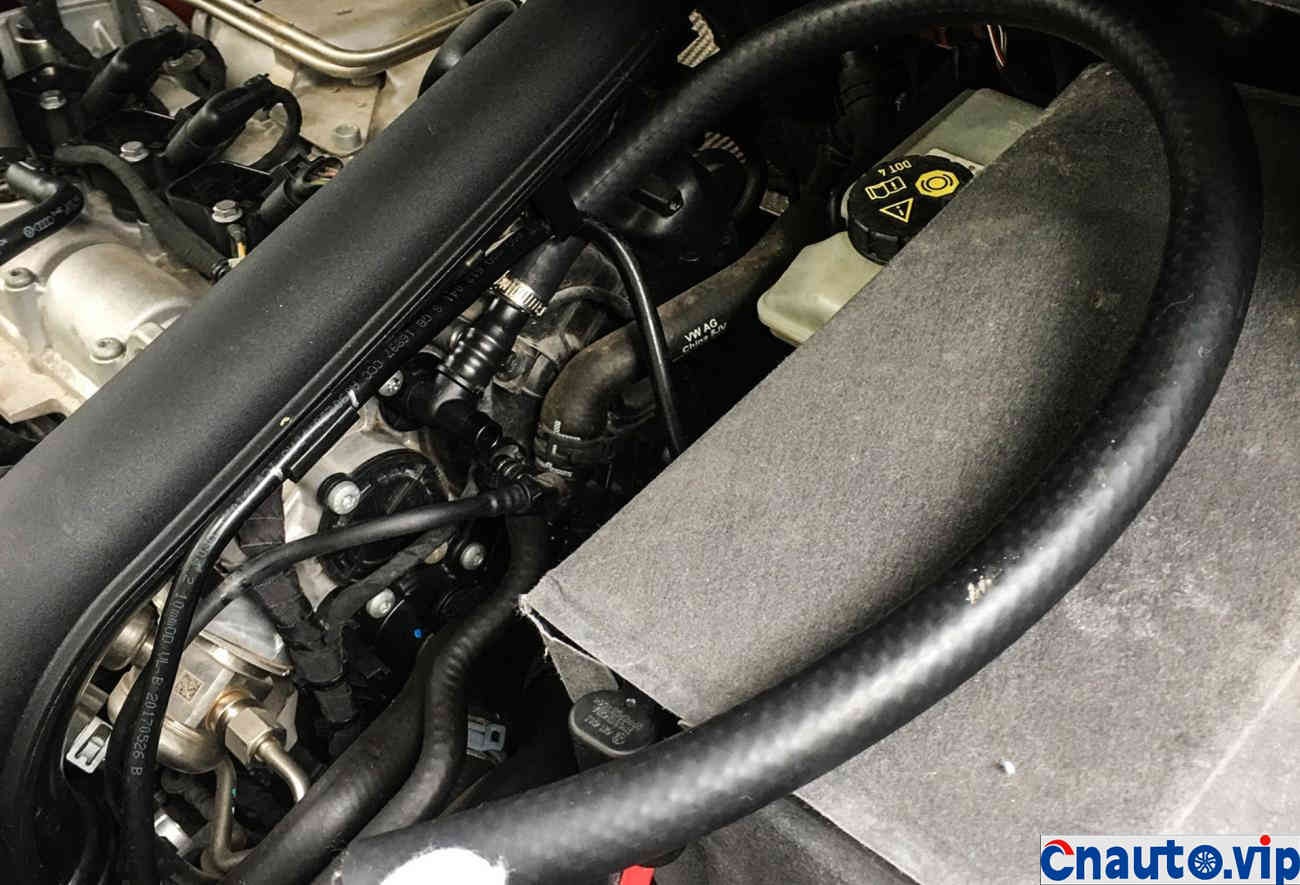
The pipe at the outlet end has been installed, and the position of the pipe is roughly like this.

Install the vent pipe next to the turbine. This joint and the rubber hose are just the right length.
If the hard pipe of this joint is left too long here, it will lead to the installation of poor wiring, and even if it can be wired, it is easy to deform or even close the rubber hose.
If the hard pipe of this joint is left too long here, it will lead to the installation of poor wiring, and even if it can be wired, it is easy to deform or even close the rubber hose.
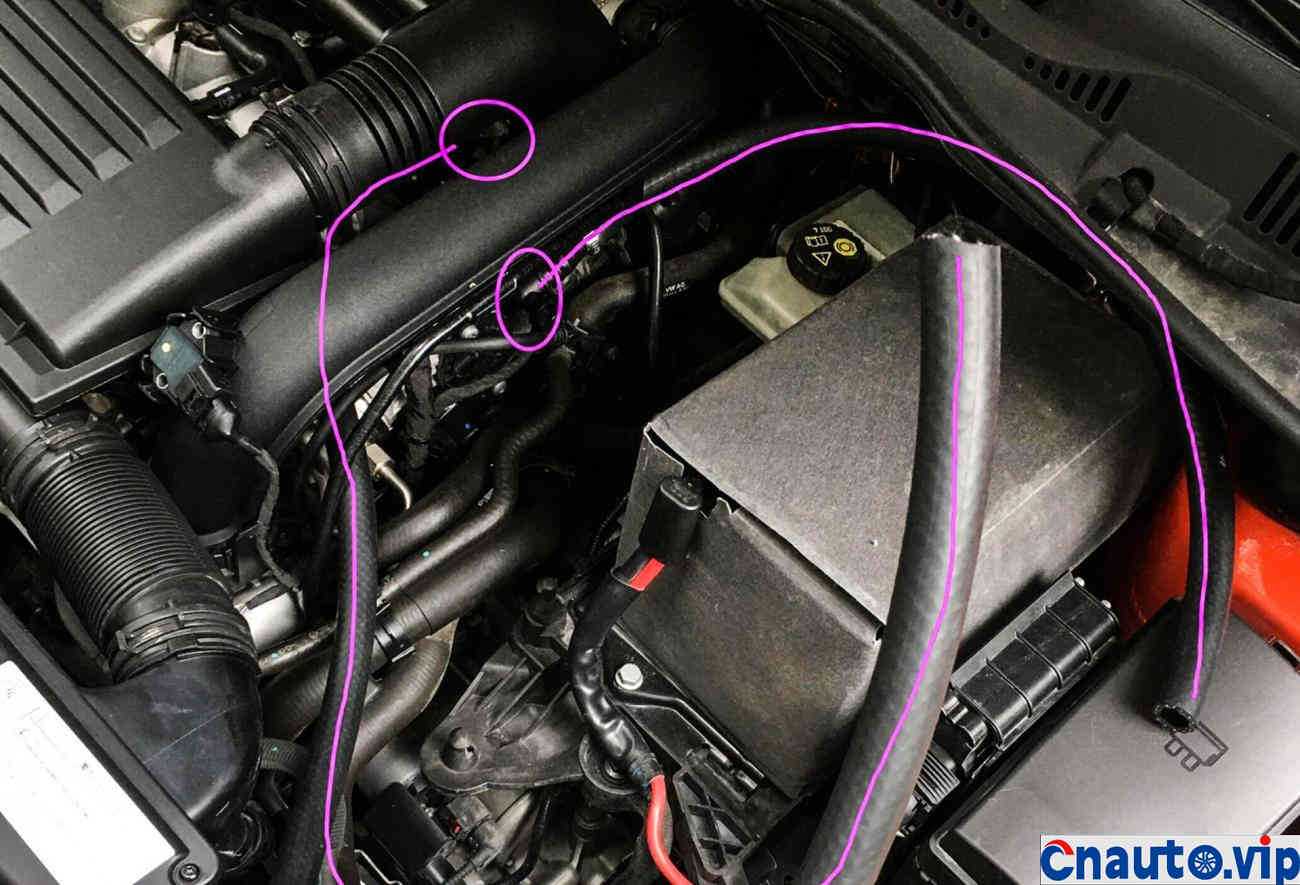
Roughly the alignment position of the two pipes.

The air intake pipe on the side of the turbine is out of place.

The breathable kettle tries to avoid laying pipes on one side of the turbine ~ ~ the high temperature is easy to realize or close.
So I chose to use the negative interface of the battery as the anchor point of the fixed breathable kettle.
In addition, no more suitable installation position has been found in the engine cabin.
So I chose to use the negative interface of the battery as the anchor point of the fixed breathable kettle.
In addition, no more suitable installation position has been found in the engine cabin.
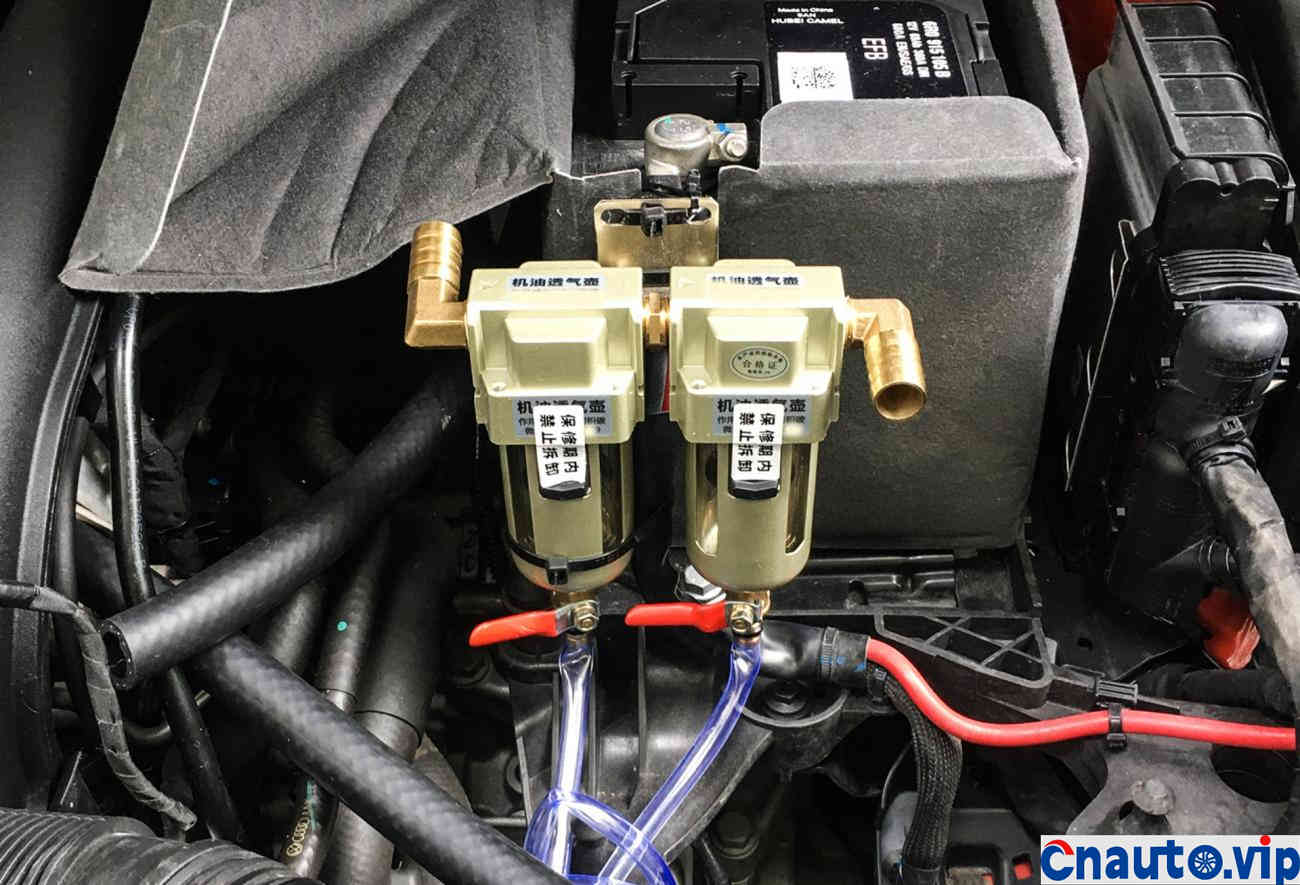
Because it can not be screwed, it can only be fixed on the negative pole of the battery with a tie.
In addition, I bought a right-angle joint, which happens to be one in and one out. I didn’t even think of this when I bought it.
In addition, I bought a right-angle joint, which happens to be one in and one out. I didn’t even think of this when I bought it.

Try to fasten it to the high place with a strap so that the blue transparent hose below will not be so easily squeezed and deformed that the oil will not come out of the closed state.
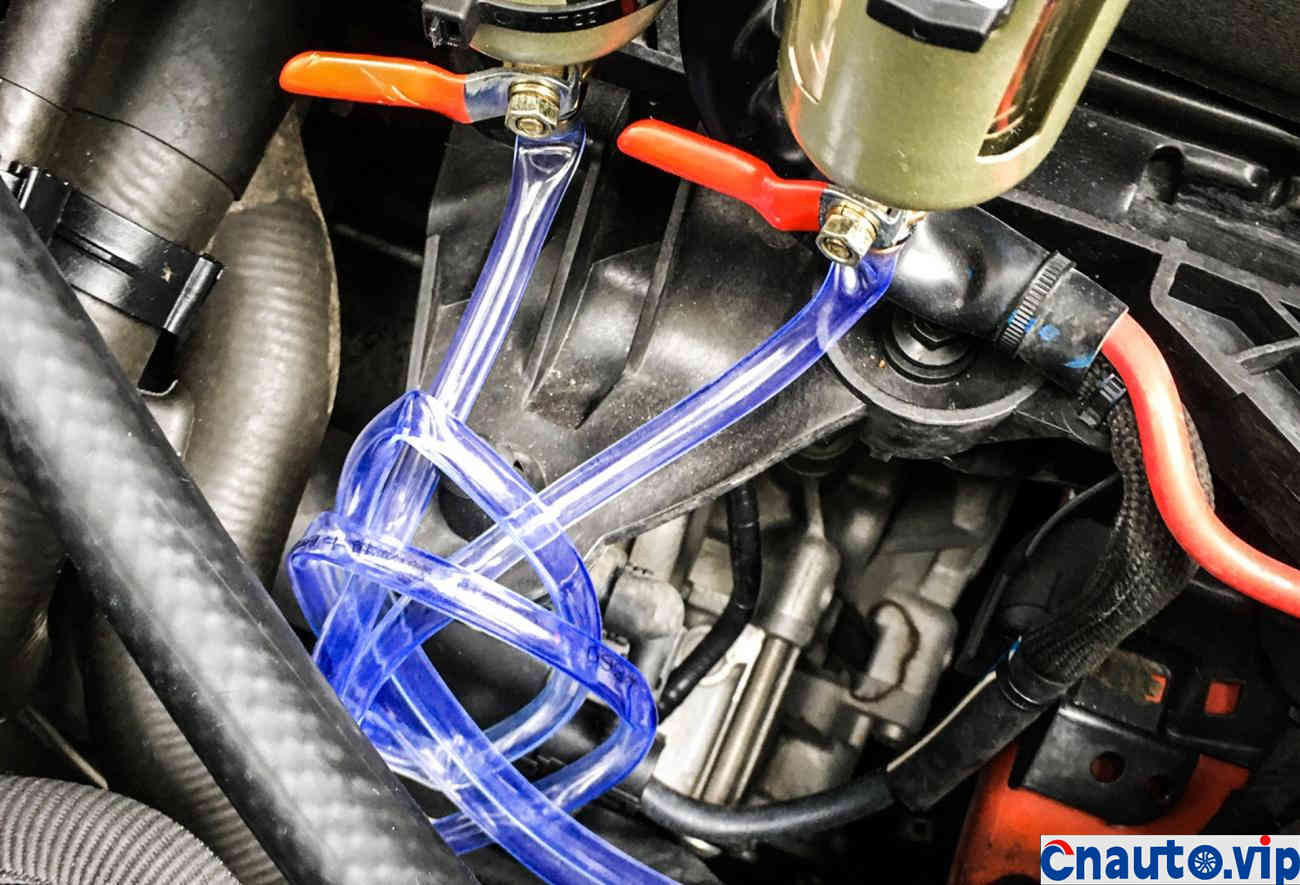
However, this translucent hose is not often used, so I installed it and rolled it up and put it here!
Next time, put the organic oil under the engine and discharge the waste oil directly.
Next time, put the organic oil under the engine and discharge the waste oil directly.

There is an arrow on the breathable kettle, indicating the position of air intake and outlet.
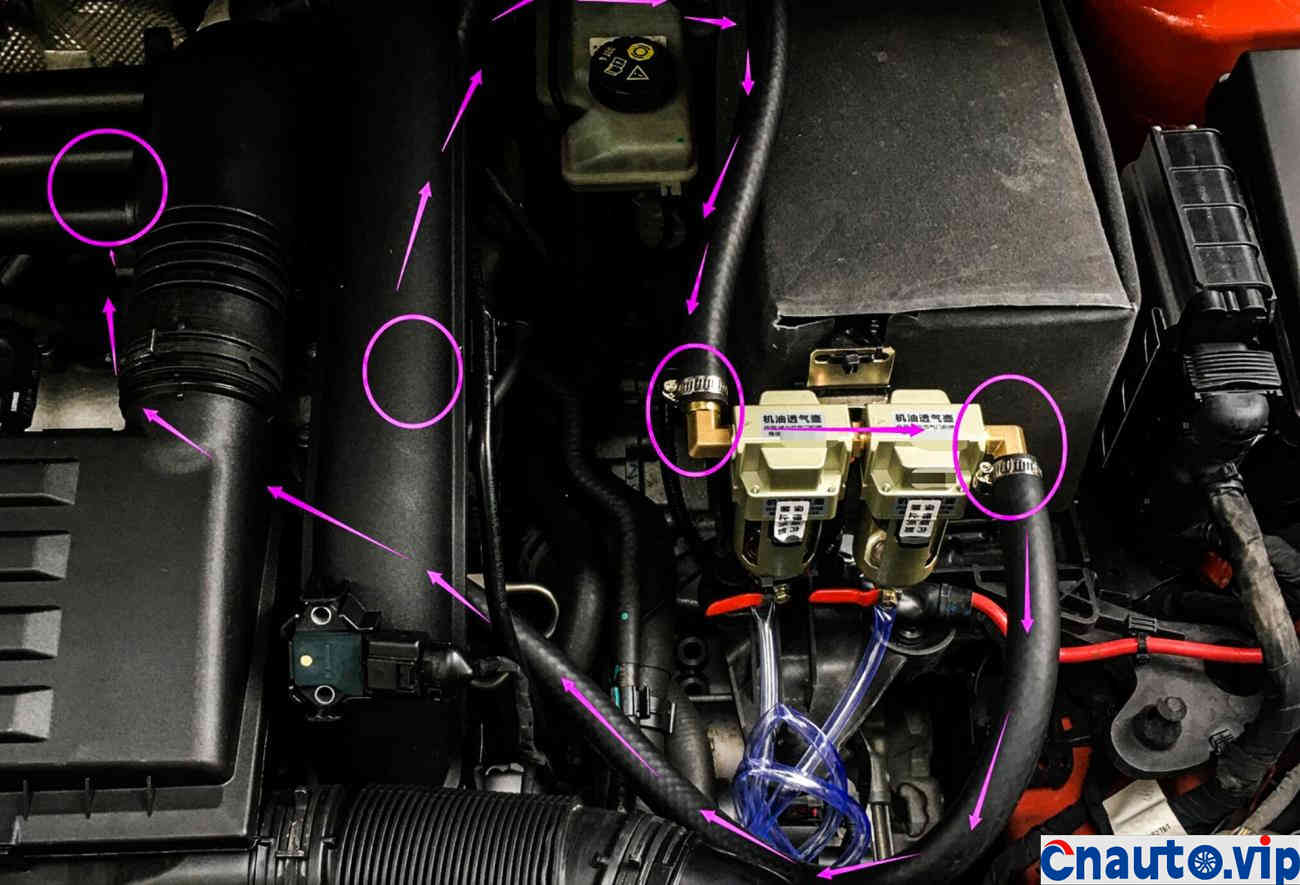
Perfect routing diagram ~ ~

The left side is the intake air ~ ~ the right side is the outlet air (the intake and outlet positions can be changed, this is unnecessary)
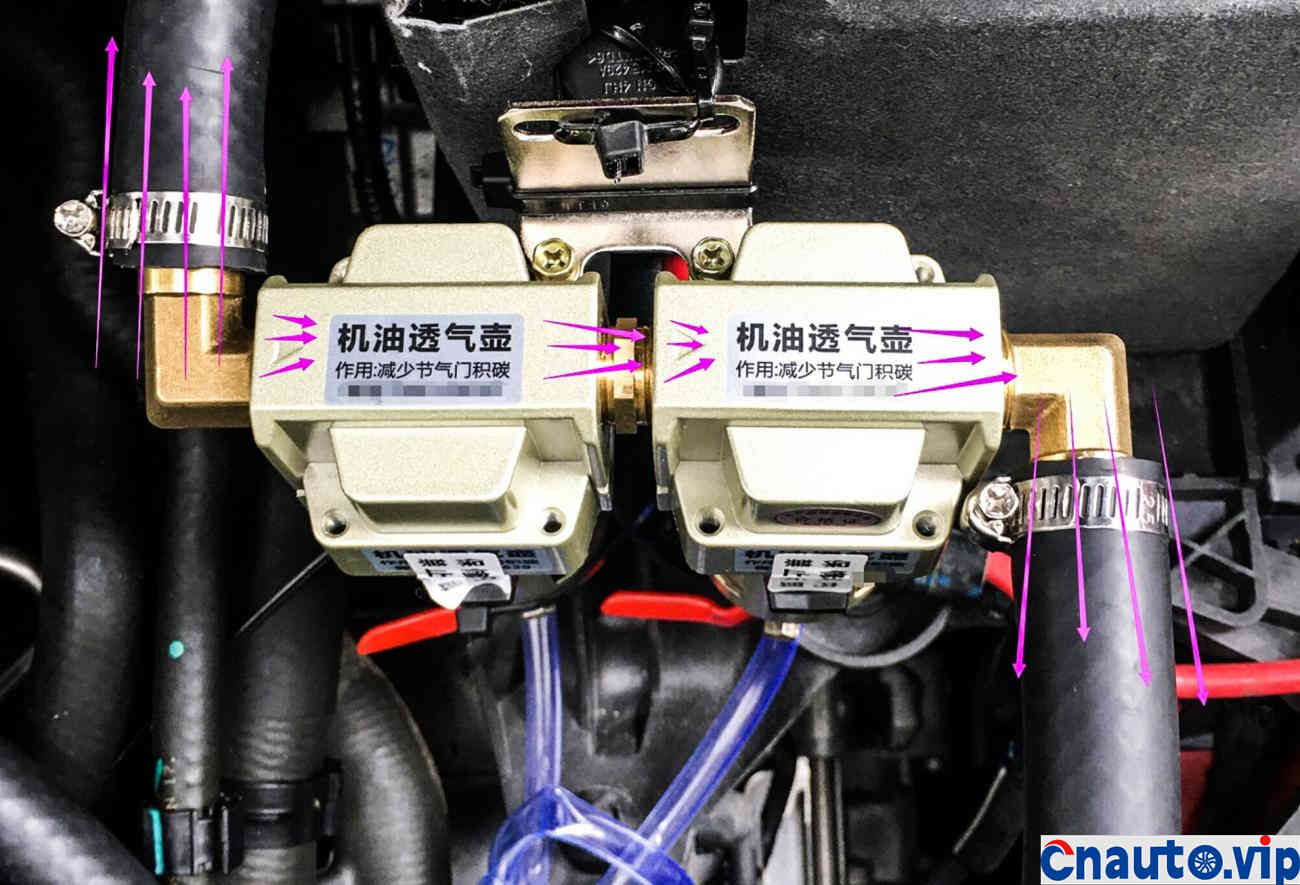
Pay attention to the small triangular arrow on the kettle. (the pink arrow marked in the upper left corner of this picture does not mean out of breath, but simply introduces the installation direction of the right angle joint. )

A more complete line chart. Rubber hose can not go at a right angle, the right angle is easy to be closed.
Therefore, when laying the pipe, we must set aside some position for it properly, otherwise it will be miserable if it is bent and deformed.
Therefore, when laying the pipe, we must set aside some position for it properly, otherwise it will be miserable if it is bent and deformed.
Well, I used the newly bought accessory factory parts. I left the original parts dismantled first.
At this point, the installation of the whole breathable kettle is perfect.
Volkswagen EA211 engine ~
At this point, the installation of the whole breathable kettle is perfect.
Volkswagen EA211 engine ~
Hot Information
Tesla Autopilot and similar automated driving systems get ‘poor’ rating from prominent safety group
 April 1, 2024
 Localization of EV parts without production scalability may not help cut EV price, says President, Amara Raja
 March 27, 2024
JCTSL may turn bus stands into charging points for e-buses
 March 27, 2024
 You May Like

